How to install Winter CMS on Rocky Linux 9.3
- 00:35 Cat /etc/os-release
- 00:51 dnf install httpd mariadb-server php php-cli php-fpm php-pdo php-common php-mysqlnd php-curl php-json php-zip php-gd php-xml php-mbstring git unzip -y
- 01:23 systemctl enable httpd mariadb
- 01:38 systemctl start httpd mariadb
- 02:00 systemctl status httpd mariadb
- 02:25 php -v
- 02:39 mysql
- 02:52 CREATE DATABASE ccwintercms;
- 03:07 CREATE USER 'ccwintercms'@'localhost' IDENTIFIED BY '123456';
- 03:41 GRANT ALL PRIVILEGES ON ccwintercms.* TO 'ccwintercms'@'localhost';
- 04:15 FLUSH PRIVILEGES;
- 04:26 QUIT
- 04:33 mkdir -p /var/www/html/wintercms/
- 04:52 cd /var/www/html/wintercms/
- 05:06 wget https://github.com/wintercms/web-installer/releases/latest/download/install.zip
- 05:27 unzip install.zip
- 05:40 chown -R apache:apache /var/www/html/wintercms/
- 06:03 chmod -R 775 /var/www/html/wintercms/
- 06:22 vim /etc/httpd/conf.d/wintercms.conf
- 06:52 httpt -t
- 07:06 firewall-cmd --permanent --add-port=80/tcp
- 07:31 firewall-cmd --permanent --add-port=443/tcp
- 07:38 firewall --reload
- 07:53 setenforce 0
- 08:04 systemctl restart httpd
To Install Winter CMS On Rocky Linux 9.3
Introduction:
Winter CMS is an open-source content management system (CMS) designed for simplicity and flexibility in building websites and web applications. It is based on the Laravel PHP framework, known for its elegant syntax and powerful features. Winter CMS provides a user-friendly interface for content creation and management, making it accessible for both developers and non-technical users.
Installation Steps:
Step 1: Check the OS version by using the below command
[root@localhost ~]# cat /etc/os-release
NAME="Rocky Linux"
VERSION="9.3 (Blue Onyx)"
ID="rocky"
ID_LIKE="rhel centos fedora"
VERSION_ID="9.3"
PLATFORM_ID="platform:el9"
PRETTY_NAME="Rocky Linux 9.3 (Blue Onyx)"
ANSI_COLOR="0;32"
LOGO="fedora-logo-icon"
CPE_NAME="cpe:/o:rocky:rocky:9::baseos"
HOME_URL="https://rockylinux.org/"
BUG_REPORT_URL="https://bugs.rockylinux.org/"
SUPPORT_END="2032-05-31"
ROCKY_SUPPORT_PRODUCT="Rocky-Linux-9"
ROCKY_SUPPORT_PRODUCT_VERSION="9.3"
REDHAT_SUPPORT_PRODUCT="Rocky Linux"
REDHAT_SUPPORT_PRODUCT_VERSION="9.3"
Step 2: Install Apache Web Server, MariaDB and PHP by using the below command
[root@localhost ~]# dnf install httpd mariadb-server php php-cli php-fpm php-pdo php-common php-mysqlnd php-curl php-json php-zip php-gd php-xml php-mbstring git unzip -y
Rocky Linux 9 - BaseOS                                                             4.5 kB/s | 4.1 kB     00:00
Rocky Linux 9 - BaseOS                                                             1.4 MB/s | 2.2 MB     00:01
Rocky Linux 9 - AppStream                                                          4.4 kB/s | 4.5 kB     00:01
Rocky Linux 9 - AppStream                                                          3.5 MB/s | 7.4 MB     00:02
Rocky Linux 9 - Extras                                                             3.5 kB/s | 2.9 kB     00:00
Rocky Linux 9 - Extras                                                              10 kB/s |  14 kB     00:01
Last metadata expiration check: 0:00:01 ago on Monday 15 January 2024 03:40:10 AM.
Package unzip-6.0-56.el9.x86_64 is already installed.
Dependencies resolved.
===================================================================================================================
 Package                               Architecture      Version                        Repository            Size
===================================================================================================================
Installing:
 git                                   x86_64            2.39.3-1.el9_2                 appstream             61 k
 httpd                                 x86_64            2.4.57-5.el9                   appstream             46 k
php-xml                               x86_64            8.0.30-1.el9_2                 appstream            131 k
Installing dependencies:
 apr                                   x86_64            1.7.0-12.el9_3                 appstream            122 k
 libzip                                x86_64            1.7.3-7.el9                    appstream             62 k
 mariadb                               x86_64            3:10.5.22-1.el9_2              appstream            1.6 M
 mariadb-common                        x86_64            3:10.5.22-1.el9_2              appstream             27 k
perl-TermReadKey                      x86_64            2.38-11.el9                    appstream             36 k
Transaction Summary
===================================================================================================================
Install  44 Packages

Total download size: 34 M
Installed size: 187 M
Downloading Packages:
(1/44): rocky-logos-httpd-90.14-2.el9.noarch.rpm                                   111 kB/s |  24 kB     00:00
(2/44): mod_lua-2.4.57-5.el9.x86_64.rpm                                            246 kB/s |  60 kB     00:00
-------------------------------------------------------------------------------------------------------------------
Total                                                                              7.8 MB/s |  34 MB     00:04
Running transaction check
Transaction check succeeded.
Running transaction test
Transaction test succeeded.
Running transaction
  Preparing        :                                                                                           1/1
  Installing       : php-common-8.0.30-1.el9_2.x86_64                                                         1/44
  Installing       : apr-1.7.0-12.el9_3.x86_64                                                                2/44
libsemanage.semanage_direct_install_info: Overriding mysql module at lower priority 100 with module at priority 200.
Installed:
  git-2.39.3-1.el9_2.x86_64                                   git-core-2.39.3-1.el9_2.x86_64
  git-core-doc-2.39.3-1.el9_2.noarch                          httpd-2.4.57-5.el9.x86_64
  httpd-core-2.4.57-5.el9.x86_64                              httpd-filesystem-2.4.57-5.el9.noarch
  perl-Error-1:0.17029-7.el9.noarch                           perl-File-Copy-2.34-480.el9.noarch
  php-xml-8.0.30-1.el9_2.x86_64                               rocky-logos-httpd-90.14-2.el9.noarch

Complete!
Step 3: Enable and Start the Apache and MariaDB service by using the below command
[root@localhost ~]# systemctl enable httpd mariadb
Created symlink /etc/systemd/system/multi-user.target.wants/httpd.service → /usr/lib/systemd/system/httpd.service.
Created symlink /etc/systemd/system/mysql.service → /usr/lib/systemd/system/mariadb.service.
Created symlink /etc/systemd/system/mysqld.service → /usr/lib/systemd/system/mariadb.service.
Created symlink /etc/systemd/system/multi-user.target.wants/mariadb.service → /usr/lib/systemd/system/mariadb.service.
[root@localhost ~]# systemctl start httpd mariadb
Step 4: Check the status of the Apache and MariaDB service by using the below command.
[root@localhost ~]# systemctl status httpd mariadb
● httpd.service - The Apache HTTP Server
     Loaded: loaded (/usr/lib/systemd/system/httpd.service; enabled; preset: disabled)
    Drop-In: /usr/lib/systemd/system/httpd.service.d
             └─php-fpm.conf
     Active: active (running) since Mon 2024-01-15 03:42:29 IST; 41s ago
       Docs: man:httpd.service(8)
   Main PID: 38600 (httpd)
     Status: "Total requests: 0; Idle/Busy workers 100/0;Requests/sec: 0; Bytes served/sec:   0 B/sec"
      Tasks: 213 (limit: 22756)
     Memory: 25.3M
        CPU: 184ms
     CGroup: /system.slice/httpd.service
             ├─38600 /usr/sbin/httpd -DFOREGROUND
             ├─38625 /usr/sbin/httpd -DFOREGROUND
             ├─38626 /usr/sbin/httpd -DFOREGROUND
             ├─38627 /usr/sbin/httpd -DFOREGROUND
             └─38628 /usr/sbin/httpd -DFOREGROUND

Jan 15 03:42:29 localhost systemd[1]: Starting The Apache HTTP Server...
Jan 15 03:42:29 localhost httpd[38600]: AH00558: httpd: Could not reliably determine the server's fully qualified >
Jan 15 03:42:29 localhost httpd[38600]: Server configured, listening on: port 80
Jan 15 03:42:29 localhost systemd[1]: Started The Apache HTTP Server.

● mariadb.service - MariaDB 10.5 database server
     Loaded: loaded (/usr/lib/systemd/system/mariadb.service; enabled; preset: disabled)
     Active: active (running) since Mon 2024-01-15 03:42:31 IST; 39s ago
       Docs: man:mariadbd(8)
             https://mariadb.com/kb/en/library/systemd/
    Process: 38602 ExecStartPre=/usr/libexec/mariadb-check-socket (code=exited, status=0/SUCCESS)
    Process: 38624 ExecStartPre=/usr/libexec/mariadb-prepare-db-dir mariadb.service (code=exited, status=0/SUCCESS)
Step 5: Check the installed PHP Version by using the below command.
[root@localhost ~]# php -v
PHP 8.0.30 (cli) (built: Aug  3 2023 17:13:08) ( NTS gcc x86_64 )
Copyright (c) The PHP Group
Zend Engine v4.0.30, Copyright (c) Zend Technologies
    with Zend OPcache v8.0.30, Copyright (c), by Zend Technologies
Step 6: Login to the MariaDB console by using the below command
[root@localhost ~]# mysql
Welcome to the MariaDB monitor.  Commands end with ; or \g.
Your MariaDB connection id is 3
Server version: 10.5.22-MariaDB MariaDB Server

Copyright (c) 2000, 2018, Oracle, MariaDB Corporation Ab and others.

Type 'help;' or '\h' for help. Type '\c' to clear the current input statement.
MariaDB [(none)]>
Step 7: Create a database by using the below command
MariaDB [(none)]> CREATE DATABASE ccwintercms;
Query OK, 1 row affected (0.001 sec)
Step 8: Create a user by using the below command
MariaDB [(none)]> CREATE USER 'ccwintercms'@'localhost' IDENTIFIED BY '123456';
Query OK, 0 rows affected (0.002 sec)
Step 9: Grant all privileges to the database for that user by using the below command
MariaDB [(none)]> GRANT ALL PRIVILEGES ON ccwintercms.* TO 'ccwintercms'@'localhost';
Query OK, 0 rows affected (0.002 sec)
Step 10: Flush the privileges and exit from the MariDB console by using the below command
MariaDB [(none)]> FLUSH PRIVILEGES;
Query OK, 0 rows affected (0.001 sec)
MariaDB [(none)]> QUIT
Bye
Step 11: Create a directory for Winter CMS on the following location.
[root@localhost ~]# mkdir -p /var/www/html/wintercms/
Step 12: Move to Winter CMS directory and download the Winter CMS source package.
[root@localhost ~]# cd /var/www/html/wintercms/
[root@localhost wintercms]# wget https://github.com/wintercms/web-installer/releases/latest/download/install.zip
--2024-01-15 03:54:52--  https://github.com/wintercms/web-installer/releases/latest/download/install.zip
Resolving github.com (github.com)... 20.207.73.82
Connecting to github.com (github.com)|20.207.73.82|:443... connected.
HTTP request sent, awaiting response... 302 Found
Location: https://github.com/wintercms/web-installer/releases/download/v1.2.4/install.zip [following]
--2024-01-15 03:54:53--  https://github.com/wintercms/web-installer/releases/download/v1.2.4/install.zip
Reusing existing connection to github.com:443.
HTTP request sent, awaiting response... 302 Found
Resolving objects.githubusercontent.com (objects.githubusercontent.com)... 185.199.110.133, 185.199.108.133, 185.199.109.133, ...
Connecting to objects.githubusercontent.com (objects.githubusercontent.com)|185.199.110.133|:443... connected.
HTTP request sent, awaiting response... 200 OK
Length: 4660072 (4.4M) [application/octet-stream]
Saving to: ‘install.zip’

install.zip                  100%[=============================================>]   4.44M  11.0MB/s    in 0.4s

2024-01-15 03:54:55 (11.0 MB/s) - ‘install.zip’ saved [4660072/4660072]
Step 13: Extract the Winter CMS source package by using the unzip command
[root@Linuxhelp wintercms]# unzip install.zip
Archive:  install.zip
   creating: install/
   creating: install/api/
  inflating: install/api/composer.json
  inflating: install/api/composer.lock
   creating: install/api/src/
   creating: install/api/src/Exception/
  inflating: install/api/src/Exception/SSLValidationException.php
  inflating: install/api/src/Api.php
   creating: install/api/vendor/
   creating: install/api/vendor/nikic/
   creating: install/api/vendor/nikic/php-parser/
Step 14: Change the ownership and permission of the directory by using the below command
[root@Linuxhelp wintercms]# chown -R apache:apache /var/www/html/wintercms/
[root@Linuxhelp wintercms]# chmod -R 775 /var/www/html/wintercms/
Step 15: Create a Virtual Configuration file to Access Winter CMS by using the below command.
[root@Linuxhelp wintercms]# vim /etc/httpd/conf.d/wintercms.conf
Insert the below lines in the configuration file

<VirtualHost *:80>

ServerName linuxhelp1.com
ServerAlias linuxhelp1.com
ServerAdmin admin@linuxhelp1.com
DocumentRoot /var/www/html/wintercms

ErrorLog /etc/httpd/logs/error.log
CustomLog /etc/httpd/logs/access.log combined

<Directory /var/www/html/wintercms/>
Options FollowSymlinks
AllowOverride All
Require all granted
</Directory>

</VirtualHost>
Step 16: Check the syntax of Apache configuration by using the below command
[root@Linuxhelp wintercms]# httpd -t
AH00558: httpd: Could not reliably determine the server's fully qualified domain name, using fe80::20c:29ff:fe61:4e66%ens160. Set the 'ServerName' directive globally to suppress this message
Syntax OK
Step 17: Add Apache Service in the firewall and reload the firewall service by using the below commands.
[root@Linuxhelp wintercms]# firewall-cmd --permanent --add-port=80/tcp
success
[root@Linuxhelp wintercms]# firewall-cmd --permanent --add-port=443/tcp
success
[root@Linuxhelp wintercms]# firewall-cmd --reload
success
Step 18: Disable the Apache Web Server default welcome page by using the below command.
[root@Linuxhelp wintercms]# setenforce 0
Step 19: Restart the Apache service to apply all changes by using the below command
[root@Linuxhelp wintercms]# systemctl restart httpd
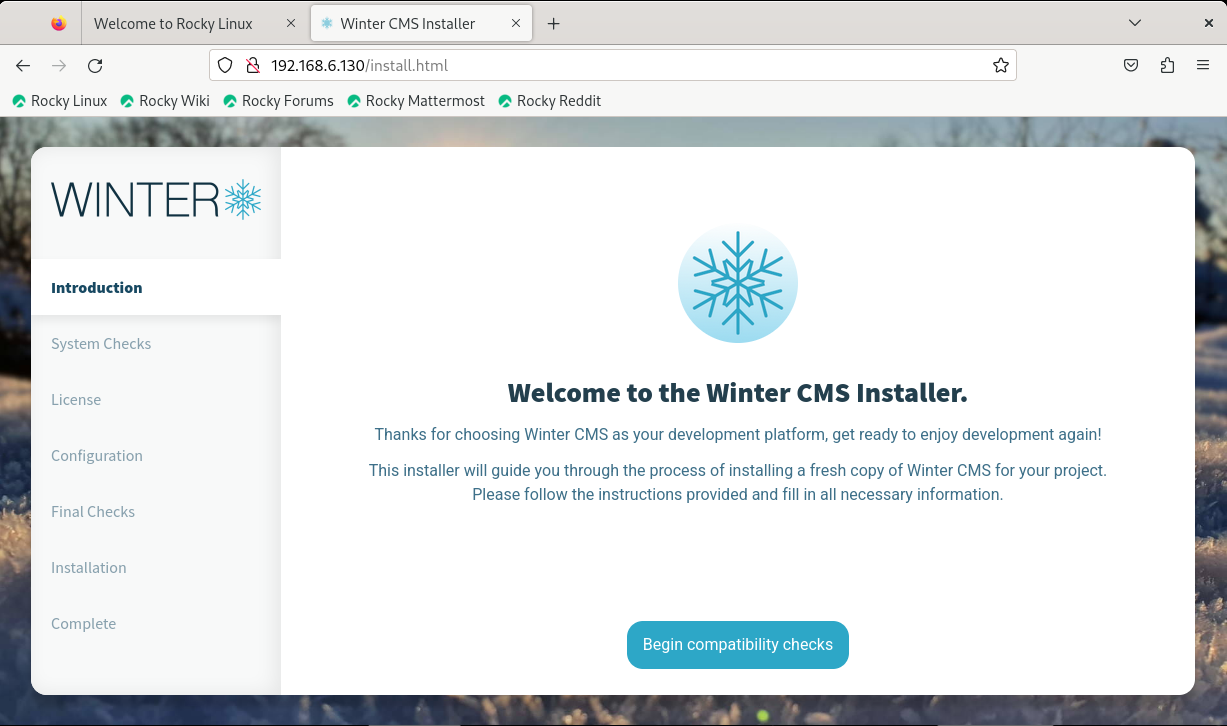
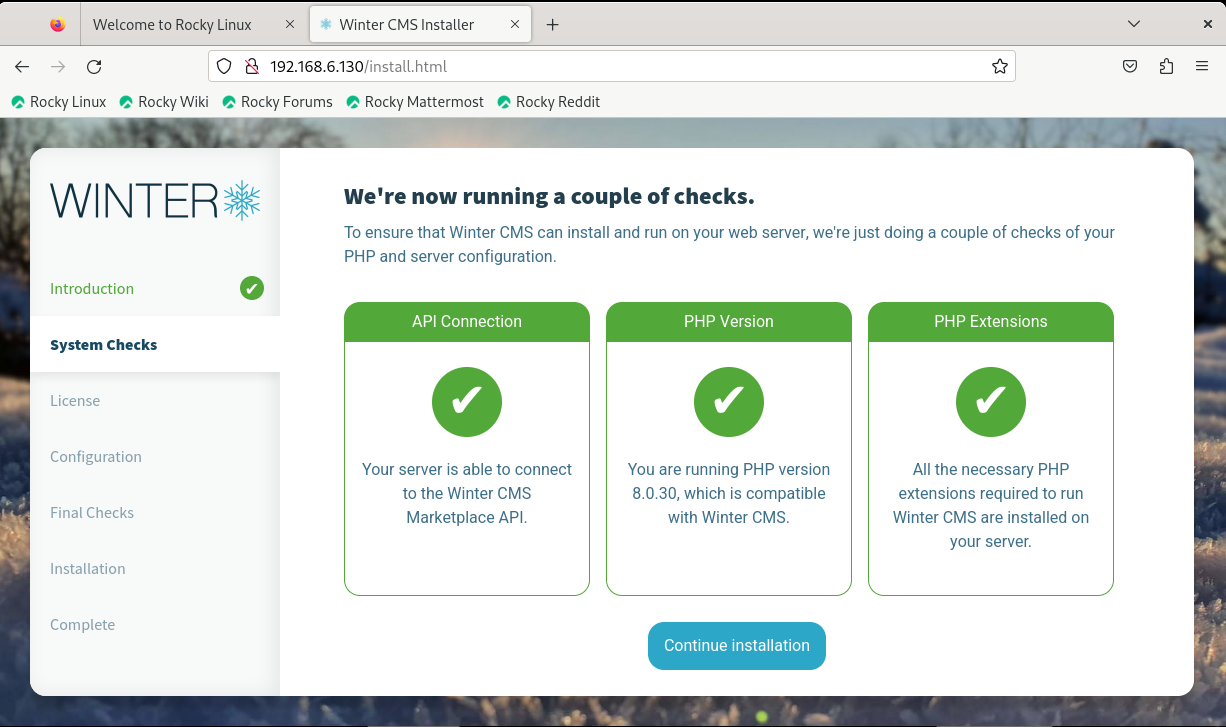
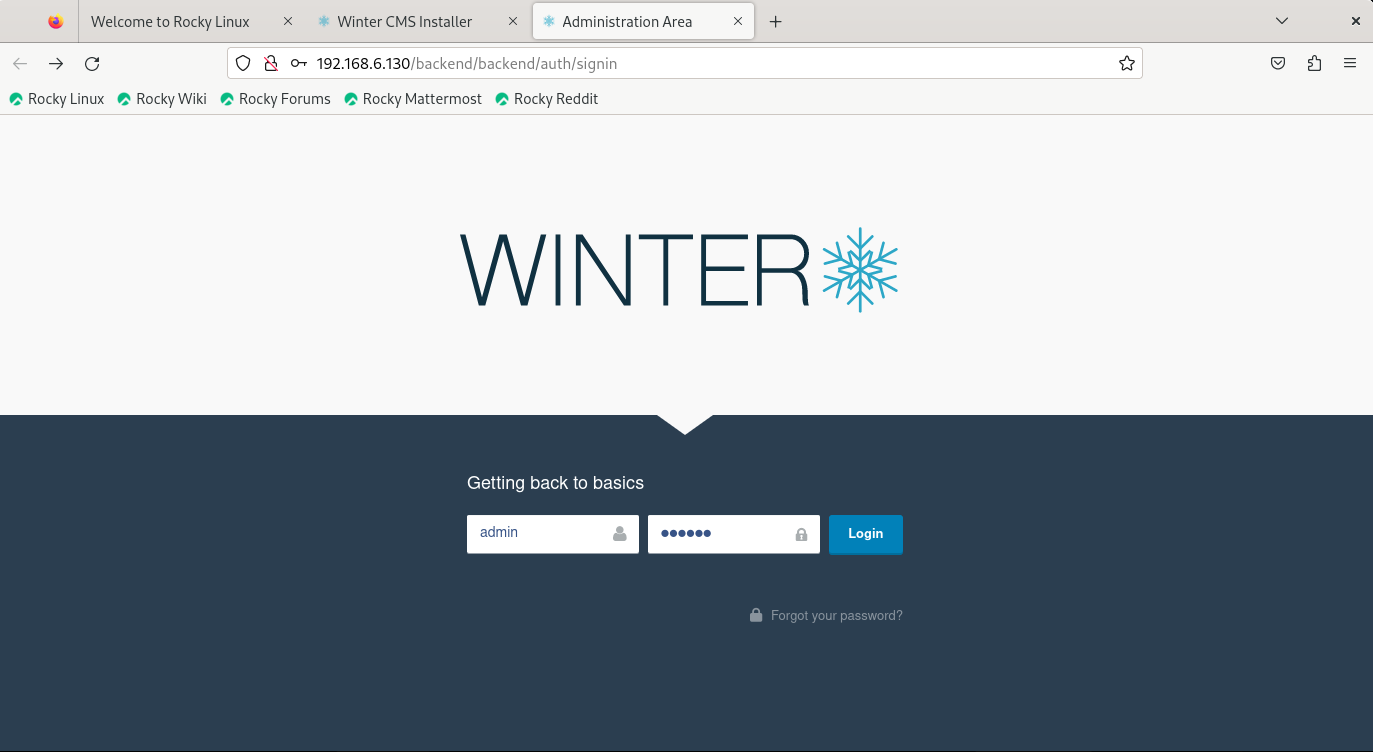
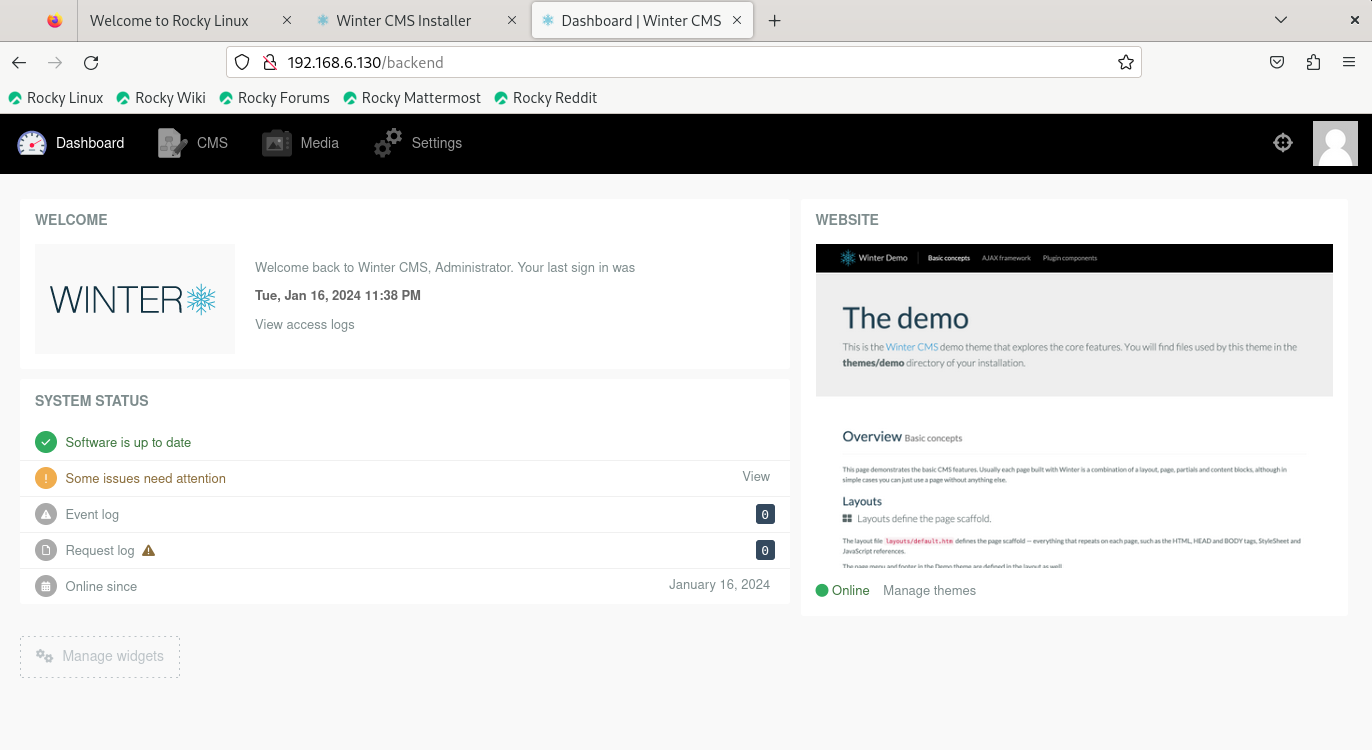
Step 20: Go to the browser and access Winter CMS by using the below URL.
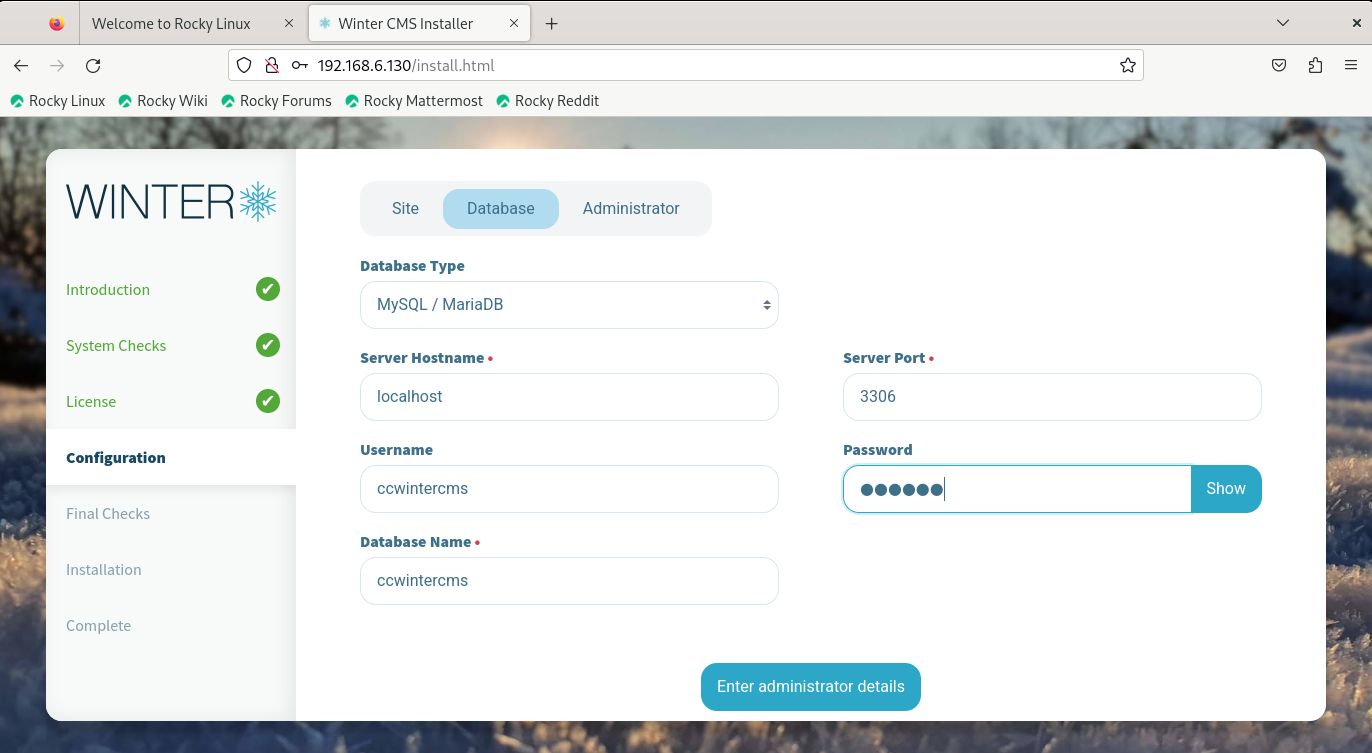
http://192.168.6.130/install.html
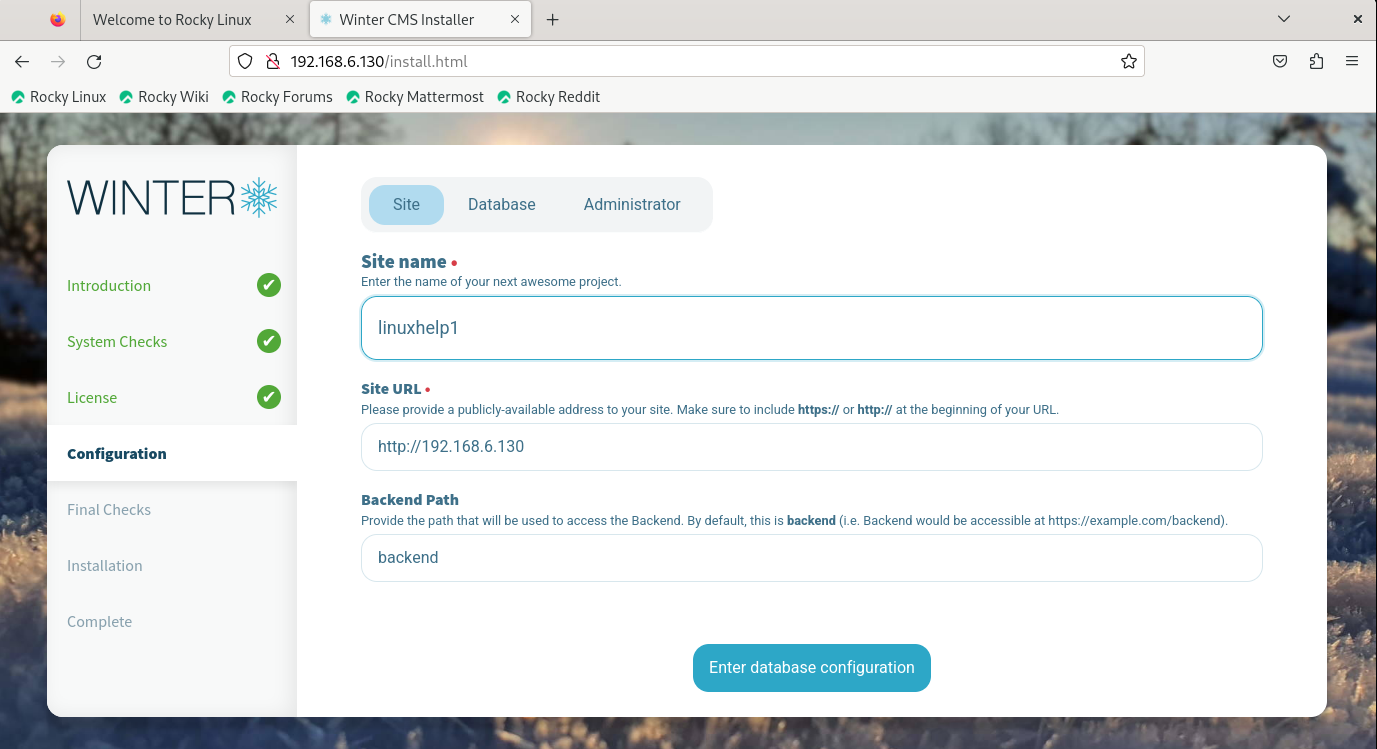
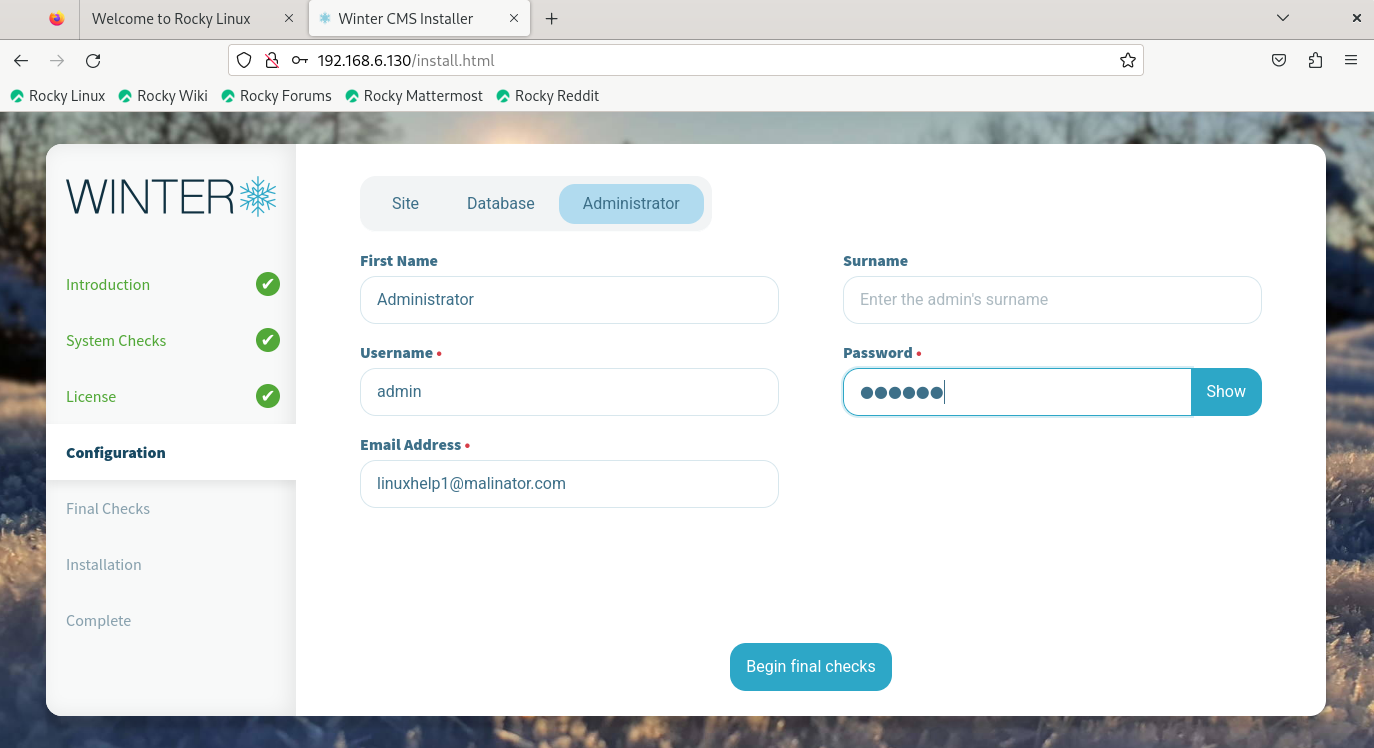
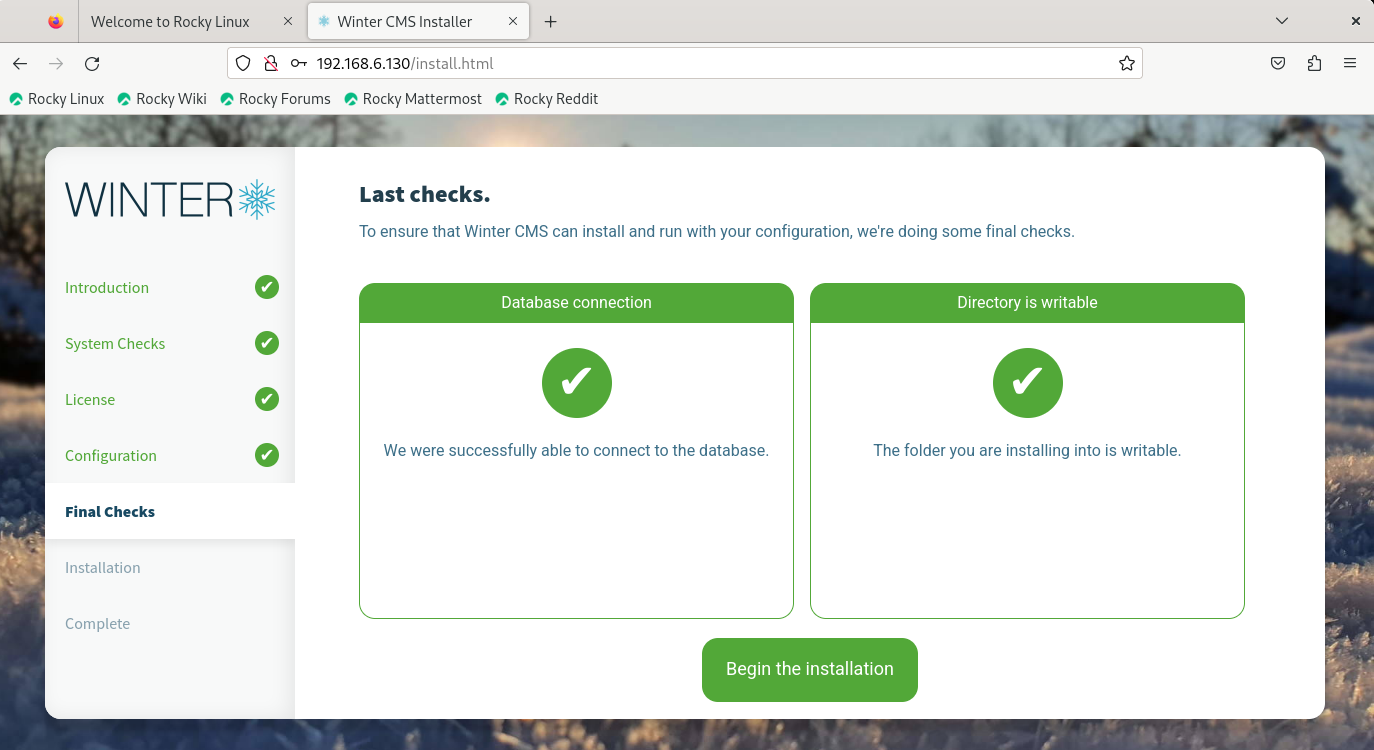
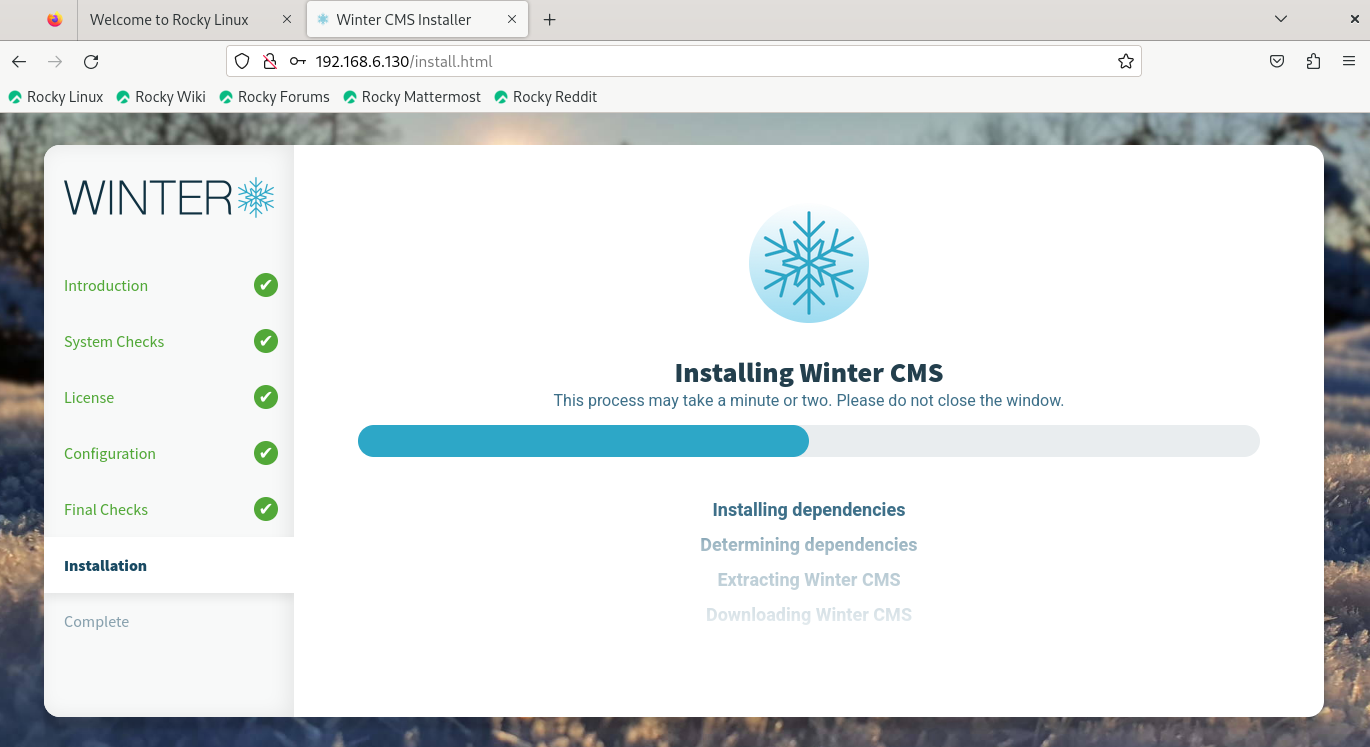
Input the Database details which was configured earlier. Follow the below steps:
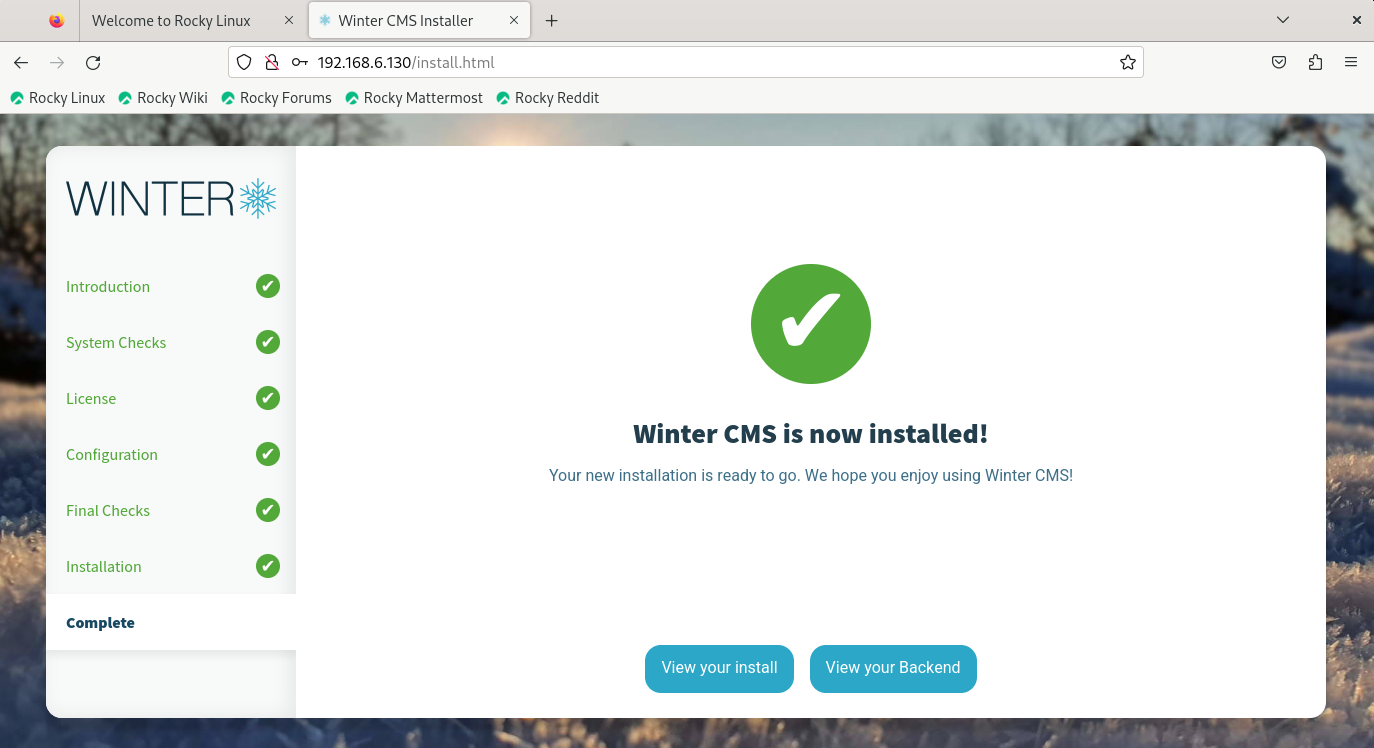
Conclusion:
We have reached the end of this article. In this guide, we have walked you through the steps required to installation of Winter CMS on Rocky Linux 9.3. Your feedback is much welcome.
Comments ( 0 )
No comments available