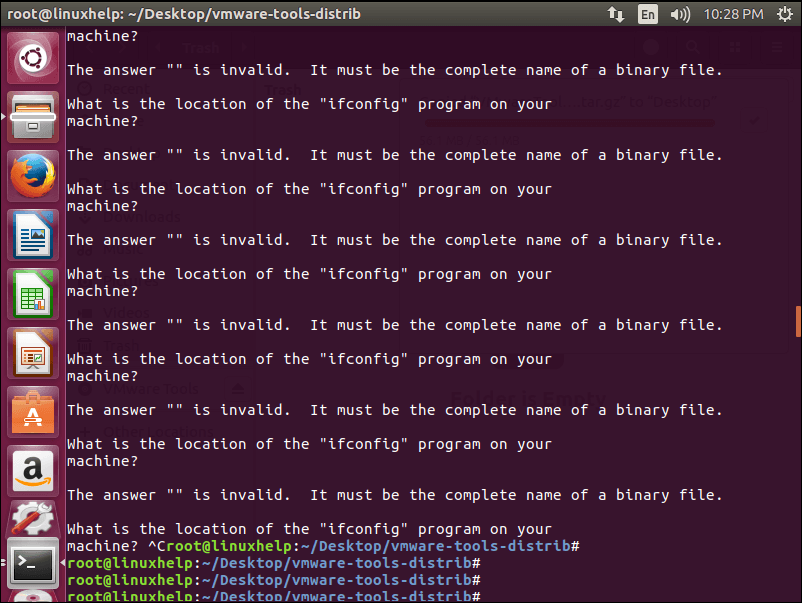
In Ubuntu 17.04 and later versions, the ifconfig command has been deprecated in favor of the ip command. This change was made to modernize the network configuration tools used in Ubuntu.
To install VMware Tools on your Ubuntu 17.04 guest, you can try the following steps:
Update your Ubuntu system to make sure you have the latest package information:
sql
Copy code
sudo apt-get update
Install the necessary packages for building kernel modules:
arduino
Copy code
sudo apt-get install build-essential
Mount the VMware Tools installation CD from the VMware menu:
In VMware Workstation or VMware Player, go to the "VM" menu, then select "Install VMware Tools."
This will mount a virtual CD containing the VMware Tools installer.
Extract the contents of the VMware Tools CD to a temporary location. You can do this by opening a terminal and running the following commands:
bash
Copy code
mkdir ~/vmware-tools
cp /media/cdrom/VMwareTools-.tar.gz ~/vmware-tools
cd ~/vmware-tools
tar -xzvf VMwareTools-.tar.gz
Navigate to the extracted directory:
bash
Copy code
cd vmware-tools-distrib
Run the VMware Tools installer script with superuser privileges:
bash
Copy code
sudo ./vmware-install.pl
During the installation process, you may be prompted with questions. When asked about the location of the ifconfig program, you can simply press Enter to accept the default value, which should work correctly with the ip command:
bash
Copy code
/usr/bin
Follow the on-screen prompts to complete the installation.
After the installation is complete, you may need to reboot your Ubuntu guest for the changes to take effect:
Copy code
sudo reboot
Once your Ubuntu guest has restarted, VMware Tools should be installed and working. You can check its status by running the following command:
https://voxblend.com/
Copy code
vmware-toolbox-cmd -v
This should display the installed version of VMware Tools, confirming that it's working correctly.