How to install and configure Apache Tomcat 10 in Rocky Linux 8.6
- 00:41 hostnamectl set-hostname tomcat.example.com
- 01:41 dnf -y install java-11-openjdk java-11-openjdk-devel
- 02:02 groupadd tomcat
- 02:31 useradd -s /bin/nologin -g tomcat -d /opt/tomcat/ tomcat
- 03:03 wget https://dlcdn.apache.org/tomcat/tomcat-10/v10.0.23/bin/apache-tomcat-10.0.23.tar.gz
- 03:22 tar xvf apache-tomcat-10.0.23.tar.gz -C /opt/tomcat/ --strip-
- 03:50 chown -R tomcat:tomcat /opt/tomcat/
- 04:12 sh -c 'chmod +x /opt/tomcat/bin/*.sh'
- 04:49 vim /etc/systemd/system/tomcat.service
- 05:20 systemctl daemon-reload
- 05:55 firewall-cmd --permanent --list-all
- 06:05 vim /opt/tomcat/conf/tomcat-users.xml
- 08:37 firewall-cmd --add-port=8080/tcp --permanent
- 17:19 vim /opt/tomcat/webapps/manager/META-INF/context.xml
To Install And Configure Apache Tomcat 10 In Rocky Linux 8.6
Introduction
Apache Tomcat is a popular open-source web server and Servlet container for Java code. As the reference implementation of Java Servlet and Java Server Pages (JSP), Tomcat was originally developed at Sun Microsystems, which afterward donated the code base to the Apache Software Foundation.
Installation procedure:
Step 1: Check the installed version of OS by using the below command
[root@linuxhelp ~]# cat /etc/os-release
NAME="Rocky Linux"
VERSION="8.6 (Green Obsidian)"
ID="rocky"
ID_LIKE="rhel centos fedora"
VERSION_ID="8.6"
PLATFORM_ID="platform:el8"
PRETTY_NAME="Rocky Linux 8.6 (Green Obsidian)"
ANSI_COLOR="0;32"
CPE_NAME="cpe:/o:rocky:rocky:8:GA"
Step 2: Set the host name by using the below command
[root@linuxhelp ~]# hostnamectl set-hostname tomcat.example.com
Step 3: Run the bash command to update host name in shell by using the below command
[root@linuxhelp ~]# bash
Step 4: Put the host entry by using the below command
[root@tomcat ~]# vim /etc/hosts
192.168.6.122 tomcat.example.com
Syntax = <serverip> <hostname>
Step 5: Install OpenJDK by using the below command
[root@tomcat ~]# dnf -y install java-11-openjdk java-11-openjdk-devel
Rocky Linux 8 - AppStream                                     3.4 MB/s | 9.6 MB     00:02
Rocky Linux 8 - BaseOS                                        3.4 MB/s | 6.7 MB     00:01
Rocky Linux 8 - Extras                                         12 kB/s |  11 kB     00:00
Dependencies resolved.
==============================================================================================
 Package                    Arch     Version                                Repository   Size
==============================================================================================
Installing:
 java-11-openjdk            x86_64   1:11.0.16.0.8-1.el8_6                  appstream   271 k
 java-11-openjdk-devel      x86_64   1:11.0.16.0.8-1.el8_6                  appstream   3.4 M
Installing dependencies:
 copy-jdk-configs           noarch   4.0-2.el8                              appstream    29 k
 java-11-openjdk-headless   x86_64   1:11.0.16.0.8-1.el8_6                  appstream    40 M
 javapackages-filesystem    noarch   5.3.0-2.module+el8.3.0+125+5da1ae29    appstream    29 k
 lksctp-tools               x86_64   1.0.18-3.el8                           baseos       98 k
 ttmkfdir                   x86_64   3.0.9-54.el8                           appstream    61 k
 tzdata-java                noarch   2022c-1.el8                            appstream   185 k
 xorg-x11-fonts-Type1       noarch   7.5-19.el8                             appstream   521 k
Enabling module streams:

 javapackages-runtime                201801
Transaction Summary
Step 6: Add Tomcat group by using the below command
[root@tomcat ~]# groupadd tomcat
Step 7: Create Tomcat directory under /opt by using the below command
[root@tomcat ~]# mkdir /opt/tomcat
Step 8: Create Tomcat user and the disable login by using the below command
[root@tomcat ~]# useradd -s /bin/nologin -g tomcat -d /opt/tomcat/ tomcat
Step 9: Download Tomcat package, here I’m downloading version 10
[root@tomcat ~]# wget https://dlcdn.apache.org/tomcat/tomcat-10/v10.0.23/bin/apache-tomcat-10.0.23.tar.gz
--2022-09-01 16:38:43--  https://dlcdn.apache.org/tomcat/tomcat-10/v10.0.23/bin/apache-tomcat-10.0.23.tar.gz
Resolving dlcdn.apache.org (dlcdn.apache.org)... 151.101.2.132, 2a04:4e42::644
Connecting to dlcdn.apache.org (dlcdn.apache.org)|151.101.2.132|:443... connected.
HTTP request sent, awaiting response... 200 OK
Length: 11972768 (11M) [application/x-gzip]
Saving to: ‘apache-tomcat-10.0.23.tar.gz’

apache-tomcat-10.0.23.t 100%[=============================>]  11.42M  6.73MB/s    in 1.7s
2022-09-01 16:38:44 (6.73 MB/s) - ‘apache-tomcat-10.0.23.tar.gz’ saved [11972768/11972768]
Step 10: Extract the files in the tomcat directory by using the below command
[root@tomcat ~]# tar xvf apache-tomcat-10.0.23.tar.gz -C /opt/tomcat/ --strip-components=1
apache-tomcat-10.0.23/conf/
apache-tomcat-10.0.23/conf/catalina.policy
apache-tomcat-10.0.23/conf/catalina.properties
apache-tomcat-10.0.23/conf/context.xml
apache-tomcat-10.0.23/conf/jaspic-providers.xml
apache-tomcat-10.0.23/conf/jaspic-providers.xsd
apache-tomcat-10.0.23/conf/logging.properties
apache-tomcat-10.0.23/conf/server.xml
apache-tomcat-10.0.23/conf/tomcat-users.xml
apache-tomcat-10.0.23/conf/tomcat-users.xsd
apache-tomcat-10.0.23/conf/web.xml
apache-tomcat-10.0.23/bin/
apache-tomcat-10.0.23/lib/
apache-tomcat-10.0.23/logs/
apache-tomcat-10.0.23/temp/
Step 11: Now give the ownership permission to the directory by using the below command
[root@tomcat ~]# chown -R tomcat:tomcat /opt/tomcat/
Step 12: Give the execute permission to the directory and enable the scripts in the directory by using the below command
[root@tomcat ~]# sh -c 'chmod +x /opt/tomcat/bin/*.sh'
Step 13: Create a systemd file for start and stop Apache Tomcat by using the below command
[root@tomcat ~]# vim /etc/systemd/system/tomcat.service
Add the content in the file
[Unit]
Description=Apache Tomcat Web Application Container
Wants=network.target
After=network.target
[Service]
Type=forking
Environment=JAVA_HOME=/usr/lib/jvm/jre
Environment=CATALINA_PID=/opt/tomcat/temp/tomcat.pid
Environment=CATALINA_HOME=/opt/tomcat
Environment='CATALINA_OPTS=-Xms512M -Xmx1G -Djava.net.preferIPv4Stack=true'
Environment='JAVA_OPTS=-Djava.awt.headless=true'
ExecStart=/opt/tomcat/bin/startup.sh
ExecStop=/opt/tomcat/bin/shutdown.sh
SuccessExitStatus=143
User=tomcat
Group=tomcat
UMask=0007
RestartSec=10
Restart=always


[Install]
WantedBy=multi-user.target
Step 14: Reload the daemon service by using the below command
[root@tomcat ~]# systemctl daemon-reload
Step 15: Start the tomcat service by using the below command
[root@tomcat ~]# systemctl start tomcat.service
Step 16: Enable the Tomcat service by using the below command
[root@tomcat ~]# systemctl enable tomcat.service
Created symlink /etc/systemd/system/multi-user.target.wants/tomcat.service → /etc/systemd/system/tomcat.service.
Step 17: Check the status of Tomcat service by using the below command
[root@tomcat ~]# systemctl status tomcat.service
● tomcat.service - Apache Tomcat Web Application Container
   Loaded: loaded (/etc/systemd/system/tomcat.service; enabled; vendor preset: disabled)
   Active: active (running) since Thu 2022-09-01 16:43:53 EDT; 18s ago
 Main PID: 40640 (java)
    Tasks: 28 (limit: 17274)
   Memory: 133.2M
   CGroup: /system.slice/tomcat.service
           └─40640 /usr/lib/jvm/jre/bin/java -Djava.util.logging.config.file=/opt/tomcat/conf
Step 18: Configure Tomcat Web Management by using the below command
[root@tomcat ~]# vim /opt/tomcat/conf/tomcat-users.xml
Change the user name and password of this file
<!--
  <role rolename="tomcat"/>
  <role rolename="role1"/>
  <user username="tomcat" password="<must-be-changed>" roles="tomcat"/>
  <user username="admin" password="Linuxc#5" roles="tomcat,role1"/>
  <user username="admin" password="Linuxc#5" roles="role1"/>
-->
Step 19: Allow Tomcat to be accessible remotely both for manager and host manager by using the below command
For manager
[root@tomcat ~]# vim /opt/tomcat/webapps/manager/META-INF/context.xml

-->
<Context antiResourceLocking="false" privileged="true" >
  <CookieProcessor className="org.apache.tomcat.util.http.Rfc6265CookieProcessor"
                   sameSiteCookies="strict" />
  <Valve className="org.apache.catalina.valves.RemoteAddrValve"
         allow="127\.\d+\.\d+\.\d+|::1|0:0:0:0:0:0:0:1|192.168.6.122" />
  <Manager sessionAttributeValueClassNameFilter="java\.lang\.(?:Boolean|Integer|Long|Number|String)|org\.apache\.catalina\.filters\.CsrfPreventionFilter\$LruCache(?:\$1)?|java\.util\.(?:Linked)?HashMap"/>
</Context>

For host manager
vim /opt/tomcat/webapps/host-manager/META-INF/context.xml
-->
<Context antiResourceLocking="false" privileged="true" >
  <CookieProcessor className="org.apache.tomcat.util.http.Rfc6265CookieProcessor"
                   sameSiteCookies="strict" />
  <Valve className="org.apache.catalina.valves.RemoteAddrValve"
         allow="127\.\d+\.\d+\.\d+|::1|0:0:0:0:0:0:0:1|192.168.6.122" />
  <Manager sessionAttributeValueClassNameFilter="java\.lang\.(?:Boolean|Integer|Long|Number|String)|org\.apache\.catalina\.filters\.CsrfPreventionFilter\$LruCache(?:\$1)?|java\.util\.(?:Linked)?HashMap"/>
</Context>
Step 20: Add the firewall for port 8080 by using the below command
[root@tomcat ~]# firewall-cmd --add-port=8080/tcp --permanent
Success
Step 21: List the default zone to check by using the below command
[root@tomcat ~]# firewall-cmd --permanent --list-all
public
  target: default
  icmp-block-inversion: no
  interfaces:
  sources:
  services: cockpit dhcpv6-client ssh

  ports: 8080/tcp
  protocols:
  forward: no
  masquerade: no
  forward-ports:
  source-ports:
  icmp-blocks:
  rich rules:
Step 22: Reload the firewall by using the below command
[root@tomcat ~]# firewall-cmd --reload
Success
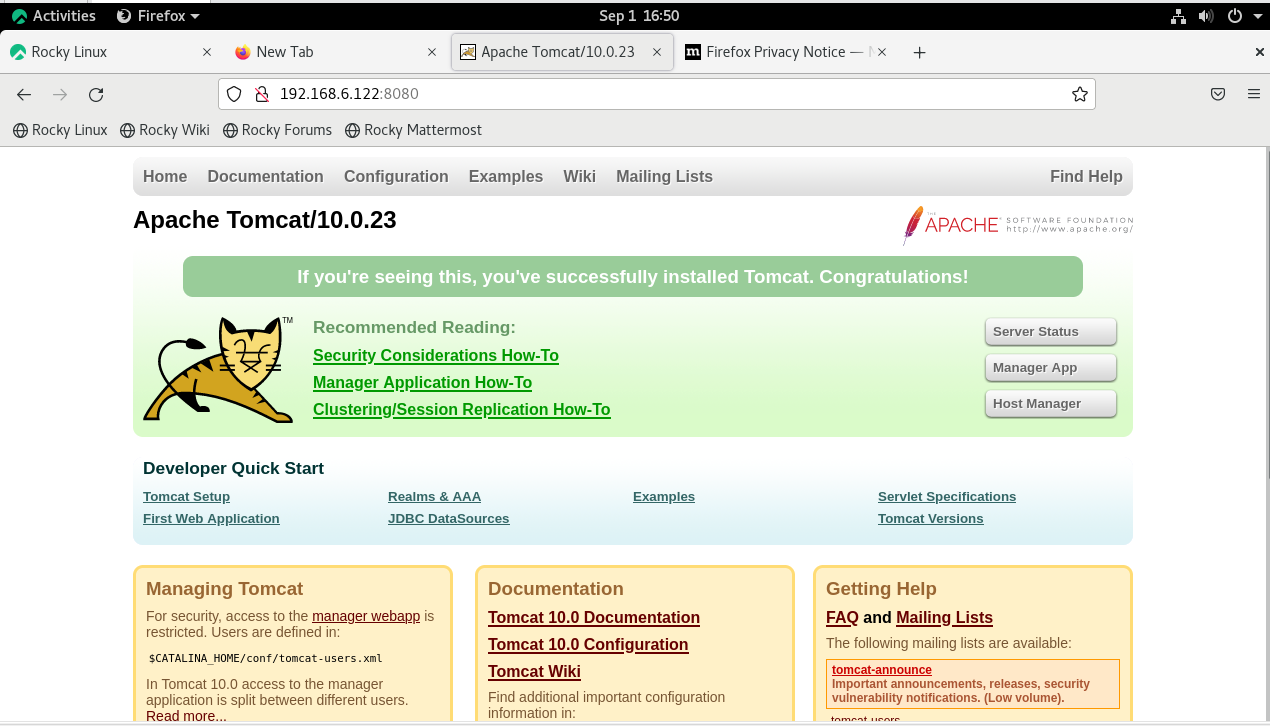
Step 23: Go to the browser and search your server IP with port 8080 as shown in the below image
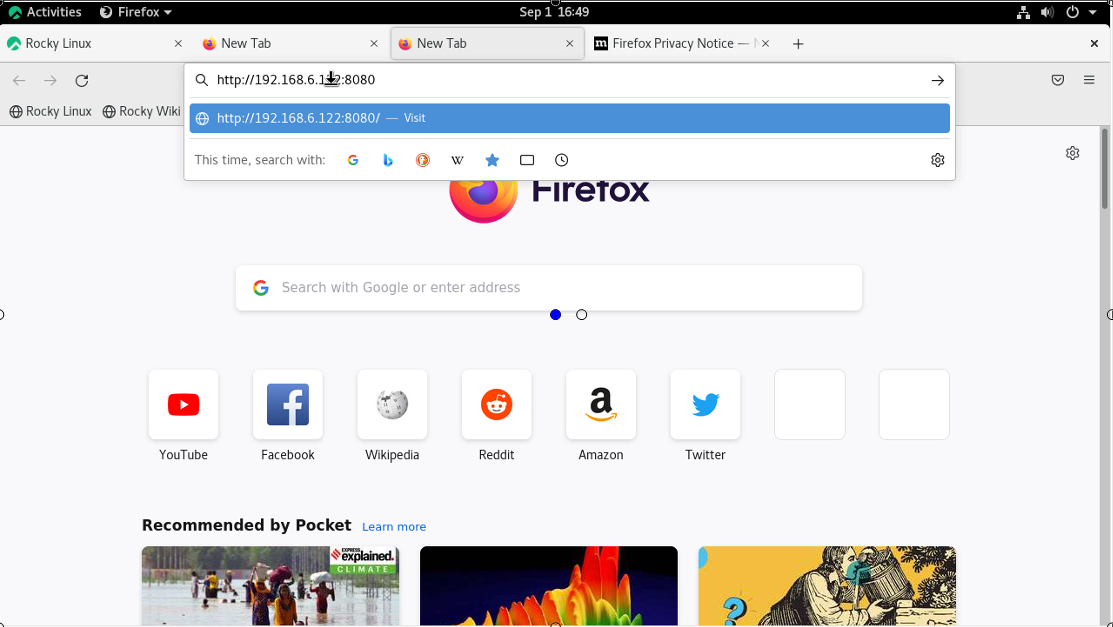
Output
This is the welcome page of tomcat
Conclusion:
We have reached the end of this article. In this guide, we have walked you through the steps required to install Apache Tomcat in Rocky Linux 8.6. Your feedback is much welcome.
Comments ( 0 )
No comments available