How to Setup Password Authentication with Apache in Ubuntu
To Setup Password Authentication with Apache in Ubuntu
Apache is a popular web server that hides the websites private information from unauthorized users. It provides easiest way to secure your site with free trusted certificates. This article shows how to setup password authentication with Apache in Ubuntu.
Installation of Apache
Utilize the following command to install Apache package.
root@linuxhelp1:~# apt-get install apache2 apache2-utils -y
Reading package lists... Done
Building dependency tree
Reading state information... Done
The following additional packages will be installed:
  apache2-bin apache2-data libapr1 libaprutil1 libaprutil1-dbd-sqlite3 libaprutil1-ldap liblua5.1-0
Suggested packages:
  apache2-doc apache2-suexec-pristine | apache2-suexec-custom
The following NEW packages will be installed:
  apache2 apache2-bin apache2-data apache2-utils libapr1 libaprutil1 libaprutil1-dbd-sqlite3 libaprutil1-ldap liblua5.1-0
0 upgraded, 9 newly installed, 0 to remove and 421 not upgraded.
Need to get 1,537 kB of archives.
After this operation, 6,350 kB of additional disk space will be used.
Get:1 http://in.archive.ubuntu.com/ubuntu xenial/main amd64 libapr1 amd64 1.5.2-3 [86.0 kB]
Get:2 http://in.archive.ubuntu.com/ubuntu xenial/main amd64 libaprutil1 amd64 1.5.4-1build1 [77.1 kB]
Get:3 http://in.archive.ubuntu.com/ubuntu xenial/main amd64 libaprutil1-dbd-sqlite3 amd64 1.5.4-1build1 [10.6 kB]
Get:4 http://in.archive.ubuntu.com/ubuntu xenial/main amd64 libaprutil1-ldap amd64 1.5.4-1build1 [8,720 B]
Get:5 http://in.archive.ubuntu.com/ubuntu xenial/main amd64 liblua5.1-0 amd64 5.1.5-8ubuntu1 [102 kB]
Get:6 http://in.archive.ubuntu.com/ubuntu xenial-updates/main amd64 apache2-bin amd64 2.4.18-2ubuntu3.1 [923 kB]
Get:7 http://in.archive.ubuntu.com/ubuntu xenial-updates/main amd64 apache2-utils amd64 2.4.18-2ubuntu3.1 [81.3 kB]
Get:8 http://in.archive.ubuntu.com/ubuntu xenial-updates/main amd64 apache2-data all 2.4.18-2ubuntu3.1 [162 kB]
Get:9 http://in.archive.ubuntu.com/ubuntu xenial-updates/main amd64 apache2 amd64 2.4.18-2ubuntu3.1 [86.7 kB]
Fetched 1,537 kB in 29s (51.3 kB/s)
Selecting previously unselected package libapr1:amd64.
(Reading database ... 173836 files and directories currently installed.)
.
.
.
Enabling conf localized-error-pages.
Enabling conf other-vhosts-access-log.
Enabling conf security.
Enabling conf serve-cgi-bin.
Enabling site 000-default.
Processing triggers for libc-bin (2.23-0ubuntu3) ...
Processing triggers for ureadahead (0.100.0-19) ...
Processing triggers for systemd (229-4ubuntu4) ...
Processing triggers for ufw (0.35-0ubuntu2) ...
To create password file
The ' htpasswd' command allows you to create a password file. Here we will creating a hidden file .htpasswd within our /etc/apache2 configuration directory.
root@linuxhelp1:~# htpasswd -c /etc/apache2/.htpasswd user1
New password:
Re-type new password:
Adding password for user user1
root@linuxhelp1:~# htpasswd -c /etc/apache2/.htpasswd user2
New password:
Re-type new password:
Adding password for user user2
You can view the username and the encrypted password for each user.
root@linuxhelp1:~# cat /etc/apache2/.htpasswd
user1:$apr1$d/XhO7Ko$/nyf1UGdWfaA0rQ17VVAT/
Now its time to configure Apache password authentication.
root@linuxhelp1:~# nano /etc/apache2/sites-enabled/000-default.conf

< Directory " /var/www/html" >
      AuthType Basic
      AuthName " Restricted Content"
      AuthUserFile /etc/apache2/.htpasswd
      Require valid-user
Save and exit the file.
Check the configuration, before restart it.
root@linuxhelp1:~# apache2ctl configtest
Syntax OK
Restart the Apache to take effect and check the status.
root@linuxhelp1:~# systemctl restart apache2
root@linuxhelp1:~# systemctl status apache2
 apache2.service - LSB: Apache2 web server
   Loaded: loaded (/etc/init.d/apache2  bad  vendor preset: enabled)
  Drop-In: /lib/systemd/system/apache2.service.d
           ??apache2-systemd.conf
   Active: active (running) since Fri 2016-11-18 17:39:43 IST  18s ago
     Docs: man:systemd-sysv-generator(8)
  Process: 4476 ExecStop=/etc/init.d/apache2 stop (code=exited, status=0/SUCCESS)
  Process: 4501 ExecStart=/etc/init.d/apache2 start (code=exited, status=0/SUCCESS)
    Tasks: 55 (limit: 512)
   CGroup: /system.slice/apache2.service
           ??4518 /usr/sbin/apache2 -k start
           ??4521 /usr/sbin/apache2 -k start
           ??4522 /usr/sbin/apache2 -k start

Nov 18 17:39:42 linuxhelp1 systemd[1]: Starting LSB: Apache2 web server...
Nov 18 17:39:42 linuxhelp1 apache2[4501]:  * Starting Apache httpd web server apache2
Nov 18 17:39:43 linuxhelp1 apache2[4501]:  *
Nov 18 17:39:43 linuxhelp1 systemd[1]: Started LSB: Apache2 web server.
Utilize the following command for access control with the .htaccess Files.
root@linuxhelp1:~# nano /etc/apache2/apache2.conf

  Options Indexes FollowSymLinks
  AllowOverride All
  Require all granted
Save and exit the file.
Here you need to add .htaccess file to the directory to restrict the entire document root.
root@linuxhelp1:~# nano /var/www/html/.htaccess

AuthType Basic
AuthName " Restricted Content"
AuthUserFile /etc/apache2/.htpasswd
Require valid-user
Save and close the file.
Restart the web server to take effect and check the status for verification.
root@linuxhelp1:~# systemctl restart apache2
root@linuxhelp1:~# systemctl status apache2
 apache2.service - LSB: Apache2 web server
   Loaded: loaded (/etc/init.d/apache2  bad  vendor preset: enabled)
  Drop-In: /lib/systemd/system/apache2.service.d
           ??apache2-systemd.conf
   Active: active (running) since Fri 2016-11-18 17:43:58 IST  17s ago
     Docs: man:systemd-sysv-generator(8)
  Process: 4630 ExecStop=/etc/init.d/apache2 stop (code=exited, status=0/SUCCESS)
  Process: 4655 ExecStart=/etc/init.d/apache2 start (code=exited, status=0/SUCCESS)
    Tasks: 55 (limit: 512)
   CGroup: /system.slice/apache2.service
           ??4672 /usr/sbin/apache2 -k start
           ??4675 /usr/sbin/apache2 -k start
           ??4676 /usr/sbin/apache2 -k start

Nov 18 17:43:57 linuxhelp1 systemd[1]: Starting LSB: Apache2 web server...
Nov 18 17:43:57 linuxhelp1 apache2[4655]:  * Starting Apache httpd web server apache2
Nov 18 17:43:58 linuxhelp1 apache2[4655]:  *
Nov 18 17:43:58 linuxhelp1 systemd[1]: Started LSB: Apache2 web server.
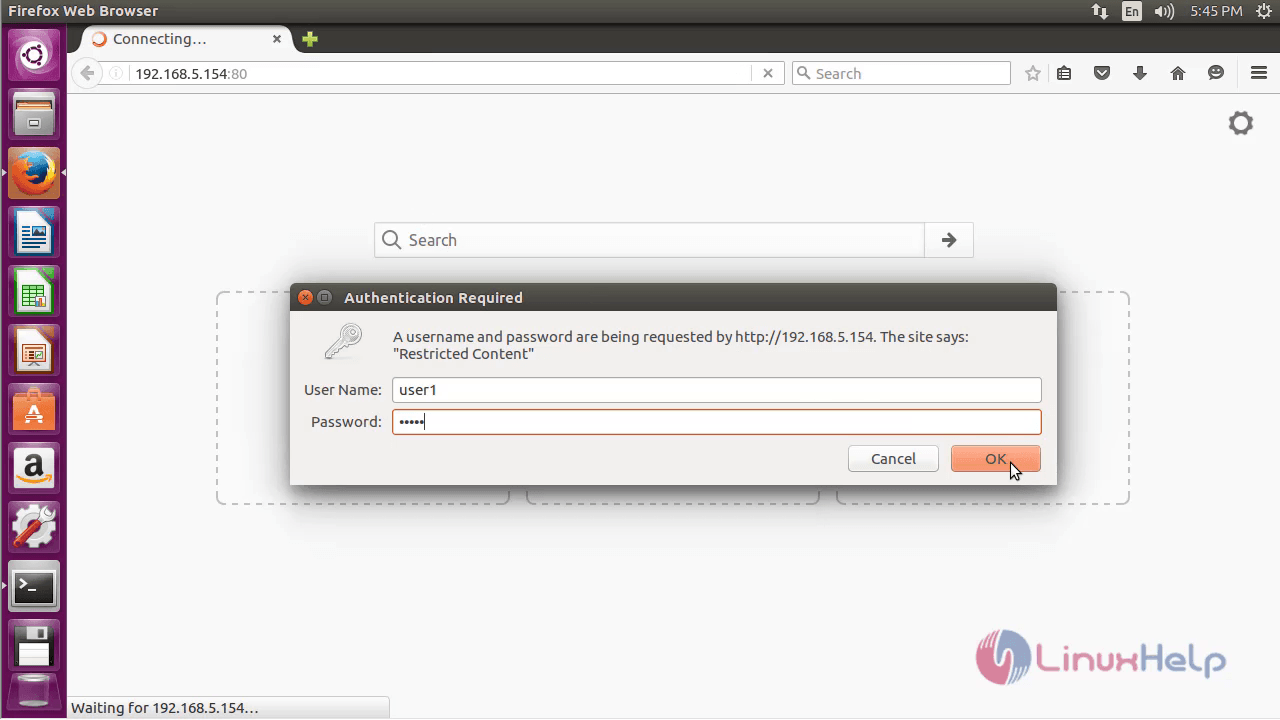
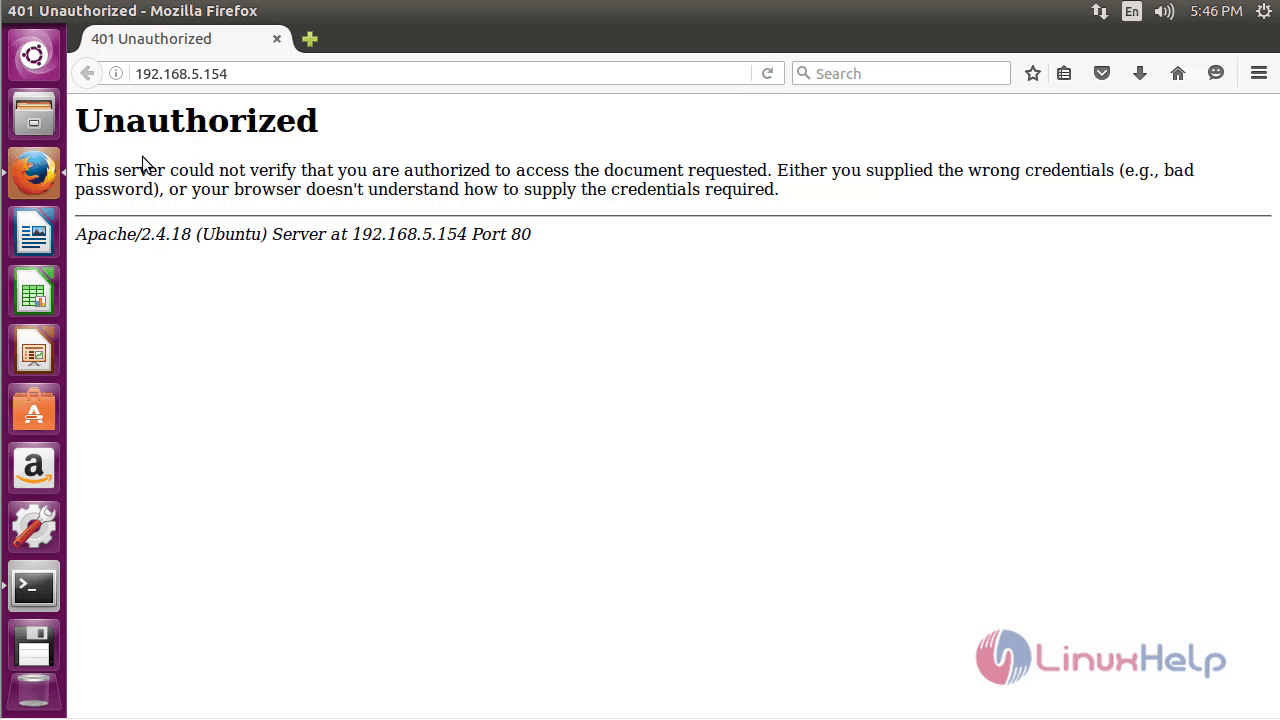
Once the above process is completed, lets try to access the restricted content in a web browser as shown below,

Enter the following credentials.
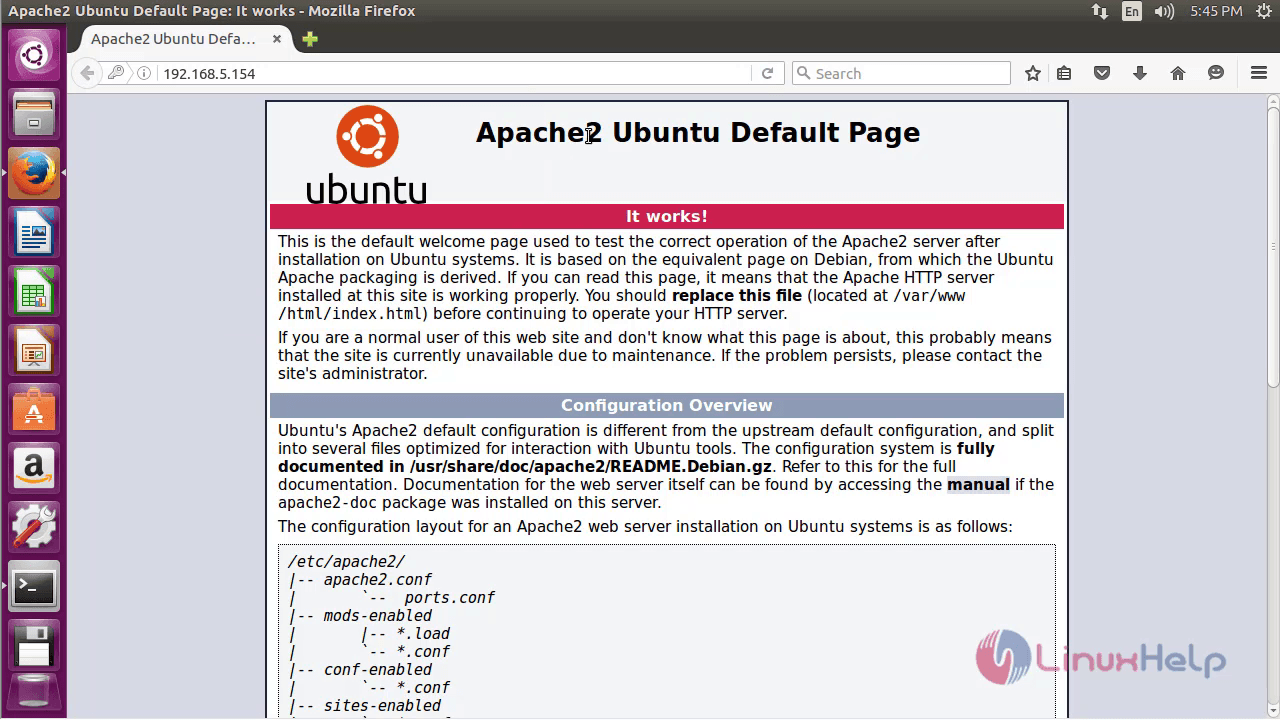
Apache default page appears.
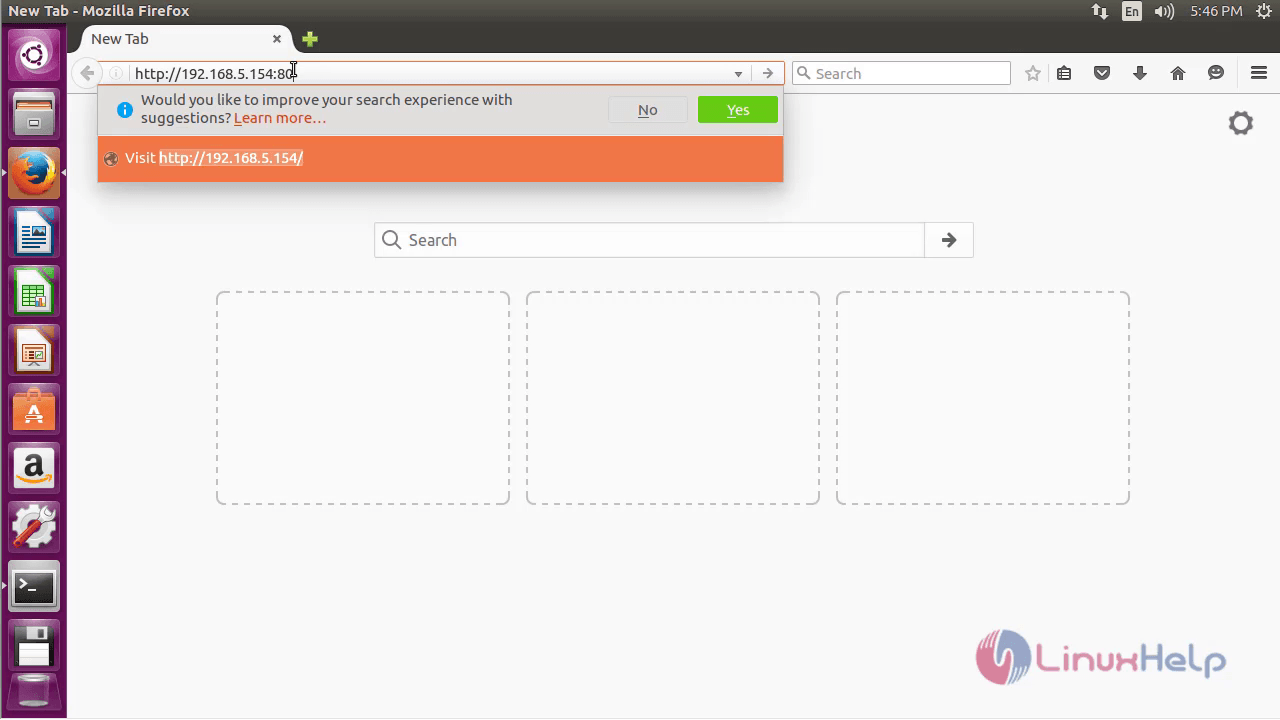
Again enter the same IP address.
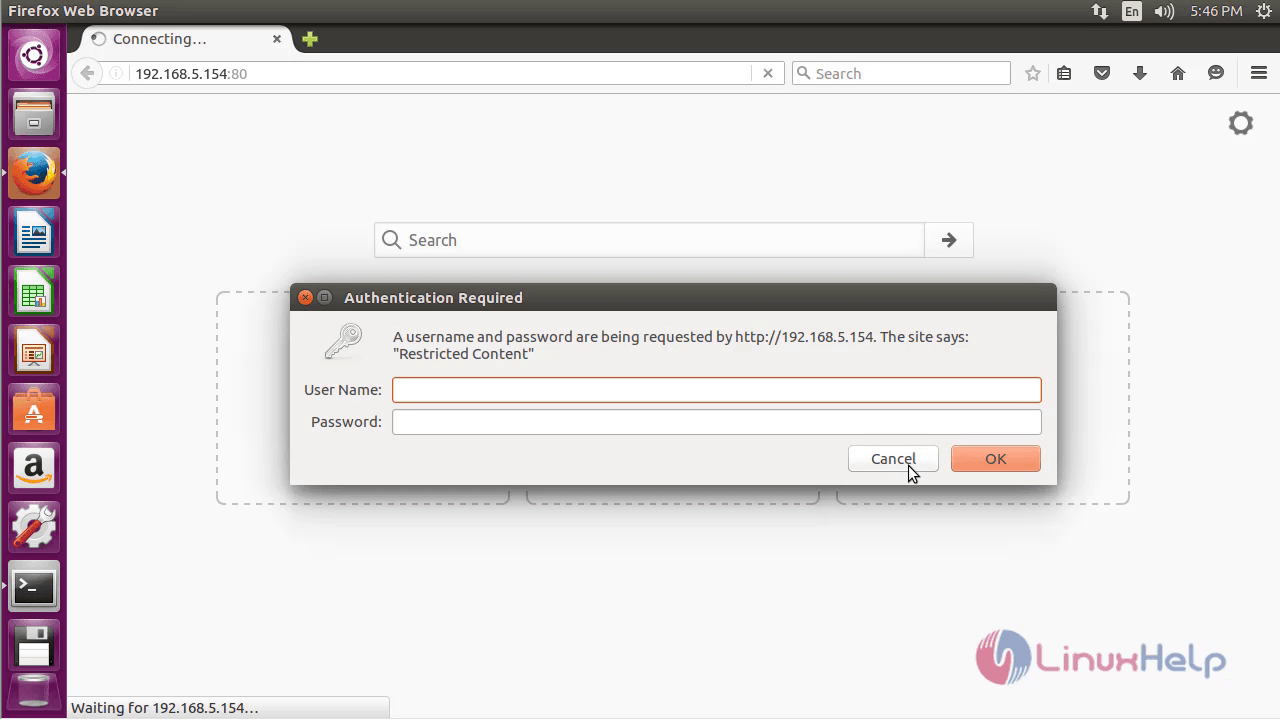
If you are not giving the respective credentials, then it will display the output as shown below,
Comments ( 1 )