How to install SuiteCRM 7.10.2 Ubuntu 17.04
To Install SuiteCRM 7.10.2 Ubuntu 17.04
SuiteCRM is an open source, rich, powerful, flexible and user-friendly Customer Relationship Management system based on SugarCRM and built using PHP. It is very simple to use and its installation is as simple as its applicability. This tutorial covers the method to install SuiteCRM on Ubuntu 17.04.
Prerequisites
- SuiteCRM requires a webserver to functionally based on LAMP setup on your system and also with following required PHP modules.
- apt-get install php-mysql php-curl php-json php-cgi php libapache2-mod-php php-mcrypt php-xmlrpc php-gd php-mbstring php php-common php-xmlrpc php-soap php-xml php-intl php-cli php-ldap php-zip php-readline php-imap
Installing SuiteCRM
First, you need to make sure that you update the system repository by making use of the following command.
root@linuxhelp1:~# apt-get update
Hit:1 http://old-releases.ubuntu.com/ubuntu zesty InRelease
Hit:2 http://old-releases.ubuntu.com/ubuntu zesty-updates InRelease
Hit:3 http://old-releases.ubuntu.com/ubuntu zesty-backports InRelease
Hit:4 http://old-releases.ubuntu.com/ubuntu zesty-security InRelease
Reading package lists... Done
Once it is done, you shall install GIT which is very much essential for this installation process.
root@linuxhelp1:~# apt-get install git
Reading package lists... Done
Building dependency tree
Reading state information... Done
The following additional packages will be installed:
  git-man liberror-perl
Suggested packages:
  git-daemon-run | git-daemon-sysvinit git-doc git-el git-email git-gui gitk gitweb git-arch
  git-cvs git-mediawiki git-svn
The following NEW packages will be installed:
.
.
Selecting previously unselected package git-man.
Preparing to unpack .../git-man_1%3a2.11.0-2ubuntu0.3_all.deb ...
Unpacking git-man (1:2.11.0-2ubuntu0.3) ...
Selecting previously unselected package git.
Preparing to unpack .../git_1%3a2.11.0-2ubuntu0.3_amd64.deb ...
Unpacking git (1:2.11.0-2ubuntu0.3) ...
Setting up git-man (1:2.11.0-2ubuntu0.3) ...
Setting up liberror-perl (0.17024-1) ...
Processing triggers for man-db (2.7.6.1-2) ...
Setting up git (1:2.11.0-2ubuntu0.3) ...
Once it is done, you need to switch over to the directory.
root@linuxhelp1:~# cd /tmp
And clone the SuiteCRM package as follows.
root@linuxhelp1:~# git clone https://github.com/salesagility/SuiteCRM.git suitecrm
Cloning into ' suitecrm' ...
remote: Counting objects: 108998, done.
remote: Total 108998 (delta 0), reused 0 (delta 0), pack-reused 108998
Receiving objects: 100% (108998/108998), 86.80 MiB | 709.00 KiB/s, done.
Resolving deltas: 100% (70401/70401), done.
Then move the SuiteCRM to /var/www location.
root@linuxhelp1:~# mv suitecrm /var/www/
And change ownership of the file by making use of the following commands.
root@linuxhelp1:/var/www# chown -R www-data.www-data suitecrm
root@linuxhelp1:/var/www# chmod -R 775 suitecrm/
You need to install the composer now, so complete that action by making use of the following command.
root@linuxhelp1:/var/www/suitecrm# apt-get install composer
Reading package lists... Done
Building dependency tree
Reading state information... Done
The following additional packages will be installed:
  jsonlint php-cli-prompt php-composer-ca-bundle php-composer-semver
  php-composer-spdx-licenses php-json-schema php-psr-log php-symfony-console
  php-symfony-filesystem php-symfony-finder php-symfony-polyfill-mbstring php-symfony-process
Suggested packages:
  fossil mercurial subversion php-symfony-event-dispatcher
The following NEW packages will be installed:
.
.
Setting up php-composer-semver (1.4.2-1) ...
Setting up php-cli-prompt (1.0.2+dfsg-1) ...
Processing triggers for man-db (2.7.6.1-2) ...
Setting up php-composer-spdx-licenses (1.1.5-1) ...
Setting up php-symfony-filesystem (2.8.7+dfsg-1ubuntu1) ...
Setting up php-symfony-polyfill-mbstring (1.2.0-1) ...
Setting up jsonlint (1.5.0-1) ...
Setting up php-symfony-process (2.8.7+dfsg-1ubuntu1) ...
Setting up php-symfony-console (2.8.7+dfsg-1ubuntu1) ...
Setting up composer (1.2.2-1) ...
And then, you need to prepare for SuiteCRM installation by running the following command.
root@linuxhelp1:/var/www/suitecrm# composer install
Do not run Composer as root/super user! See https://getcomposer.org/root for details
Loading composer repositories with package information
Updating dependencies (including require-dev)
  - Installing leafo/scssphp (dev-master 9410cbb)
    Cloning 9410cbb398d17b096ce4bdd533f1712a651aca3d from cache

  - Installing mikey179/vfsstream (v1.4.0)
    Downloading: 100%

  - Installing behat/transliterator (v1.2.0)
    Downloading: 100%

  - Installing jeroendesloovere/vcard (1.5.0)
    Downloading: 100%

  - Installing browserstack/browserstack-local (dev-master 491c6e3)
    Cloning 491c6e31960ce8111d2cb70cb84d03e73f270dbb from cache
.
.
codeception/codeception suggests installing codeception/specify (BDD-style code blocks)
codeception/codeception suggests installing codeception/verify (BDD-style assertions)
codeception/codeception suggests installing codeception/phpbuiltinserver (Start and stop PHP built-in web server for your tests)
codeception/codeception suggests installing flow/jsonpath (For using JSONPath in REST module)
codeception/codeception suggests installing phpseclib/phpseclib (for SFTP option in FTP Module)
codeception/codeception suggests installing league/factory-muffin (For DataFactory module)
codeception/codeception suggests installing league/factory-muffin-faker (For Faker support in DataFactory module)
codeception/codeception suggests installing symfony/phpunit-bridge (For phpunit-bridge support)
codeception/codeception suggests installing stecman/symfony-console-completion (For BASH autocompletion)
Package league/url is abandoned, you should avoid using it. Use league/uri instead.
Writing lock file
Generating autoload files
To make configuration PHP modules, you need to open the php.ini file
root@linuxhelp1:/var/www# vim /etc/php/7.0/apache2/php.ini
And edit the following lines in that file.
[..]
Upload_max_filesize = 100M
cgi.fix_pathinfo=0
session.save_path = /var/lib/php/sessions/
[..]
After that, you need to set a password for the database.
root@linuxhelp1:~# mysql_secure_installation

NOTE: RUNNING ALL PARTS OF THIS SCRIPT IS RECOMMENDED FOR ALL MariaDB
         SERVERS IN PRODUCTION USE!   PLEASE READ EACH STEP CAREFULLY!

In order to log into MariaDB to secure it, we' ll need the current
password for the root user.  If you' ve just installed MariaDB, and
you haven' t set the root password yet, the password will be blank,
so you should just press enter here.

Enter current password for root (enter for none):
OK, successfully used password, moving on...

Setting the root password ensures that nobody can log into the MariaDB
root user without the proper authorisation.

Set root password? [Y/n] y
New password:
Re-enter new password:
Password updated successfully!
Reloading privilege tables..
 ... Success!

By default, a MariaDB installation has an anonymous user, allowing anyone
to log into MariaDB without having to have a user account created for
them.  This is intended only for testing, and to make the installation
go a bit smoother.  You should remove them before moving into a
production environment.

Remove anonymous users? [Y/n]
 ... Success!

Normally, root should only be allowed to connect from ' localhost' .  This
ensures that someone cannot guess at the root password from the network.

Disallow root login remotely? [Y/n]
 ... Success!

By default, MariaDB comes with a database named ' test'  that anyone can
access.  This is also intended only for testing, and should be removed
before moving into a production environment.

Remove test database and access to it? [Y/n]
 - Dropping test database...
 ... Success!
 - Removing privileges on test database...
 ... Success!

Reloading the privilege tables will ensure that all changes made so far
will take effect immediately.

Reload privilege tables now? [Y/n]  y
 ... Success!

Cleaning up...

All done!  If you' ve completed all of the above steps, your MariaDB
installation should now be secure.

Thanks for using MariaDB!
And then, you need to create Database for suiteCRM.
root@linuxhelp1:~# mysql -u root -p
Enter password:
Welcome to the MariaDB monitor.  Commands end with   or g.
Your MariaDB connection id is 10
Server version: 10.1.25-MariaDB- Ubuntu 17.04

Copyright (c) 2000, 2017, Oracle, MariaDB Corporation Ab and others.

Type ' help '  or ' h'  for help. Type ' c'  to clear the current input statement.

MariaDB [(none)]>  CREATE DATABASE suite
Query OK, 1 row affected (0.00 sec)

MariaDB [(none)]>  GRANT ALL PRIVILEGES ON typo3.* TO  ' suiteuser' @' localhost'  IDENTIFIED BY ' 123'
Query OK, 0 rows affected (0.03 sec)

MariaDB [(none)]>  FLUSH PRIVILEGES
Query OK, 0 rows affected (0.00 sec)

MariaDB [(none)]>  EXIT
Bye.
And then you should also create a virtual host for SuiteCRM.
root@linuxhelp1:/var/www# vim /etc/apache2/sites-available/suite.conf
You should add the following lines to it.
[..]
< VirtualHost *:80>
ServerName www.linuxhelp1.com
DocumentRoot /var/www/suitecrm/

< Directory /var/www/suitecrm/>
AllowOverride All
allow from all
< /Directory>

< /VirtualHost>
[..]
Once it is done, you need to enable the site by making use of the following command.
root@linuxhelp1:/var/www# a2ensite suite.conf
Enabling site suite.
To activate the new configuration, you need to run:
  systemctl reload apache2
You should now restart apache2.
root@linuxhelp1:/var/www# systemctl restart apache2
And then, disable the default site
root@linuxhelp1:/var/www# a2dissite 000-default.conf
You shall restart apache2 by making use of the following command.
root@linuxhelp1:/var/www# systemctl restart apache2
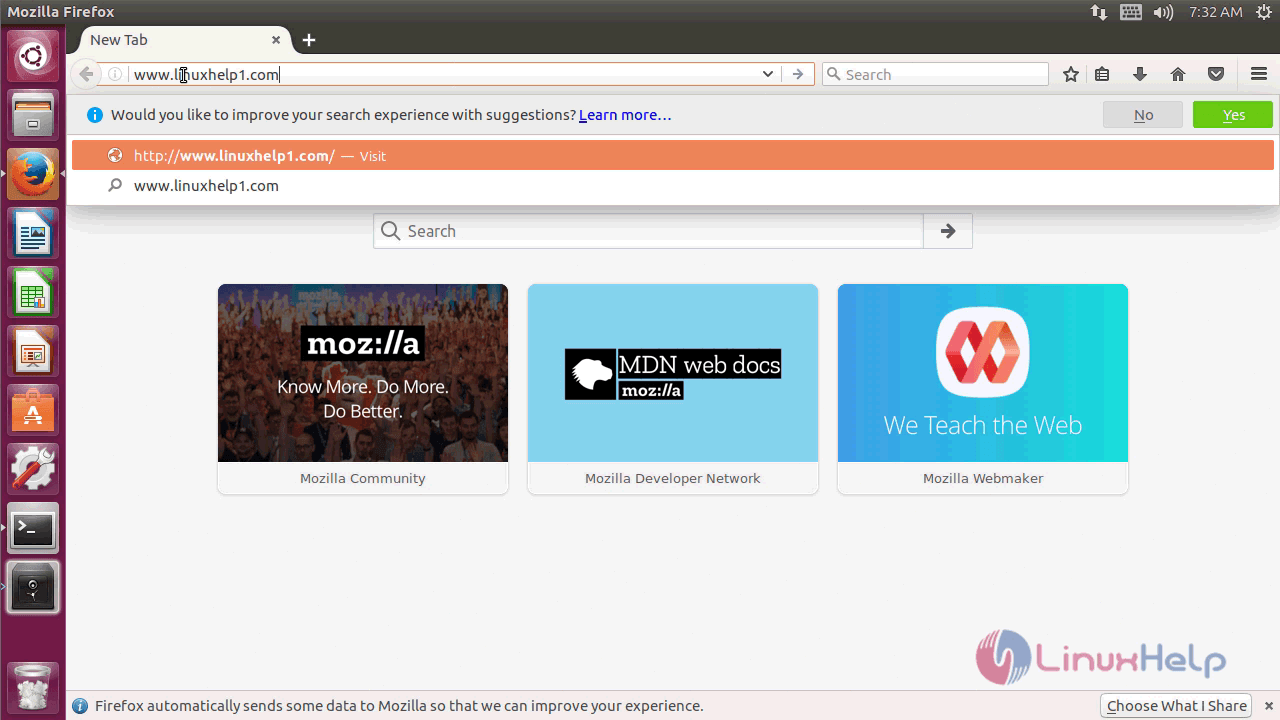
Now, let use continue this process through GUI. Go to your Browser and type “ http://IP (or) domain name.“
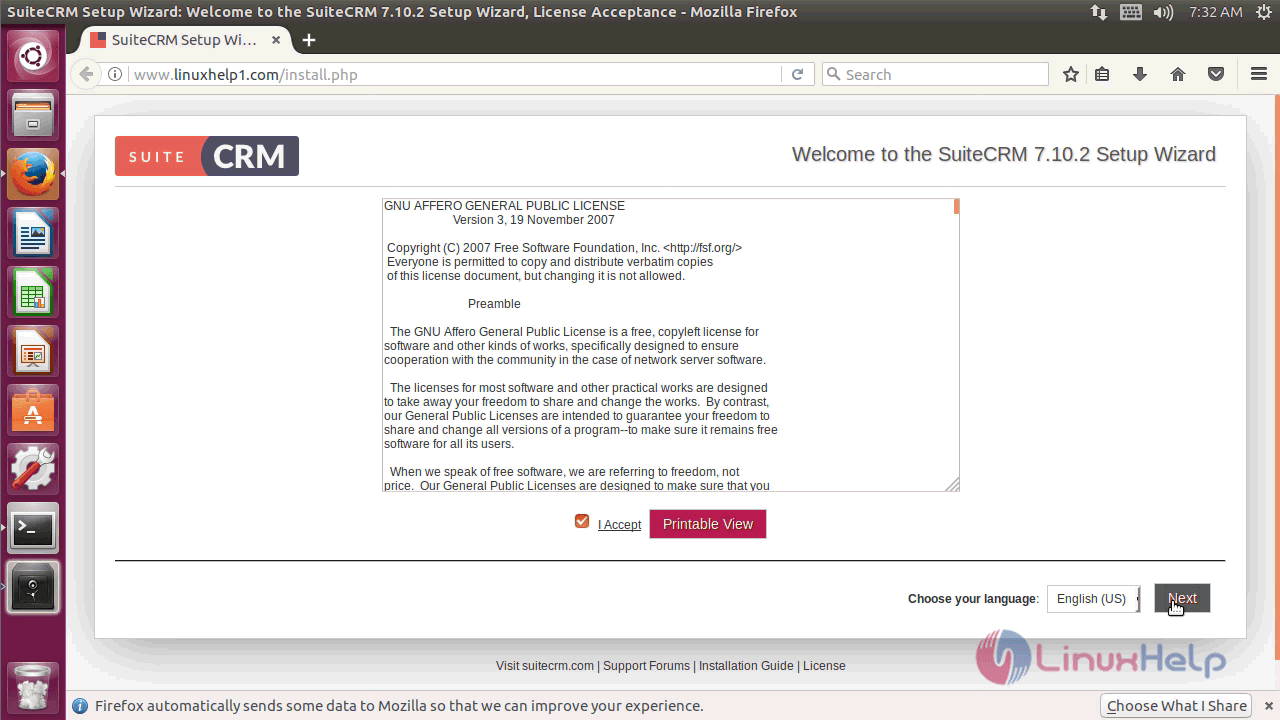
The page of SuiteCRM now appears so you need to accept the license agreement to proceed.
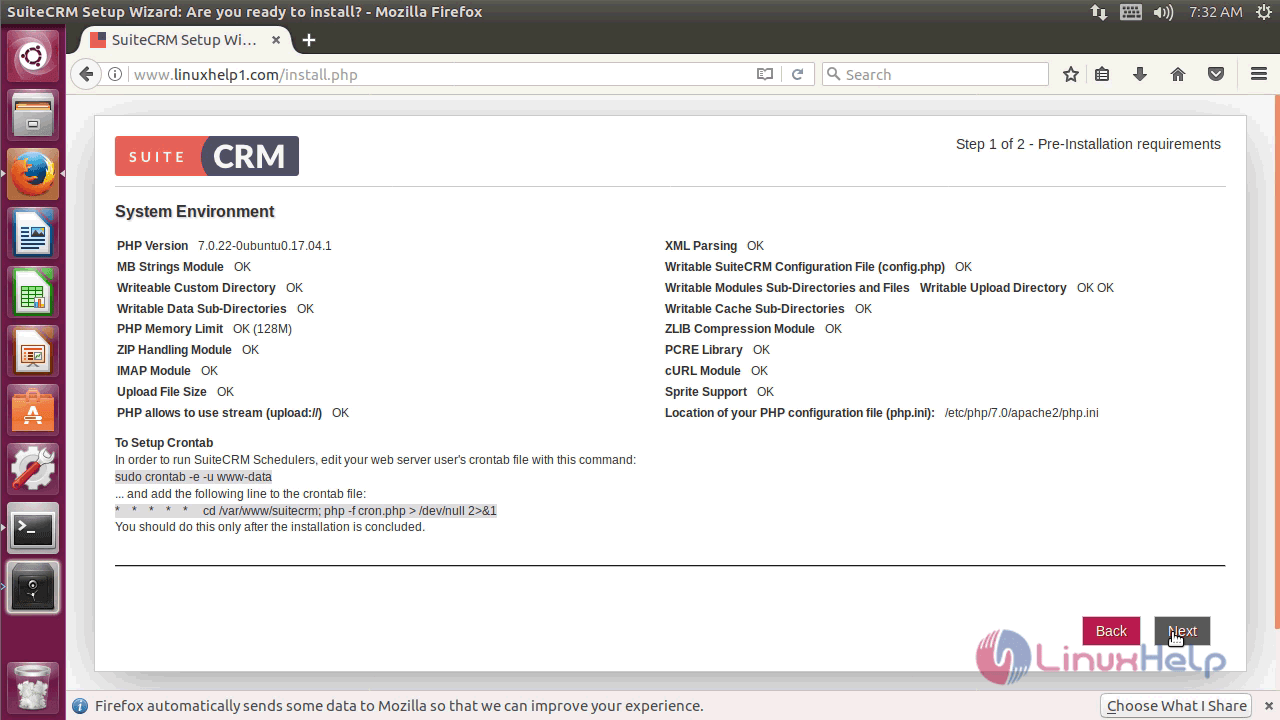
The system environment configuration now appears.
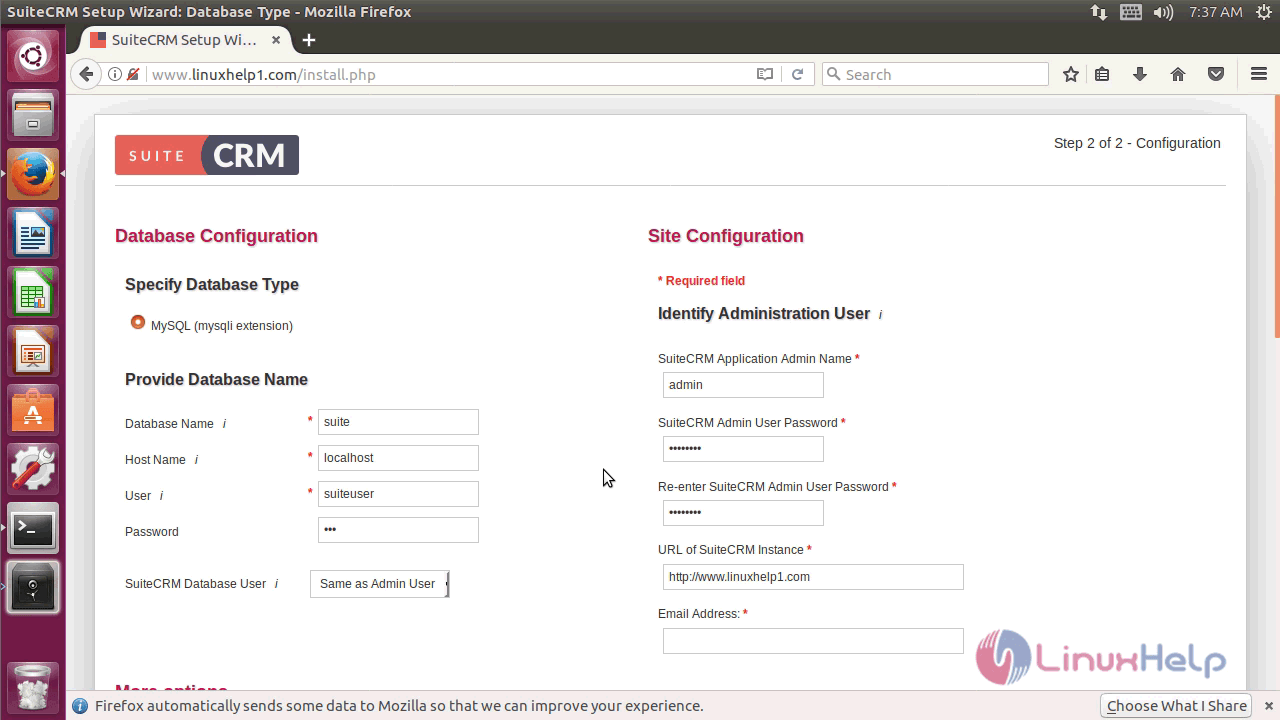
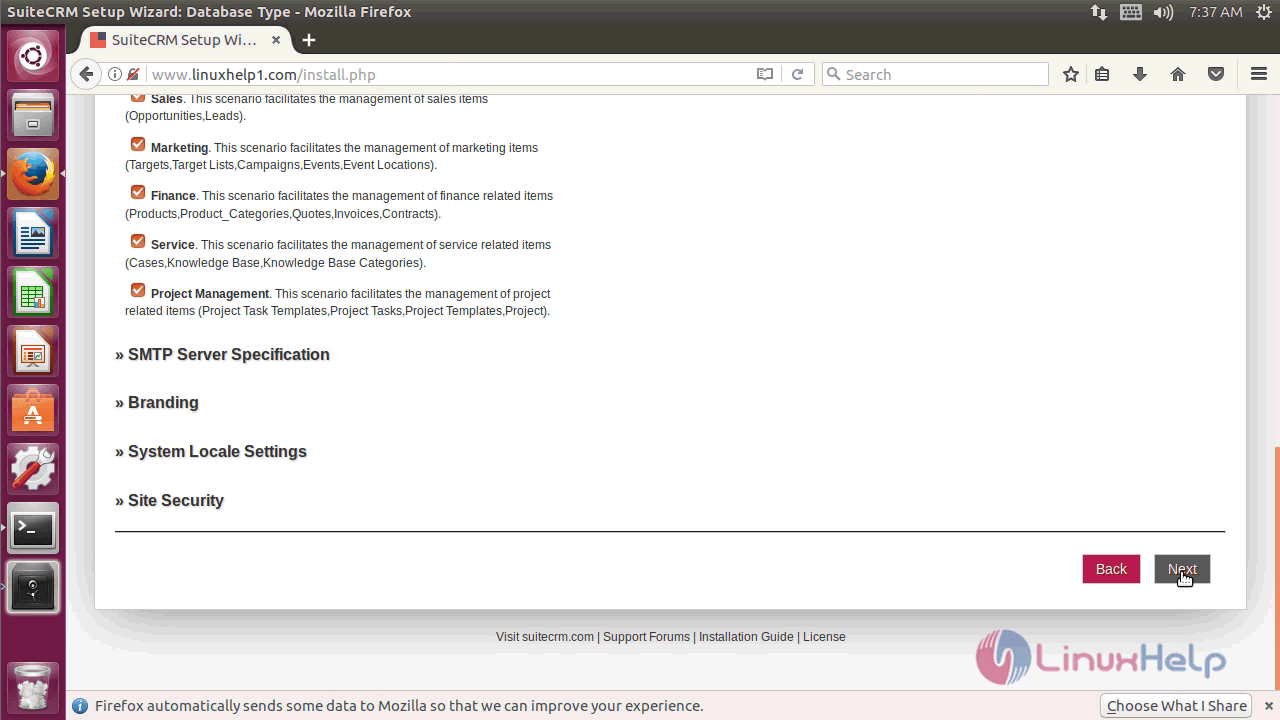
And then, give the admin user and database details in the next page.
Click in the Next button to proceed further.
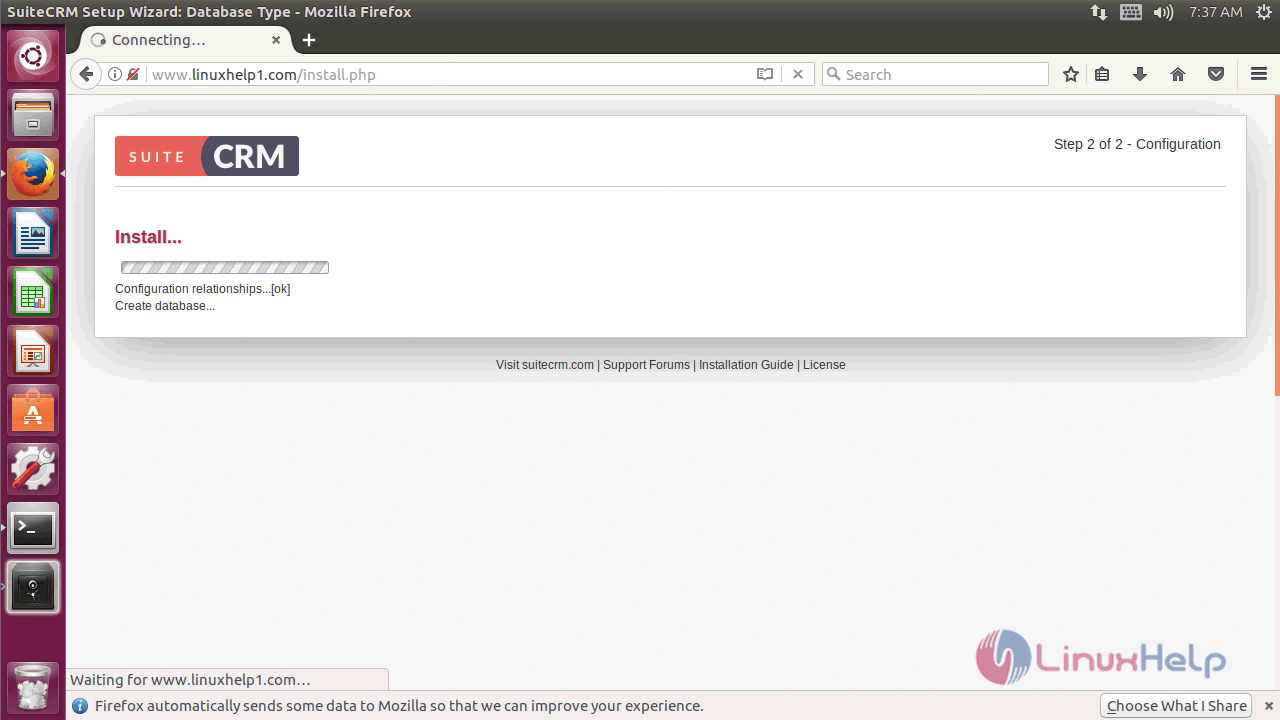
Now installing the configuration.
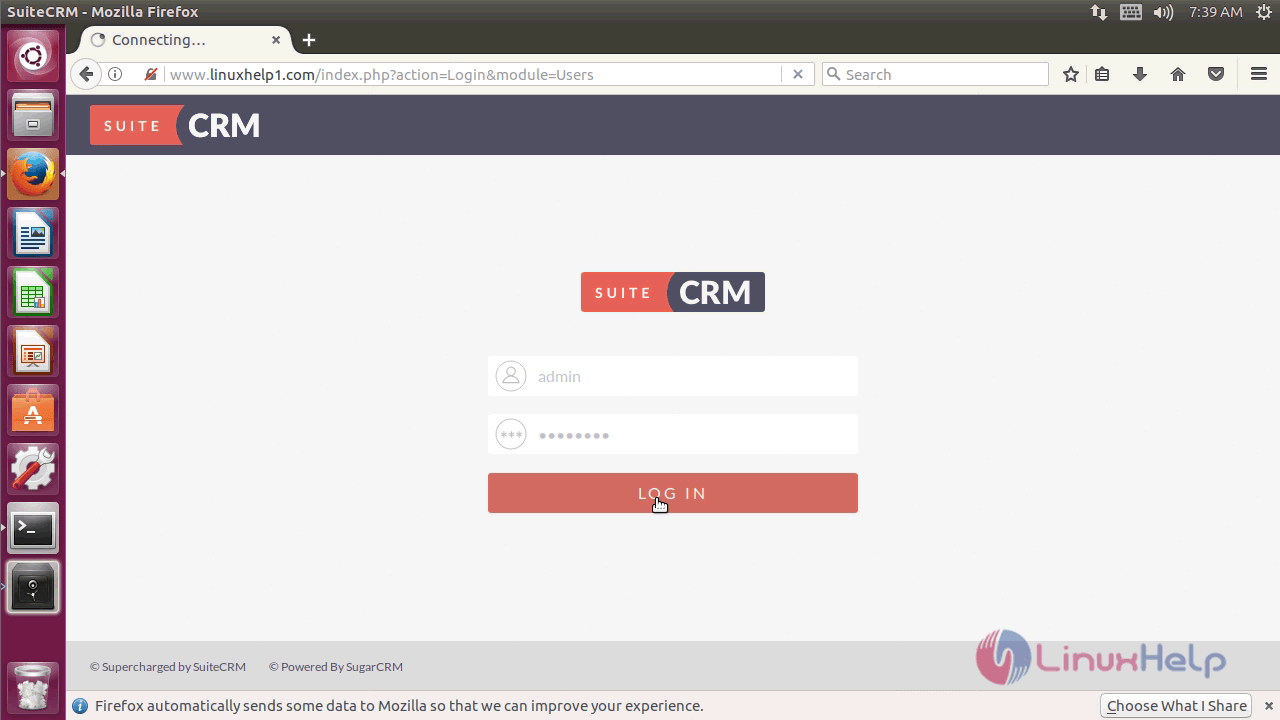
Once it is done, the Login page of SuiteCRM will now appear.
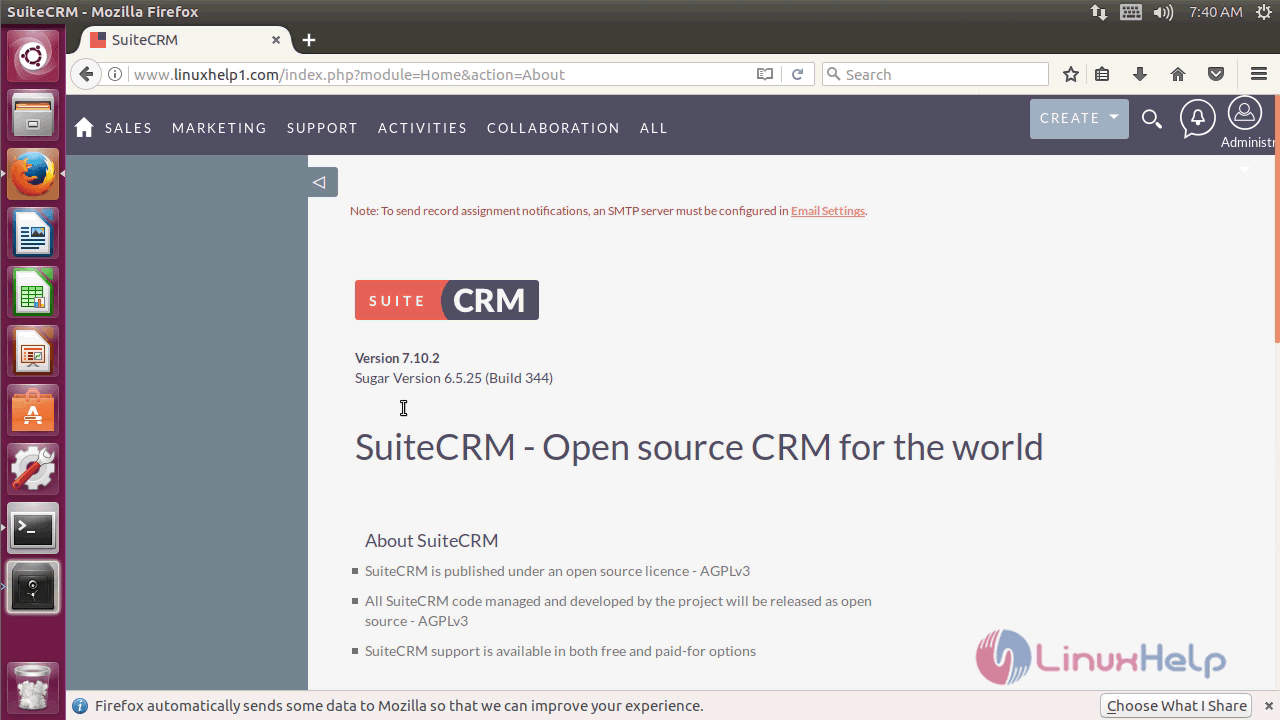
You need to now open the SuiteCRM.
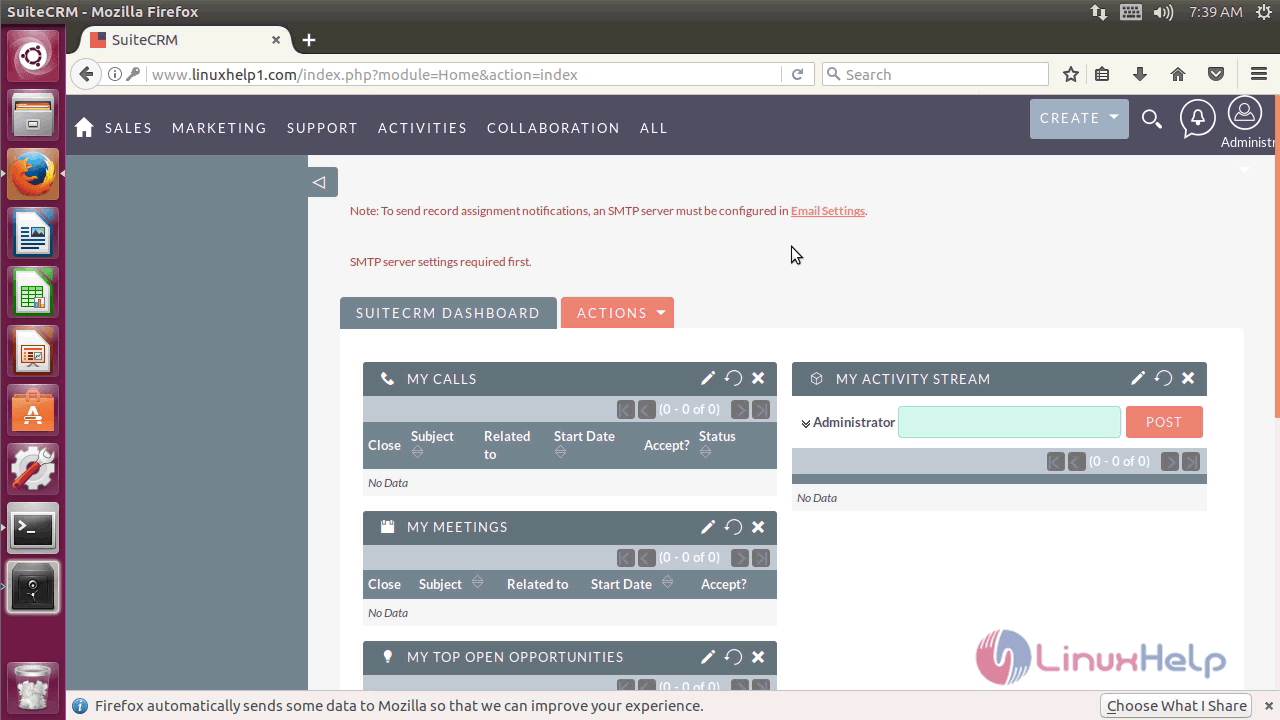
You can know more information on the SuiteCRM by checking out the version.
With this, the method to install SuiteCRM comes to an end.
Comments ( 0 )
No comments available