How To Install Opmanager On CentOS 7.6
- 00:26 java -version
- 00:36 ls -la
- 00:46 mv ManageEngine_OpManager_Plus_64bit.bin /opt
- 00:52 cd /opt/
- 00:55 ls -al
- 01:03 chown -R root:root ManageEngine_OpManager_Plus_64bit.bin
- 01:15 chmod -R 775 ManageEngine_OpManager_Plus_64bit.bin
- 01:23 ls -la
- 01:30 ./ManageEngine_OpManager_Plus_64bit.bin
- 02:32 cd ManageEngine/OpManager/
- 02:40 cd bin/
- 02:56 ./linkAsService.sh
- 03:08 systemctl start OpManager.service
- 03:24 systemctl status OpManager.service
Installation Of Opmanager On Centos 7.6
OpManager is a network monitoring software which automatically discovers your network, group your devices, services, process status and more. In this tutorial learn the basic installation of OpManager on CentOS 7.6
Installation process
Check the java version by using the following command
[root@linuxhelp ~]# java -version
openjdk version "1.8.0_252"
OpenJDK Runtime Environment (build 1.8.0_252-b09)
OpenJDK 64-Bit Server VM (build 25.252-b09, mixed mode)
List out the files by running the following command.
[root@linuxhelp ~]# ls -la
total 522740
dr-xr-x---. 14 root root      4096 Jul  7 14:43 .
dr-xr-xr-x. 18 root root      4096 Jul  6 16:42 ..
-rw-r--r--   1 root root 215957833 Jul  6 12:39 ManageEngine_OpManager_Plus_64bit.bin
Move the opmanager to /opt directory
[root@linuxhelp ~]# mv ManageEngine_OpManager_Plus_64bit.bin /opt
Enter into /opt directory
[root@linuxhelp ~]# cd /opt/
List out the files
[root@linuxhelp opt]# ls -al
total 210912
drwxr-xr-x.  3 root root      4096 Jul  7 14:57 .
dr-xr-xr-x. 18 root root      4096 Jul  6 16:42 ..
-rw-r--r--   1 root root 215957833 Jul  6 12:39 ManageEngine_OpManager_Plus_64bit.bin
drwxr-xr-x.  2 root root      4096 Oct 31  2018 rh
Set the ownership and permission for OpManager
[root@linuxhelp opt]# chown -R root:root ManageEngine_OpManager_Plus_64bit.bin
[root@linuxhelp opt]# chmod -R 775 ManageEngine_OpManager_Plus_64bit.bin
And then list out the files
[root@linuxhelp opt]# ls -la
total 210912
drwxr-xr-x.  3 root root      4096 Jul  7 14:57 .
dr-xr-xr-x. 18 root root      4096 Jul  6 16:42 ..
-rwxrwxr-x   1 root root 215957833 Jul  6 12:39 ManageEngine_OpManager_Plus_64bit.bin
drwxr-xr-x.  2 root root      4096 Oct 31  2018 rh
To install the opmanager run the following command
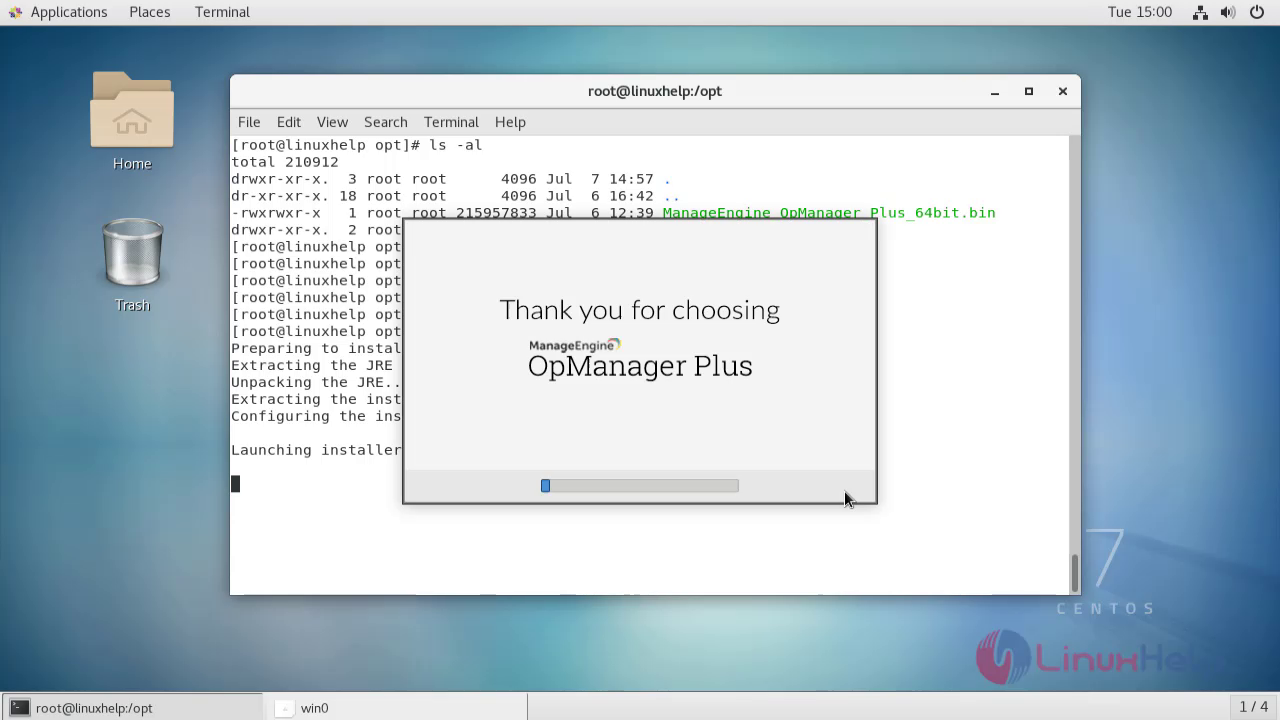
[root@linuxhelp opt]# ./ManageEngine_OpManager_Plus_64bit.bin
Preparing to install...
Extr0acting the JRE from the installer archive...
Unpacking the JRE...
Extracting the installation resources from the installer archive...
Configuring the installer for this system's environment...

Launching installer...
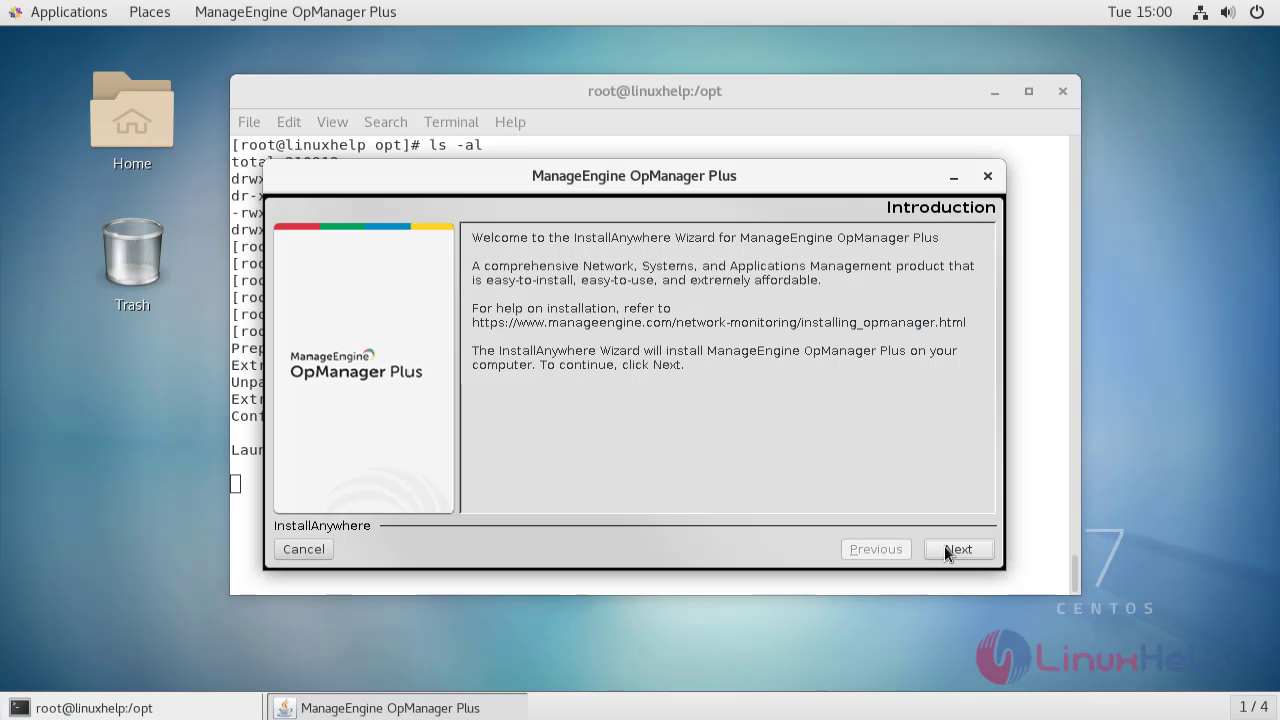
 This is the welcome step of opmanager
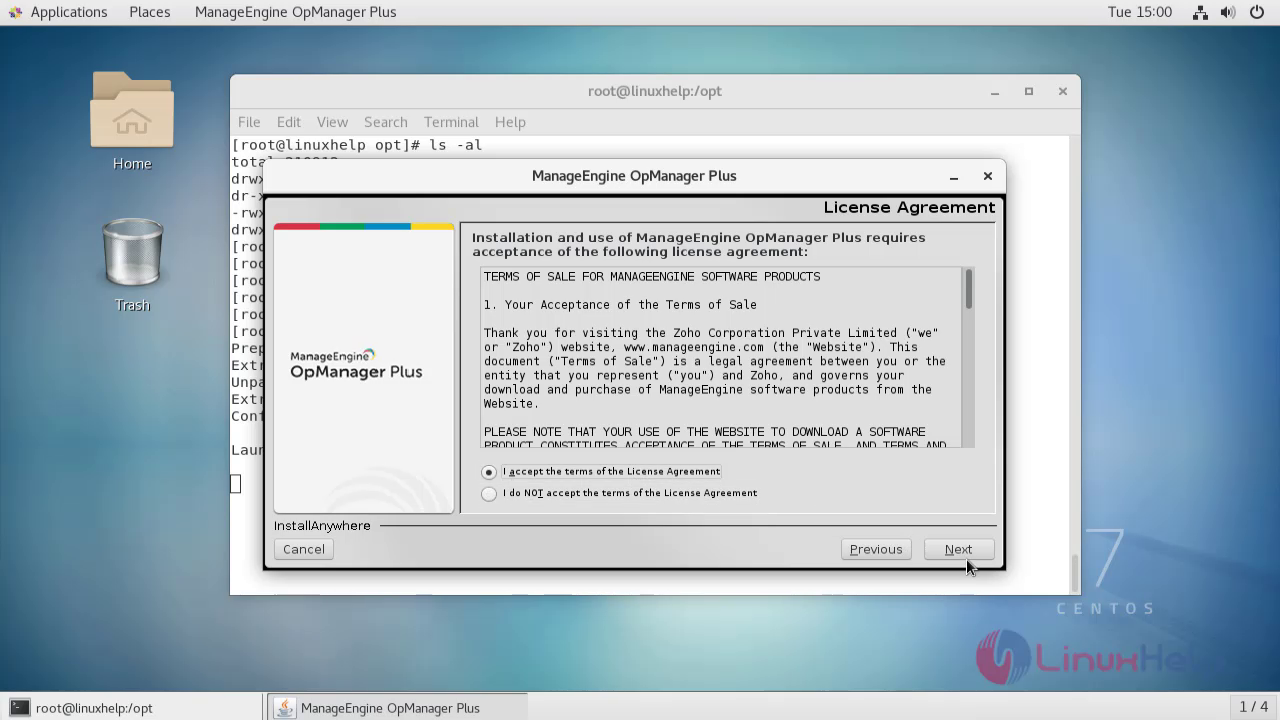
 Accept the terms and condition and click next
 Select the installation directory for opmanager
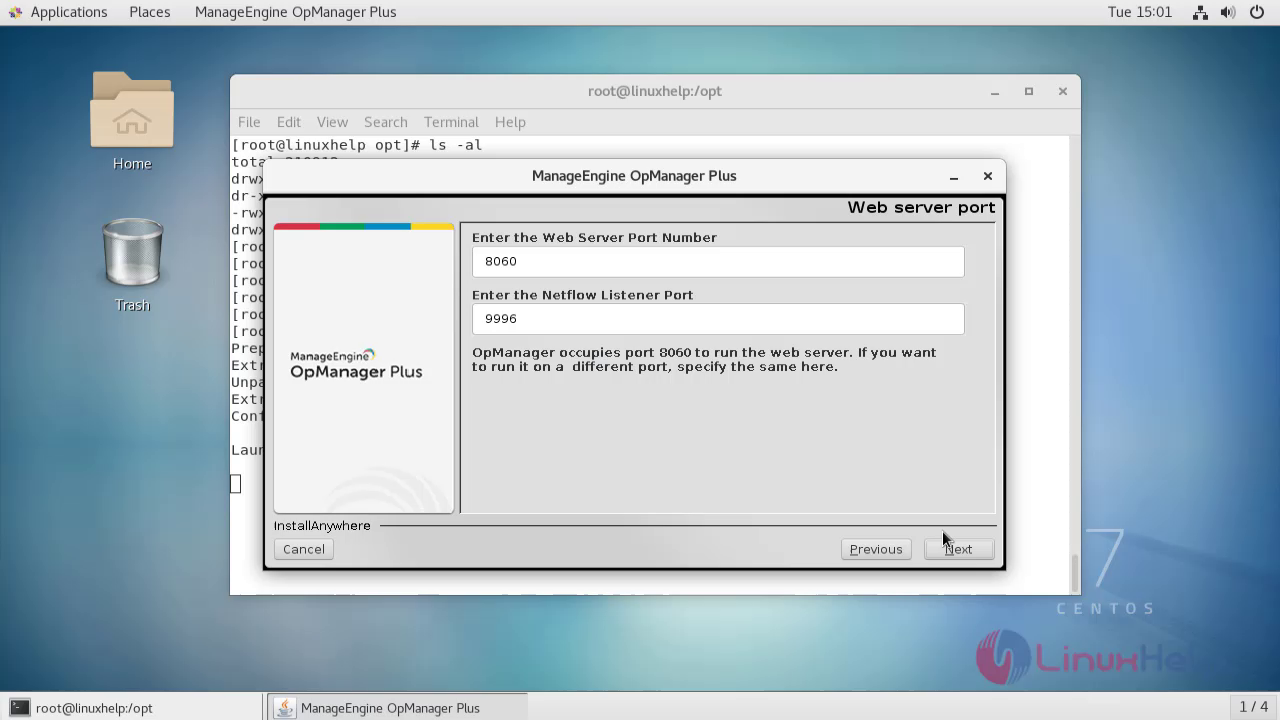
 Select the port number for web server
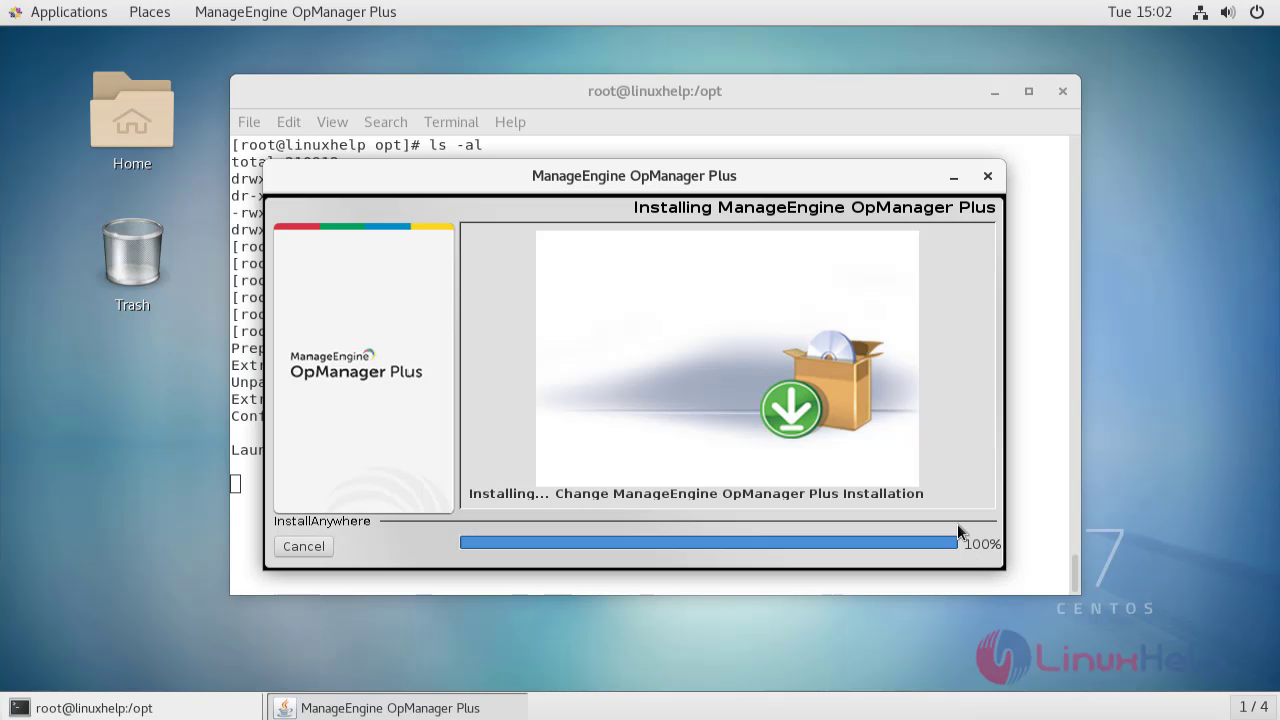
 The Opmanager installation is in process
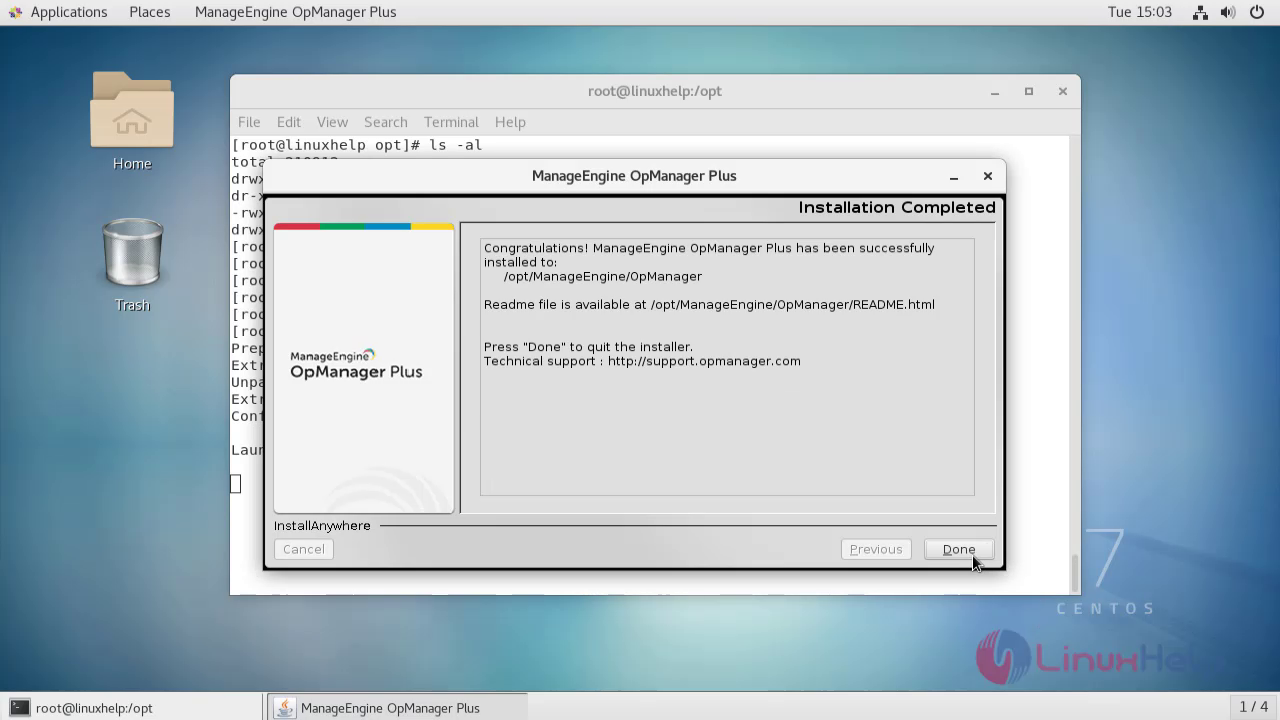
 The installation is completed now click done
Go to the opmanager directory
[root@linuxhelp opt]# cd ManageEngine/OpManager/
Enter into the bin directory
[root@linuxhelp OpManager]# cd bin/
List out the files
[root@linuxhelp bin]# ls -la
total 1872
drwxrwxr-x  3 root root   4096 Jul  7 15:02 .
drwxr-xr-x 38 root root   4096 Jul  7 15:02 ..
-rwxrwxr-x  1 root root   2187 Jul  3 11:17 about.txt
-rwxrwxr-x  1 root root   5493 Jul  3 11:17 app_ctl.sh
-rwxrwxr-x  1 root root   1665 Jul  3 11:17 JREMigration.sh
-rwxrwxr-x  1 root root   2541 Jul  3 11:17 linkAsService.sh
.
.
-rwxrwxr-x  1 root root   1787 Jul  3 11:17 VWinstall.sh
-rwxrwxr-x  1 root root    366 Jul  3 11:17 VW_load.sh
-rwxrwxr-x  1 root root    325 Jul  3 11:17 VWoptimizedb.sh
-rwxrwxr-x  1 root root    984 Jul  3 11:17 VWreinitializeDB.sh
-rwxrwxr-x  1 root root    411 Jul  3 11:17 VWremoteload.sh
-rwxrwxr-x  1 root root    335 Jul  3 11:17 VWremoteoptimizedb.sh
-rwxrwxr-x  1 root root    628 Jul  3 11:17 VWserver_lin.rsp
-rwxrwxr-x  1 root root   1877 Jul  3 11:17 VWserver_win.rsp
-rwxrwxr-x  1 root root    788 Jul  3 11:17 VWstartdb.sh
-rwxrwxr-x  1 root root    464 Jul  3 11:17 VWstopdb.sh
-rwxrwxr-x  1 root root    492 Jul  3 11:17 VWuninstall.sh
-rwxrwxr-x  1 root root 641544 Jul  3 11:17 wrapper
-rwxrwxr-x  1 root root 815504 Jul  3 11:17 wrapper.exe
Run the following command to start the opmanager as daemon service
[root@linuxhelp bin]# ./linkAsService.sh
========================================
Running Opmanager as Service
========================================
Opmanager Directory 	-->  /opt/ManageEngine/OpManager/bin
Opmanager Service name 	-->  OpManager.service
----------------------------------------
OpManager.service successfully placed in /etc/systemd/system/ directory
----------------------------------------
Enabling services -
Created symlink from /etc/systemd/system/multi-user.target.wants/OpManager.service to /etc/systemd/system/OpManager.service.
Opmanager service is added successfully
========================================
To start the service login as superuser and use - systemctl start OpManager.service
=======================================
Once the process is completed start Opmanager service
[root@linuxhelp bin]# systemctl start OpManager.service
Check the opmanager status
[root@linuxhelp bin]# systemctl status OpManager.service
? OpManager.service - OpManager As Service
   Loaded: loaded (/etc/systemd/system/OpManager.service; enabled; vendor preset: disabled)
   Active: active (exited) since Tue 2020-07-07 15:05:25 IST; 1min 26s ago
  Process: 66602 ExecStart=/opt/ManageEngine/OpManager/bin/na_service start (code=exited, status=0/SUCCESS)
 Main PID: 66602 (code=exited, status=0/SUCCESS)
    Tasks: 61
   CGroup: /system.slice/OpManager.service
           +-66616 ./wrapper ../conf/wrapper.conf wrapper.pidfile=.//OpManager.pid wrapper...
           +-66631 /opt/ManageEngine/OpManager/jre/bin/java -Dcatalina.home=.. -Dserver.ho...

Jul 07 15:05:24 linuxhelp systemd[1]: Starting OpManager As Service...
Jul 07 15:05:25 linuxhelp systemd[1]: Started OpManager As Service.
Jul 07 15:05:39 linuxhelp su[66721]: (to postgres) root on none
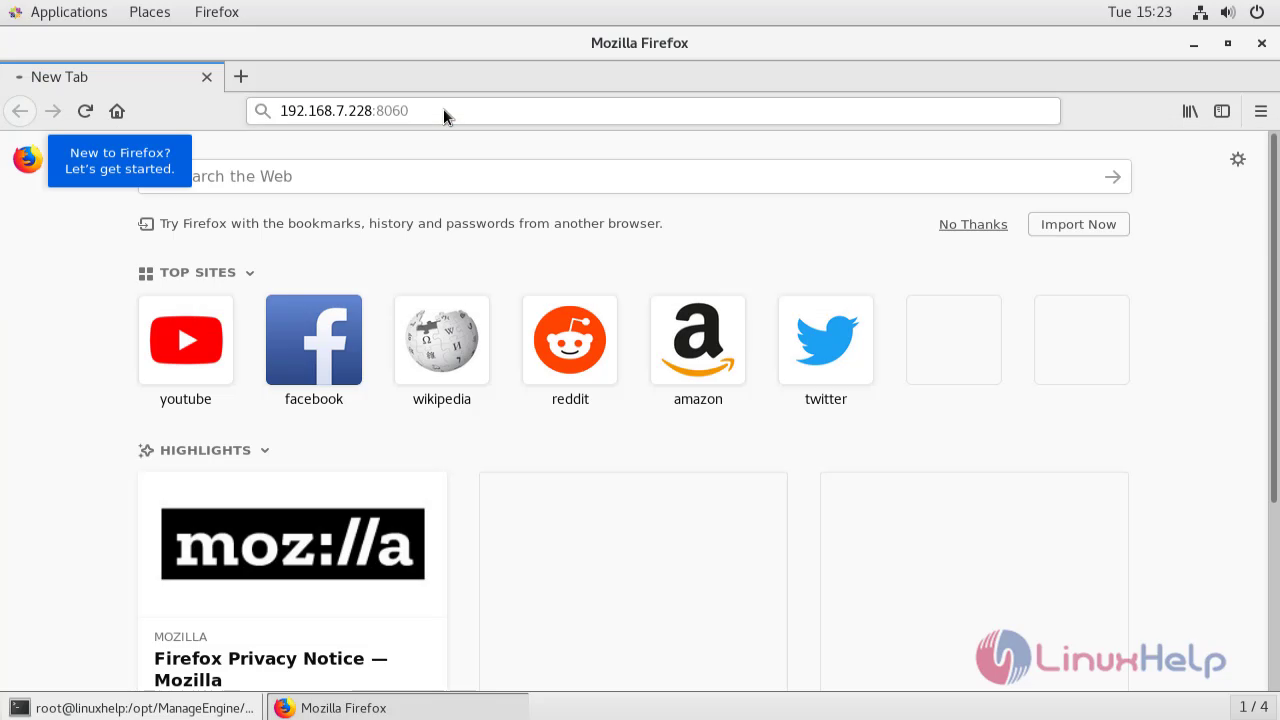
Go to the browser and enter ip address and port number
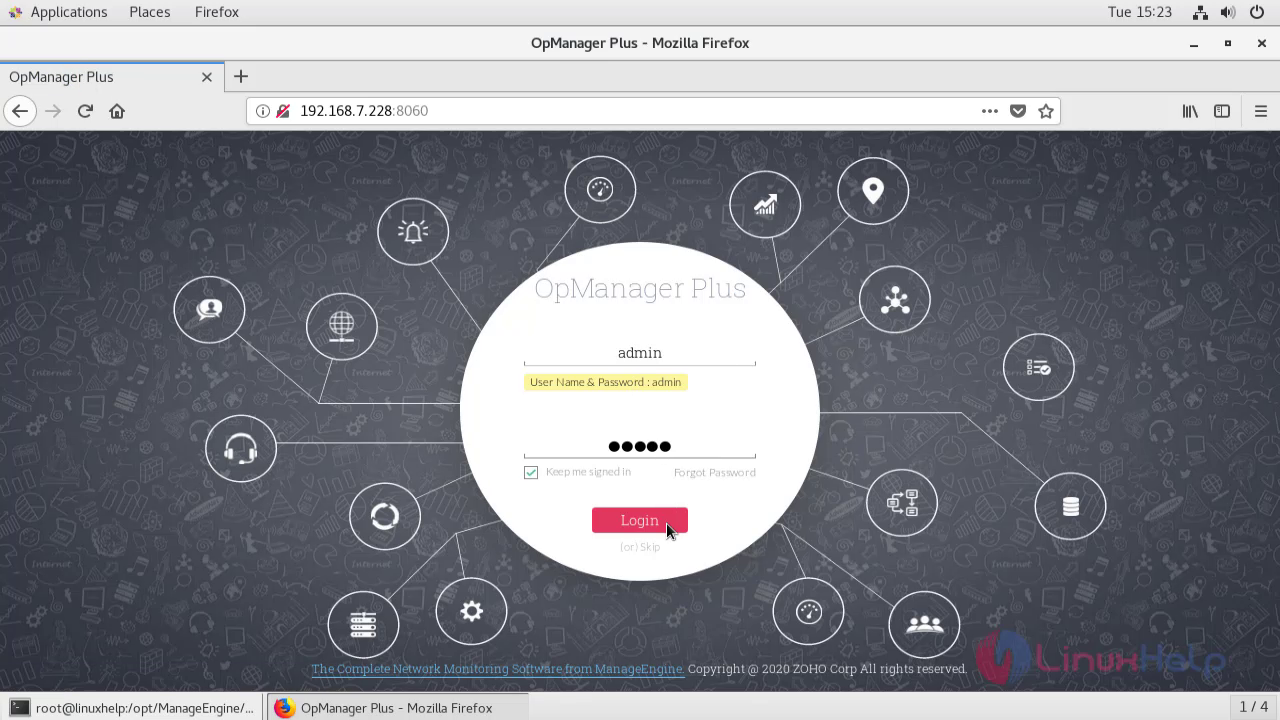
 Enter the default credentials and log in to opmanager
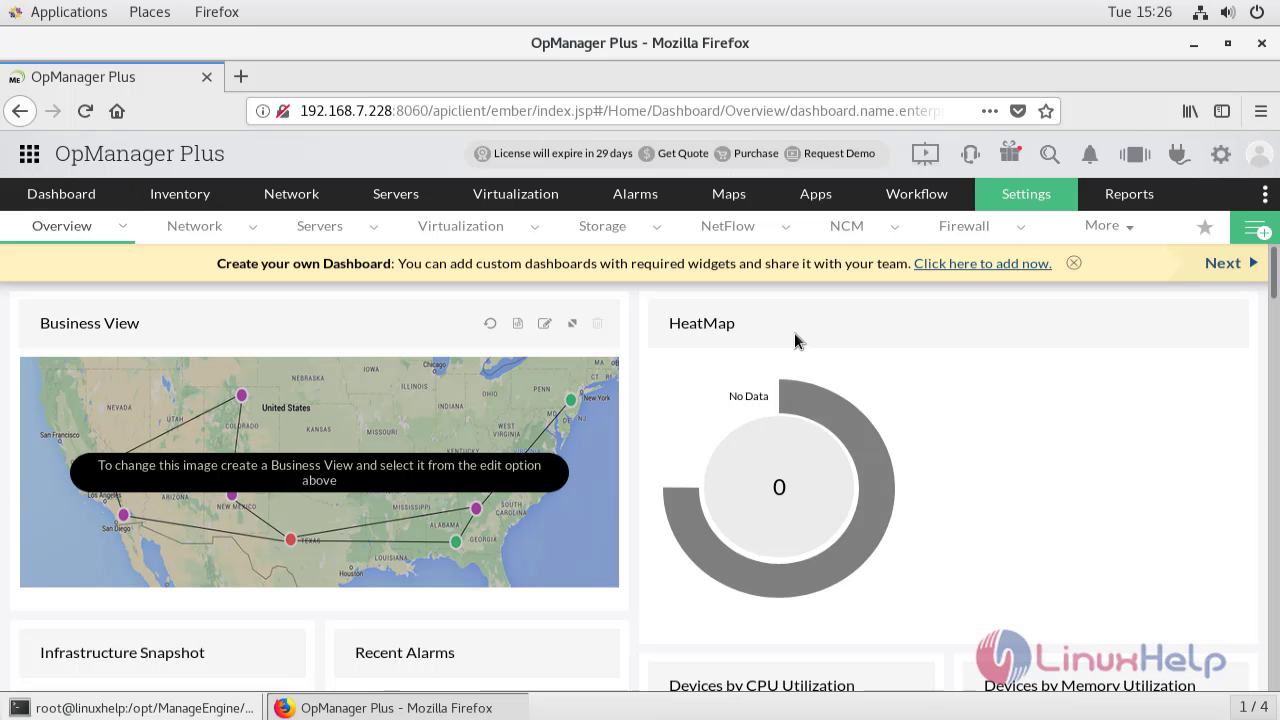
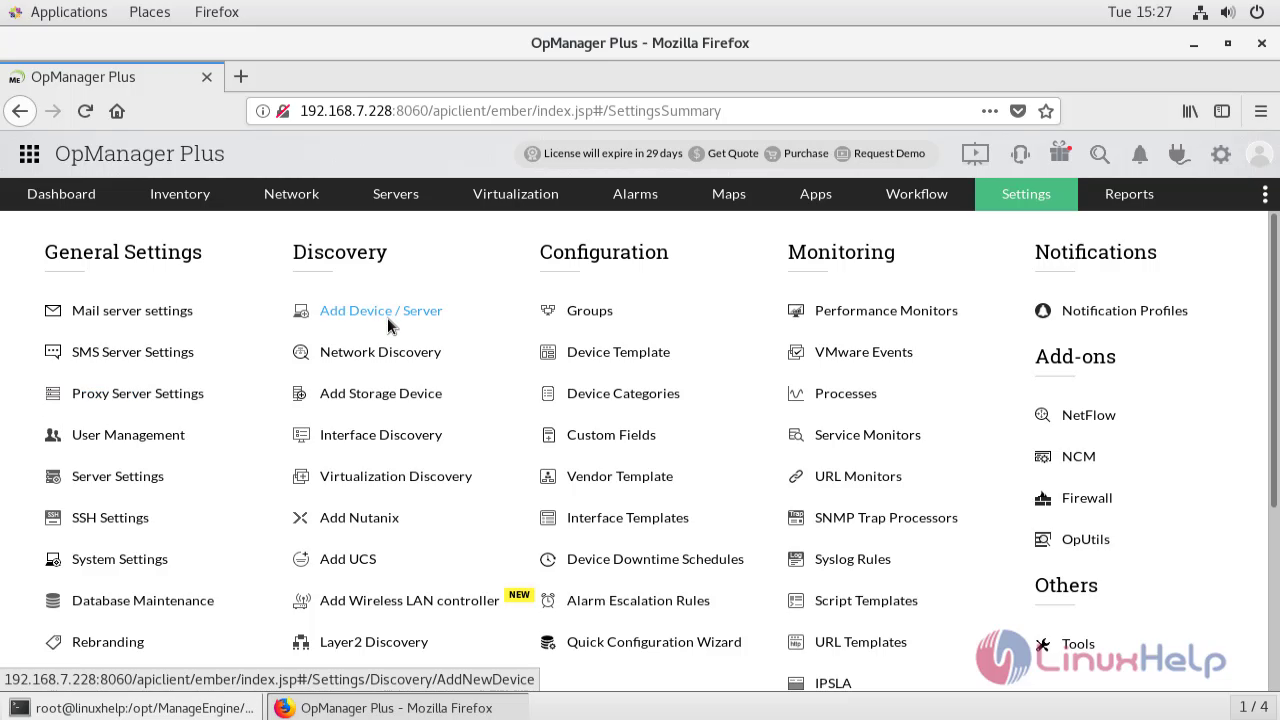
 Go to the settings
 Select the add device
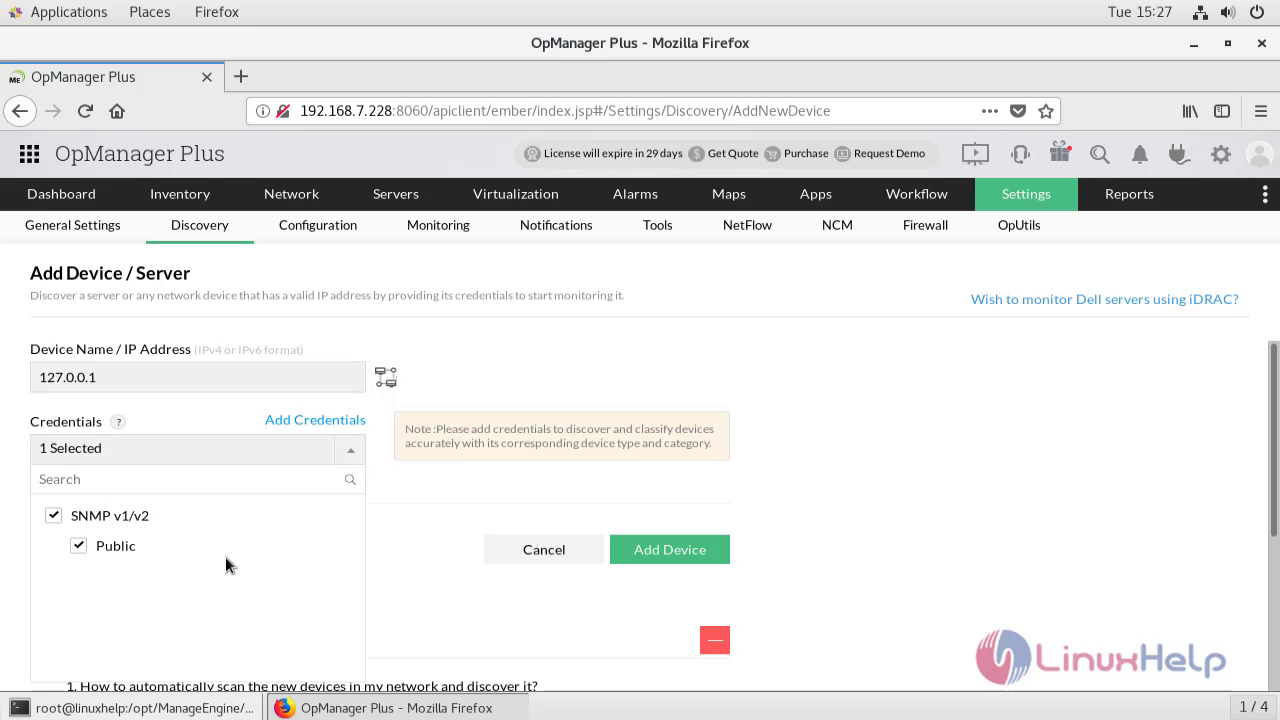
 Enter the ip address of adding device and add it to opmanager monitoring
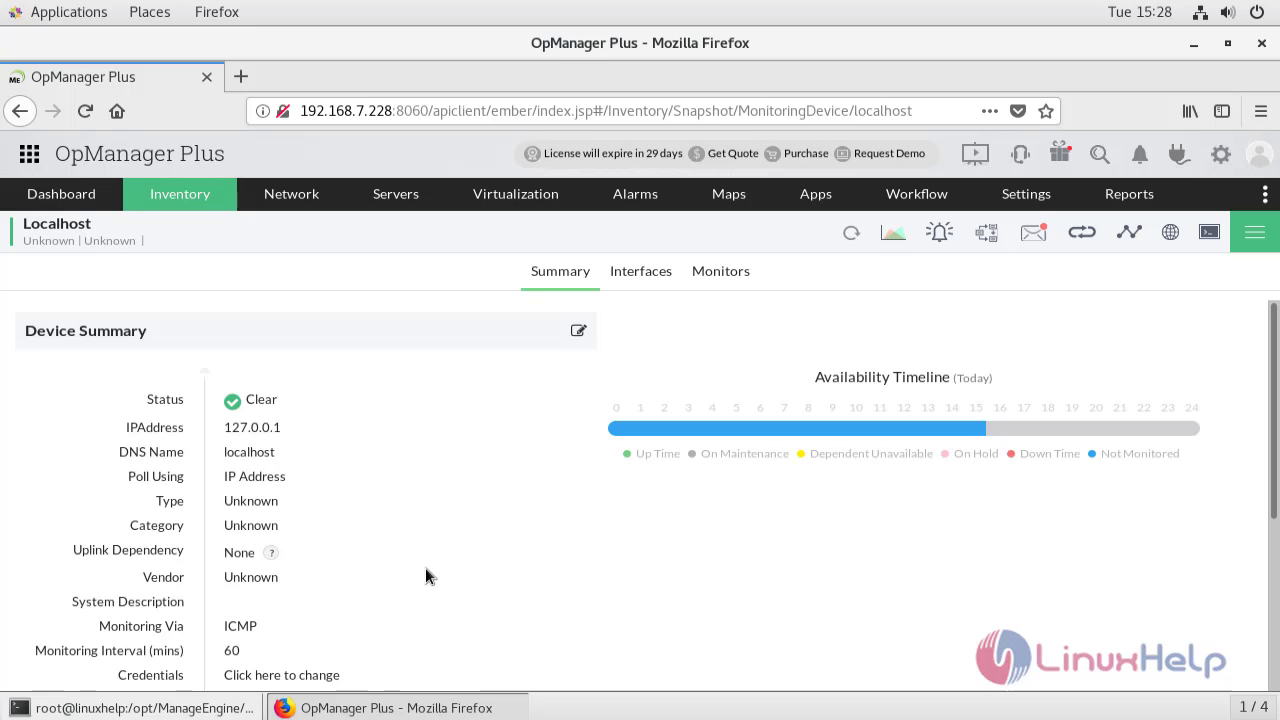
 The device is added successfully to OpManager
 With this the installation of Opmanager on centos 7.6 comes to end
Comments ( 0 )
No comments available