How to install GLPI on OpenSUSE Leap 42.3
To install GLPI on OpenSUSE Leap 42.3
In our previous article, we have seen about the installation procedure of GLPI Asset Management on CentOS 7 using LEMP. In this tutorial we will see about the installation process of GLPI on OpenSUSE Leap 42.3. GLPI is an open-source for Information Resource-Manager with an additional Administration- Interface. It is used to build up a database with an inventory devices such as computer, software, and printers,etc. It has enhanced functions such as, job-tracking-system with mail-notification and methods to build a database with basic information about the network-topology.
Pre-Requisite
LAMP Stack
- Apache
- MariaDB
- PHP 7 (php php-ctype php-dom php-iconv php-json php-sqlite php-tokenizer php-xmlreader php-xmlwriter)
Installation procedure
To proceed with the installation procedure, download the GLPI package using wget command followed by the download link.
linuxhelp:~ # wget https://github.com/glpi-project/glpi/releases/download/9.1.3/glpi-9.1.3.tgz
--2017-10-20 10:02:47--  https://github.com/glpi-project/glpi/releases/download/9.1.3/glpi-9.1.3.tgz
Resolving github.com (github.com)... 192.30.255.112, 192.30.255.113
Connecting to github.com (github.com)|192.30.255.112|:443... connected.
HTTP request sent, awaiting response... 302 Found
Location: https://github-production-release-asset-2e65be.s3.amazonaws.com/39182755/c5562782-2c07-11e7-9a66-6e723bb737e6?X-Amz-Algorithm=AWS4-HMAC-SHA256& X-Amz-Credential=AKIAIWNJYAX4CSVEH53A%2F20171020%2Fus-east-1%2Fs3%2Faws4_request& X-Amz-Date=20171020T043324Z& X-Amz-Expires=300& X-Amz-Signature=8e4921e18a745732bcbd0c61890d8f9f55725787ce43d48c0d8542e99b09349c& X-Amz-SignedHeaders=host& actor_id=0& response-content-disposition=attachment%3B%20filename%3Dglpi-9.1.3.tgz& response-content-type=application%2Foctet-stream [following]
--2017-10-20 10:02:48--  https://github-production-release-asset-2e65be.s3.amazonaws.com/39182755/c5562782-2c07-11e7-9a66-6e723bb737e6?X-Amz-Algorithm=AWS4-HMAC-SHA256& X-Amz-Credential=AKIAIWNJYAX4CSVEH53A%2F20171020%2Fus-east-1%2Fs3%2Faws4_request& X-Amz-Date=20171020T043324Z& X-Amz-Expires=300& X-Amz-Signature=8e4921e18a745732bcbd0c61890d8f9f55725787ce43d48c0d8542e99b09349c& X-Amz-SignedHeaders=host& actor_id=0& response-content-disposition=attachment%3B%20filename%3Dglpi-9.1.3.tgz& response-content-type=application%2Foctet-stream
Resolving github-production-release-asset-2e65be.s3.amazonaws.com (github-production-release-asset-2e65be.s3.amazonaws.com)... 54.231.98.80
Connecting to github-production-release-asset-2e65be.s3.amazonaws.com (github-production-release-asset-2e65be.s3.amazonaws.com)|54.231.98.80|:443... connected.
HTTP request sent, awaiting response... 200 OK
Length: 29325987 (28M) [application/octet-stream]
Saving to: ‘ glpi-9.1.3.tgz’

100%[==================================================================================================> ] 29,325,987   485KB/s   in 66s

2017-10-20 10:03:56 (432 KB/s) - ‘ glpi-9.1.3.tgz’  saved [29325987/29325987]
Extract the downloaded package using tar command as follows.
linuxhelp:~ # tar -xvzf glpi-9.1.3.tgz
Archive:  kanboard-latest.zip
   creating: /srv/www/htdocs/kanboard/
  inflating: /srv/www/htdocs/kanboard/.htaccess
   creating: /srv/www/htdocs/kanboard/app/
  inflating: /srv/www/htdocs/kanboard/app/.htaccess
   creating: /srv/www/htdocs/kanboard/app/Action/
  inflating: /srv/www/htdocs/kanboard/app/Action/Base.php
  inflating: /srv/www/htdocs/kanboard/app/Action/CommentCreation.php
  inflating: /srv/www/htdocs/kanboard/app/Action/CommentCreationMoveTaskColumn.php
  inflating: /srv/www/htdocs/kanboard/app/Action/TaskAssignCategoryColor.php
  inflating: /srv/www/htdocs/kanboard/app/Action/TaskAssignCategoryLabel.php
  inflating: /srv/www/htdocs/kanboard/app/Action/TaskAssignCategoryLink.php
  inflating: /srv/www/htdocs/kanboard/app/Action/TaskAssignColorCategory.php
  inflating: /srv/www/htdocs/kanboard/app/Action/TaskAssignColorColumn.php
  inflating: /srv/www/htdocs/kanboard/app/Action/TaskAssignColorLink.php
.
.
.
.
glpi/ajax/dropdownAllItems.php
glpi/ajax/displayMessageAfterRedirect.php
glpi/ajax/common.tabs.php
glpi/ajax/comments.php
glpi/ajax/autocompletion.php
glpi/README.md
glpi/LISEZMOI.txt
glpi/COPYING.txt
glpi/CHANGELOG.txt
glpi/AUTHORS.txt
glpi/.htaccess
Move the GLPI directory into Apache root directory and list the files pertaining to the directory.
linuxhelp:~ # mv glpi /srv/www/htdocs/
linuxhelp:~ # cd /srv/www/htdocs/
linuxhelp:/srv/www/htdocs # ll
total 12
drwxrwxrwx  2 wwwrun www  4096 Oct  9 23:15 gif
drwxrwxr-x 15   1002 1002 4096 Apr 28 15:12 glpi
-rwxrwxrwx  1 wwwrun www  2356 Mar 18  2017 info2html.css
Provide the Owner permission and file execution permission for the GLPI directory.
linuxhelp:/srv/www/htdocs # chown -R wwwrun:www /srv/www/htdocs/
linuxhelp:/srv/www/htdocs # chmod -R 777 /srv/www/htdocs/
Next configure the Apache Virtual Host using vim editor and enter the following content in the file. Save and exit the file.
linuxhelp:/srv/www/htdocs/glpi # vim /etc/apache2/conf.d/glpi.conf
< VirtualHost *:80>
DocumentRoot " /srv/www/htdocs"
ServerName www.linuxhelp1.com
< Directory " /srv/www/htdocs/" >
DirectoryIndex index.php
Options FollowSymLinks
AllowOverride All
Require all granted
< /Directory>
< /VirtualHost>
Restart the Apache service.
linuxhelp:/srv/www/htdocs/glpi # systemctl restart apache2
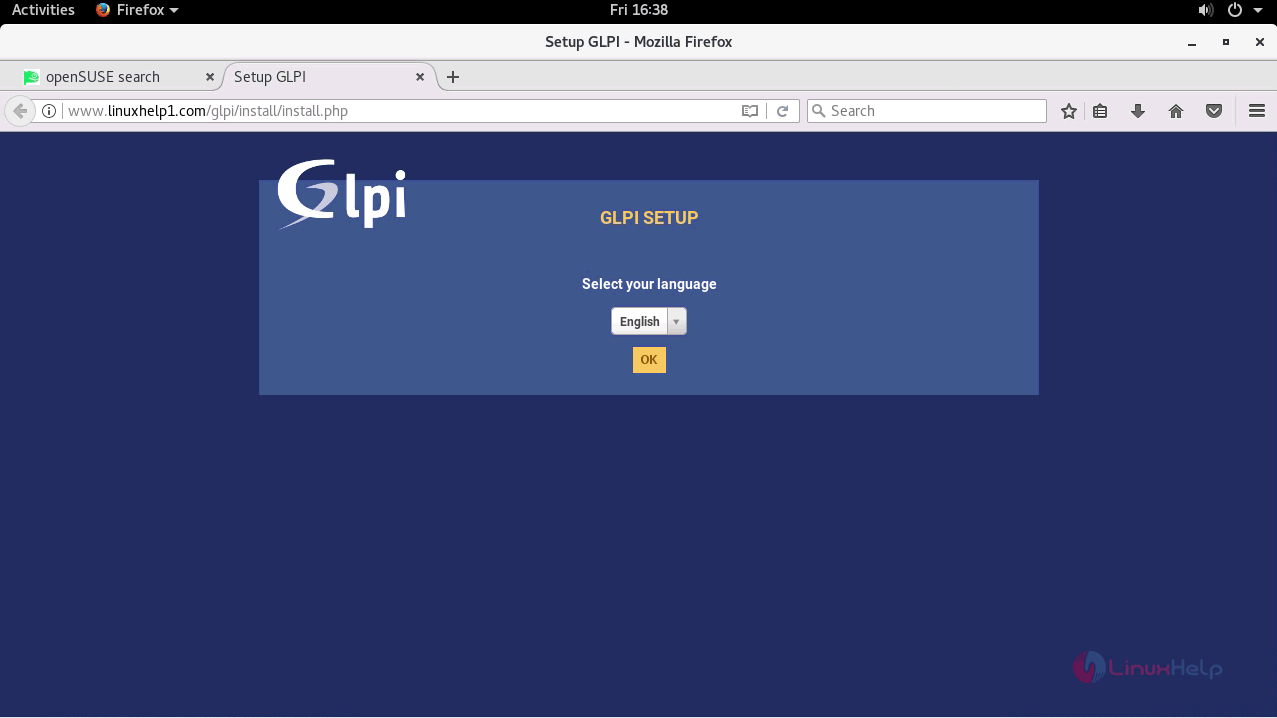
Switch over to the browser and enter the URL as http://www.linuxhelp1.com/glpi. The Setup page of GLPI appears on the screen. Select the Language and click OK.
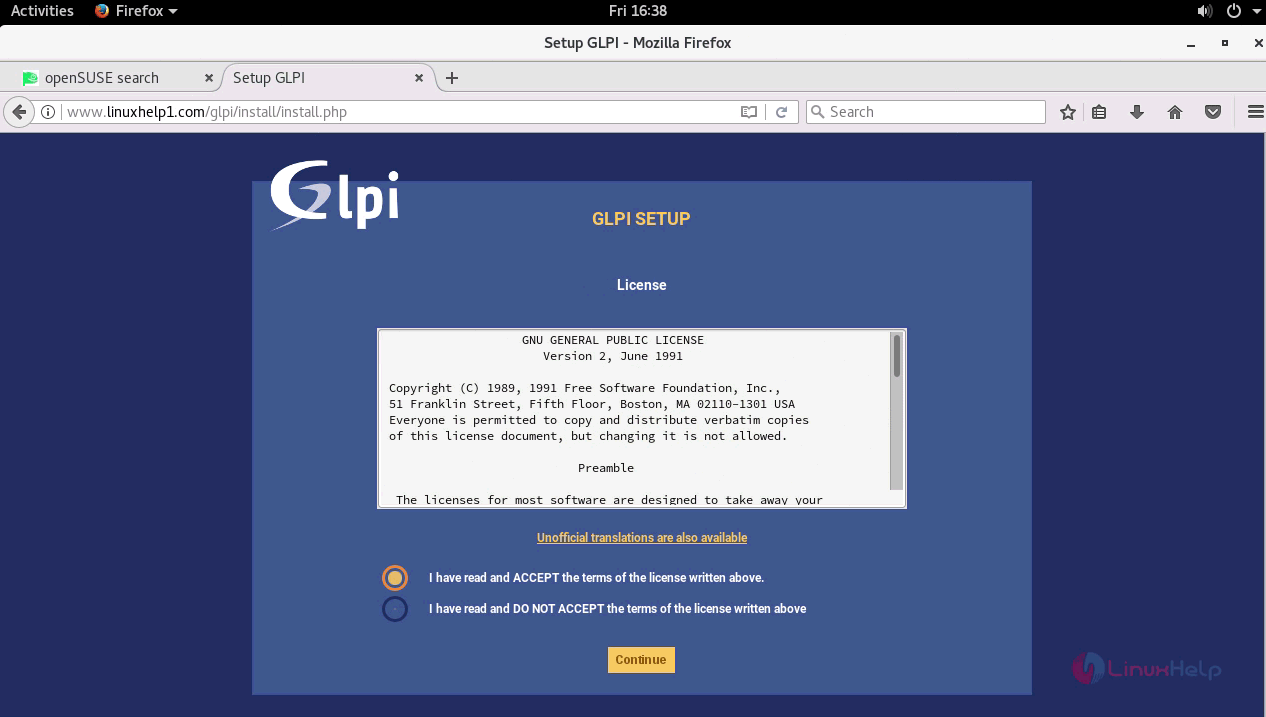
The License Agreement of GLPI is shown to the user and select the " I have read and Accept the terms of the license written above" option and click continue.
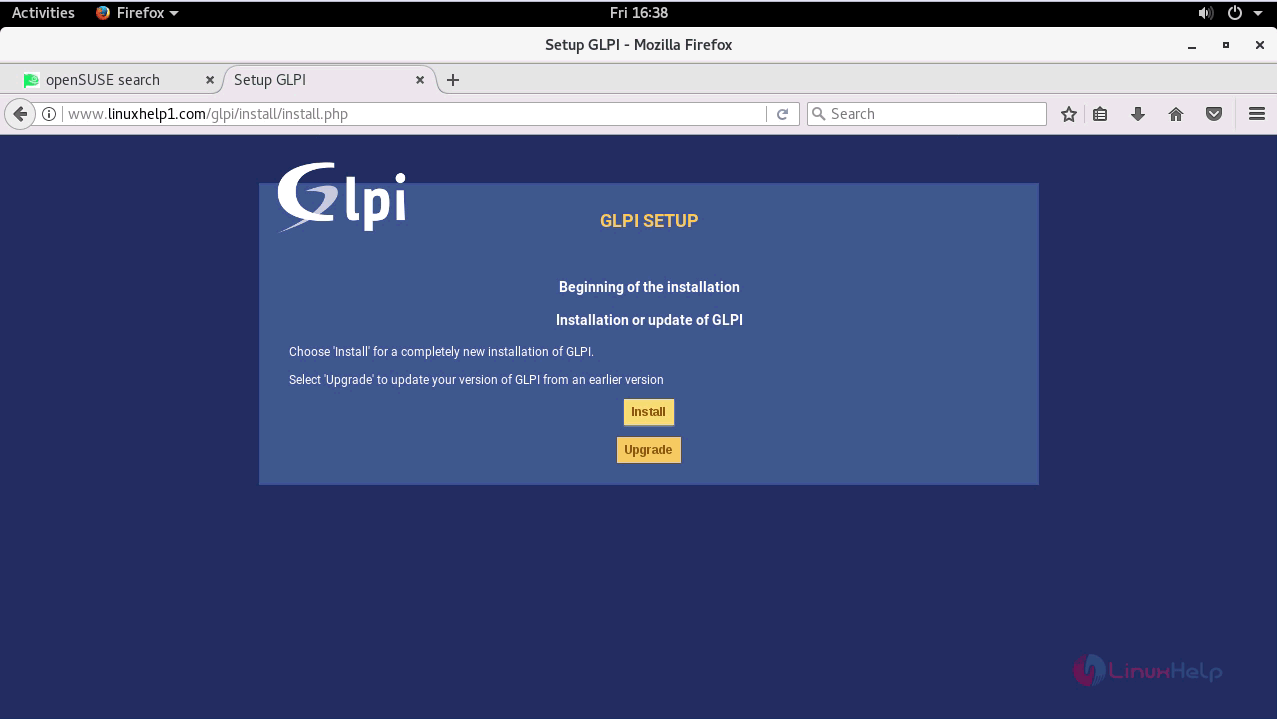
Click Install option to install a completely new GLPI application in the system or else select Upgrade option.
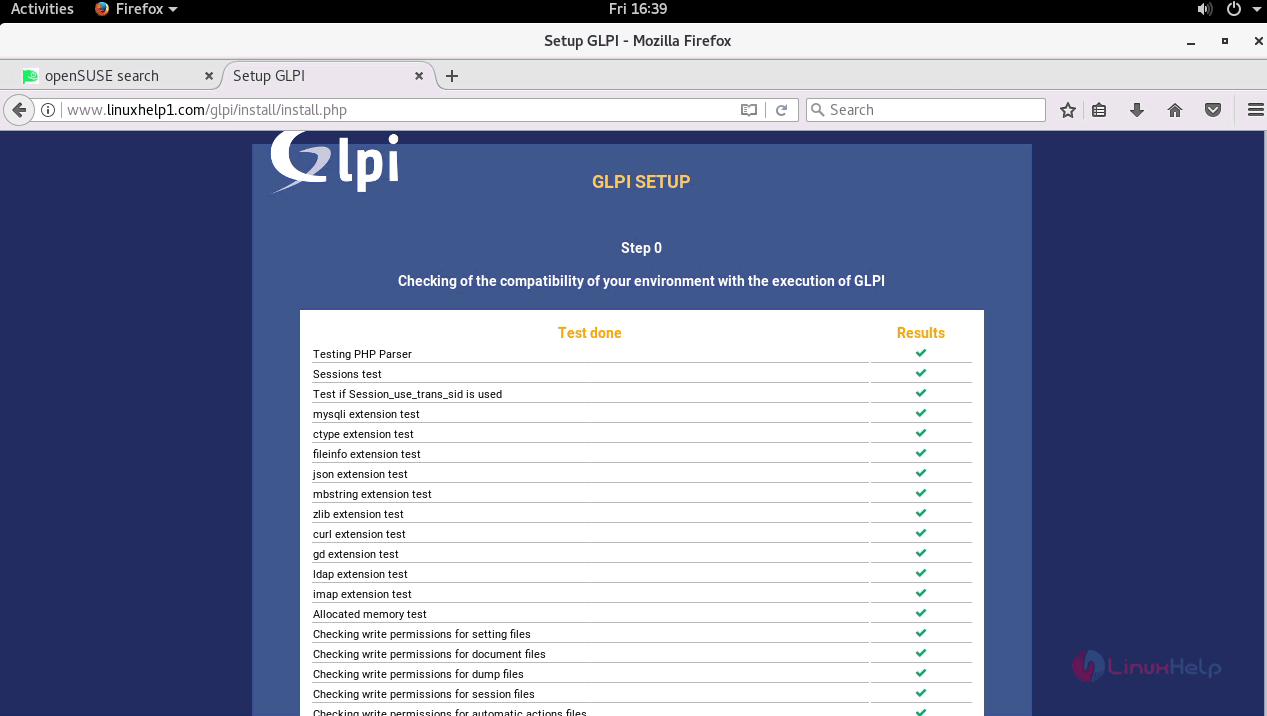
The environment compatability list is shown and if all the tests are done, navigate to next page.
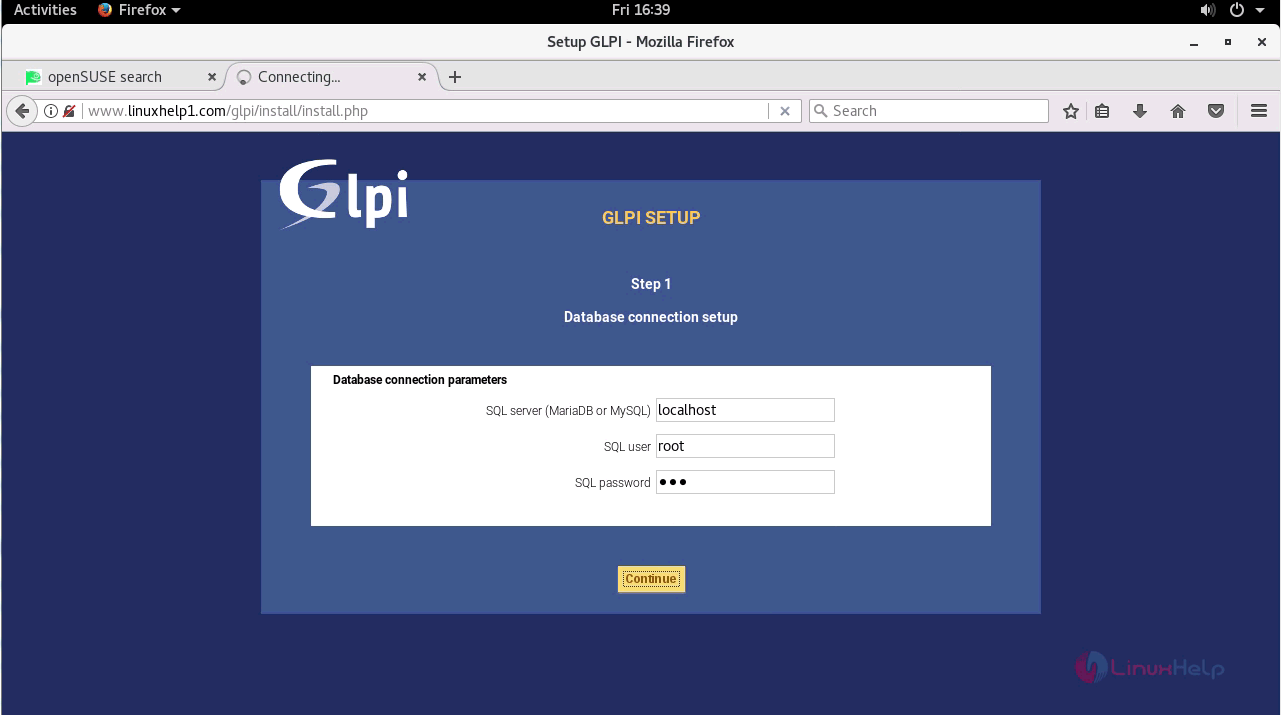
Next enter the database details required for GLPI and click continue.
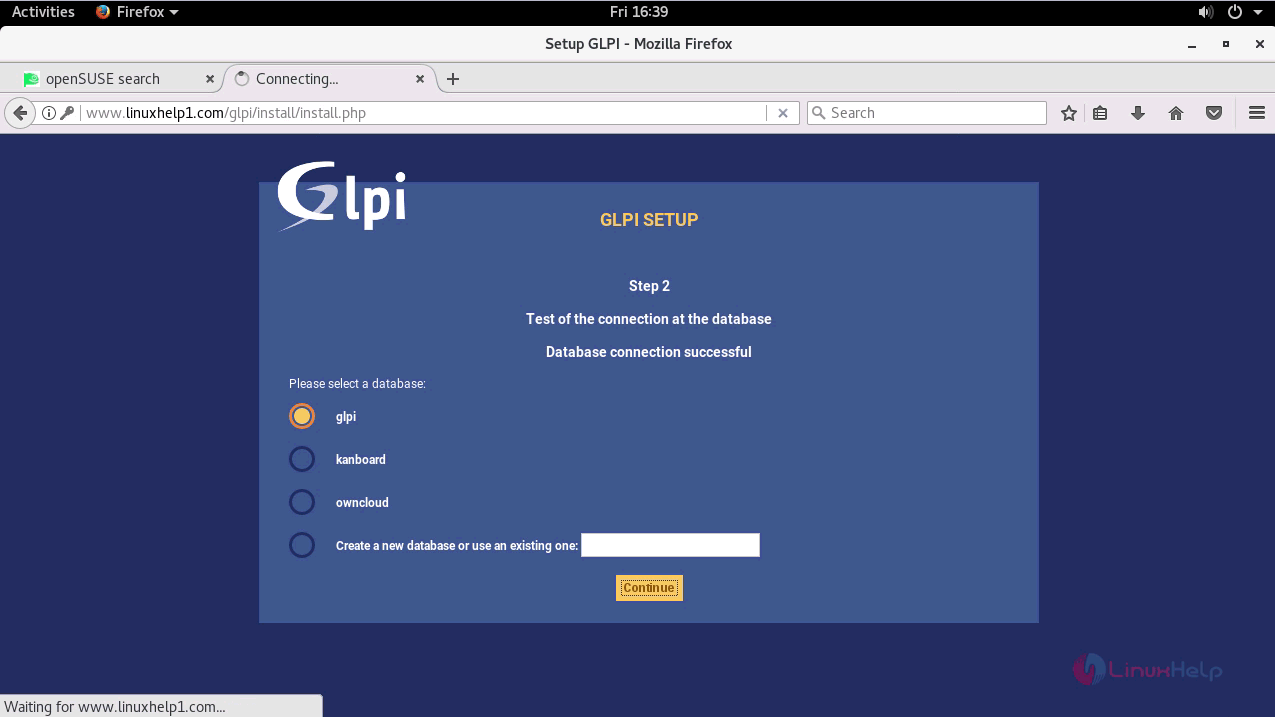
The database connection is successfully done and now select the already created database option and click continue.
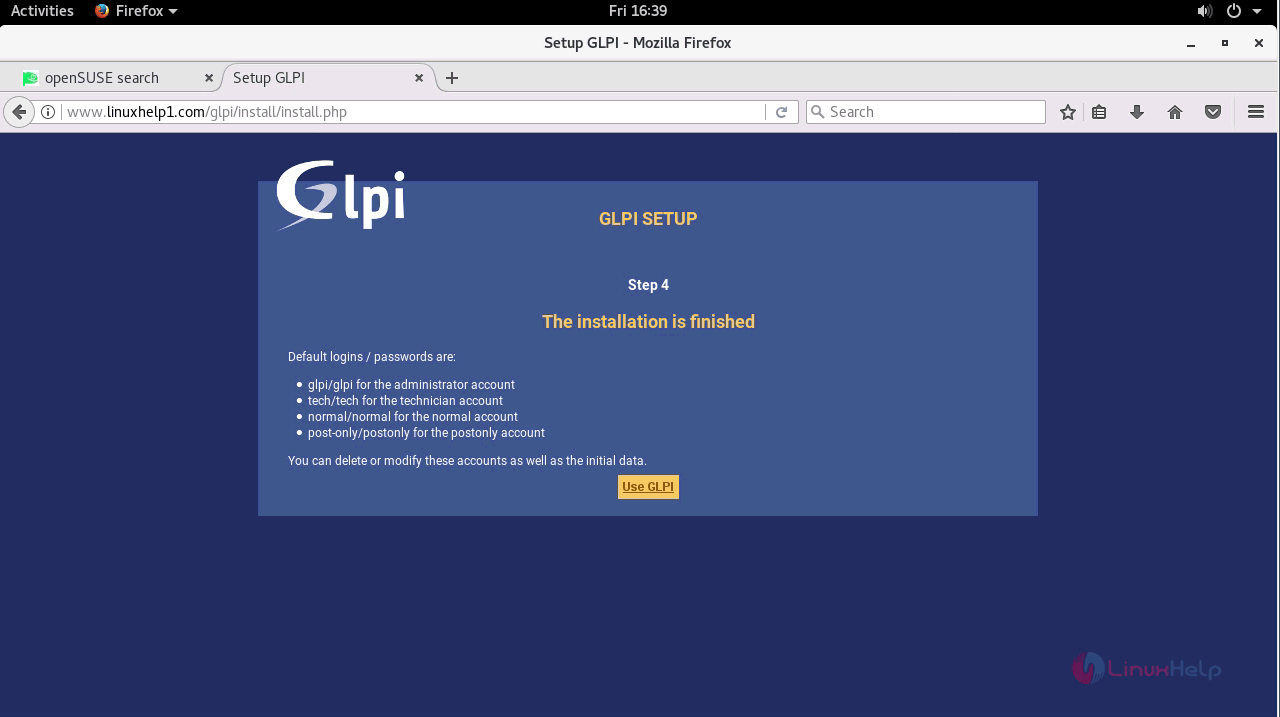
The installation process is completed and now the default logins and passwords are displayed to the use. Click Use GLPI option to navigate to login page.
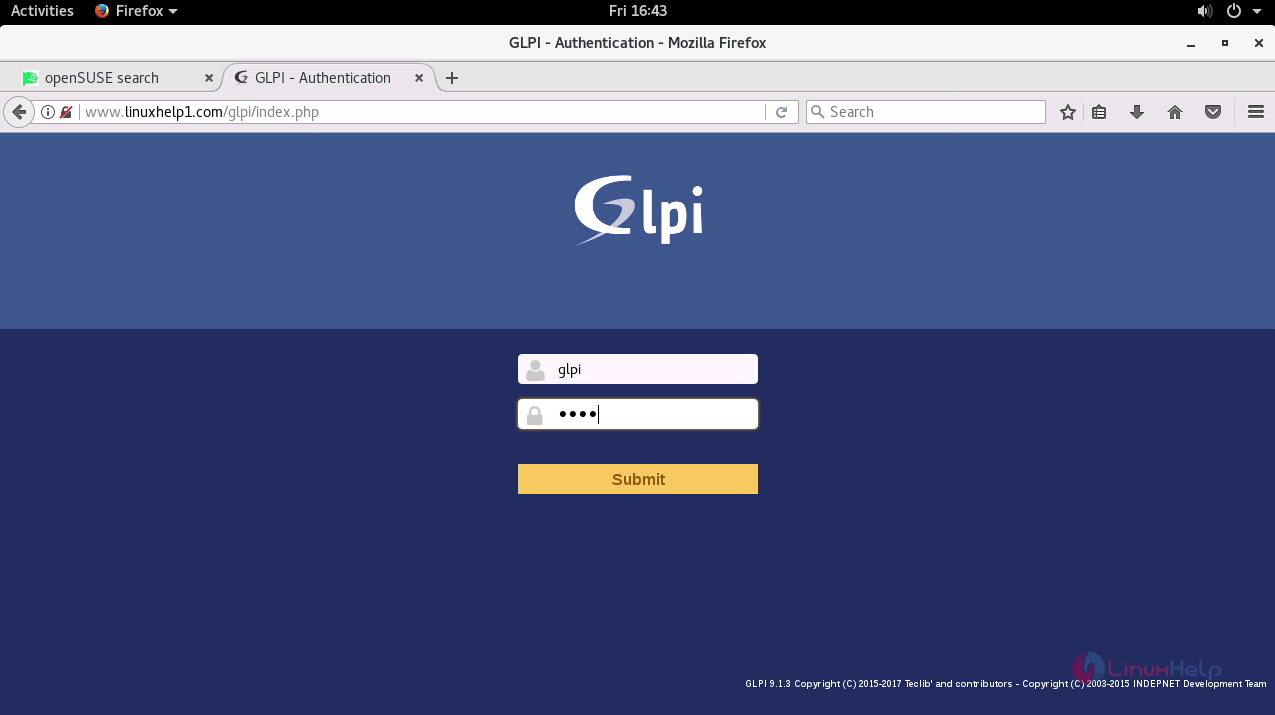
Enter the required login credentials and login to administrator account and click submit option.
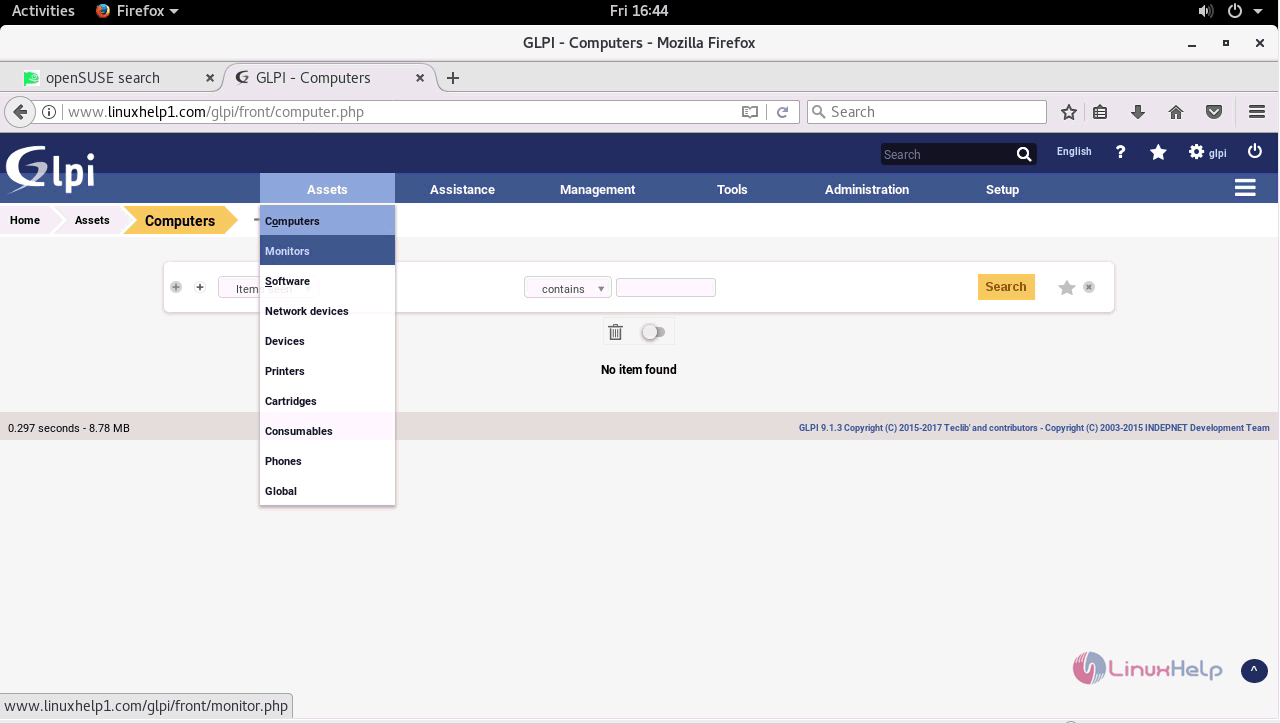
The installation file has been removed and now you can use the dashboard of GLPI.
Thus we conclude the installation procedure of GLPI on OpenSUSE Leap 42.3.
Comments ( 0 )
No comments available