How to install Apache GUI on Debian 11.3
- 00:35 lsb_release -a
- 00:48 sudo apt update && sudo apt upgrade
- 01:26 sudo apt install openjdk-11-jre
- 02:02 java -version
- 02:17 sudo apt install apache2
- 02:37 systemctl start apache2
- 02:50 systemctl status apache2
- 03:05 sudo apt -y install php php-common
- 03:09 php -v
- 03:52 sudo nano /var/www/html/test.php
- 04:30 systemctl restart apache2
- 05:15 sudo mkdir /usr/local/apachegui/
- 05:37 cd /usr/local/apachegui/
- 05:51 sudo wget -c https://github.com/jrossi227/ApacheGUI/releases/download/v1.12.0/ApacheGUI-1.12.0.tar.gz
- 06:17 ls -la
- 06:22 sudo tar -xvzf ApacheGUI-1.12.0.tar.gz
- 06:43 cd ApacheGUI/bin/
- 06:53 sudo ./run.sh
To Install Apache GUI on Debian 11.3
Introduction
Apache GUI is a free and open-source web interface tool that is developed to help Administrate the Apache Web Server. The functionality of the Apache GUI application includes: editing, Searching, and Validating your Configurations and Manage Virtual Hosts. In this tutorial, we will cover the installation of Apache GUI on Debian 11.3
Installation Procedure:
Step 1: Check the OS Version by using the below command
[root@linuxhelp:~#] lsb_release -a
No LSB modules are available.
Distributor ID:	Debian
Description:	Debian GNU/Linux 11 (bullseye)
Release:	11
Codename:	bullseye
Step 2: Next, update the system package by using the below command.
[root@linuxhelp:~#] sudo apt update && sudo apt upgrade
Get:1 http://deb.debian.org/debian bullseye InRelease [116 kB]
Get:2 http://security.debian.org/debian-security bullseye-security InRelease [48
.4 kB]
Get:3 http://deb.debian.org/debian bullseye-updates InRelease [44.1 kB]
Get:4 http://security.debian.org/debian-security bullseye-security/main Sources
[160 kB]
Get:5 http://deb.debian.org/debian bullseye/main Sources [8,633 kB]
Get:6 http://security.debian.org/debian-security bullseye-security/main amd64 Pa
ckages [189 kB]
Get:7 http://security.debian.org/debian-security bullseye-security/main Translat
ion-en [119 kB]
Get:8 http://deb.debian.org/debian bullseye-updates/main Sources.diff/Index [11.
7 kB]
Get:9 http://deb.debian.org/debian bullseye-updates/main amd64 Packages.diff/Ind
ex [11.7 kB]
Get:10 http://deb.debian.org/debian bullseye-updates/main Translation-en.diff/In
dex [4,995 B]
Get:11 http://deb.debian.org/debian bullseye-updates/main Sources T-2022-10-02-2
032.44-F-2022-08-18-2019.35.pdiff [2,486 B]
Get:12 http://deb.debian.org/debian bullseye-updates/main amd64 Packages T-2022-
10-02-2032.44-F-2022-08-18-2019.35.pdiff [4,713 B]
Get:11 http://deb.debian.org/debian bullseye-updates/main Sources T-2022-10-02-2
032.44-F-2022-08-18-2019.35.pdiff [2,486 B]
Get:12 http://deb.debian.org/debian bullseye-updates/main amd64 Packages T-2022-
10-02-2032.44-F-2022-08-18-2019.35.pdiff [4,713 B]
Get:13 http://deb.debian.org/debian bullseye-updates/main Translation-en T-2022-
09-22-1635.40-F-2022-09-22-1635.40.pdiff [3,855 B]
Get:13 http://deb.debian.org/debian bullseye-updates/main Translation-en T-2022-
09-22-1635.40-F-2022-09-22-1635.40.pdiff [3,855 B]
Get:14 http://deb.debian.org/debian bullseye/main amd64 Packages [8,184 kB]
Get:15 http://deb.debian.org/debian bullseye/main Translation-en [6,239 kB]
Fetched 23.8 MB in 6s (3,996 kB/s)
Reading package lists... Done
Building dependency tree... Done
Reading state information... Done
Creating config file /etc/php/7.4/apache2/php.ini with new version
Module mpm_event disabled.
Enabling module mpm_prefork.
apache2_switch_mpm Switch to prefork
apache2_invoke: Enable module php7.4
Setting up php7.4 (7.4.30-1+deb11u1) ...
Setting up php (2:7.4+76) ...
Processing triggers for man-db (2.9.4-2) ...
Processing triggers for php7.4-cli (7.4.30-1+deb11u1) ...
Processing triggers for libapache2-mod-php7.4 (7.4.30-1+deb11u1) ...
Step 3: Next Install the repositories for OpenJDK by using the below command.
[root@linuxhelp:~#] sudo apt install openjdk-11-jre
Reading package lists... Done
Building dependency tree... Done
Reading state information... Done
The following additional packages will be installed:
  ca-certificates-java java-common libatk-wrapper-java libatk-wrapper-java-jni
  openjdk-11-jre-headless
Suggested packages:
  default-jre fonts-ipafont-gothic fonts-ipafont-mincho fonts-wqy-microhei
  | fonts-wqy-zenhei fonts-indic
The following NEW packages will be installed:
  ca-certificates-java java-common libatk-wrapper-java libatk-wrapper-java-jni
  openjdk-11-jre openjdk-11-jre-headless
0 upgraded, 6 newly installed, 0 to remove and 0 not upgraded.
Need to get 37.7 MB of archives.
After this operation, 172 MB of additional disk space will be used.
Do you want to continue? [Y/n] y
Get:1 http://deb.debian.org/debian bullseye/main amd64 java-common all 0.72 [14.
5 kB]
Processing triggers for gnome-menus (3.36.0-1) ...
Processing triggers for man-db (2.9.4-2) ...
Processing triggers for ca-certificates (20210119) ...
Updating certificates in /etc/ssl/certs...
0 added, 0 removed; done.
Running hooks in /etc/ca-certificates/update.d...
done.
done.
Step 4: Then, check the installed version by using the below command.
[root@linuxhelp:~#] java -version
openjdk version "11.0.16" 2022-07-19
OpenJDK Runtime Environment (build 11.0.16+8-post-Debian-1deb11u1)
OpenJDK 64-Bit Server VM (build 11.0.16+8-post-Debian-1deb11u1, mixed mode, sharing)
Step 5: Install Apache and PHP by using the below command.
[root@linuxhelp:~#] sudo apt install apache2
Reading package lists... Done
Building dependency tree... Done
Reading state information... Done
The following additional packages will be installed:
  apache2-data apache2-utils
Suggested packages:
  apache2-doc apache2-suexec-pristine | apache2-suexec-custom
The following NEW packages will be installed:
  apache2 apache2-data apache2-utils
0 upgraded, 3 newly installed, 0 to remove and 0 not upgraded.
Need to get 695 kB of archives.
After this operation, 2,004 kB of additional disk space will be used.
Do you want to continue? [Y/n] y
Get:1 http://deb.debian.org/debian bullseye/main amd64 apache2-data all 2.4.54-1~deb11u1 [160 kB]
Get:2 http://deb.debian.org/debian bullseye/main amd64 apache2-utils amd64 2.4.54-1~deb11u1 [260 kB]
Get:3 http://deb.debian.org/debian bullseye/main amd64 apache2 amd64 2.4.54-1~deb11u1 [275 kB]
Fetched 695 kB in 1s (751 kB/s)
Selecting previously unselected package apache2-data.
(Reading database ... 144483 files and directories currently installed.)
Preparing to unpack .../apache2-data_2.4.54-1~deb11u1_all.deb ...
Unpacking apache2-data (2.4.54-1~deb11u1) ...
Selecting previously unselected package apache2-utils.
Preparing to unpack .../apache2-utils_2.4.54-1~deb11u1_amd64.deb ...
Unpacking apache2-utils (2.4.54-1~deb11u1) ...
Selecting previously unselected package apache2.
Preparing to unpack .../apache2_2.4.54-1~deb11u1_amd64.deb ...
Unpacking apache2 (2.4.54-1~deb11u1) ...
Setting up apache2-data (2.4.54-1~deb11u1) ...
Setting up apache2-utils (2.4.54-1~deb11u1) ...
Setting up apache2 (2.4.54-1~deb11u1) ...
Created symlink /etc/systemd/system/multi-user.target.wants/apache2.service → /l                                                                                                                                  ib/systemd/system/apache2.service.
Created symlink /etc/systemd/system/multi-user.target.wants/apache-htcacheclean.service → /lib/systemd/system/apache-htcacheclean.service.
Processing triggers for man-db (2.9.4-2) ...
Step 6: After completing the above step, start the Apache by using the below command
[root@linuxhelp:~#] systemctl start apache2
Step 7: Once the Apache service is started, then check the status by using the below command
[root@linuxhelp:~#] systemctl status apache2
Step 8: Once completed the Apache installation, next install PHP and its modules by using the below command.
[root@linuxhelp:~#] sudo apt -y install php php-common
Reading package lists... Done
Building dependency tree... Done
Reading state information... Done
The following additional packages will be installed:
  libapache2-mod-php7.4 php7.4 php7.4-cli php7.4-common php7.4-json
  php7.4-opcache php7.4-readline
Suggested packages:
  php-pear
The following NEW packages will be installed:
  libapache2-mod-php7.4 php php-common php7.4 php7.4-cli php7.4-common
  php7.4-json php7.4-opcache php7.4-readline
0 upgraded, 9 newly installed, 0 to remove and 0 not upgraded.
Need to get 4,128 kB of archives.
After this operation, 18.0 MB of additional disk space will be used.
Get:1 http://deb.debian.org/debian bullseye/main amd64 php-common all 2:76 [15.6kB]
Get:2 http://deb.debian.org/debian bullseye/main amd64 php7.4-common amd64 7.4.30-1+deb11u1 [1,023 kB]

Creating config file /etc/php/7.4/apache2/php.ini with new version
Module mpm_event disabled.
Enabling module mpm_prefork.
apache2_switch_mpm Switch to prefork
apache2_invoke: Enable module php7.4
Setting up php7.4 (7.4.30-1+deb11u1) ...
Setting up php (2:7.4+76) ...
Processing triggers for man-db (2.9.4-2) ...
Processing triggers for php7.4-cli (7.4.30-1+deb11u1) ...
Processing triggers for libapache2-mod-php7.4 (7.4.30-1+deb11u1) ...
Step 9: Then Check the PHP Version by using the below command.
[root@linuxhelp:~#] php -v
PHP 7.4.30 (cli) (built: Jul  7 2022 15:51:43) ( NTS )
Copyright (c) The PHP Group
Zend Engine v3.4.0, Copyright (c) Zend Technologies
    with Zend OPcache v7.4.30, Copyright (c), by Zend Technologies
Step 10: Configure the info.php by using the below command
[root@linuxhelp:~#] sudo nano /var/www/html/test.php
<?php
phpinfo();
?>
Step 11: Once the following step is completed, restart the apache service by using the below command
[root@linuxhelp ~]# systemctl restart apache2
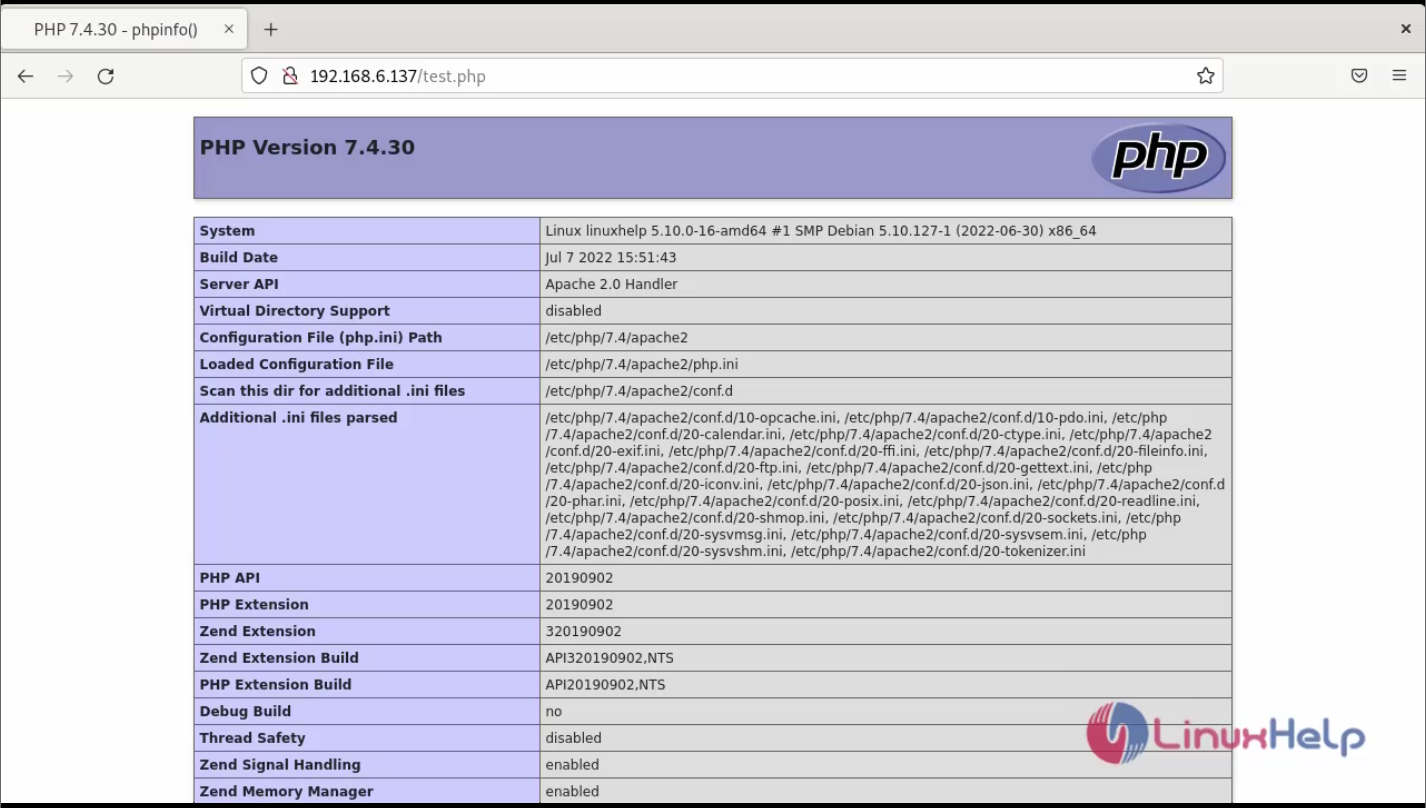
Step 12: Now, open your web browser and go to http://server-ip/test.php or http://localhost/test.php as shown in the below image
Step 13: Now it’s time to install the Apache GUI. The first thing we have to do is download it from Github by using the below commands.
[root@linuxhelp:~#] sudo mkdir /usr/local/apachegui/

[root@linuxhelp:~#] cd /usr/local/apachegui/

[root@linuxhelp:/usr/local/apachegui:~#] sudo wget -c https://github.com/jrossi227/A
pacheGUI/releases/download/v1.12.0/ApacheGUI-1.12.0.tar.gz
--2022-10-07 22:19:04--  https://github.com/jrossi227/ApacheGUI/releases/downloa
d/v1.12.0/ApacheGUI-1.12.0.tar.gz
Resolving github.com (github.com)... 20.207.73.82
Connecting to github.com (github.com)|20.207.73.82|:443... connected.
HTTP request sent, awaiting response... 302 Found
Resolving objects.githubusercontent.com (objects.githubusercontent.com)... 185.1
99.111.133, 185.199.108.133, 185.199.110.133, ...
Connecting to objects.githubusercontent.com (objects.githubusercontent.com)|185.
199.111.133|:443... connected.
HTTP request sent, awaiting response... 200 OK
Length: 54063420 (52M) [application/octet-stream]
Saving to: ‘ApacheGUI-1.12.0.tar.gz’
ApacheGUI-1.12.0.ta 100%[===================>]  51.56M  16.9MB/s    in 3.1s
2022-10-07 22:19:09 (16.9 MB/s) - ‘ApacheGUI-1.12.0.tar.gz’ saved [54063420/5406
3420]
Step 14: Long list the directory by using the below command.
[root@linuxhelp:/usr/local/apachegui:~#] ls -la
total 52808
drwxr-xr-x  2 root root     4096 Oct  7 22:19 .
drwxr-xr-x 11 root root     4096 Oct  7 22:18 ..
-rw-r--r--  1 root root 54063420 Dec  7  2021 ApacheGUI-1.12.0.tar.gz
Step 15: Next, decompress the file by using the below command
[root@linuxhelp:/usr/local/apachegui:~#] sudo tar -xvzf ApacheGUI-1.12.0.tar.gz
ApacheGUI/
ApacheGUI/._.DS_Store
ApacheGUI/.DS_Store
ApacheGUI/._tomcat
ApacheGUI/tomcat/
ApacheGUI/bin/
ApacheGUI/bin/default-history-database.db
ApacheGUI/bin/default-gui-database.db
ApacheGUI/bin/README
ApacheGUI/bin/._run.sh
ApacheGUI/bin/run.sh
ApacheGUI/bin/stop.sh
ApacheGUI/tomcat/._webapps
ApacheGUI/tomcat/webapps/
ApacheGUI/tomcat/._temp
ApacheGUI/tomcat/temp/
ApacheGUI/tomcat/._.DS_Store
ApacheGUI/tomcat/.DS_Store
ApacheGUI/tomcat/._LICENSE
ApacheGUI/tomcat/LICENSE
ApacheGUI/tomcat/._bin
Step 16: Once you have decompressed the file, navigate to the gene rated folder by using the below command
[root@linuxhelp:/usr/local/apachegui:~#] cd ApacheGUI/bin/
Step 17: Finally start Apache GUI by using the below command
[root@linuxhelp:/usr/local/apachegui/ApacheGUI/bin:~#] sudo ./run.sh
./run.sh: 1: [: -ne: unexpected operator
Using CATALINA_BASE:   /usr/local/apachegui/ApacheGUI/tomcat
Using CATALINA_HOME:   /usr/local/apachegui/ApacheGUI/tomcat
Using CATALINA_TMPDIR: /usr/local/apachegui/ApacheGUI/tomcat/temp
Using JRE_HOME:        /usr
Using CLASSPATH:       /usr/local/apachegui/ApacheGUI/tomcat/bin/bootstrap.jar:/                                                                                                                                  usr/local/apachegui/ApacheGUI/tomcat/bin/tomcat-juli.jar
Tomcat started.
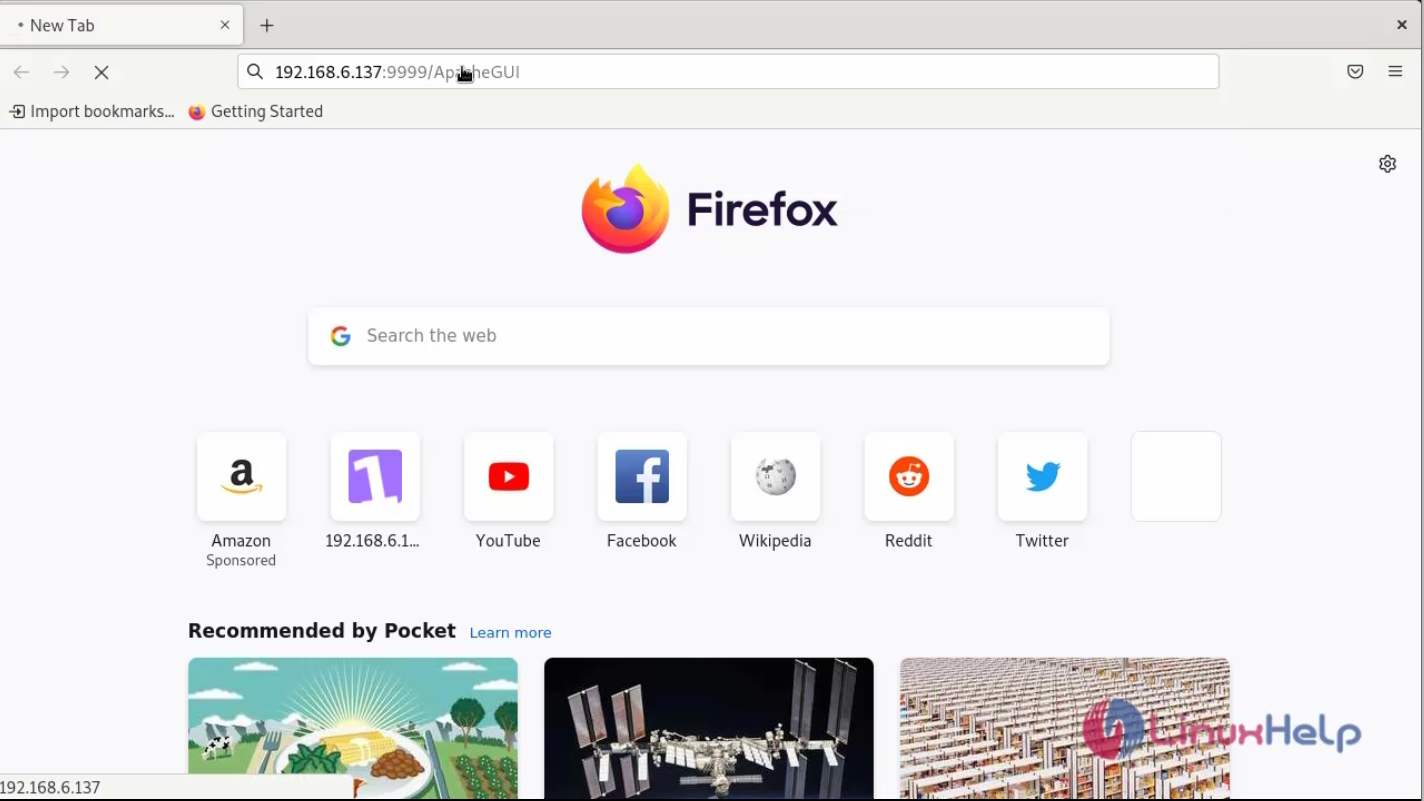
Step 18: Now open your web browser and go to http://your-server:9999/ApacheGUI as shown in the below image
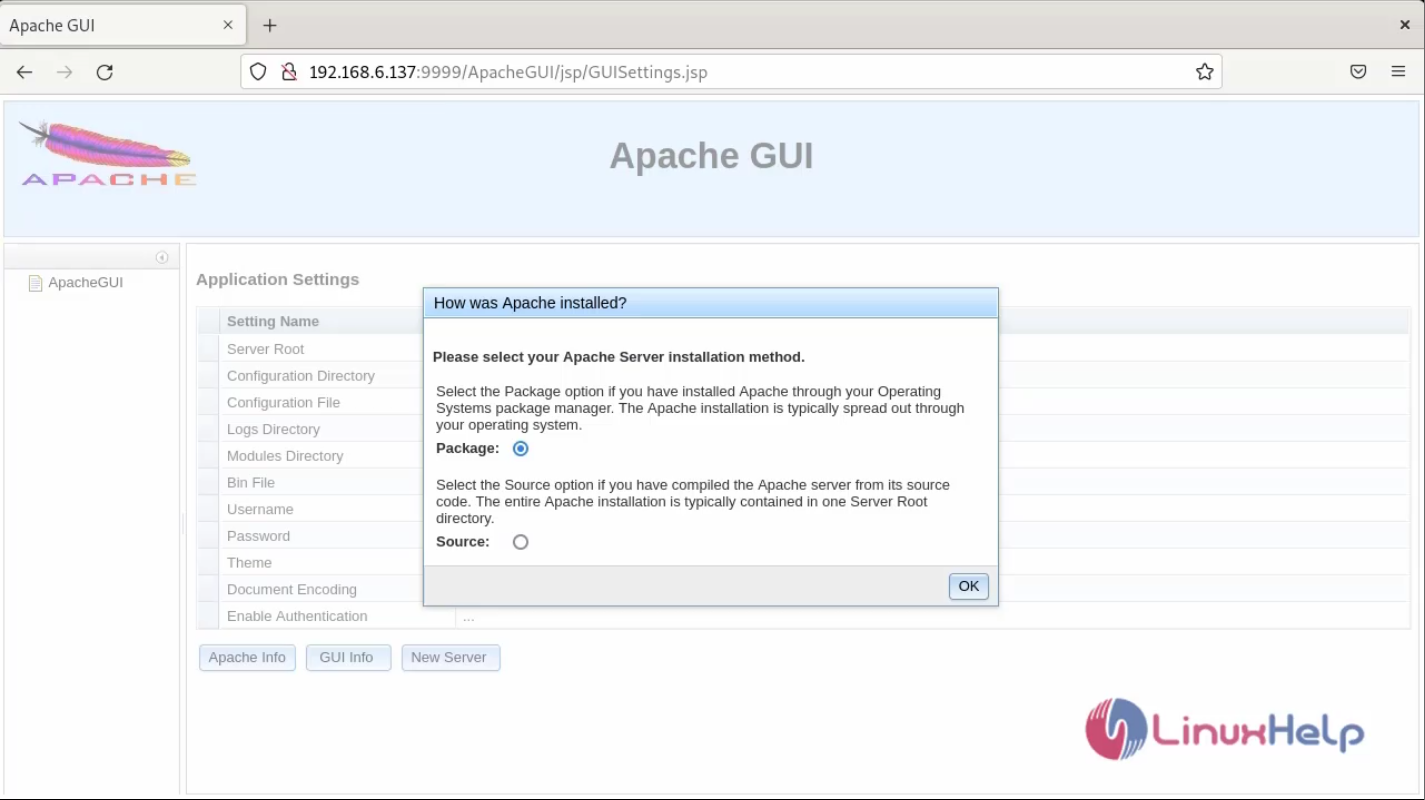
Step 19: Select the type of installation for Apache GUI as shown in the below image
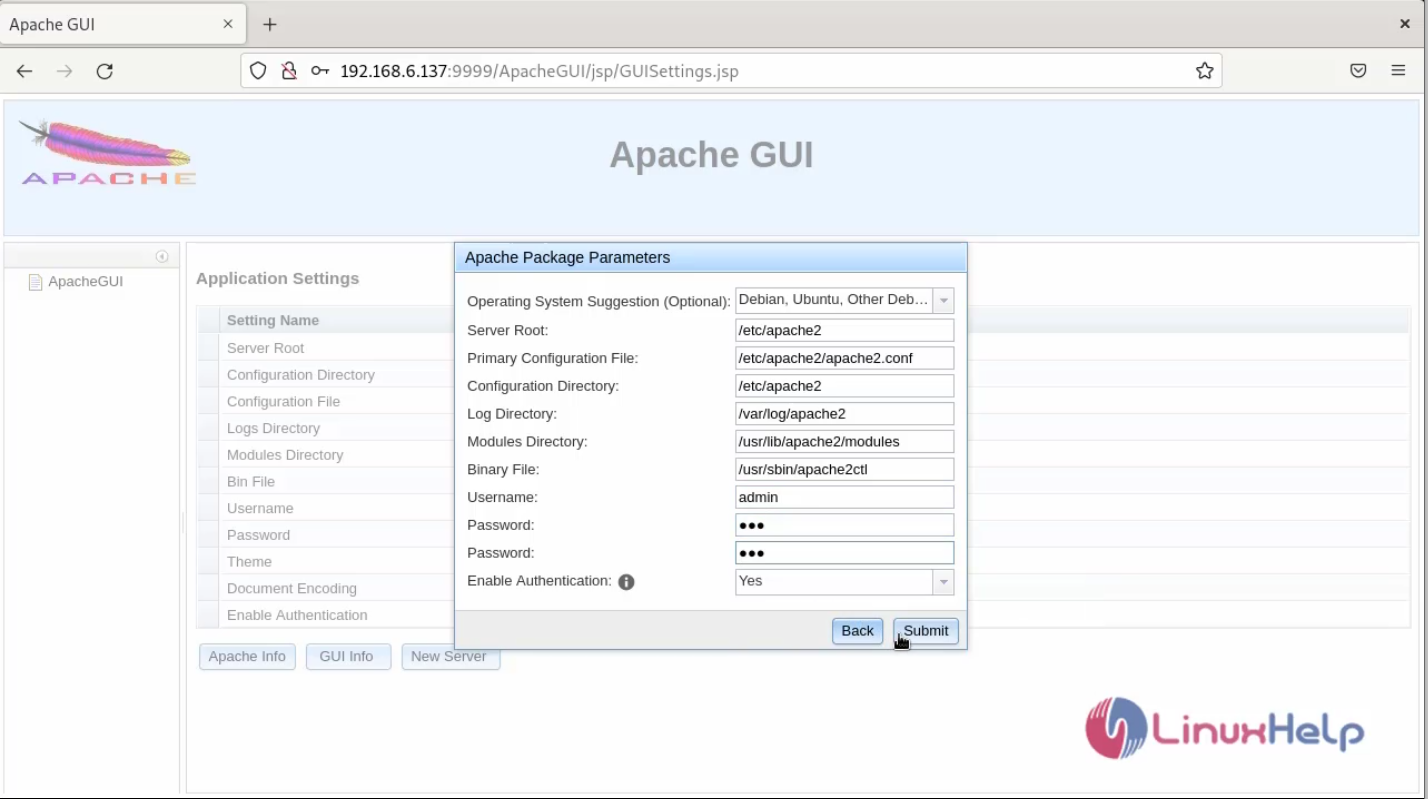
Step 20: Configure the Apache package parameter and Admin user setup as shown in the below image
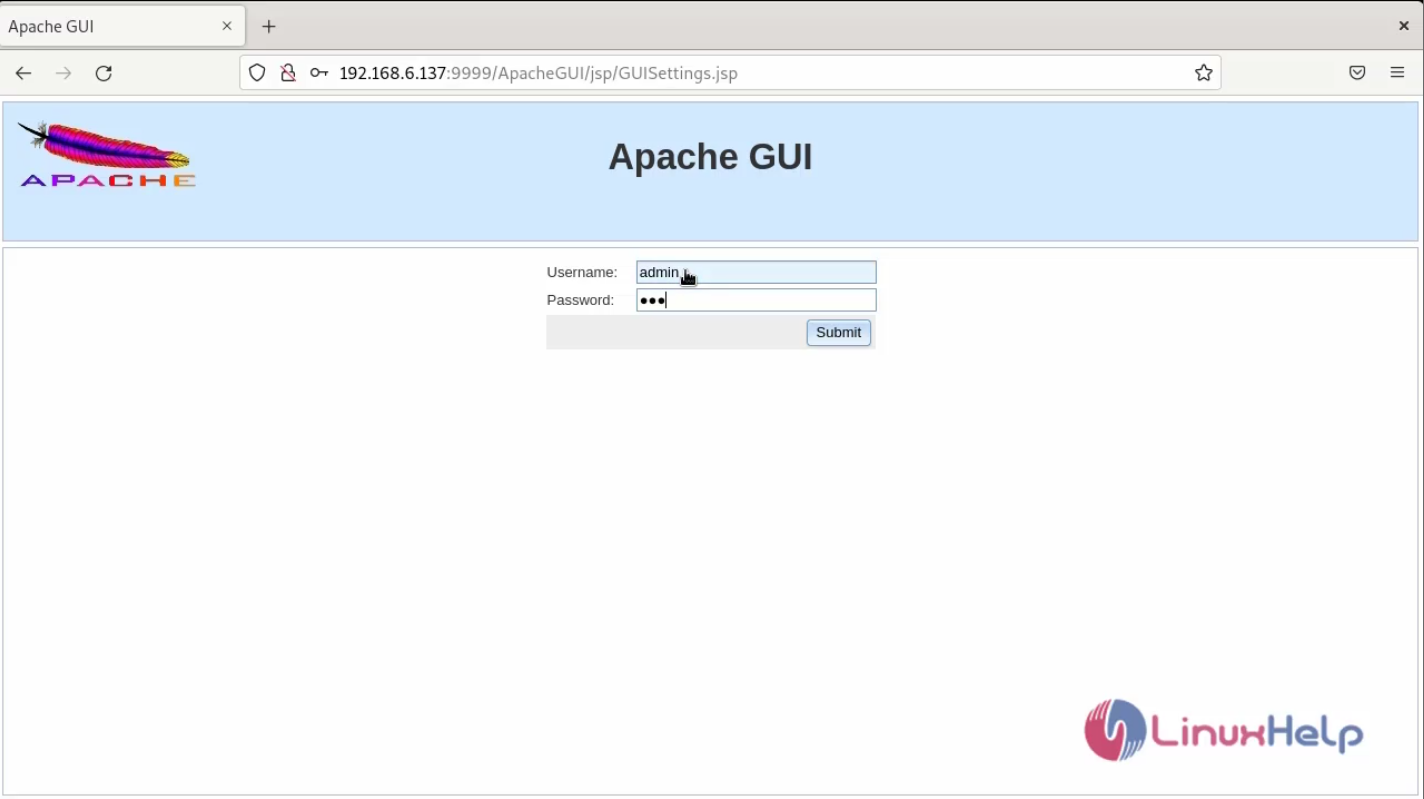
Step 21: Once the configuration is completed you will see the Login page of Apache GUI, and you can log in using the admin user credentials as shown in the below image
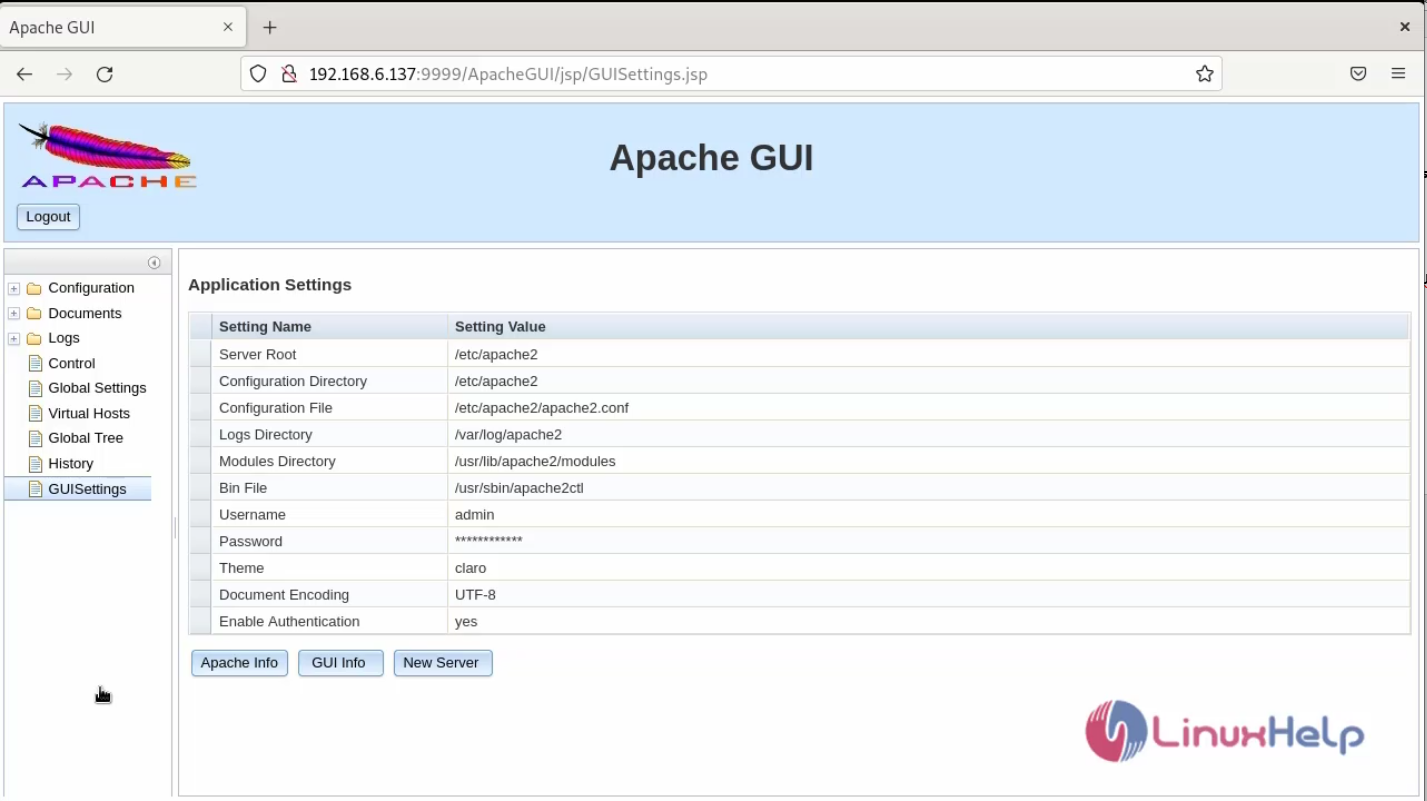
Step 22: After the Successful login, you will see the Admin dashboard of Apache GUI as shown below in the below image
Conclusion:
We have reached the end of this article. In this guide, we have walked you through the steps required to install Apache GUI on Debian 11.3. Your feedback is much welcome.
Comments ( 0 )
No comments available