How To install and configure Mysql On Debian 11.3
- 00:40 apt install mariadb-server
- 00:56 systemctl status mariadb
- 01:11 systemctl enable mariadb
- 01:28 mysql_secure_installation
- 02:19 mysql -u root -p
- 02:38 CREATE DATABASE MYSQL;
- 02:59 USE MYSQL
- 03:13 SHOW DATABASES;
- 03:37 CREATE USER 'USER1'@'localhost' IDENTIFIED BY'mysql@123;
- 03:58 FLUSH PRIVILEGES;
- 04:07 GRANT ALL ON *.*TO'USER1'@'localhost'WITH GRANT OPTION;
- 04:32 GRANT INSERT,UPDATE ON *.*TO'USER1'@'localhost';
- 05:12 SHOW GRANTS FOR 'USER1'@'localhost';
- 05:45 DROP USER'USER1'@'localhost';
To Install and Configure Mysql on Debian 11.3
Introduction:
One of the most common tasks when administering a database is to oversee access and permissions. MariaDB is an open-source, fully compatible, relational database management system (RDBMS). The MariaDB client makes it easy to add new users and grant them different degrees of privileges.
Installation Procedure :
Step 1: Install the Mariadb-server by using the below command
root@linuxhelp:~# apt install mariadb-server
Reading package lists... Done
Building dependency tree... Done
Reading state information... Done
The following package was automatically installed and is no longer required:
  libonig5
Use 'apt autoremove' to remove it.
The following NEW packages will be installed:
  mariadb-server
0 upgraded, 1 newly installed, 0 to remove and 4 not upgraded.
Need to get 35.3 kB of archives.
After this operation, 72.7 kB of additional disk space will be used.
Get:1 http://deb.debian.org/debian bullseye/main amd64 mariadb-server all 1:10.5.15-0+deb11u1 [35.3 kB]
Fetched 35.3 kB in 0s (81.8 kB/s)
Selecting previously unselected package mariadb-server.
(Reading database ... 286808 files and directories currently installed.)
Preparing to unpack .../mariadb-server_1%3a10.5.15-0+deb11u1_all.deb ...
Unpacking mariadb-server (1:10.5.15-0+deb11u1) ...
Setting up mariadb-server (1:10.5.15-0+deb11u1) ...
Step 2: Check the MariaDB status by using the below command
root@linuxhelp:~# systemctl status mariadb
● mariadb.service - MariaDB 10.5.15 database server
     Loaded: loaded (/lib/systemd/system/mariadb.service; enabled; vendor preset: >
     Active: active (running) since Wed 2022-05-25 03:04:30 IST; 1 day 2h ago
       Docs: man:mariadbd(8)
             https://mariadb.com/kb/en/library/systemd/
   Main PID: 782 (mariadbd)
     Status: "Taking your SQL requests now..."
      Tasks: 9 (limit: 4620)
     Memory: 104.1M
        CPU: 8.050s
     CGroup: /system.slice/mariadb.service
             └─782 /usr/sbin/mariadbd

May 25 03:04:30 linuxhelp mariadbd[782]: 2022-05-25  3:04:30 0 [Note] InnoDB: Load>
May 25 03:04:30 linuxhelp mariadbd[782]: 2022-05-25  3:04:30 0 [Note] InnoDB: Buff>
May 25 03:04:30 linuxhelp mariadbd[782]: 2022-05-25  3:04:30 0 [Note] Server socke>
May 25 03:04:30 linuxhelp mariadbd[782]: 2022-05-25  3:04:30 0 [Note] Reading of a>
May 25 03:04:30 linuxhelp mariadbd[782]: 2022-05-25  3:04:30 0 [Note] Added new Ma>
May 25 03:04:30 linuxhelp mariadbd[782]: 2022-05-25  3:04:30 0 [Note] /usr/sbin/ma>
May 25 03:04:30 linuxhelp mariadbd[782]: Version: '10.5.15-MariaDB-0+deb11u1'  soc>
May 25 03:04:30 linuxhelp systemd[1]: Started MariaDB 10.5.15 database server.
May 25 03:04:30 linuxhelp /etc/mysql/debian-start[825]: Upgrading MySQL tables if >
May 25 03:04:30 linuxhelp /etc/mysql/debian-start[919]: Triggering myisam-recover >
<ads 1>
Step 3: Start the MariaDB by using the below command
root@linuxhelp:~# systemctl enable mariadb
Synchronizing state of mariadb.service with SysV service script with /lib/systemd/systemd-sysv-install.
Executing: /lib/systemd/systemd-sysv-install enable mariadb
Step 4: Install the MySQL secure installation and set the root passwd by using the below command
root@linuxhelp:~# mysql_secure_installation

NOTE: RUNNING ALL PARTS OF THIS SCRIPT IS RECOMMENDED FOR ALL MariaDB
      SERVERS IN PRODUCTION USE!  PLEASE READ EACH STEP CAREFULLY!

In order to log into MariaDB to secure it, we'll need the current
password for the root user. If you've just installed MariaDB, and
haven't set the root password yet, you should just press enter here.

Enter current password for root (enter for none):
OK, successfully used password, moving on...

Setting the root password or using the unix_socket ensures that nobody
can log into the MariaDB root user without the proper authorisation.

You already have your root account protected, so you can safely answer 'n'.

Switch to unix_socket authentication [Y/n] y
Enabled successfully!
Reloading privilege tables..
 ... Success!


You already have your root account protected, so you can safely answer 'n'.

Change the root password? [Y/n] y
New password:
Re-enter new password:
Password updated successfully!
Reloading privilege tables..
 ... Success!


By default, a MariaDB installation has an anonymous user, allowing anyone
to log into MariaDB without having to have a user account created for
them.  This is intended only for testing, and to make the installation
go a bit smoother.  You should remove them before moving into a
production environment.

Remove anonymous users? [Y/n] y
 ... Success!

Normally, root should only be allowed to connect from 'localhost'.  This
ensures that someone cannot guess at the root password from the network.

Disallow root login remotely? [Y/n] y
 ... Success!

By default, MariaDB comes with a database named 'test' that anyone can
access.  This is also intended only for testing, and should be removed
before moving into a production environment.

Remove test database and access to it? [Y/n] y
 - Dropping test database...
 ... Success!
 - Removing privileges on test database...
 ... Success!

Reloading the privilege tables will ensure that all changes made so far
will take effect immediately.

Reload privilege tables now? [Y/n] y
 ... Success!

Cleaning up...

All done!  If you've completed all of the above steps, your MariaDB
installation should now be secure.

Thanks for using MariaDB!
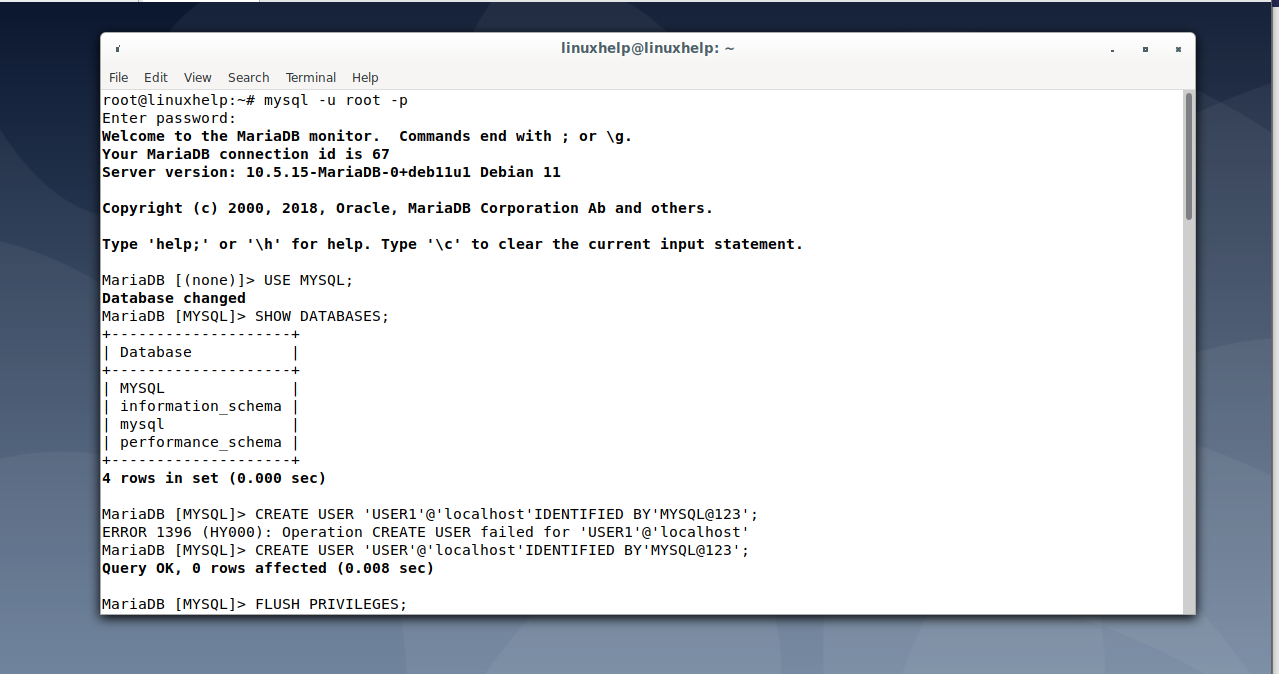
Step 5: Open the MariaDB Database by using the below command
root@linuxhelp:~# mysql -u root -p
Enter password:
Welcome to the MariaDB monitor.  Commands end with ; or \g.
Your MariaDB connection id is 65
Server version: 10.5.15-MariaDB-0+deb11u1 Debian 11

Copyright (c) 2000, 2018, Oracle, MariaDB Corporation Ab and others.

Type 'help;' or '\h' for help. Type '\c' to clear the current input statement.
Step 6: Create a new database by using the below command
MariaDB [(none)]> CREATE DATABASE MYSQL;
Query OK, 1 row affected (0.006 sec)
MariaDB [(none)]> USE MYSQL
Database changed
Step 8: Check the number of available databases
MariaDB [MYSQL]> SHOW DATABASES;
+--------------------+
| Database           |
+--------------------+
| MYSQL              |
| information_schema |
| mSHOysql              |


| performance_schema |
+--------------------+
4 rows in set (0.000 sec)
Step 9: Create new user in database by using the below command
MariaDB [MYSQL]> CREATE USER 'USER1'@'localhost' IDENTIFIED BY'mysql@123';
Query OK, 0 rows affected (0.008 sec)
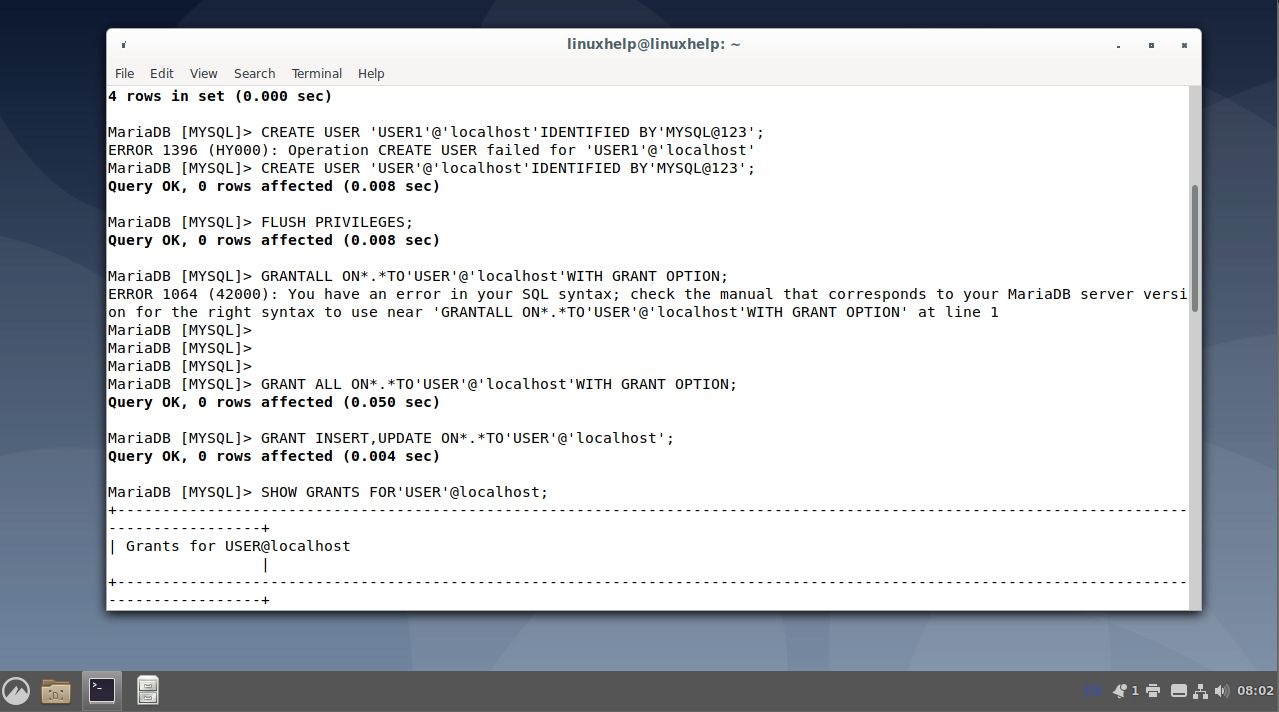
Step 10: Refresh the privileges by using the below command
MariaDB [MYSQL]> FLUSH PRIVILEGES;
Query OK, 0 rows affected (0.001 sec)
Step 11: Grant the privileges to MariaDB user by using the below command
MariaDB [MYSQL]> GRANT ALL ON *.*TO'USER1'@'localhost'WITH GRANT OPTION;
Query OK, 0 rows affected (0.001 sec)
Step 12: Refresh the privileges by using the below command
MariaDB [MYSQL]> FLUSH PRIVILEGES;
Query OK, 0 rows affected (0.001 sec)
Step 13: Grant the multiple privileges to MariaDB user by using the below command
MariaDB [MYSQL]> GRANT INSERT,UPDATE ON *.*TO'USER1'@'localhost';
Query OK, 0 rows affected (0.001 sec)
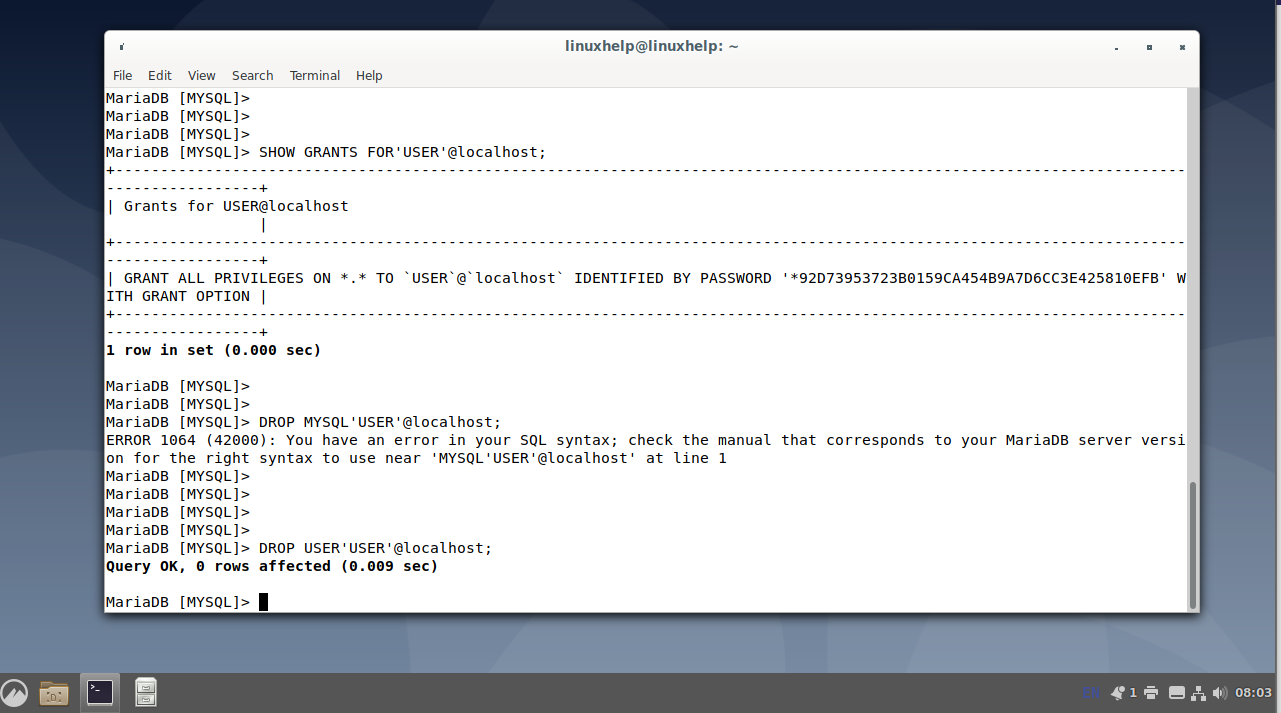
Step 14: Show the user Grant the privileges
MariaDB [MYSQL]> SHOW GRANTS FOR 'USER1'@'localhost';
+-----------------------------------------------------------------------------------------------------------------------------------------+
| Grants for USER1@localhost                                                                                                              |
+-----------------------------------------------------------------------------------------------------------------------------------------+
| GRANT ALL PRIVILEGES ON *.* TO `USER1`@`localhost` IDENTIFIED BY PASSWORD '*4B4F5AF88255C46EB9281BD84ED0329C56937097' WITH GRANT OPTION |
+-----------------------------------------------------------------------------------------------------------------------------------------+
1 row in set (0.002 sec)
Step 15: Remove the MariaDB user account by using the below command
MariaDB [MYSQL]> DROP USER'USER1'@'localhost';
Query OK, 0 rows affected (0.001 sec)
Conclusion:
By this how to install and configure MariaDB has come to an end.
Comments ( 0 )
No comments available