• Categories
    Category
  • Categories
    Category
  • News
  • Tutorials
  • Forums
  • Tags
  • Users
Tutorial Comments FAQ Related Articles

How to Block a domain using RPZ on Bind DNS server on CentOS

1931

To Block a domain using RPZ on Bind DNS server on CentOS

Domain Name System or DNS is a service that will resolve the host name for the particular IP address. Response Policy Zones (DNS RPZ) is used for protection against malicious global identifiers like host names, domain names, IP addresses and nameservers. Response Policy Zones (DNS RPZ) prevents accessing certain internet domains and redirecting to other locations.Blocking a domain in DNS server is about redirecting all queries for a particular domain to a loopback or any false IP address by using RPZ. This tutorial explains the configuration procedure of blocking a domain using RPZ in Bind DNS server on CentOS.

Configuration procedure

To proceed with the configuration procedure, install the bind package using yum command and press y to continue with the installation.

[root@ns1 ~]# yum install bind* -y
Loaded plugins: fastestmirror, refresh-packagekit, security
Setting up Install Process
Loading mirror speeds from cached hostfile
 * base: ftp.iitm.ac.in
 * extras: mirror.ehost.vn
 * updates: ftp.iitm.ac.in
Resolving Dependencies
-->  Running transaction check
--->  Package bind.x86_64 32:9.8.2-0.62.rc1.el6_9.4 will be installed
--->  Package bind-chroot.x86_64 32:9.8.2-0.62.rc1.el6_9.4 will be installed
--->  Package bind-devel.x86_64 32:9.8.2-0.62.rc1.el6_9.4 will be installed
--->  Package bind-dyndb-ldap.x86_64 0:2.3-8.el6 will be installed
.
.
.
Installed:
  bind.x86_64 32:9.8.2-0.62.rc1.el6_9.4  bind-chroot.x86_64 32:9.8.2-0.62.rc1.el6_9.4  bind-devel.x86_64 32:9.8.2-0.62.rc1.el6_9.4  bind-dyndb-ldap.x86_64 0:2.3-8.el6  bind-sdb.x86_64 32:9.8.2-0.62.rc1.el6_9.4

Dependency Installed:
  postgresql-libs.x86_64 0:8.4.20-7.el6                                                                                                                                                                           
Updated:
  bind-libs.x86_64 32:9.8.2-0.62.rc1.el6_9.4                                                              bind-utils.x86_64 32:9.8.2-0.62.rc1.el6_9.4                                                             

Complete!

Edit the named.conf configuration file using vim editor and enter the following contents in the file. Save and exit the file.

[root@ns1 ~]# vim /etc/named.conf

options {
        listen-on port 53 { 127.0.0.1  192.168.7.222  } 
        listen-on-v6 port 53 { ::1  } 
        directory       " /var/named"  
        dump-file       " /var/named/data/cache_dump.db"  
        statistics-file " /var/named/data/named_stats.txt"  
        memstatistics-file " /var/named/data/named_mem_stats.txt"  
        allow-query     { localhost  } 
        recursion yes 
        dnssec-enable yes 
        dnssec-validation yes 

        /* Path to ISC DLV key */
        bindkeys-file " /etc/named.iscdlv.key"  
        managed-keys-directory " /var/named/dynamic"  
} 

logging {
        channel default_debug {
                file " data/named.run"  
                severity dynamic 
        } 
} 
zone " ."  IN {
        type hint 
        file " named.ca"  
} 

include " /etc/named.rfc1912.zones"  
include " /etc/named.root.key"  

Add your IP address as shown in above configuration and start and enable named service by running the following set of commands.

[root@ns1 ~]# service named start
Generating /etc/rndc.key:                                  [  OK  ]
Starting named:                                            [  OK  ]
[root@ns1 ~]# chkconfig named on

Edit the resolving DNS server IP on your network configuration file using vim editor and make the following changes. Save and exit the file.

[root@ns1 ~]# vim /etc/sysconfig/network-scripts/ifcfg-eth0

DEVICE=eth0
TYPE=Ethernet
UUID=36a6e616-74e3-4df5-ad16-ca3b691bc2d8
ONBOOT=yes
NM_CONTROLLED=yes
BOOTPROTO=none
HWADDR=00:0C:29:F2:17:C6
IPADDR=192.168.7.222
PREFIX=24
GATEWAY=192.168.7.1
DNS1=8.8.8.8
DEFROUTE=yes
IPV4_FAILURE_FATAL=yes
IPV6INIT=no
NAME=" System eth0" 

Now restart the network service.

[root@ns1 ~]# service network restart
Shutting down interface eth0:  Device state: 3 (disconnected)
                                                           [  OK  ]
Shutting down loopback interface:                          [  OK  ]
Bringing up loopback interface:                            [  OK  ]
Bringing up interface eth0:  Active connection state: activated
Active connection path: /org/freedesktop/NetworkManager/ActiveConnection/2
                                                           [  OK  ]

To block a domain using DNS RPZ method, open named.conf configuration and create a zone as like shown below.

[root@ns1 ~]# vim /etc/named.conf
response-policy { zone " ns1.example.com"   } 
zone " ns1.example.com"  IN {
type master 
file " rpz.db"  
} 

Next create a forward zone file as we mentioned in named.conf configuration named rpz.db and enter the following details in the file. Save and exit the file.

[root@ns1 ~]# vim /var/named/rpz.db

$TTL 1D
@       IN SOA ns1.example.com. root.example.com. (
                                        0         serial
                                        1D        refresh
                                        1H        retry
                                        1W        expire
                                        3H )      minimum
@ IN NS ns1.example.com.
@ IN A 192.168.7.222

youtube.com IN CNAME @
www.youtube.com IN CNAME @

Restart the named service.

[root@ns1 ~]# service named restart
Stopping named:                                            [  OK  ]
Starting named:                                            [  OK  ]

Check nslookup of the site that has been blocked by executing the following command.

[root@ns1 ~]# nslookup youtube.com
Server: 192.168.7.222
Address: 192.168.7.222#53

Non-authoritative answer:
youtube.com canonical name = ns1.example.com.
Name: ns1.example.com
Address: 192.168.7.222

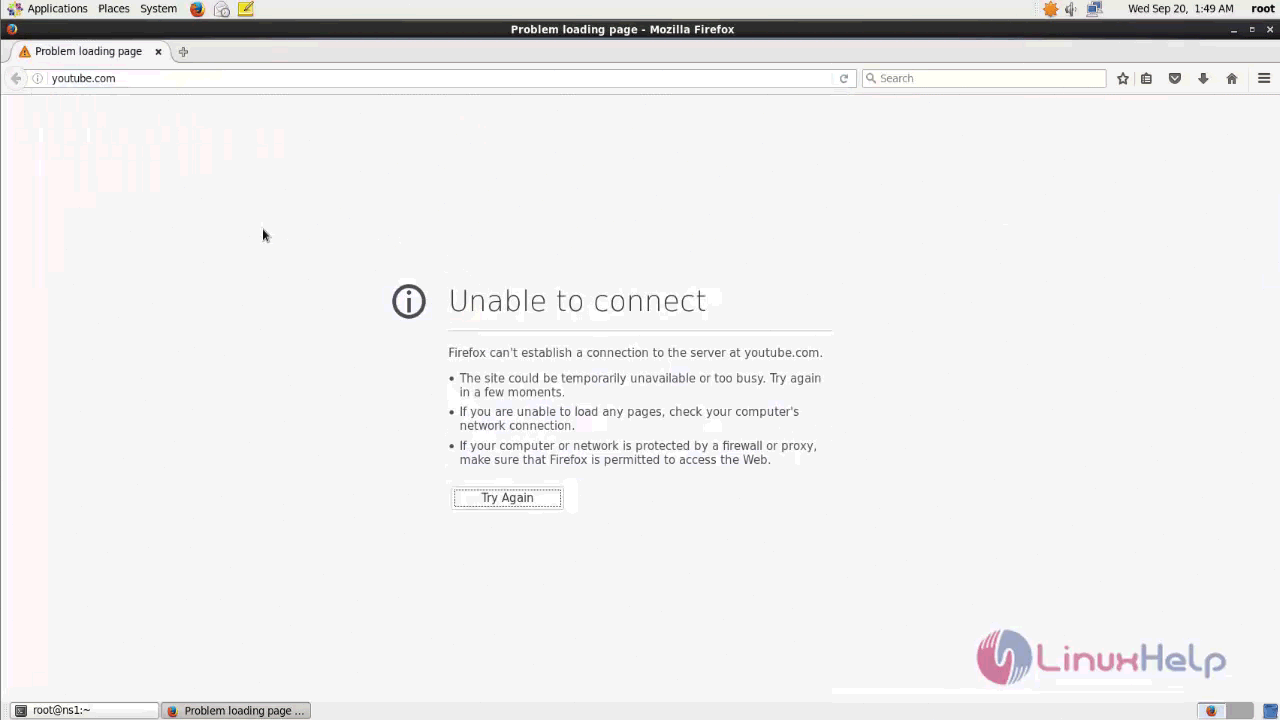
To check in the browser, type the blocked domain name in the browser and try to access it. The domain will remain blocked as per the configuration.
denied site

Thus the configuration procedure of Blocking a domain using RPZ on Bind DNS server on CentOS is done without any glitches.

Tags:
ethan
Author: 

Comments ( 0 )

No comments available

Add a comment

Frequently asked questions ( 5 )

Q

how to add a white list using RPZ?

A

use the below link to add a white list using RPZ
"https://topranks.github.io/2017/05/13/DNS-Whitelist-in-BIND-with-RPZ.html"

Q

what is DNS RPZ?

A

Domain Name Service Response Policy Zones (DNS RPZ) is a method that allows a nameserver administrator to overlay custom information on top of the global DNS to provide alternate responses to

Q

what is the package to be install DNS configuration in centos?

A

use the below command to install the package of DNS
# yum install bind* -y

Q

what is the purpose of Block a domain using RPZ on Bind DNS server in centos?

A

Domain Name System or DNS is a service that will resolve the host name for the particular IP address. Response Policy Zones (DNS RPZ) is used for protection against malicious global identifiers like host names, domain names, IP addresses and nameservers. Response Policy Zones (DNS RPZ) prevents accessing certain internet domains and redirecting to other locations.Blocking a domain in DNS server is about redirecting all queries for a particular domain to a loopback or any false IP address by using RPZ.

Q

where to edit the configuration file for DNS in centos?

A

Edit the named.conf configuration file using vim editor and enter the following contents in the file. Save and exit the file.
# vim /etc/named.conf

Related Tutorials in How to Block a domain using RPZ on Bind DNS server on CentOS

Related Tutorials in How to Block a domain using RPZ on Bind DNS server on CentOS

How To Install AnyDesk on Centos 7
Apr 2, 2018
How to install Tiki Wiki CMS Groupware on CentOS 7
May 31, 2018
How to install PHP ImageMagick on CentOS 7
Nov 4, 2017
How to Upgrade and Downgrade the PHP Versions on CentOS 7.6
Jun 4, 2019
How to install Apache from Source Code on CentOS 7
Oct 21, 2017
How to enable or disable repositories in CentOS
Mar 28, 2018
How to install AWStats on CentOS 7
Dec 8, 2017
How to install Apache JMeter in CentOS 7
Mar 24, 2017

Related Forums in How to Block a domain using RPZ on Bind DNS server on CentOS

Related Forums in How to Block a domain using RPZ on Bind DNS server on CentOS

CentOS
connor class=
How To Completely Remove Apache package On CentOS 7.6
May 14, 2019
CentOS
ceriaimmaculate class=
setfacl : command not found
Jan 3, 2018
CentOS
mason class=
Error getting authority: Error initializing authority: Could not connect: No such file or directory (g-io-error-quark, 1)
Nov 20, 2018
CentOS
landon class=
Command to find SNMP Version
May 28, 2018
CentOS
arjitharon class=
cannot start minio service help
Mar 10, 2018
Apache tomcat
AadrikaAnshu class=
Cannot find ./catalina.sh The file is absent or does not have execute permission This file is needed to run this program
Jun 17, 2019
gitlab
caden class=
Insufficient space in download directory /var/cache/yum/x86_64/6/base/packages
Jul 22, 2019
OpenVAS
frank class=
Could not retrieve mirrorlist http://mirrorlist.centos.org/?release=7&arch=x86_64&repo=os&infra=stock error was 14: curl#6 - "Could not resolve host: mirrorlist.centos.org; Unknown error"
Dec 20, 2018

Related News in How to Block a domain using RPZ on Bind DNS server on CentOS

Related News in How to Block a domain using RPZ on Bind DNS server on CentOS

Security Breach In The World's First Domain Registrar Network Solutions
Nov 5, 2019
Attackers Target Home Routers with DNS Hijacking
Apr 9, 2019
Despite ISP Opposition, All Major Browsers will Eventually Roll Out DNS-over-HTTPS
Nov 12, 2019
Back To Top!
Rank
User
Points

Top Contributers

userNamenaveelansari
135850

Top Contributers

userNameayanbhatti
92510

Top Contributers

userNamehamzaahmed
32150

Top Contributers

1
userNamelinuxhelp
31040

Top Contributers

userNamemuhammadali
24500
Can you help Isaac ?
How to run windows application in linux

I need to run the windows application in my Linux machine, instead of installing from yum repo or any other repos. How to do that..??

Networking
  • Routing
  • trunk
  • Netmask
  • Packet Capture
  • domain
  • HTTP Proxy
Server Setup
  • NFS
  • KVM
  • Memory
  • Sendmail
  • WebDAV
  • LXC
Shell Commands
  • Cloud commander
  • Command line archive tools
  • last command
  • Shell
  • terminal
  • Throttle
Desktop Application
  • Linux app
  • Pithos
  • Retrospect
  • Scribe
  • TortoiseHg
  • 4Images
Monitoring Tool
  • Monit
  • Apache Server Monitoring
  • EtherApe 
  • Arpwatch Tool
  • Auditd
  • Barman
Web Application
  • Nutch
  • Amazon VPC
  • FarmWarDeployer
  • Rukovoditel
  • Mirror site
  • Chef
Contact Us | Terms of Use| Privacy Policy| Disclaimer
© 2025 LinuxHelp.com All rights reserved. Linux™ is the registered trademark of Linus Torvalds. This site is not affiliated with linus torvalds in any way.