How to Install Fedora 23 Server - Cockpit Management Tool
To Install Fedora 23 Server and its Administration using Cockpit Management Tool
The Installation of Fedora 23 server and the administration is illustrated in this tutorial using the Cockpit management tool.
New Features in Fedora 23 Server
- Graphical user interface known as “ CockPit” for the administration of remote server.
- A programmatic interface called “ RoleKit” for easier deployment.
- Default Installation of Perl 5.22.
- Default Disabling of RC4 and SSLv3.
- Support of Unicode 8.0.
- Replacement of python 2 by Python 3.
- Upgrades of DNF System.
For the installation of Fedora 23 Server on our system, we have to make sure that our system should satisfy the following requirements:
Requirements
- 1 GB RAM
- Minimum resolution of 800× 600 for Graphical installation
- 1 GHz or even faster CPU
- 10 GB of unallocated Disk Space
Steps to install Fedora 23 Server
With the help of Unetbootin tool, Rufus or Brasero, prepare a bootable USB flash drive.
After preparing bootable media, fix it in the suitable port/device and boot from it. Watch the initial install screen:
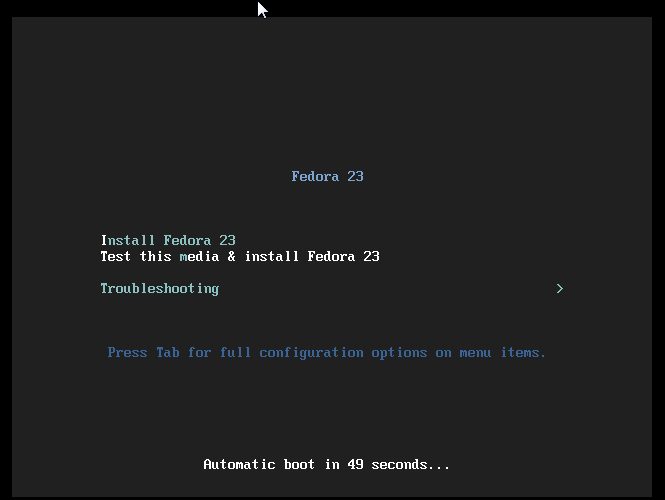
Click install option and wait for some time to go to the next screen. There you will have the option for changing installation language. Click the suitable one and proceed:

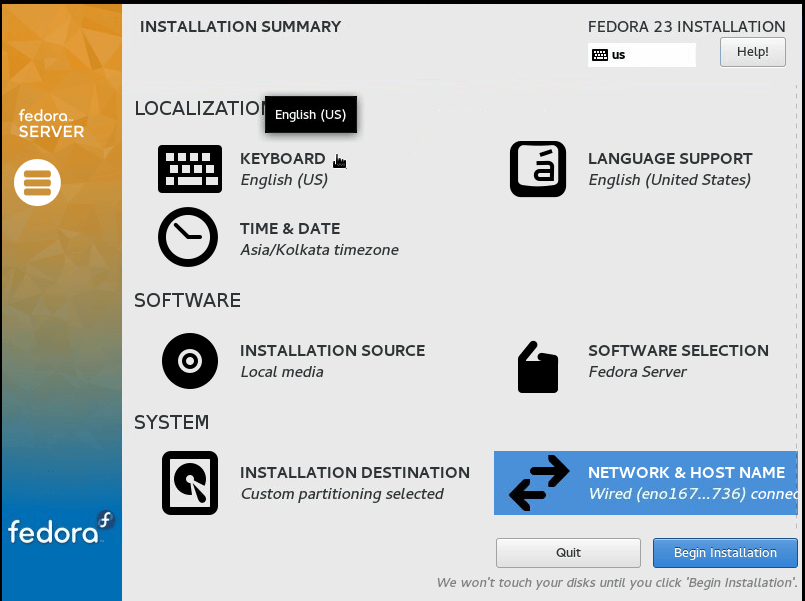
Now the Installation Summary screen will appear.
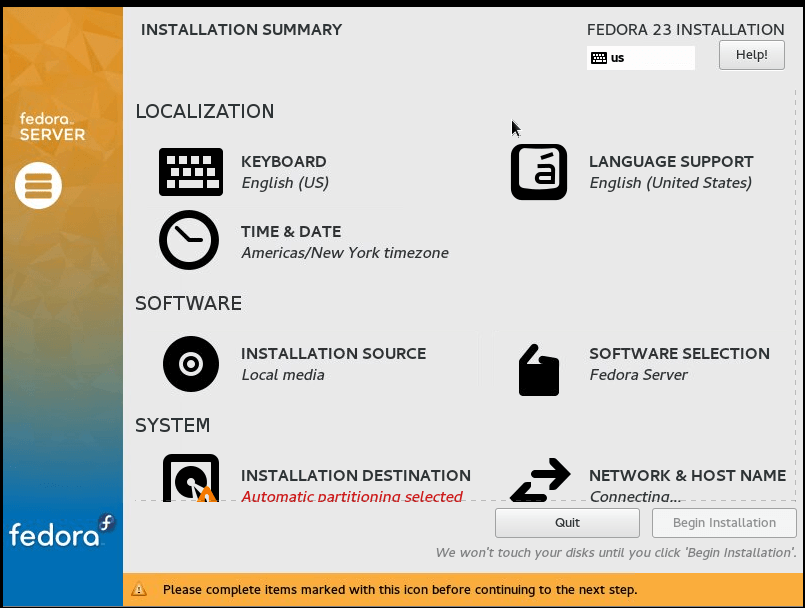
By using the above options, we can able to configure our preferred settings.
Keyboard Configuration
Here we have the option to select the keyboard layouts for our server. In order to add more, click the plus sign:
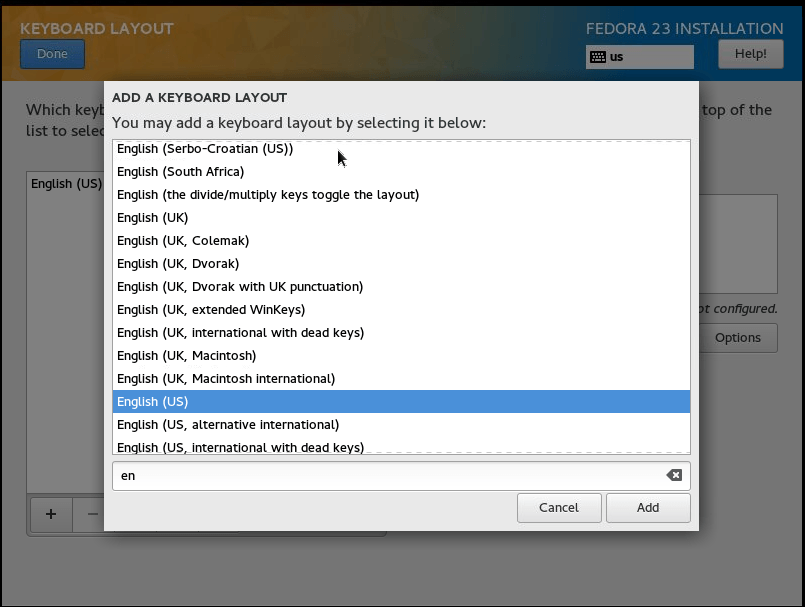
After selecting the choice, click Done, which is displayed on the upper left corner. It directs us to the Installation Summary screen.
Language Support setting
To configure the language support for our Fedora server, we have to select the appropriate language displayed on the screen.
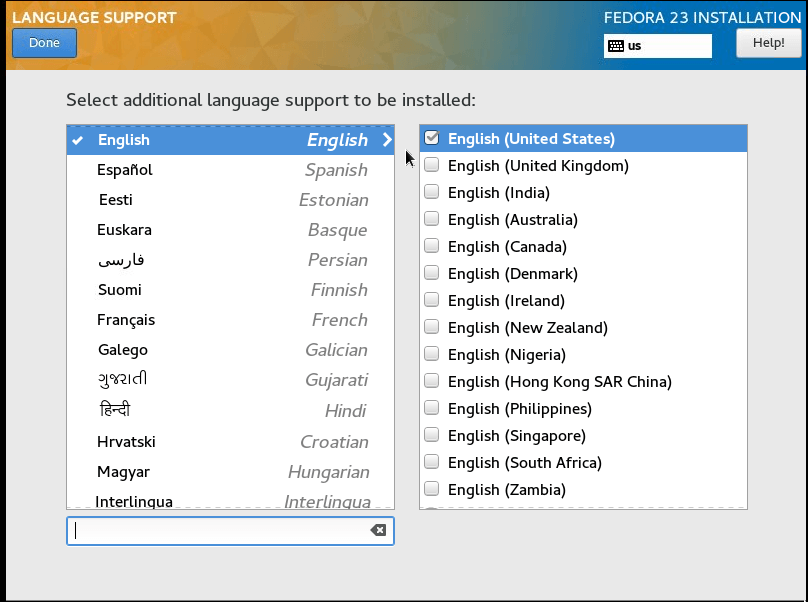
After selecting the appropriate language, click the “ Done” button on the top left corner.
Date and Time setting
Here we will be allowed to fix the Date & Time for our server by choosing the suitable time zone from the drop down menu or on the map:

Click Done button, after the selection of suitable time settings.
Installation Source Selection
The Installation Source helps us to predict the media for installing the operating system. Here we have the option to change the installation source from network destination.
In addition to that, we can also apply the installation updates here, without using the source image packages
: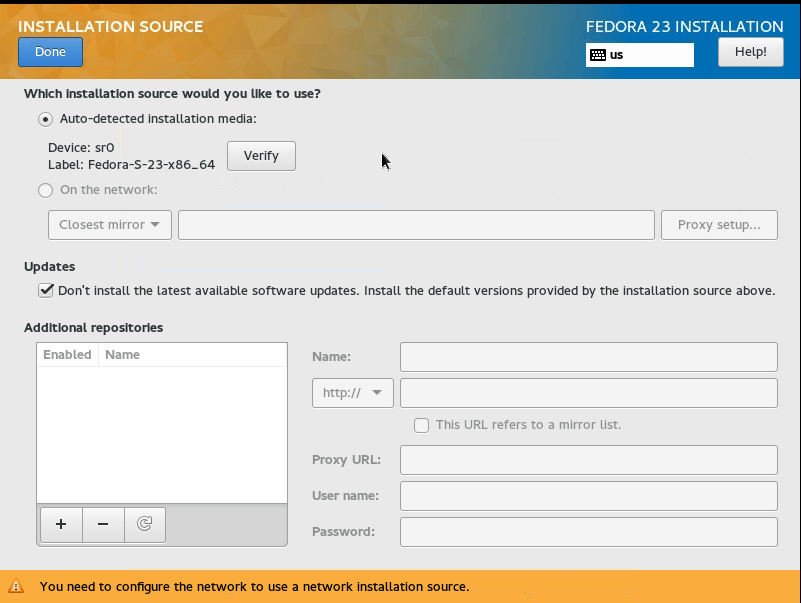
After completing it, click Done button.
Selection of Software
Here we can select the appropriate software, which is to be pre-installed on our server at the time of booting. Here we also have the 4 predefined options as follow
- An easier and integrated Fedora Server for server management.
- An advanced user option called “ Minimal install” , which is a minimum amount of software. With the use of that, we can configure everything.
- Infrastructure Server for the maintenance of network infrastructure services.
The most common selections are:
- FTP server
- MariaDB (MySQL) Database
- Common Network Manager Sub modules
- Hardware support
- System Tools
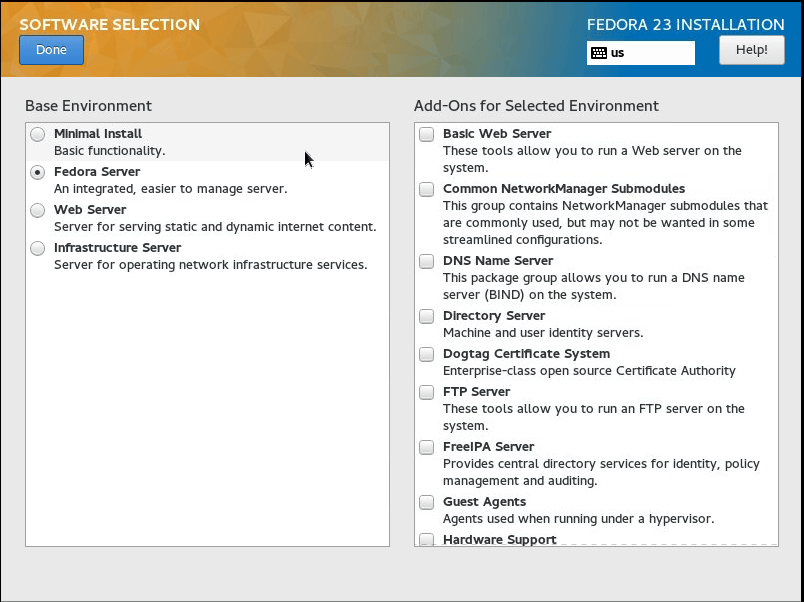
Now we have to click the blue Done button after selecting our choice, which will direct us once again to the Installation Summary window.
Configuration of Installation Destination
Click the Installation Destination option and select the disk, whatever you want, for installing Fedora 23 Server. Then click I will configure partitioning:
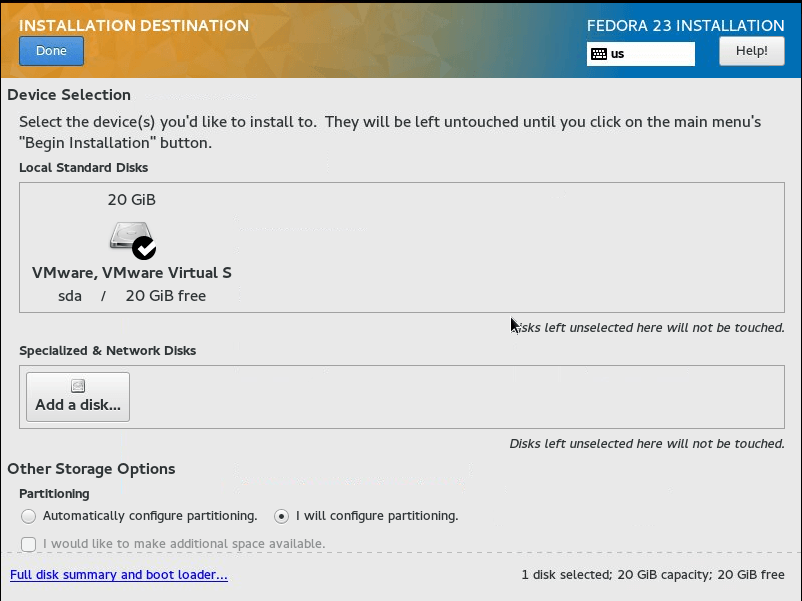
Now the disk partitions of our server can be configured by clicking the blue Done button.
From the drop down menu, click standard partition and then click the plus + sign, thereby we can create our first disk partition.
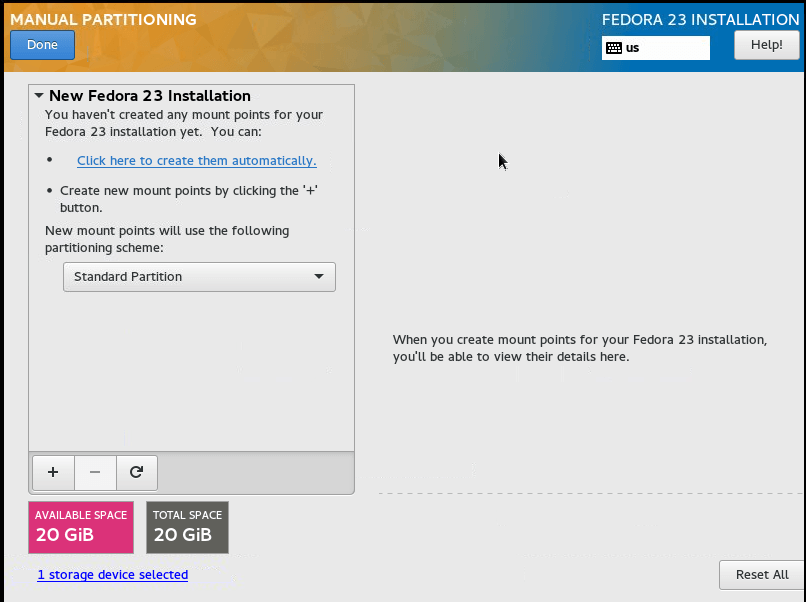
Here we have to fix the Desired Capacity and Mount Point of the partition, on the smaller window, which is appearing on the screen.
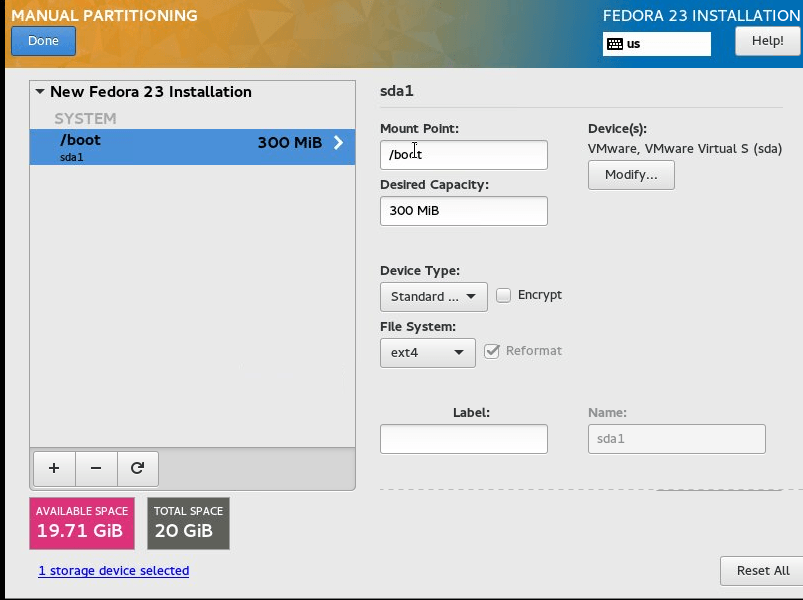
Set the Mount Point as /boot, and the Desired Capacity as 300MB.
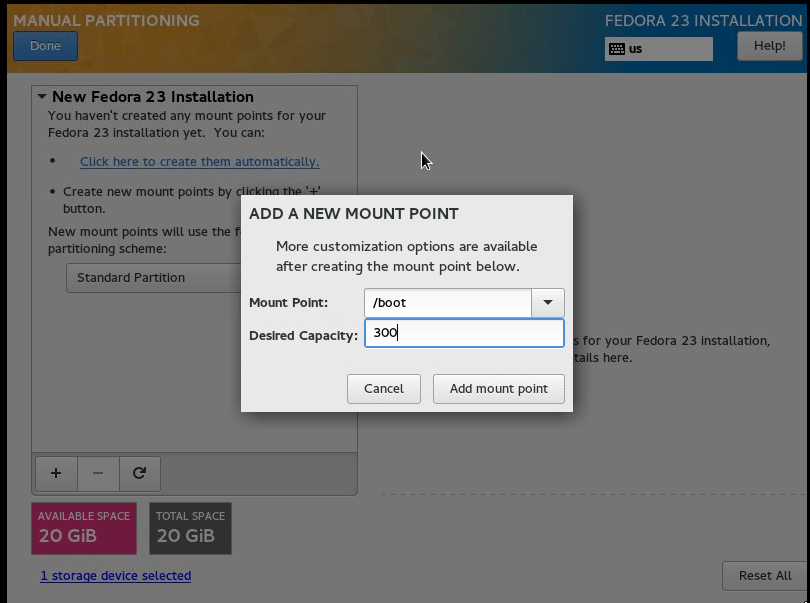
After creating the partition, select ext4.
Here we can add swap memory for our server, which can be helpful at the time, when our server goes out.
But also we have to make sure that swap is always slower than physical memory, and we can’ t use it often.
Now click the plus “ +” sign once again to add “ swap” memory and also select “ swap” from the drop down menu, which appears in the new window.
Fix the Mount Point as “ Swap” and desired capacity as “ 2 GB“ .

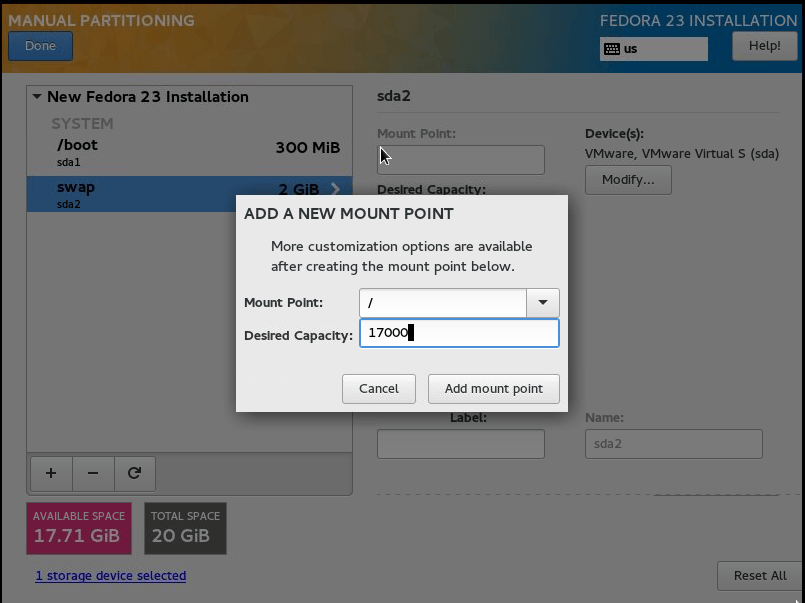
Here we can create our “ /” partition, by selecting “ /” from the drop down menu and clicking the “ +” button.
Fix the Mount Point as “ /” and set the Desired Capacity 17000MB.
Now click the blue “ Done” button, which will lead us to the list of changes that have to be done on the disk:
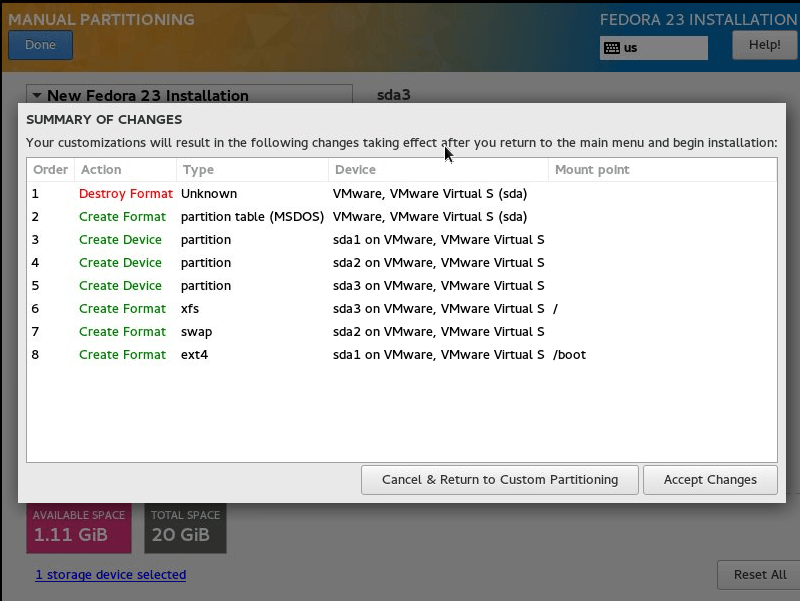
Click the Accept Changes option, if everything is fine. Now we will be directed to the Installation Summary screen.
Network & Hostname Configuration
Here we can change the host name by just entering the suitable name next to Host Name:
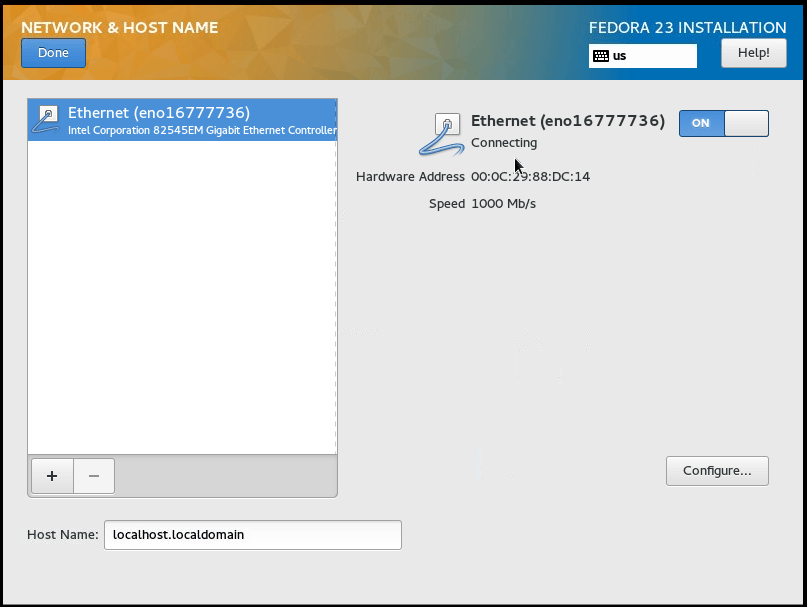
Click the right side Configure button for the configuration of network settings for our server.
A new window appears where you can do the following:
Select IPv4 Settings
Select Manual next to Method
Select the Add button
Enter the appropriate IP settings, which are provided by the ISP.
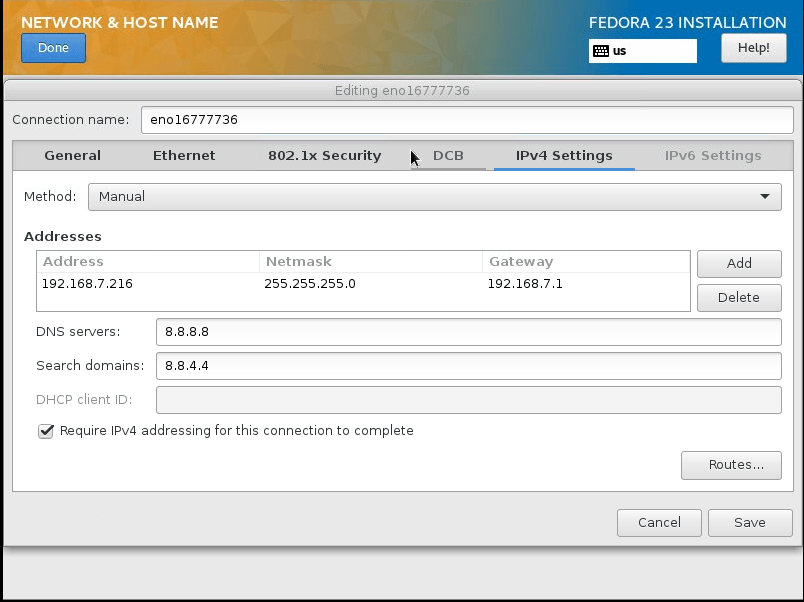
Now save all the changes and click Done button.
Start Installation
Click Begin Installation button, which is displayed in the bottom right:
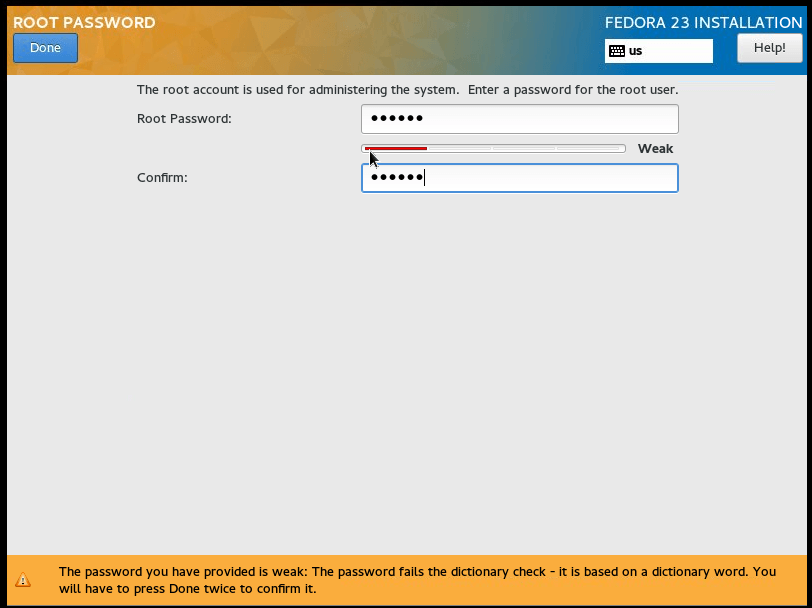
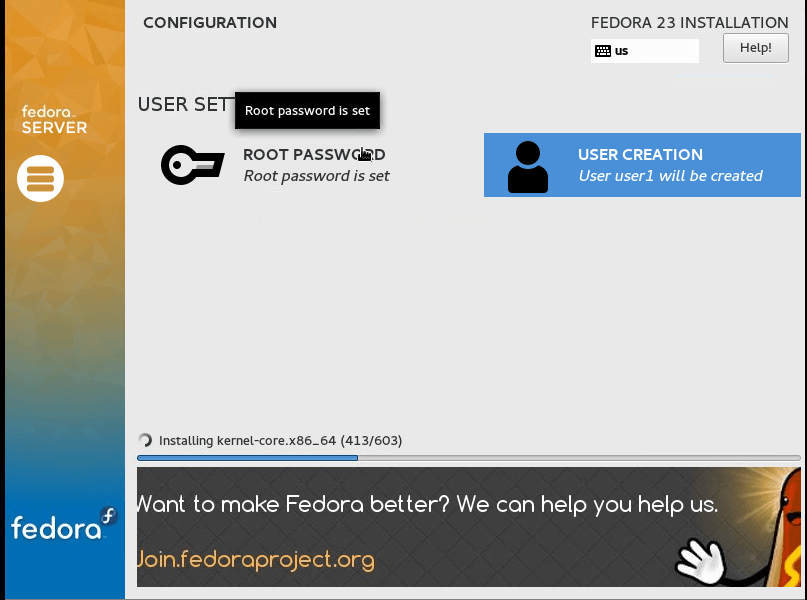
With the continuation of the installation, we have to configure the password of the root user, by clicking the ROOT PASSWORD and setting a strong password. In addition to that, we can create additional user account, which is an optional one.
Here we are allowed to create user account for our new server, by filling the username, real name and password.

Wait for some time and let the installation complete.
After the completion of installation, select the reboot option on the bottom right, which enables us to eject the installation media and boot to the new server.

Now we will access our server with the configured root user.
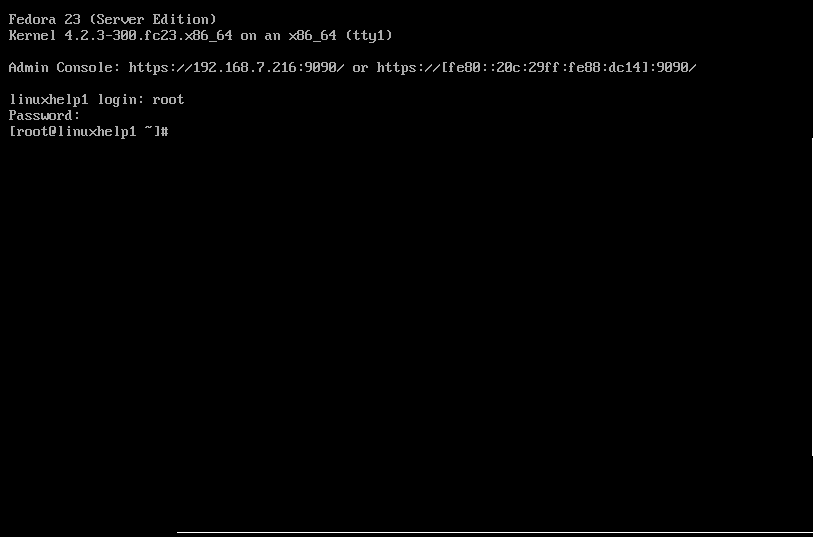
Administration of Fedora 23 Server using Cockpit
A control panel known as “ Cockpit” is used, which is very helpful for new administrators, and also let us manage the services of our server through browser.
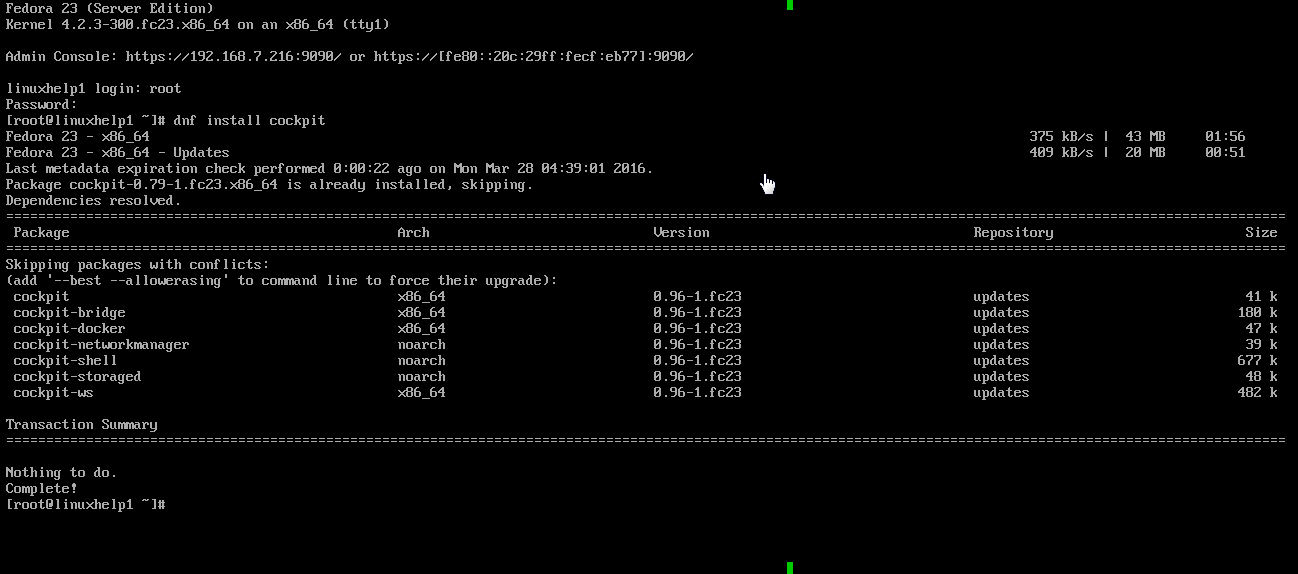
For the installation of cockpit on our server, we have to run the commands as follows:
[root@linuxhelp1 ~]# dnfinstall cockpit
To start the cockpit service
[root@linuxhelp1 ~]# systemctl enable cockpit.socket
[root@linuxhelp1 ~]# systemctl start cockpit
[root@linuxhelp1 ~]# firewall-cmd --add-service=cockpit

Now we can access cockpit on the following URL in our browsers:
http://your-ip-address:9090
An SSL warning will appear. We have to ignore that and have to proceed:
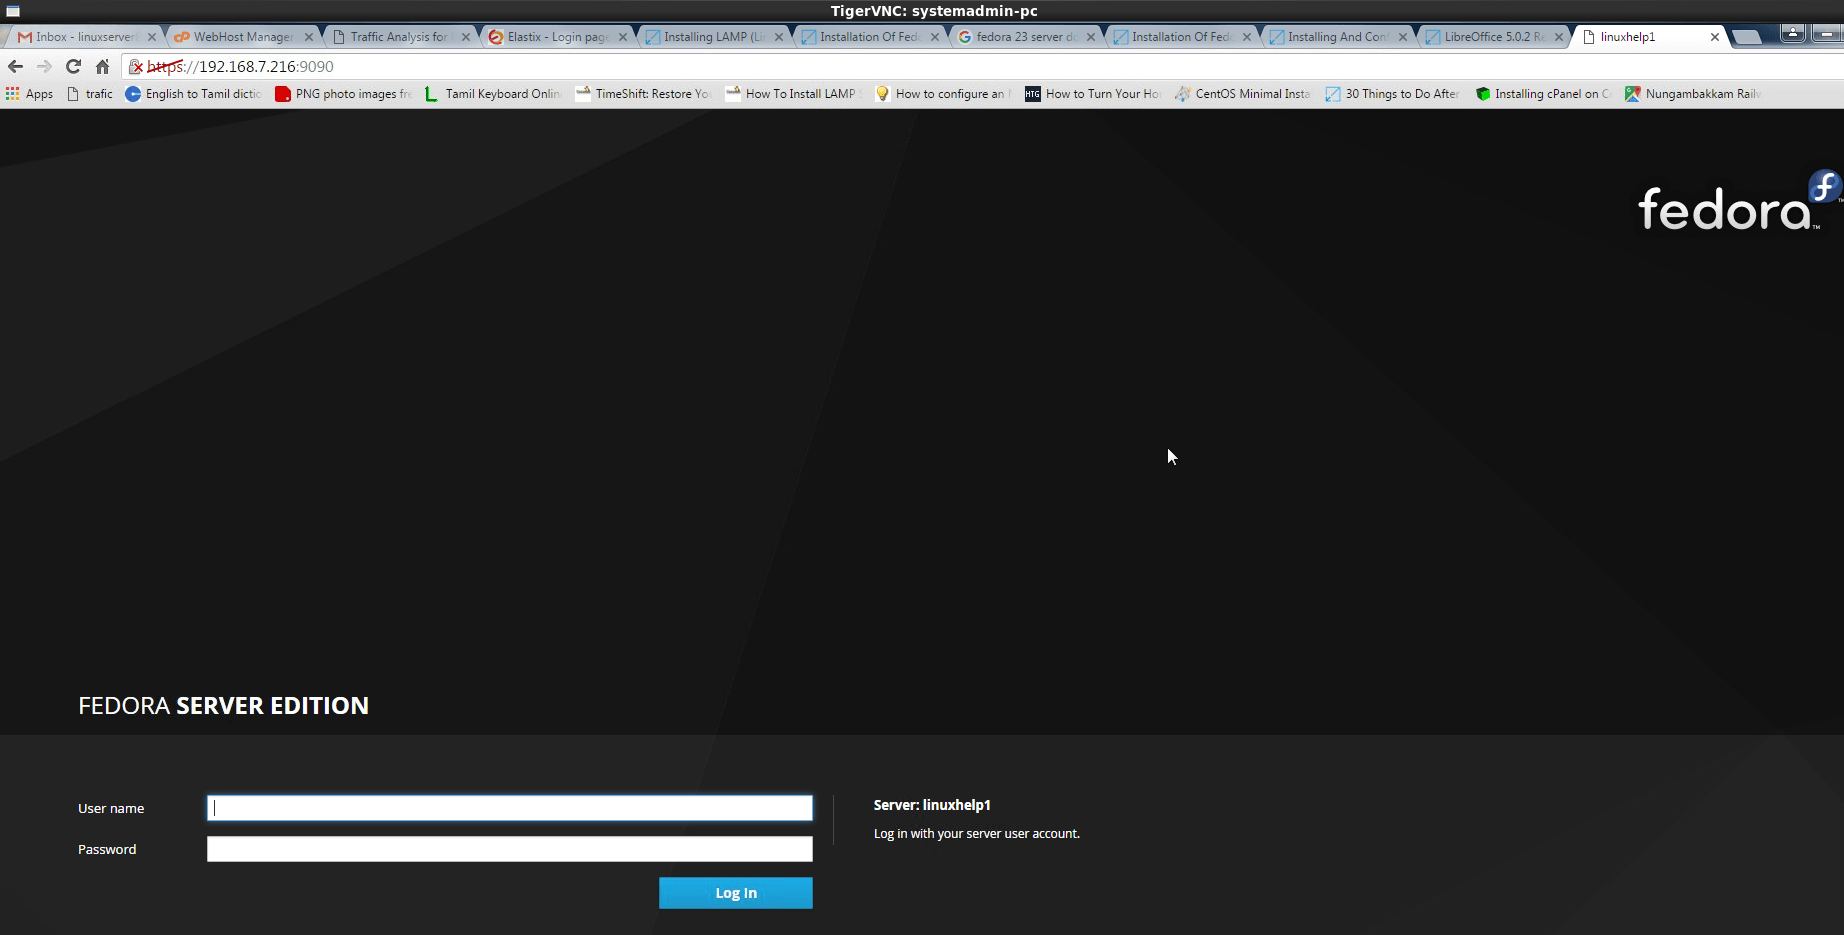
For authentication,
Set the Username as root and Password as the root password for our server.
The various sections of this control panel can be used for the following:
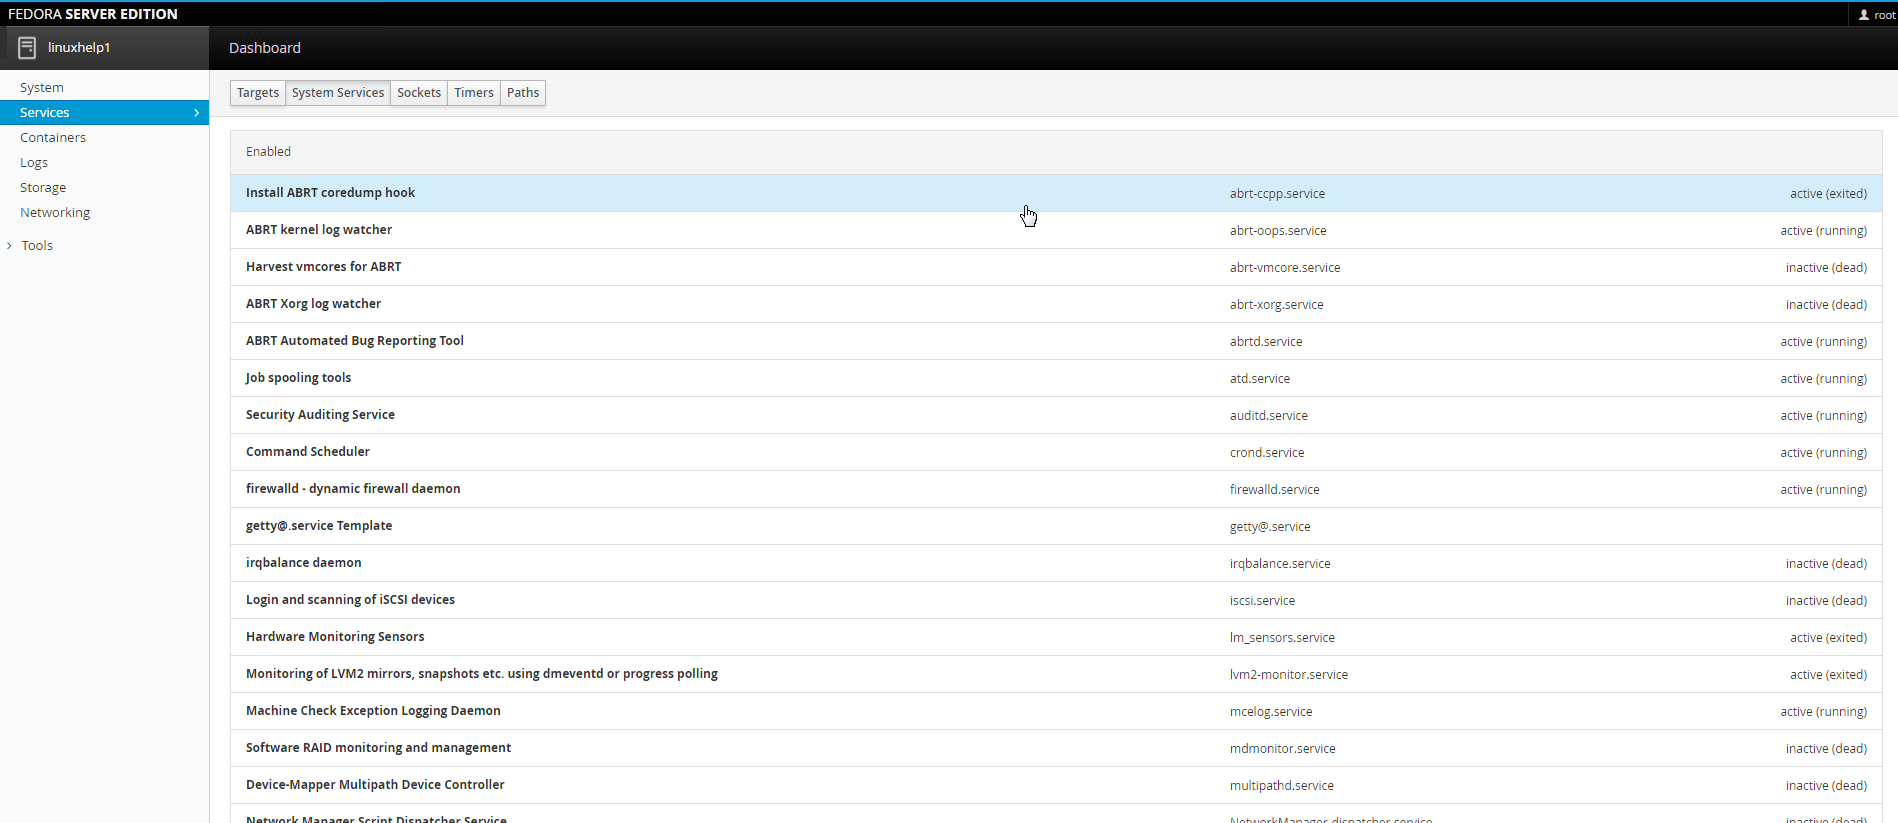
Enable/disable/stop/start/restart services
Check system load
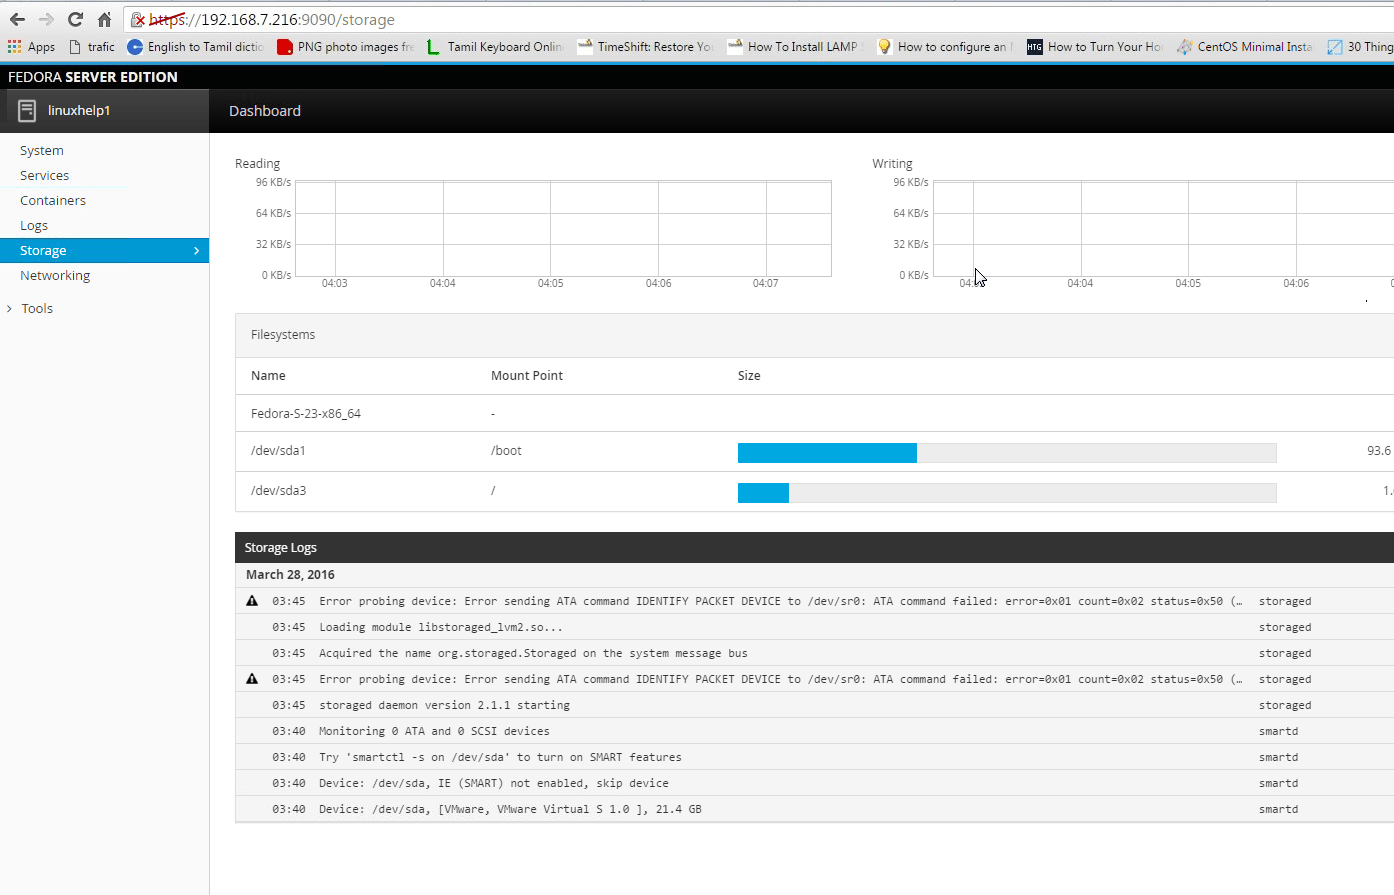
See disk usage and I/O operations
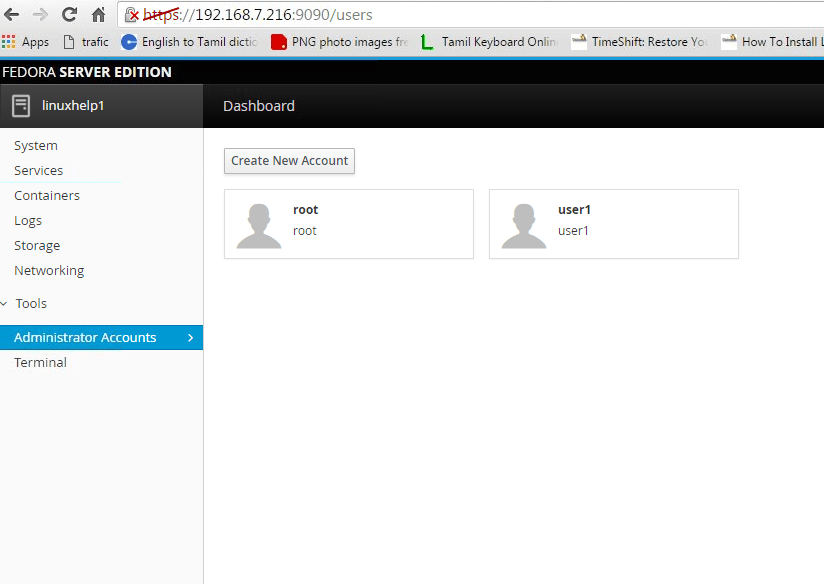
Manage accounts
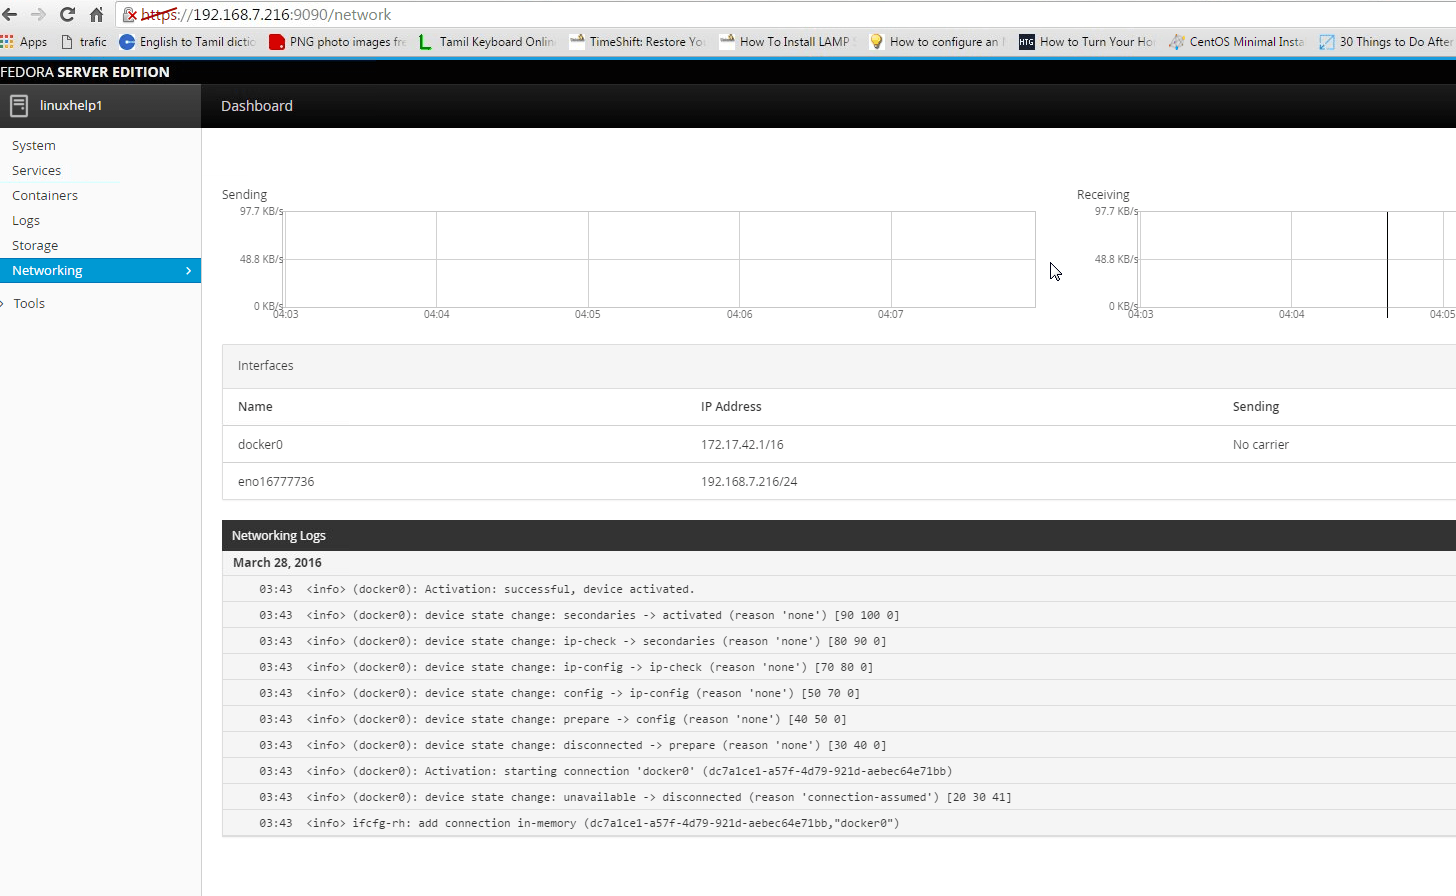
Review network stats
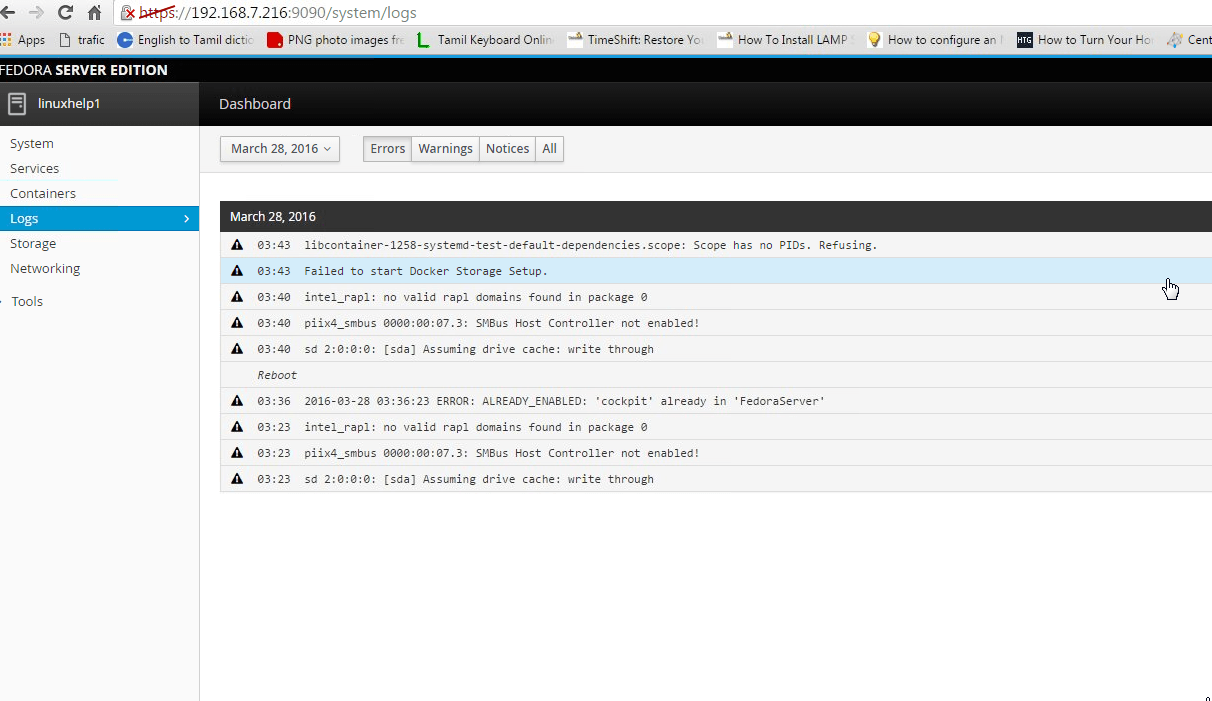
Review logs
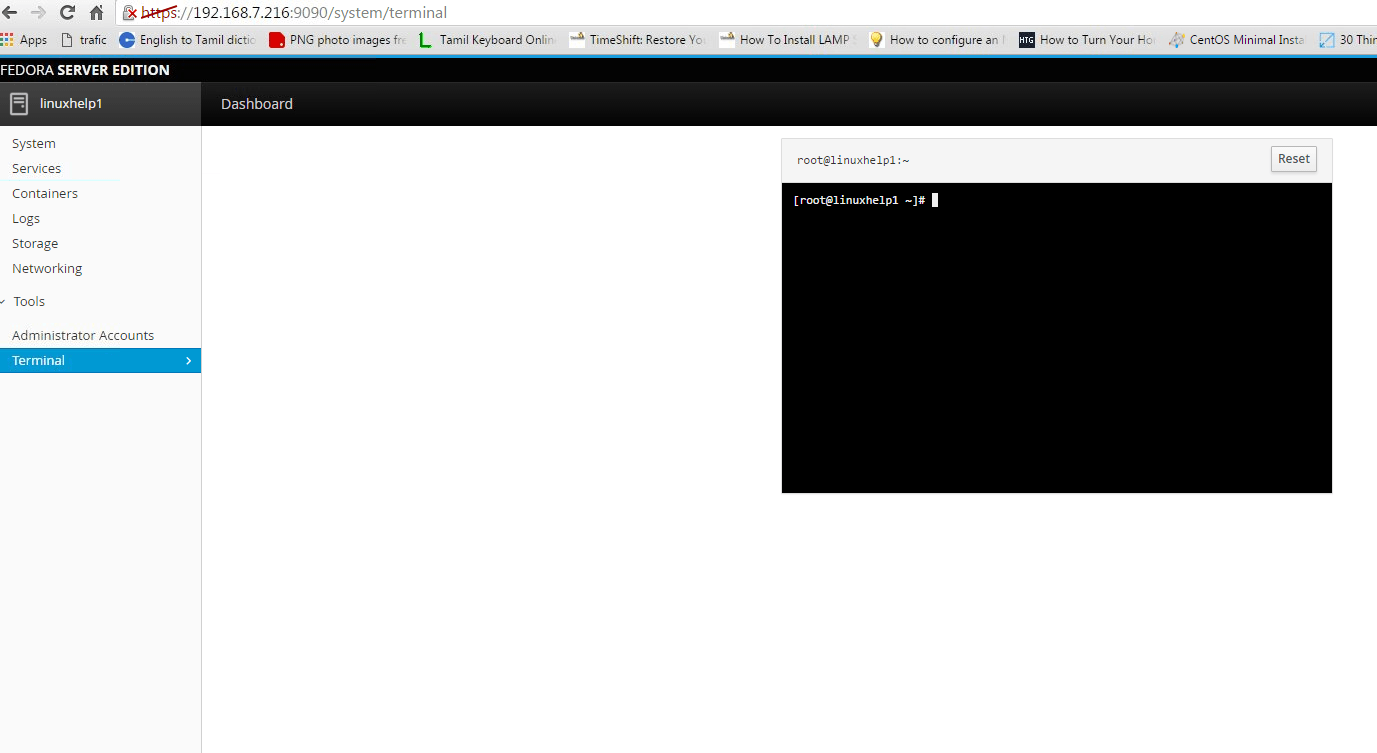
Use web terminal
System Load Checking

System Services Monitoring
System Logs Monitoring
Disk I/O Rate Monitoring
Network Usage Monitoring
Management of System Accounts
Web Terminal usage


Comments ( 0 )
No comments available