How To Install and configure samba server on Debian 11.3
- 00:35 cat /etc/os-release
- 00:45 ip a
- 00:51 apt install samba
- 01:03 systemctl enable smbd
- 01:18 systemctl status smbd
- 01:33 systemctl restart smbd
- 01:45 systemctl status smbd
- 02:04 mkdir /smbshare
- 02:20 nano /etc/samba/smb.conf
- 03:06 useradd smbuser
- 03:20 smbpasswd -a smbuser
- 03:50 chown smbuser:smbuser /smbshare/
- 04:10 systemctl restart smbd
- 04:36 touch /smbshare/user1
- 04:53 cd /smbshare/
- 04:57 ls
To Configure Samba Server with Debian 11.3
Introduction
The Samba package allows communication through the SMB (Server Message Block) protocol. It can be challenging to work in a hybrid environment. Even routine tasks like file/resource sharing or printer sharing can present challenges. Backing up the Inter-OS environment and working with MS Active Directory is not possible without Samba.
Step 1: Check the OS version by using the below command
[root@linuxhelp ~]# cat /etc/os-release

PRETTY_NAME="Debian GNU/Linux 11 (bullseye)"
NAME="Debian GNU/Linux"
VERSION_ID="11"
VERSION="11 (bullseye)"
VERSION_CODENAME=bullseye
Step 2: Check The IP Address by using the below command
[root@linuxhelp~]#  ip a

1: lo: <LOOPBACK,UP,LOWER_UP> mtu 65536 qdisc noqueue state UNKNOWN group default qlen 1000
    link/loopback 00:00:00:00:00:00 brd 00:00:00:00:00:00
    inet 127.0.0.1/8 scope host lo
       valid_lft forever preferred_lft forever
    inet6 ::1/128 scope host
       valid_lft forever preferred_lft forever
2: ens33: <BROADCAST,MULTICAST,UP,LOWER_UP> mtu 1500 qdisc pfifo_fast state UP group default qlen 1000
    link/ether 00:0c:29:f2:4d:6c brd ff:ff:ff:ff:ff:ff
    altname enp2s1
    inet 192.168.6.133/24 brd 192.168.6.255 scope global noprefixroute ens33
       valid_lft forever preferred_lft forever
    inet6 fe80::b6ad:ef36:1ad2:bcbb/64 scope link noprefixroute
       valid_lft forever preferred_lft forever
Step 3: Install the Samba server by using the below command
[root@linuxhelp ~]# apt install samba

Reading package lists... Done

Building dependency tree... Done
Reading state information... Done
The following package was automatically installed and is no longer required:
  libonig5
Use 'apt autoremove' to remove it.
The following additional packages will be installed:
  attr ibverbs-providers libcephfs2 libgfapi0 libgfrpc0 libgfxdr0 libglusterfs0
  libibverbs1 librados2 librdmacm1 liburing1 python3-dnspython python3-gpg
  python3-markdown python3-pygments python3-requests-toolbelt python3-samba
  python3-tdb samba-common samba-common-bin samba-dsdb-modules samba-vfs-modules
  tdb-tools

Done
Setting up libgfrpc0:amd64 (9.2-1) ...
Setting up samba (2:4.13.13+dfsg-1~deb11u3) ...
Adding group `sambashare' (GID 131) ...
Done.
Samba is not being run as an AD Domain Controller: Masking samba-ad-dc.service.
Step 4: Enable the samba service and reboot by using the below command
[root@linuxhelp ~]# systemctl enable smbd

Synchronizing state of smbd.service with SysV service script with /lib/systemd/systemd-sysv-install.
Executing: /lib/systemd/systemd-sysv-install enable smbd
Step 5: Check the status from smdb by using the below command
[root@linuxhelp ~#] systemctl ststus smbd

Unknown command verb ststus.
root@linuxhelp:~# systemctl status smbd
● smbd.service - Samba SMB Daemon
     Loaded: loaded (/lib/systemd/system/smbd.service; enabled; vendor preset: enabled)
     Active: inactive (dead)
       Docs: man:smbd(8)
             man:samba(7)
             man:smb.conf(5)
Step 6: Restart the smdb service by using the below command
[root@linuxhelp ~]# systemctl restart smbd
Step 7: Check the status smdb service by using the below command
[root@linuxhelp~]# systemctl status smbd

● smbd.service - Samba SMB Daemon
     Loaded: loaded (/lib/systemd/system/smbd.service; enabled; vendor preset: enabled)
     Active: active (running) since Tue 2022-05-31 04:16:47 IST; 4s ago
       Docs: man:smbd(8)
             man:samba(7)
             man:smb.conf(5)
      Tasks: 4 (limit: 4620)
     Memory: 14.8M
        CPU: 93ms
Step 8: Create a folder by using the below command
[root@linuxhelp ~]# mkdir /smbshare
[root@linuxhelp ~]# cp /etc/samba/smb.conf smb.conf.orig
Step 9: Open the samba configuration file and add the user details by using the below command
root@linuxhelp:~# nano /etc/samba/smb.conf
Step 10: Add the samba user by using the below command
[root@linuxhelp ~]# useradd smbuser

[root@linuxhelp ~]# smbpasswd -a smbuser

New SMB password:
Retype new SMB password:
Added user smbuser.
Step 11: Change the Directory by using the below command
root@linuxhelp ~]# cd /smbshare/

[root@linuxhelp/smbshare ~#] ls

user1
root@linuxhelp:/smbshare#
Step 12: Make smbuser owner for samba share user by using the below command
[root@linuxhelp ~#] chown smbuser:smbuser /smbshare/
Step 13: Restart the samba service by using the below command
[root@linuxhelp ~]# systemctl restart smbd

[root@linuxhelp ~]# systemctl restart smbd
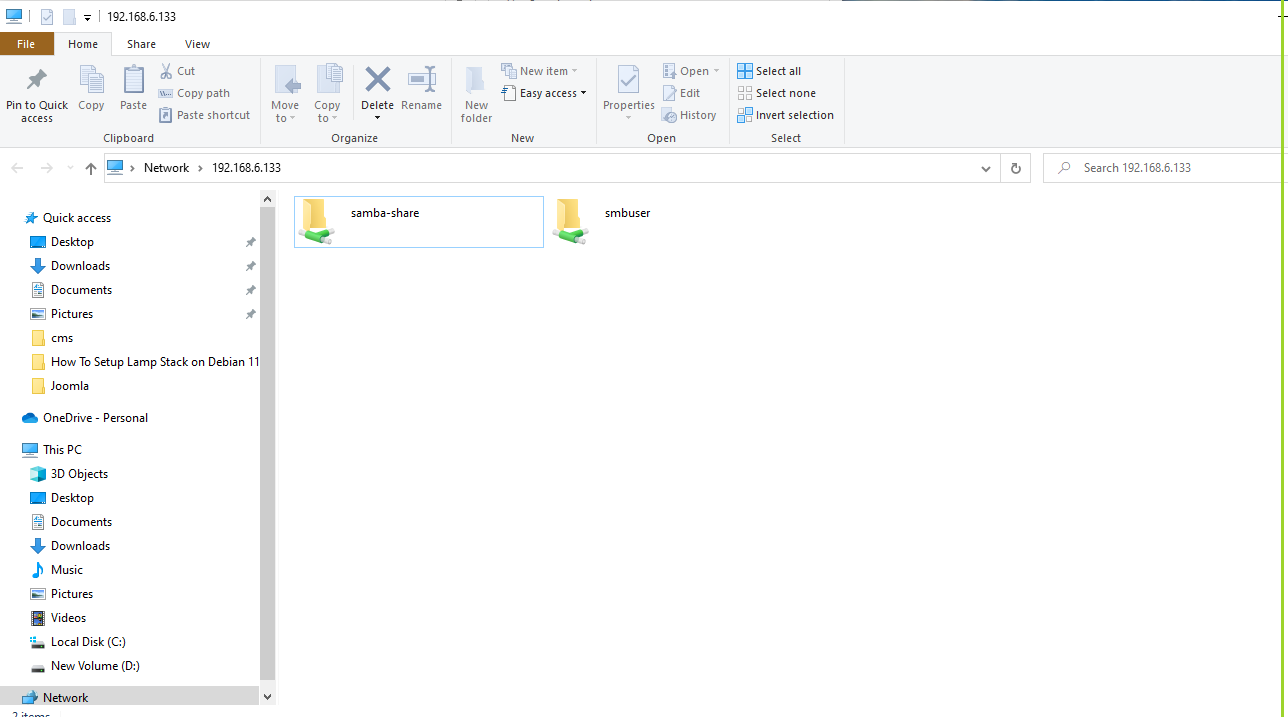
Step 14: Open an MS window client. Browse with the IP address of samba share and press enter as shown in the below image
Step 15: Create a new file and see the file by using the below command
[root@linuxhelp ~]# touch /smbshare/user1

[root@linuxhelp ~]# cd /smbshare/

root@linuxhelp:/smbshare# ls
user1
root@linuxhelp:/smbshare#
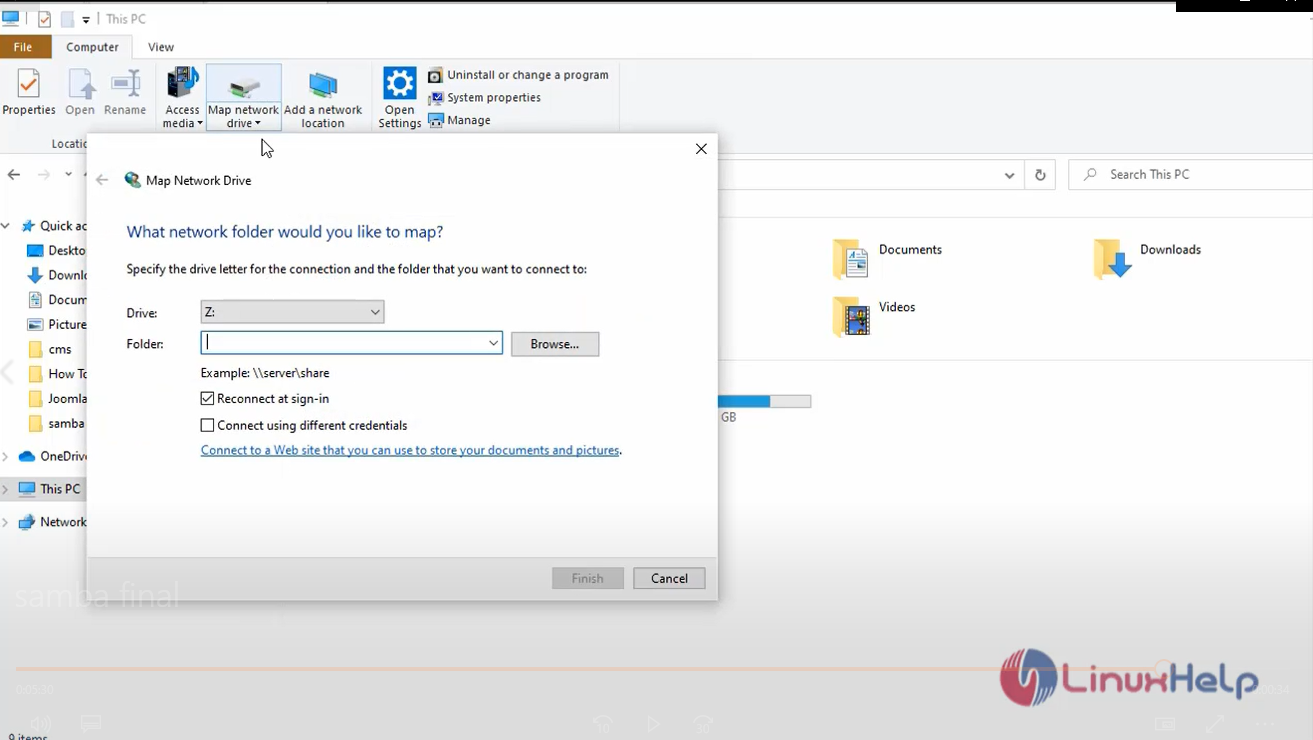
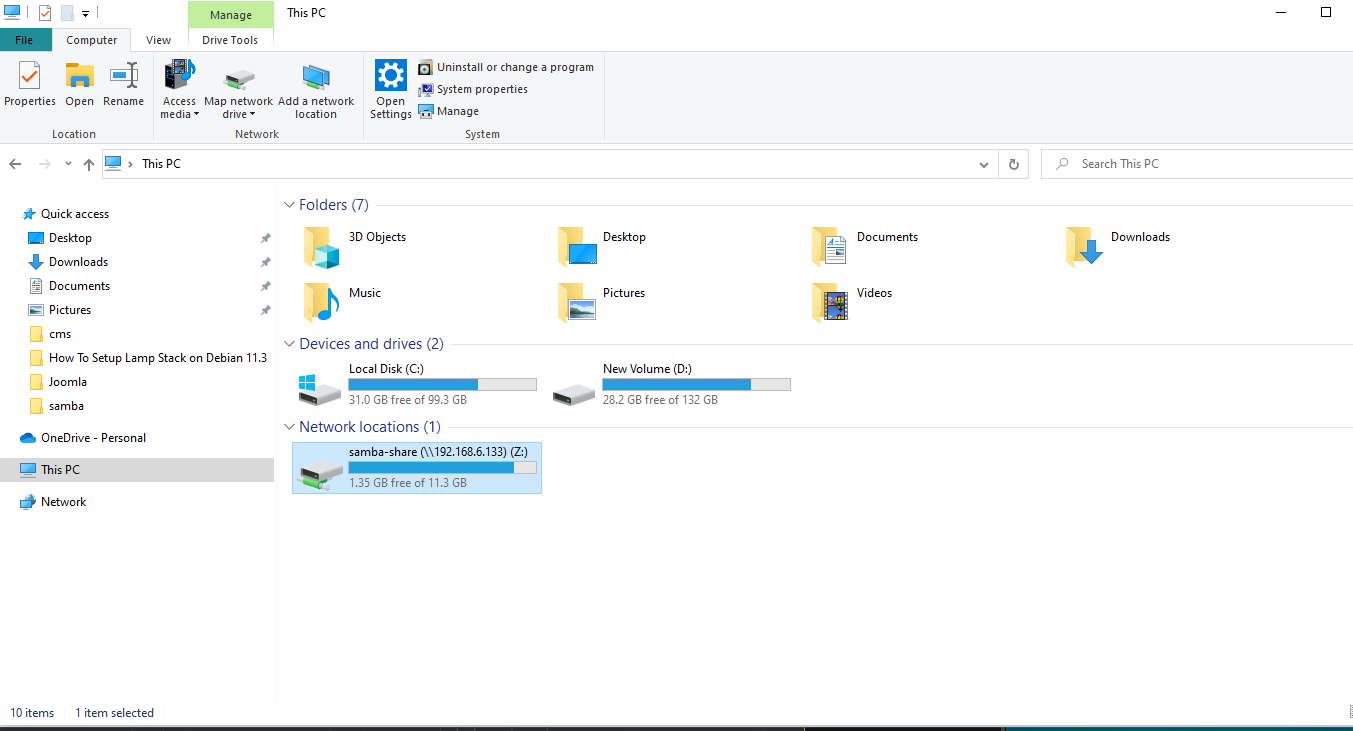
Step 16: Mount the share folder on Ms Windows’s client permanently as shown in the below image.
By this how to configure Samba server with Debian 11 has come to an end.
Comments ( 0 )
No comments available