How to install Xrdp Server (Remote Desktop) on Debian 11.3
- 00:35 lsb_release -a
- 00:45 apt-get update
- 01:10 sudo apt install xrdp
- 01:35 systemctl start xrdp
- 01:54 systemctl status xrdp
- 02:15 systemctl enable xrdp
- 02:30 sudo adduser xrdp ssl-cert
- 02:55 sudo systemctl restart xrdp
- 03:14 sudo ufw status
- 03:28 sudo ufw allow 3389
- 03:49 sudo ufw status
- 04:03 ip a
To Install Xrdp Server (Remote Desktop) On Debian 11.3
Introduction:
Xrdp is a free and open-source implementation of the Microsoft RDP (Remote Desktop Protocol) server that allows operating systems other than Microsoft Windows (such as Linux and BSD-style operating systems) to give a fully functional RDP-compatible remote desktop experience.
Procedure:
Step 1: Check the installed version of OS by using the below command
[root@linuxhelp ~] # lsb_release -a
 No LSB modules are available.
Distributor ID: Debian
Description:    Debian GNU/Linux 11 (bullseye)
Release:        11
Codename:       bullseye
Step 2: Next Update APT repository cache by using the below command
[root@linuxhelp ~]# apt-get update
Get:1 http://deb.debian.org/debian bullseye InRelease [116 kB]
Get:2 http://repo.mysql.com/apt/debian bullseye InRelease [12.9 kB]
Get:3 http://security.debian.org/debian-security bullseye-security InRelease [48.4 kB]
Get:4 http://deb.debian.org/debian bullseye-updates InRelease [44.1 kB]
Get:5 http://deb.debian.org/debian bullseye/main Sources [8,633 kB]
Get:6 https://packages.sury.org/php bullseye InRelease [6,841 B]
Get:7 http://repo.mysql.com/apt/debian bullseye/mysql-8.0 Sources [938 B]
Fetched 24.1 MB in 7s (3,664 kB/s)
Reading package lists... Done
Building dependency tree... Done
Reading state information... Done
Step 3: Now Install the Xrdp package by using below command.
root@linuxhelp: ~# sudo apt install xrdp
Reading package lists... Done
Building dependency tree... Done
Reading state information... Done
The following additional packages will be installed:
  xorgxrdp
Suggested packages:
  guacamole xrdp-pulseaudio-installer
The following NEW packages will be installed:
  xorgxrdp xrdp
0 upgraded, 2 newly installed, 0 to remove and 141 not upgraded.
Need to get 506 kB of archives.
After this operation, 3,238 kB of additional disk space will be used.
Do you want to continue? [Y/n] y
Get:1 http://deb.debian.org/debian bullseye/main amd64 xrdp amd64 0.9.12-1.1 [446 kB]
Get:2 http://deb.debian.org/debian bullseye/main amd64 xorgxrdp amd64 1:0.2.12-1 [59.9 kB]
Fetched 506 kB in 0s (1,501 kB/s)
Selecting previously unselected package xrdp.
(Reading database ... 149281 files and directories currently installed.)
Preparing to unpack .../xrdp_0.9.12-1.1_amd64.deb ...
Unpacking xrdp (0.9.12-1.1) ...
Selecting previously unselected package xorgxrdp.
Preparing to unpack .../xorgxrdp_1%3a0.2.12-1_amd64.deb ...
Unpacking xorgxrdp (1:0.2.12-1) ...
Setting up xrdp (0.9.12-1.1) ...
Generating 2048 bit rsa key...
ssl_gen_key_xrdp1 ok
saving to /etc/xrdp/rsakeys.ini
Created symlink /etc/systemd/system/multi-user.target.wants/xrdp-sesman.service → /lib/systemd/system/xrdp-sesman.service.
Created symlink /etc/systemd/system/multi-user.target.wants/xrdp.service → /lib/systemd/system/xrdp.service.
Setting up xorgxrdp (1:0.2.12-1) ...
Processing triggers for man-db (2.9.4-2) ...
Processing triggers for libc-bin (2.31-13+deb11u3) ...
Step 4: Start the Xrdp service by using the below command.
[root@linuxhelp ~] # systemctl start xrdp
Step 5: Check the status of xrdp by using the below command.
[root@linuxhelp ~] # systemctl status xrdp
● xrdp. service - xrdp daemon
     Loaded: loaded (/lib/systemd/system/xrdp.service; enabled; vendor preset: enabled)
     Active: active (running) since Mon 2022-09-12 01:50:39 IST; 9s ago
       Docs: man:xrdp(8)
             man:xrdp.ini(5)
    Process: 29340 ExecStartPre=/bin/sh /usr/share/xrdp/socksetup (code=exited, status=0/SUCCESS)
    Process: 29348 ExecStart=/usr/sbin/xrdp $XRDP_OPTIONS (code=exited, status=0/SUCCESS)
   Main PID: 29349 (xrdp)
      Tasks: 1 (limit: 3450)
     Memory: 772.0K
        CPU: 17ms
     CGroup: /system.slice/xrdp.service
             └─29349 /usr/sbin/xrdp
Step 6: Next Enable the Xrdp service by using the below command
[root@linuxhelp ~]# systemctl enable xrdp
Synchronizing state of xrdp.service with SysV service script with /lib/systemd/systemd-sysv-install.
Executing: /lib/systemd/systemd-sysv-install enable xrdp
Step 7: Add Xrdp user to SSL-Cert group by using the below command
[root@linuxhelp ~]# sudo adduser xrdp ssl-cert
Adding user `xrdp' to group `ssl-cert' ...
Adding user xrdp to group ssl-cert
Done.
Step 8: Restart the xrdp service by using the below command
[root@linuxhelp ~]# sudo systemctl restart xrdp
Step 9: Check the status from firewall by using the below command
root@linuxhelp: ~# sudo ufw status
Status: active
To                         Action      From
--                         ------      ----
OpenSSH                    ALLOW       Anywhere

3389                       ALLOW       Anywhere
OpenSSH (v6)               ALLOW       Anywhere (v6)
Step 10: Allow port in firewall using the below command
[root@linuxhelp ~]# sudo ufw allow 3389
Step 11: Again, Check the status from firewall by using the below command
root@linuxhelp:~# sudo ufw status
Status: active

To                         Action      From
--                         ------      ----
OpenSSH                    ALLOW       Anywhere
3389                       ALLOW       Anywhere
OpenSSH (v6)               ALLOW       Anywhere (v6)
3389 (v6)                  ALLOW       Anywhere (v6)
Step 12: Next, check the IP Address of the system by using the below command
[root@linuxhelp ~]# ip a
1: lo: <LOOPBACK,UP,LOWER_UP> mtu 65536 qdisc noqueue state UNKNOWN group default qlen 1000
    link/loopback 00:00:00:00:00:00 brd 00:00:00:00:00:00
    inet 127.0.0.1/8 scope host lo
       valid_lft forever preferred_lft forever
    inet6 ::1/128 scope host

       valid_lft forever preferred_lft forever
2: ens33: <BROADCAST,MULTICAST,UP,LOWER_UP> mtu 1500 qdisc pfifo_fast state UNKNOWN group default qlen 1000
    link/ether 00:0c:29:f7:6f:3e brd ff:ff:ff:ff:ff:ff
    altname enp2s1
    inet 192.168.2.128/24 brd 192.168.2.255 scope global noprefixroute ens33
       valid_lft forever preferred_lft forever
    inet6 fe80::20c:29ff:fef7:6f3e/64 scope link noprefixroute
       valid_lft forever preferred_lft forever
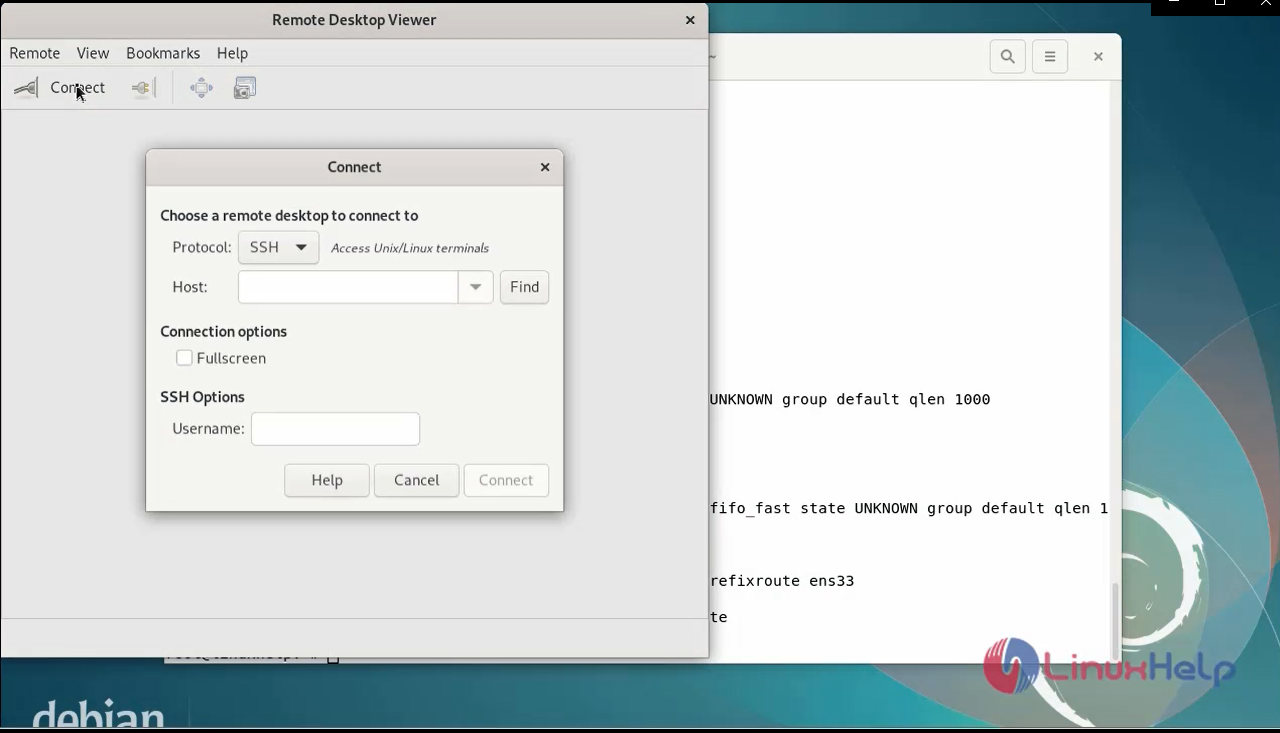
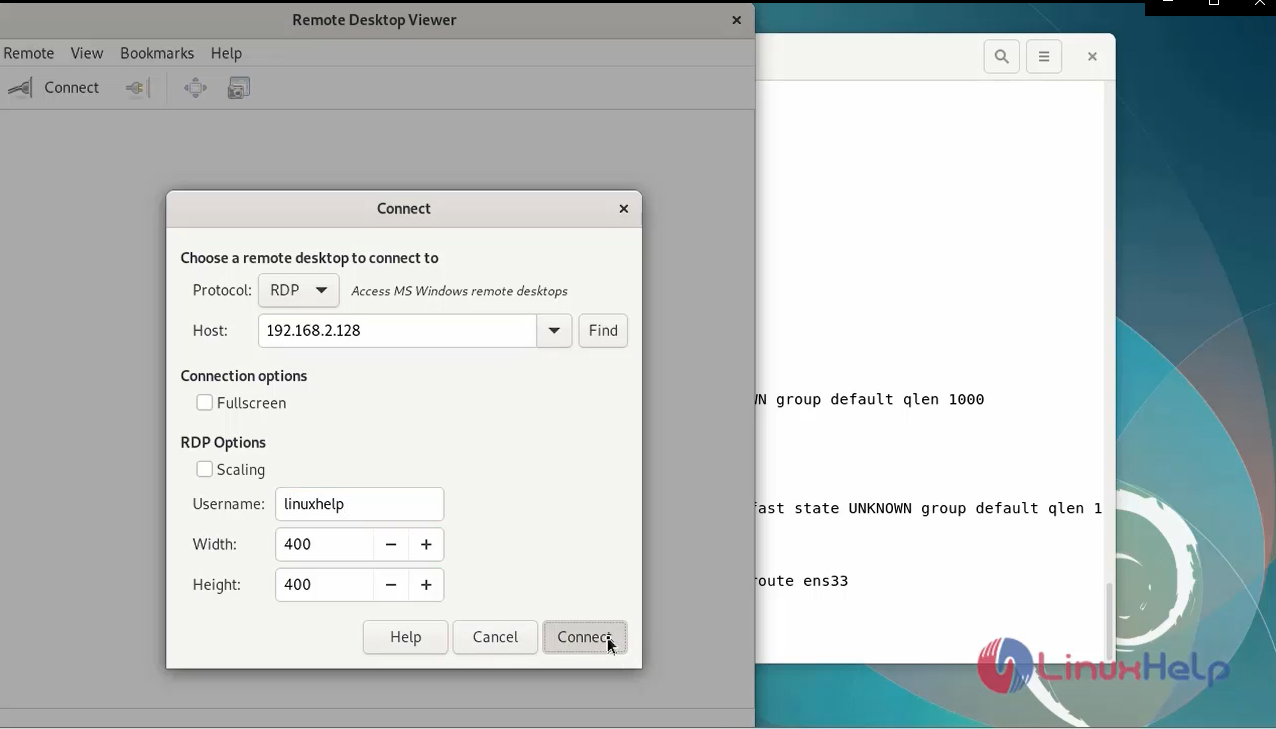
Step 13: Open your local Xrdp client and connect to the remote as shown in the below image
Step 14: On the login screen, enter click “YES”” as shown in the image
Step 15: This is the login page of Xrdp.

Conclusion:
We have reached the end of this article. In this guide, we have walked you through the steps required to install Xrdp Server (Remote Desktop) on Debian 11.3. Your feedback is much welcome.
Comments ( 0 )
No comments available