How to install Quick CMS on Rocky Linux 9.2
- 00:23 Cat /etc/os-release
- 00:38 yum install httpd httpd-tools php php-curl php-gd php-mbstring php-zip php-json -y
- 01:04 systemctl enable httpd
- 01:13 systemctl start httpd
- 01:29 systemctl status httpd
- 01:52 firewall-cmd --permanent --add-service=http
- 02:16 firewall-cmd --permanent --add-service=https
- 02:25 firewall-cmd --reload
- 02:48 mkdir /var/www/html/quickcms
- 03:09 cd /var/www/html/quickcms
- 03:24 wget https://opensolution.org/download/home.html?sFile=Quick.Cms_v6.7-en.zip
- 03:50 mv 'home.html?sFile=Quick.Cms_v6.7-en.zip' quickcms.zip
- 04:16 unzip quickcms.zip
- 04:29 rm quickcms.zip
- 04:52 chmod -R 755 /var/www/html/quickcms
- 05:13 chown -R apache:apache /var/www/html/quickcms
- 05:32 chcon -R -t httpd_sys_content_rw_t /var/www/html/quickcms
- 05:43 vi /etc/httpd/conf.d/quickcms.conf
- 06:32 httpd -t
- 06:51 systemctl restart httpd
To Install Quick CMS On Rocky Linux 9.2
Introduction:
Quick CMS is an easy-to-use, PHP-based content management tool. With this tool, you can easily extend functionality and change the layout of your website.
Installation Step:
Step 1: Check the OS version by using the below command.
[root@Linuxhelp ~]# cat /etc/os-release
NAME="Rocky Linux"
VERSION="9.2 (Blue Onyx)"
ID="rocky"
ID_LIKE="rhel centos fedora"
VERSION_ID="9.2"
PLATFORM_ID="platform:el9"
PRETTY_NAME="Rocky Linux 9.2 (Blue Onyx)"
ANSI_COLOR="0;32"
LOGO="fedora-logo-icon"
CPE_NAME="cpe:/o:rocky:rocky:9::baseos"
HOME_URL="https://rockylinux.org/"
BUG_REPORT_URL="https://bugs.rockylinux.org/"
SUPPORT_END="2032-05-31"
ROCKY_SUPPORT_PRODUCT="Rocky-Linux-9"
ROCKY_SUPPORT_PRODUCT_VERSION="9.2"
REDHAT_SUPPORT_PRODUCT="Rocky Linux"
REDHAT_SUPPORT_PRODUCT_VERSION="9.2"
Step 2: Install Apache and PHP by using the below command
[root@Linuxhelp ~]# yum install httpd httpd-tools php php-curl php-gd php-mbstring php-zip php-json -y
Rocky Linux 9 - BaseOS                                             5.4 kB/s | 4.1 kB     00:00
Rocky Linux 9 - AppStream                                          4.0 kB/s | 4.5 kB     00:01
Rocky Linux 9 - Extras                                             3.1 kB/s | 2.9 kB     00:00
Dependencies resolved.
===================================================================================================
Package                    Architecture    Version                       Repository          Size
===================================================================================================
Installing:
httpd                      x86_64          2.4.53-11.el9_2.5             appstream           47 k
httpd-tools                x86_64          2.4.53-11.el9_2.5             appstream           81 k
php                        x86_64          8.0.30-1.el9_2                appstream          7.7 k
php-common                 x86_64          8.0.30-1.el9_2                appstream          665 k
Installing dependencies:
apr                        x86_64          1.7.0-11.el9                  appstream          123 k
apr-util                   x86_64          1.6.1-20.el9_2.1              appstream           94 k
apr-util-bdb               x86_64          1.6.1-20.el9_2.1              appstream           12 k
httpd-core                 x86_64          2.4.53-11.el9_2.5             appstream          1.4 M
httpd-filesystem           noarch          2.4.53-11.el9_2.5             appstream           14 k
Installing weak dependencies:
apr-util-openssl           x86_64          1.6.1-20.el9_2.1              appstream           14 k
mod_http2                  x86_64          1.15.19-4.el9_2.4             appstream          149 k
mod_lua                    x86_64          2.4.53-11.el9_2.5             appstream           61 k

Transaction Summary
===================================================================================================
Install  23 Packages

Total download size: 8.6 M
Installed size: 41 M
Downloading Packages:
(1/23): mod_lua-2.4.53-11.el9_2.5.x86_64.rpm                       198 kB/s |  61 kB     00:00
(2/23): httpd-2.4.53-11.el9_2.5.x86_64.rpm                         755 kB/s |  47 kB     00:00
(3/23): httpd-filesystem-2.4.53-11.el9_2.5.noarch.rpm              282 kB/s |  14 kB     00:00
(4/23): rocky-logos-httpd-90.14-1.el9.noarch.rpm                    57 kB/s |  24 kB     00:00
(5/23): httpd-tools-2.4.53-11.el9_2.5.x86_64.rpm                   173 kB/s |  81 kB     00:00
---------------------------------------------------------------------------------------------------
Total                                                              4.5 MB/s | 8.6 MB     00:01
Running transaction check
Transaction check succeeded.
Running transaction test
Transaction test succeeded.
Running transaction
 Preparing        :                                                                           1/1
 Installing       : php-common-8.0.30-1.el9_2.x86_64                                         1/23
 Installing       : apr-1.7.0-11.el9.x86_64                                                  2/23
 Installing       : apr-util-bdb-1.6.1-20.el9_2.1.x86_64                                     3/23
 Installing       : apr-util-1.6.1-20.el9_2.1.x86_64                                         4/23
 Installing       : apr-util-openssl-1.6.1-20.el9_2.1.x86_64                                 5/23

Installed:
 apr-1.7.0-11.el9.x86_64                         apr-util-1.6.1-20.el9_2.1.x86_64
 apr-util-bdb-1.6.1-20.el9_2.1.x86_64            apr-util-openssl-1.6.1-20.el9_2.1.x86_64
 httpd-2.4.53-11.el9_2.5.x86_64                  httpd-core-2.4.53-11.el9_2.5.x86_64
 httpd-filesystem-2.4.53-11.el9_2.5.noarch       httpd-tools-2.4.53-11.el9_2.5.x86_64
 rocky-logos-httpd-90.14-1.el9.noarch

Complete!
Step 3: Enable and Start the Apache service by using the below command
[root@Linuxhelp ~]# systemctl enable httpd
Created symlink /etc/systemd/system/multi-user.target.wants/httpd.service → /usr/lib/systemd/system/httpd.service.
 [root@Linuxhelp ~]# systemctl start httpd
Step 4: Check the status of the apache service by using the below command
[root@Linuxhelp ~]# systemctl status httpd
● httpd.service - The Apache HTTP Server
    Loaded: loaded (/usr/lib/systemd/system/httpd.service; enabled; preset: disabled)
   Drop-In: /usr/lib/systemd/system/httpd.service.d
            └─php-fpm.conf
    Active: active (running) since Mon 2023-11-20 04:54:59 IST; 27s ago
      Docs: man:httpd.service(8)
  Main PID: 82501 (httpd)
    Status: "Total requests: 0; Idle/Busy workers 100/0;Requests/sec: 0; Bytes served/sec:   0 B/>
     Tasks: 213 (limit: 22877)
    Memory: 27.4M
       CPU: 249ms
    CGroup: /system.slice/httpd.service
            ├─82501 /usr/sbin/httpd -DFOREGROUND
            ├─82508 /usr/sbin/httpd -DFOREGROUND
            ├─82509 /usr/sbin/httpd -DFOREGROUND
            ├─82510 /usr/sbin/httpd -DFOREGROUND
            └─82511 /usr/sbin/httpd -DFOREGROUND

Nov 20 04:54:58 Linuxhelp systemd[1]: Starting The Apache HTTP Server...
Nov 20 04:54:59 Linuxhelp httpd[82501]: AH00558: httpd: Could not reliably determine the server's >
Nov 20 04:54:59 Linuxhelp systemd[1]: Started The Apache HTTP Server.
Nov 20 04:54:59 Linuxhelp httpd[82501]: Server configured, listening on: port 80
Step 5: Run the below firewall-cmd command to add both HTTP and HTTPS ports to the firewalld. Then, reload the firewalld to apply the changes by using the below command
[root@Linuxhelp ~]# firewall-cmd --permanent --add-service=http
success
[root@Linuxhelp ~]# firewall-cmd --permanent --add-service=https
success
[root@Linuxhelp ~]# firewall-cmd --reload
success
Step 6: Enter the below command to create a new directory '/var/www/html/quickcms'. This will be used as the root installation directory of QuickCMS.
[root@Linuxhelp ~]# mkdir /var/www/html/quickcms
Step 7: Now go to the '/var/www/html/quickcms' directory and download the Quick CMS source code by using the wget command.
[root@Linuxhelp ~]# cd /var/www/html/quickcms/
 [root@Linuxhelp quickcms]# wget https://opensolution.org/download/home.html?sFile=Quick.Cms_v6.7-en.zip
--2023-11-20 05:04:36--  https://opensolution.org/download/home.html?sFile=Quick.Cms_v6.7-en.zip
Resolving opensolution.org (opensolution.org)... 94.152.13.75
Connecting to opensolution.org (opensolution.org)|94.152.13.75|:443... connected.
HTTP request sent, awaiting response... 200 OK
Length: unspecified [application/zip]
Saving to: ‘home.html?sFile=Quick.Cms_v6.7-en.zip’

home.html?sFile=Quick.Cm     [    <=>                           ] 895.62K   681KB/s    in 1.3s

2023-11-20 05:04:41 (681 KB/s) - ‘home.html?sFile=Quick.Cms_v6.7-en.zip’ saved [917111]
Step 8: Long list the files and check the downloaded source file by using the below command
[root@Linuxhelp quickcms]# ll
total 896
-rw-r--r--. 1 root root 917111 Nov 20 05:04 'home.html?sFile=Quick.Cms_v6.7-en.zip'
Step 9: Rename the 'home.html?sFile=Quick.Cms_v6.7-en.zip' into quickcms.zip for our convenience.
[root@Linuxhelp quickcms]# mv home.html\?sFile\=Quick.Cms_v6.7-en.zip quickcms.zip
[root@Linuxhelp quickcms]# ll
total 896
-rw-r--r--. 1 root root 917111 Nov 20 05:04 quickcms.zip
Step 10: Extract the downloaded zip file by using the below command
[root@Linuxhelp quickcms]# unzip quickcms.zip
Archive:  quickcms.zip
  creating: core/
 inflating: core/common-admin.js
 inflating: core/common-admin.php
 inflating: core/common.js
 inflating: core/common.php
 inflating: core/files-admin.php
 inflating: core/files.php
 inflating: core/lang-admin.php
  creating: core/libraries/
 inflating: core/libraries/file-jobs.php
 inflating: templates/default/header.php
  creating: templates/default/img/
Step 11: After extracted the quickcms.zip file then remove the zip file by using the below command
[root@Linuxhelp quickcms]# rm quickcms.zip
rm: remove regular file 'quickcms.zip'?y
[root@Linuxhelp quickcms]# ll
total 36
-rw-r--r--. 1 root root  3573 Dec 28  2016 admin.php
drwxr-xr-x. 3 root root  4096 Jan 29  2020 core
drwxr-xr-x. 3 root root   113 Jan 29  2020 database
-rw-r--r--. 1 root root 15406 Nov 25  2019 favicon.ico
drwxr-xr-x. 3 root root  4096 Feb 24  2020 files
-rw-r--r--. 1 root root    63 Jan 18  2019 HOW_TO_INSTALL.txt
-rw-r--r--. 1 root root  2628 Jan 29  2020 index.php
drwxr-xr-x. 5 root root   186 Jan 29  2020 plugins
drwxr-xr-x. 4 root root    34 Jan 29  2020 templates
Step 12: Set proper ownership and permissions for the Quickcms directory by using the below command
[root@Linuxhelp quickcms]# chmod -R 755 /var/www/html/quickcms/
[root@Linuxhelp quickcms]# chown -R apache:apache /var/www/html/quickcms/
[root@Linuxhelp quickcms]# chcon -R -t httpd_sys_content_rw_t /var/www/html/quickcms
Step 13: Edit the quickcms configuration file and define your database settings in below configuration file.
[root@Linuxhelp quickcms]# vi /etc/httpd/conf.d/quickcms.conf
Insert the following lines

<VirtualHost *:80>

ServerName linuxhelp.xyz
ServerAlias linuxhelp.xyz
DocumentRoot /var/www/html/quickcms
<Directory /var/www/html/quickcms/>
    Options -Indexes +FollowSymLinks
    AllowOverride All
</Directory>
ErrorLog /var/log/httpd/ linuxhelp.xyz -error.log
CustomLog /var/log/httpd/ linuxhelp.xyz-access.log combined
</VirtualHost>
Step 14: Check the apache configuration by using the below command
[root@Linuxhelp quickcms]# httpd -t
AH00558: httpd: Could not reliably determine the server's fully qualified domain name, using fe80::20c:29ff:fe5f:5581%ens160. Set the 'ServerName' directive globally to suppress this message
Syntax OK
Step 15: Finally restart the Apache service to apply the configuration changes
[root@Linuxhelp quickcms]# systemctl restart httpd
Step 16: To access QuickCMS installer, open your web browser and access the QuickCMS installer using the URL http://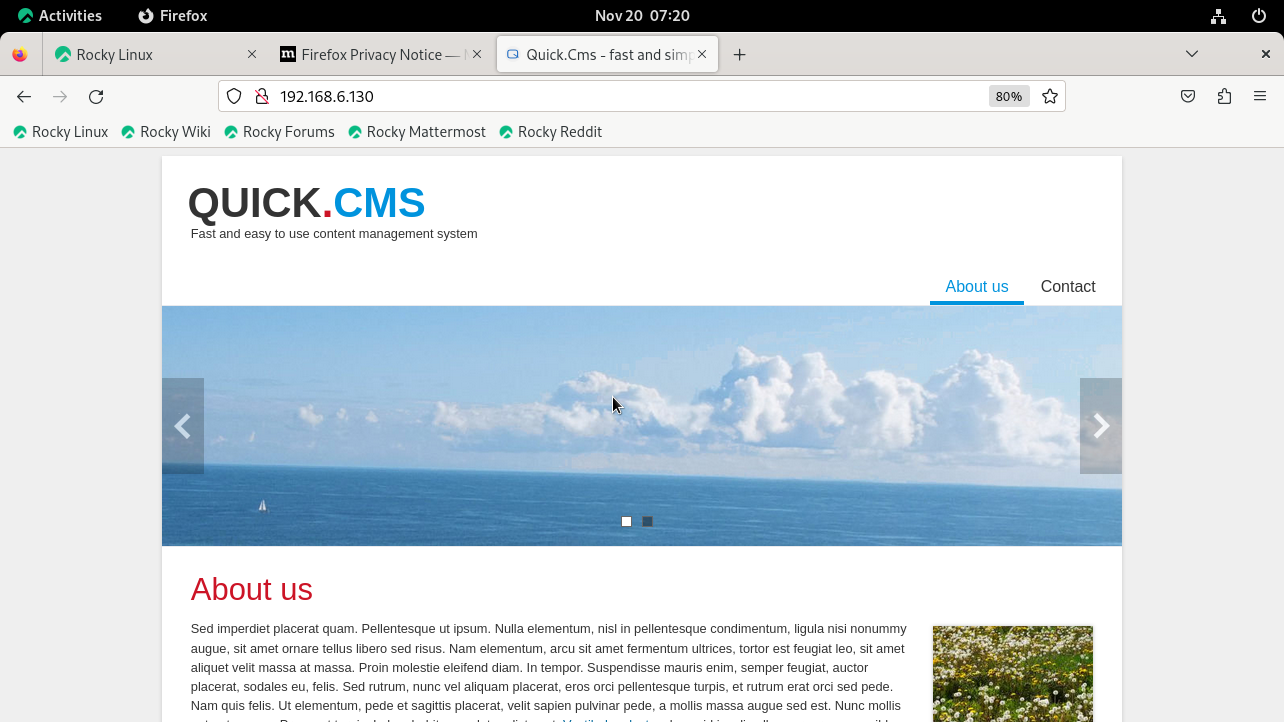
Here we can set our password on/admin.php page. Just enter your preferred username and password then enter
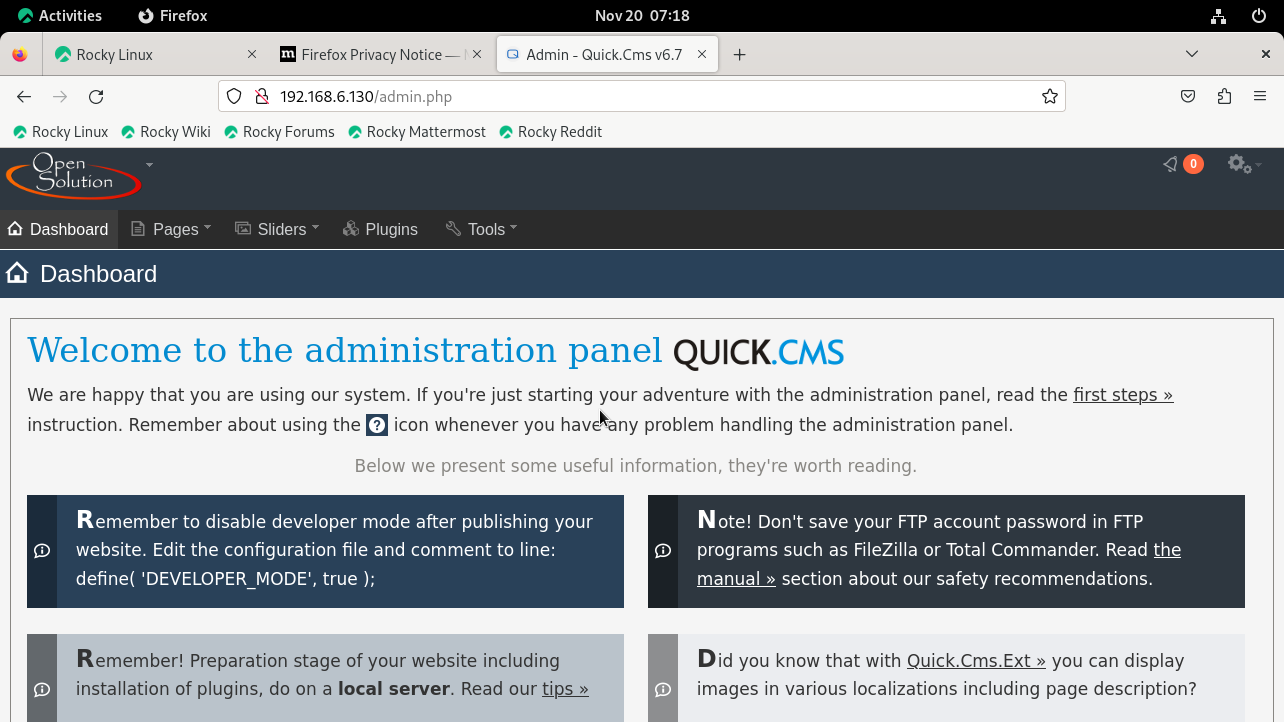
This is the Dashboard of our Quick CMS
Conclusion:
We have reached the end of this article. In this guide, we have walked you through the steps required to install Quick CMS on Rocky Linux 9.2. Your feedback is much welcome.
Comments ( 0 )
No comments available