How to install KiCad in Ubuntu
To install KiCad in Ubuntu
KiCad is an open source software used to capture and design the printed electronic circuit boards. This inbuilt tool allows the user to create a bill of materials, artwork, Gerber files, and 3D views of the PCB and its respective components. Installation of KiCad in Ubuntu is explained in this article.
Features
- Integrated designing environment
- Supports all Linux distributions
- Well documented configuration files
- Supports multiple languages
Installation of KiCad
First add the KiCad repo by using “ add-apt-repository” command.
root@linuxhelp:~# add-apt-repository ppa:js-reynaud/kicad-4
 This ppa provide a daily build for KiCad 4.0 branch (lp:kicad/4.0).
 More info: https://launchpad.net/~js-reynaud/+archive/ubuntu/kicad-4
Press [ENTER] to continue or ctrl-c to cancel adding it

gpg: keyring `/tmp/tmp2mw_z676/secring.gpg'  created
gpg: keyring `/tmp/tmp2mw_z676/pubring.gpg'  created
gpg: requesting key 910F124E from hkp server keyserver.ubuntu.com
gpg: /tmp/tmp2mw_z676/trustdb.gpg: trustdb created
gpg: key 910F124E: public key " Launchpad PPA for j2010"  imported
gpg: Total number processed: 1
gpg:               imported: 1  (RSA: 1)
OK
Update the added repo by using the following command.
root@linuxhelp:~# apt-get update
Hit:1 http://in.archive.ubuntu.com/ubuntu xenial InRelease
Hit:2 http://security.ubuntu.com/ubuntu xenial-security InRelease
Hit:3 http://ppa.launchpad.net/atareao/sunflower/ubuntu xenial InRelease
Hit:4 http://in.archive.ubuntu.com/ubuntu xenial-updates InRelease
Hit:5 http://in.archive.ubuntu.com/ubuntu xenial-backports InRelease
Hit:6 http://ppa.launchpad.net/dhor/myway/ubuntu xenial InRelease
Hit:7 http://ppa.launchpad.net/djcj/hybrid/ubuntu xenial InRelease
.
.
.
.
.
Hit:20 http://ppa.launchpad.net/teejee2008/ppa/ubuntu xenial InRelease
Hit:21 http://ppa.launchpad.net/wereturtle/ppa/ubuntu xenial InRelease
Get:22 http://ppa.launchpad.net/js-reynaud/kicad-4/ubuntu xenial/main amd64 Packages [5,644 B]
Get:23 http://ppa.launchpad.net/js-reynaud/kicad-4/ubuntu xenial/main i386 Packages [5,632 B]
Get:24 http://ppa.launchpad.net/js-reynaud/kicad-4/ubuntu xenial/main Translation-en [1,852 B]
Fetched 30.7 kB in 3s (7,792 B/s)
Reading package lists... Done
Now its time to install the KiCad by using “ apt-get install” command.
root@linuxhelp:~# apt-get install kicad
Reading package lists... Done
Building dependency tree
Reading state information... Done
The following additional packages will be installed:
  kicad-doc-en kicad-library libboost-context1.58.0 libboost-thread1.58.0
  python-wxgtk3.0 python-wxversion
Suggested packages:
  extra-xdg-menus kicad-demo kicad-locale-ko | kicad-locale-ru
  | kicad-locale-pl | kicad-locale-pt | kicad-locale-ja | kicad-locale-id
  | kicad-locale-ca | kicad-locale-it | kicad-locale-el | kicad-locale-zh
  | kicad-locale-de | kicad-locale-sl | kicad-locale-cs | kicad-locale-bg
  | kicad-locale-sv | kicad-locale-lt | kicad-locale-fi | kicad-locale-fr
  | kicad-locale-hu | kicad-locale-nl | kicad-locale-es | kicad-locale-sk
The following NEW packages will be installed:
  kicad kicad-doc-en kicad-library libboost-context1.58.0
  libboost-thread1.58.0 python-wxgtk3.0 python-wxversion
0 upgraded, 7 newly installed, 0 to remove and 56 not upgraded.
Need to get 114 MB/120 MB of archives.
After this operation, 918 MB of additional disk space will be used.
.
.
.
.
Setting up libboost-thread1.58.0:amd64 (1.58.0+dfsg-5ubuntu3.1) ...
Setting up libboost-context1.58.0:amd64 (1.58.0+dfsg-5ubuntu3.1) ...
Setting up python-wxversion (3.0.2.0+dfsg-1build1) ...
Setting up python-wxgtk3.0 (3.0.2.0+dfsg-1build1) ...
update-alternatives: using /usr/lib/wx/python/wx3.0.pth to provide /usr/lib/wx/python/wx.pth (wx.pth) in auto mode
Setting up kicad (4.0.3+e1-6302~38~ubuntu16.04.1) ...
Setting up kicad-doc-en (4.0.3+e1+1108~16~ubuntu16.04.1) ...
Setting up kicad-library (4.0.2-0+596~2~ubuntu16.04.1) ...
Processing triggers for libc-bin (2.23-0ubuntu3) ...
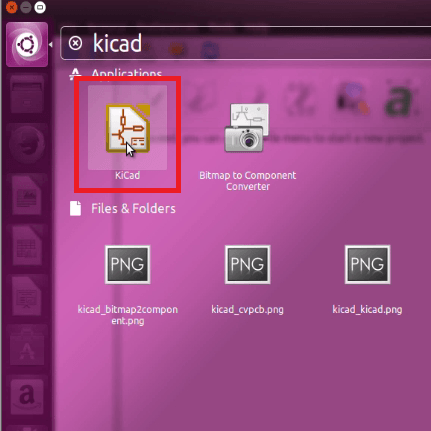
Open the installed software from the terminal or Unity dash. Type KiCad in the search bar and click on the displayed application.
At first, blank page will appear as shown below.
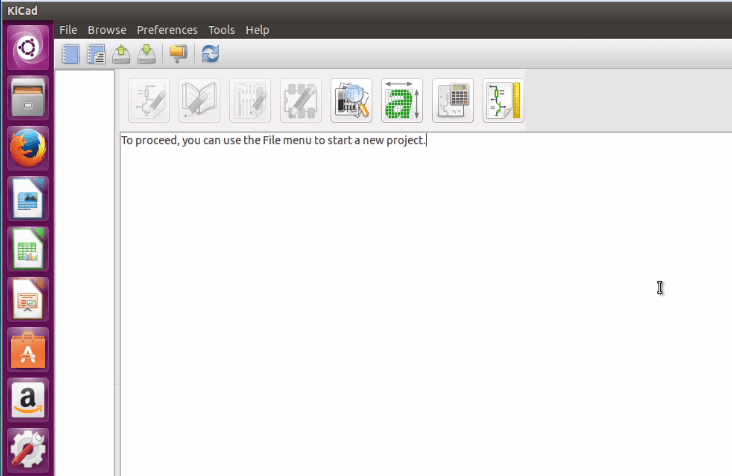
To create new project, click on File option in menu bar and then select “ new project” .

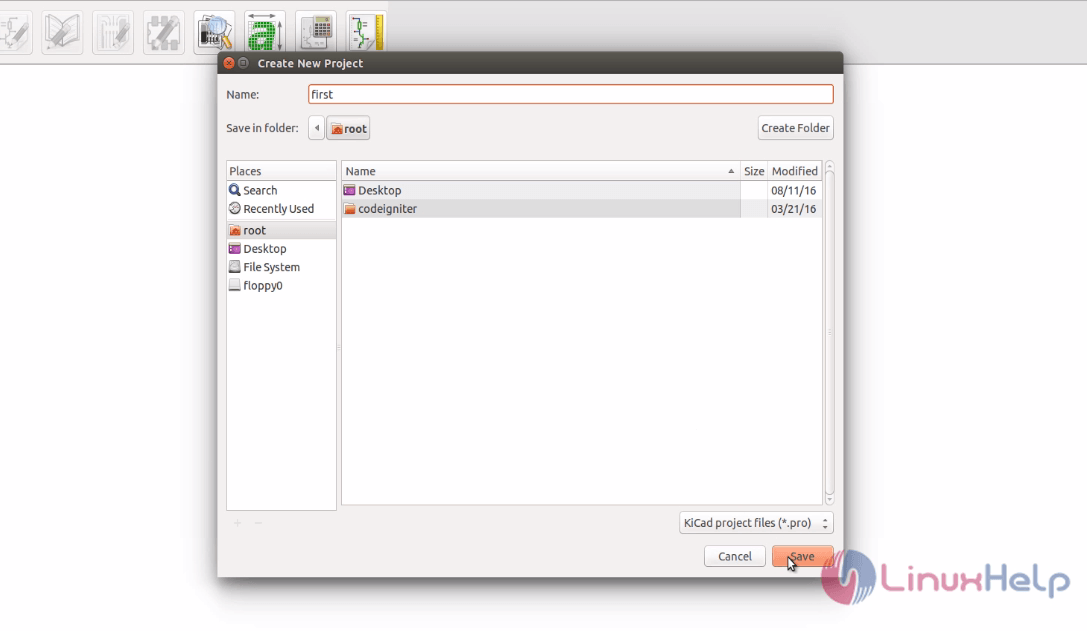
Type the file name and click on save option.
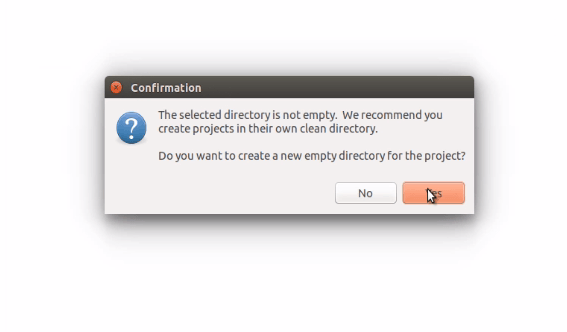
Confirmation prompt will display to save empty project. Click on Yes option.
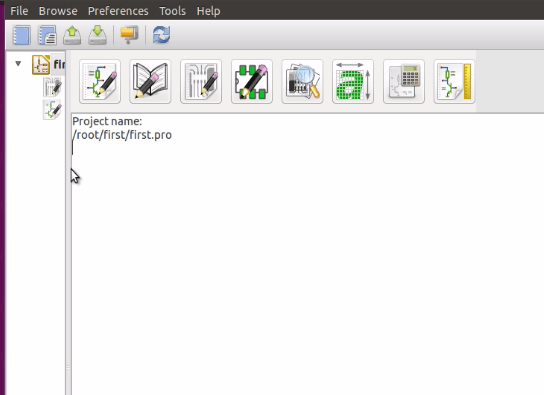
Now the first project page will appear as given below.
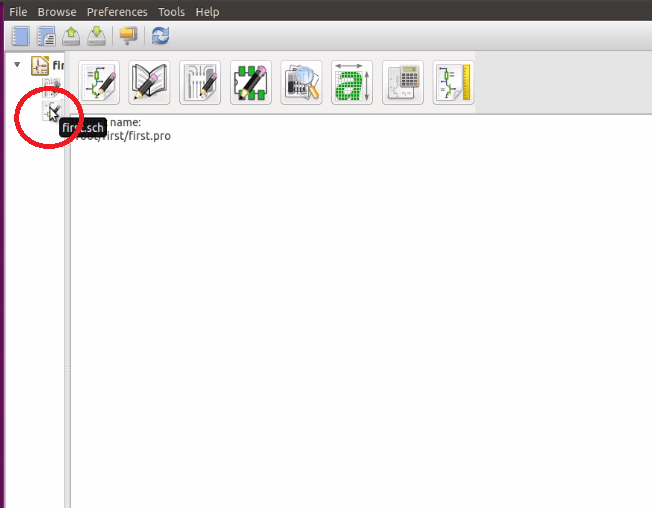
Here double click on the .sch file to view menu.
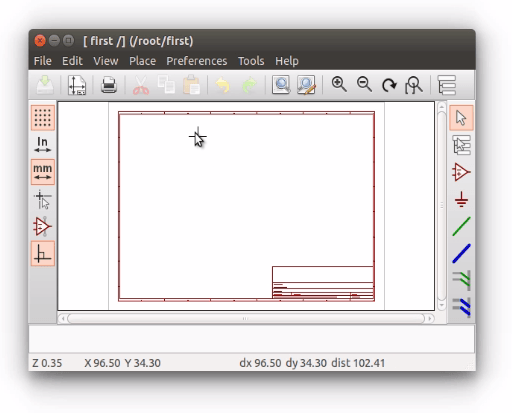
Start designing the own project.


Comments ( 0 )
No comments available