• Categories
    Category
  • Categories
    Category
  • News
  • Tutorials
  • Forums
  • Tags
  • Users
Tutorial Comments FAQ Related Articles

How to create, attach, and mount a disk to Linux VM (Microsoft Azure)

7471

To create, attach, and mount a disk to Linux VM (Microsoft Azure)

Virtual Machine helps you to not only run several of your applications but it also gives you the liberty to allocate the storage of your choice to store your data online securely. Although VM provides its own storage, many times you find a need for an extra storage as existing storage runs out of space. That is where additional an additional disk comes into picture. Fortunately, Microsoft has made it easy for us by introducing some easy features to attach the disk. Throughout this blog I will be elaborating the process of attaching an additional disk to your VM.

Prerequisite Linux VM

Installation Procedure:

Step 1: Log in to Azure Portal snap 1

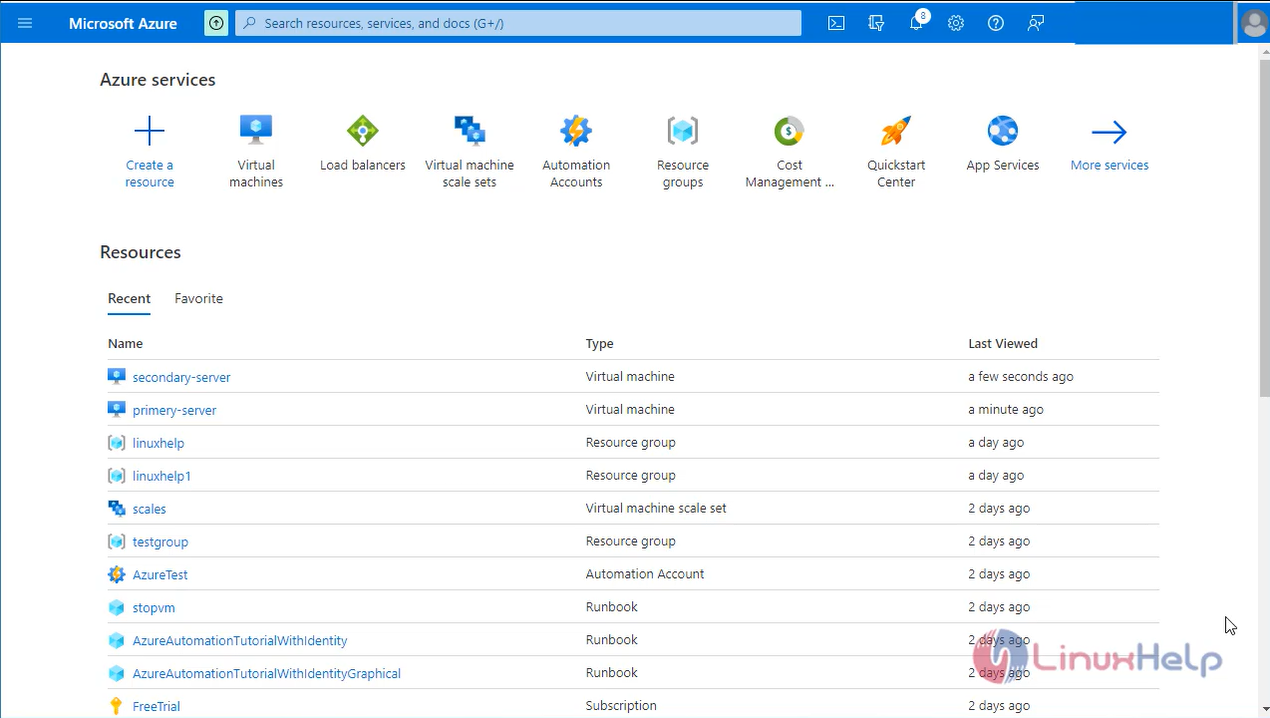
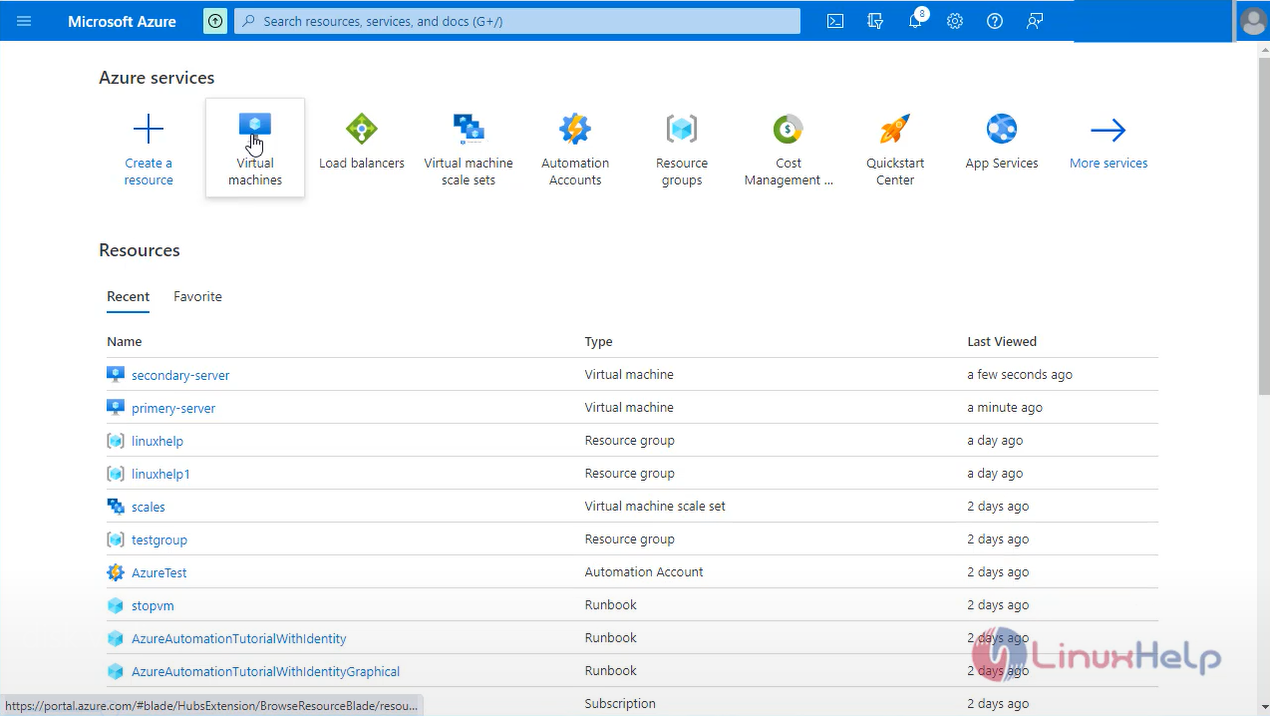
Step 2: Select your VM snap 2

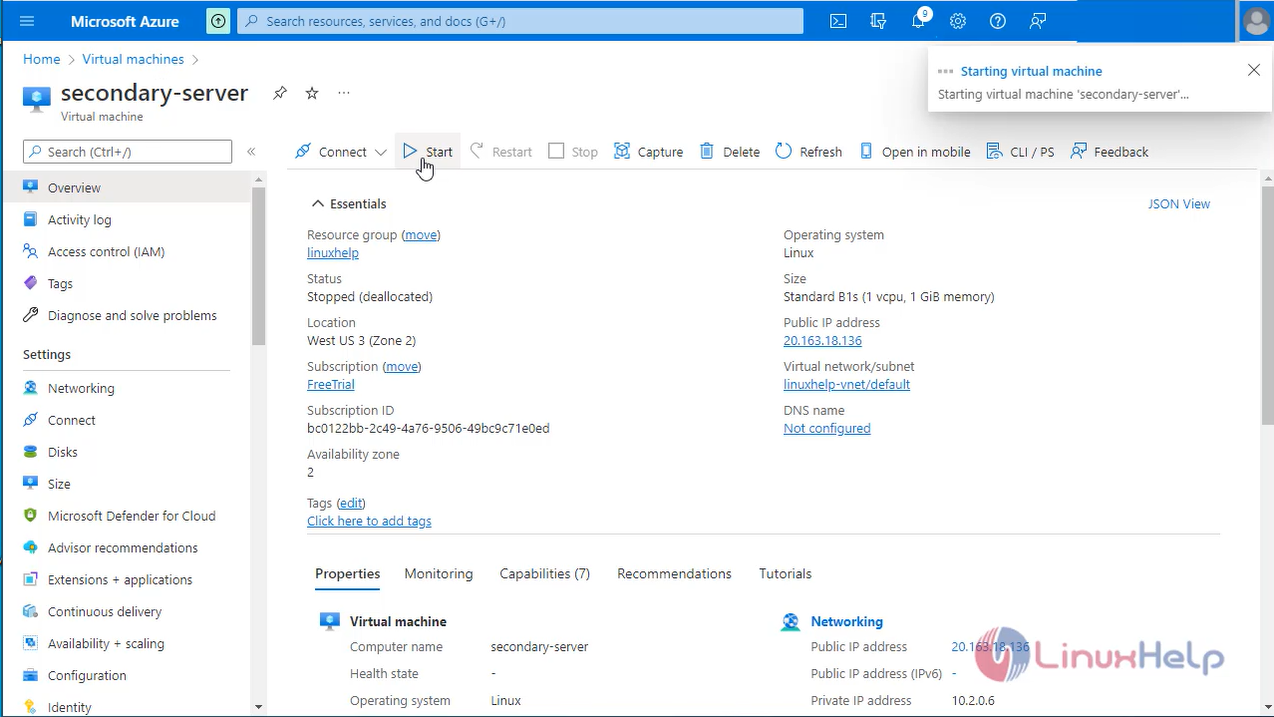
Step 3: Start the Virtual machine snap 3

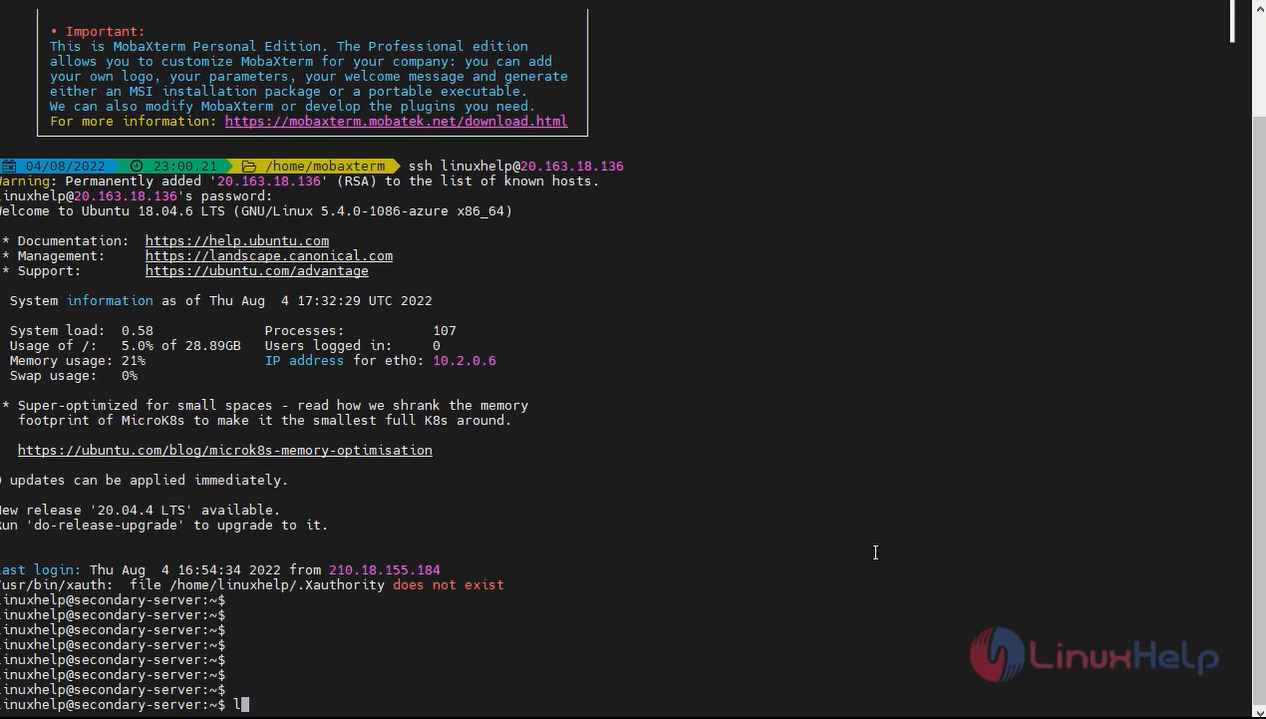
Step 4: Go to command prompt login to the Linux machine snap 4

Step 5: Check the OS version by using the below command

linuxhelp@secondary-server: ~$ lsb_release -a
No LSB modules are available.
Distributor ID: Ubuntu
Description:    Ubuntu 18.04.6 LTS
Release:        18.04
Codename:       bionic

Step 6: Once connected to your VM, you need to find the disk.

linuxhelp@secondary-server: ~$ lsblk
NAME    MAJ: MIN RM SIZE RO TYPE MOUNTPOINT
sda       8:0    0   30G 0 disk
├─sda1    8:1    0 29.9G 0 part /
├─sda14   8:14   0    4M 0 part
└─sda15   8:15   0 106M 0 part /boot/eGFI
sdb       8:16   0    4G 0 disk
└─sdb1    8:17   0    4G 0 part /mnt

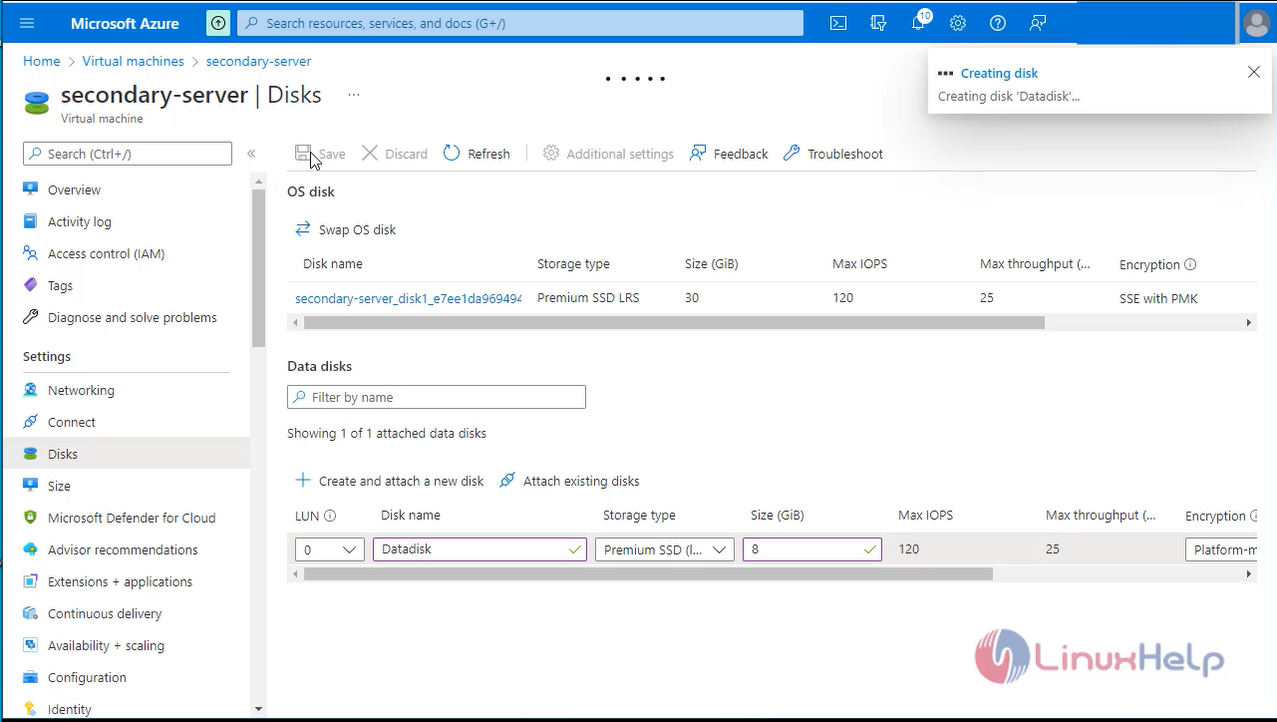
Step 7: Next go to Azure portal and attach a new disk On the Disks pane, under Data disks, select Create and attach a new disk. snap 5

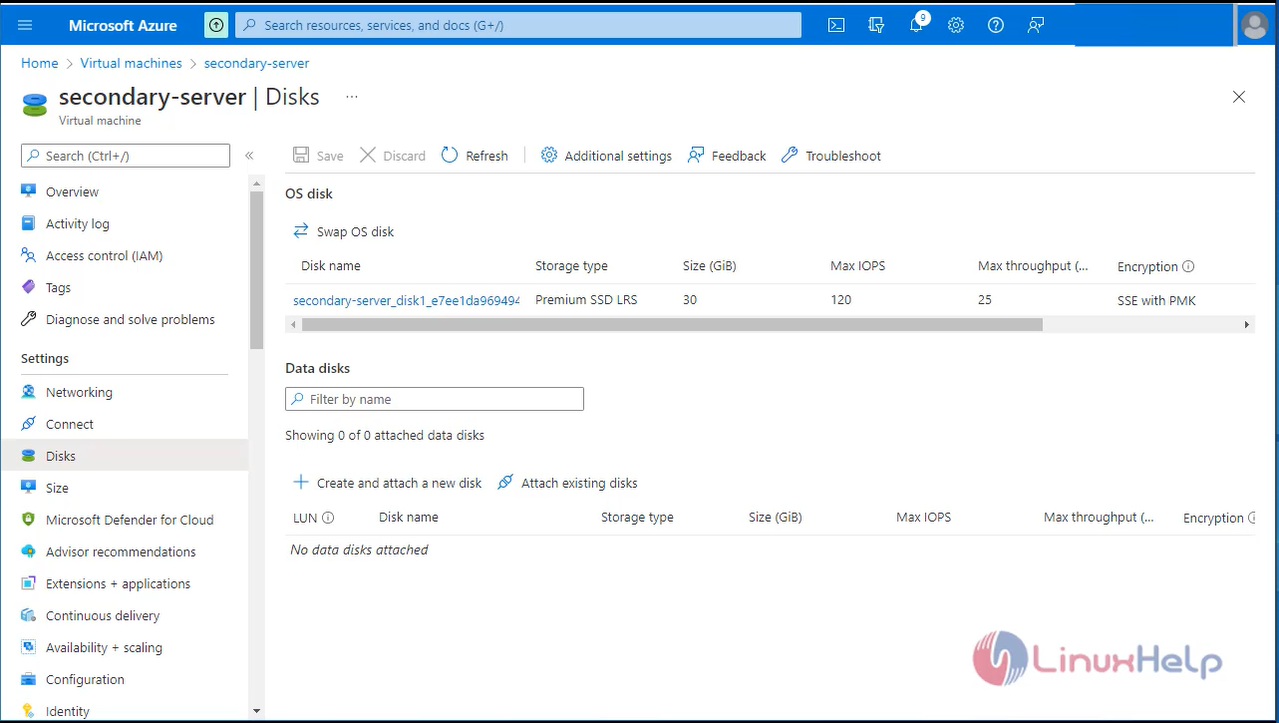
Step 8: Enter a name for your managed disk. Review the default settings, and update the Storage type, Size (GiB), Encryption and Host caching as necessary. snap 6 snap7

Step 9: Open fdisk to create partitions on /dev/sdc disk

root@secondary-server:~# fdisk /dev/sdc


Welcome to fdisk (util-Linux 2.31.1).
Changes will remain in memory only, until you decide to write them.
Be careful before using the write command.

Device does not contain a recognized partition table.
Created a new DOS disk label with disk identifier 0x30dc808b.

Command (m for help): n'
Partition type
   p   primary (0 primary, 0 extended, 4 free)
   e   extended (container for logical partitions)
Select (default p): p
Partition number (1-4, default 1):
First sector (2048-16777215, default 2048):
Last sector, +sectors or +size{K,M,G,T,P} (2048-16777215, default 16777215):

Created a new partition 1 of type 'Linux' and of size 8 GiB.

Command (m for help): p
Disk /dev/sdc: 8 GiB, 8589934592 bytes, 16777216 sectors
Units: sectors of 1 * 512 = 512 bytes
Sector size (logical/physical): 512 bytes / 4096 bytes
I/O size (minimum/optimal): 4096 bytes / 4096 bytes
Disk label type: dos
Disk identifier: 0x30dc808b

Device     Boot Start      End  Sectors Size Id Type
/dev/sdc1        2048 16777215 16775168   8G 83 Linux

Command (m for help): w

The partition table has been altered.
Calling IOCtl () to re-read partition table.
Syncing disks.

Step 10: Use the lsblk command to find the partition mounted on the root of the file system.

root@secondary-server: ~# lsblk
NAME    MAJ: MIN RM  SIZE RO TYPE MOUNTPOINT
sda       8:0    0   30G  0 disk
├─sda1    8:1    0 29.9G  0 part /
├─sda14   8:14   0    4M  0 part
└─sda15   8:15   0  106M  0 part /boot/efi
sdb       8:16   0    4G  0 disk
└─sdb1    8:17   0    4G  0 part /mnt
sdc       8:32   0    8G  0 disk
└─sdc1    8:33   0    8G  0 part

Step 11: Format the file system “sdc” to ext4 file system

root@secondary-server: ~# mkfs. ext4 /dev/sdc1
mke2fs 1.44.1 (24-Mar-2018)
Discarding device blocks: done
Creating filesystem with 2096896 4k blocks and 524288 inodes
Filesystem UUID: 52ad0f32-d9e7-4fc1-84fd-5b626a026072
Superblock backups stored on blocks:
        32768, 98304, 163840, 229376, 294912, 819200, 884736, 1605632

Allocating group tables: done
Writing inode tables: done
Creating journal (16384 blocks): done
Writing superblocks and filesystem accounting information: done

Step 12: Mount the disk Create a directory to mount the file system using mkdir

root@secondary-server: ~# mkdir /data
root@secondary-server: ~# mount /dev/sdc1 /data/

Step 13: Viewing the mounted status by using following command

root@secondary-server:~# df -h
Filesystem      Size  Used Avail Use% Mounted on
udev            438M     0  438M   0% /dev
tmpfs            92M  592K   91M   1% /run
/dev/sda1        29G  1.5G   28G   6% /
tmpfs           457M     0  457M   0% /dev/shm
tmpfs           5.0M     0  5.0M   0% /run/lock
tmpfs           457M     0  457M   0% /sys/fs/cgroup
/dev/sda15      105M  4.4M  100M   5% /boot/efi
/dev/sdb1       3.9G   28K  3.7G   1% /mnt
tmpfs            92M     0   92M   0% /run/user/1000
/dev/sdc1       7.8G   24K  7.4G   1% /data

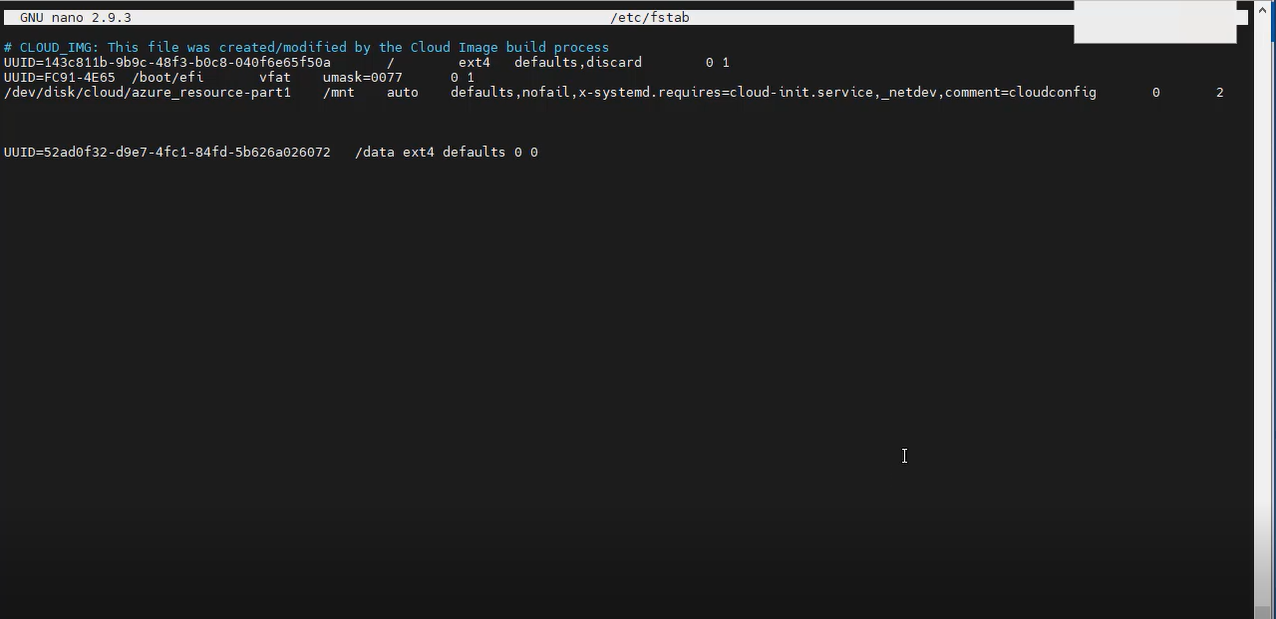
Step 14: Next Permanently mount the file system and copy the sdc UID by using following commands.

root@secondary-server:~# blkid
/dev/sdb1: UUID="a7ee9f8c-e179-40ef-a347-d780d85327ef" TYPE="ext4" PARTUUID="f51d685b-01"
/dev/sda1: LABEL="cloudimg-rootfs" UUID="143c811b-9b9c-48f3-b0c8-040f6e65f50a" TYPE="ext4" PARTUUID="02b05550-26f1-4959-b139-aa97efeadaca"
/dev/sda15: LABEL="UEFI" UUID="FC91-4E65" TYPE="vfat" PARTUUID="5f2e8bd0-b7ad-4eca-9621-cdc22fedde98"
/dev/sda14: PARTUUID="28450b13-5b7b-4223-aaac-70ddf8590fbf"
/dev/sdc1: UUID="52ad0f32-d9e7-4fc1-84fd-5b626a026072" TYPE="ext4" PARTUUID="30dc808b-01"

Step 15: Next, open the /etc/fstab file in a text editor as follows: root@secondary-server:~# nano /etc/fstab snap 8

Step 16: Mounts all file systems listed in /etc/fstab. root@secondary-server:~# mount -a

Step 17: You can now use lsblk again to see the disk and the mountpoint.

root@secondary-server:~# lsblk
NAME    MAJ:MIN RM  SIZE RO TYPE MOUNTPOINT
sda       8:0    0   30G  0 disk
├─sda1    8:1    0 29.9G  0 part /
├─sda14   8:14   0    4M  0 part
└─sda15   8:15   0  106M  0 part /boot/efi
sdb       8:16   0    4G  0 disk
└─sdb1    8:17   0    4G  0 part /mnt
sdc       8:32   0    8G  0 disk
└─sdc1    8:33   0    8G  0 part /data

Step 18: finally go to azure portal turn off the Virtual machine snap 9

Conclusion:

We have reached the end of this article. In this guide, we have walked you through the steps required to create, attach, and mount a disk to Linux VM (Microsoft Azure). Your feedback is much welcome.

Tags:
michael
Author: 

Comments ( 0 )

No comments available

Add a comment

Frequently asked questions ( 5 )

Q

Can we attach the disk while running the Azure VM?

A

You can attach a data disk to a Windows VM in the Azure portal. Before you attach disks to your VM, review these tips: Check the size of the virtual machine that controls the data disks to attach

Q

What types of disks can be attached to an Azure VM?

A

Persistent, secured disk storage for Azure virtual machines

We offer four disk storage options — Ultra Disk Storage, Premium SSD, Standard SSD, and Standard HDD.

Q

What is the maximum storage for disks?

A

In 2018, the largest hard drive had a capacity of 15 TB, while the largest capacity SSD had a capacity of 100 TB. As of 2018, HDDs were forecast to reach 100 TB capacities around 2025, but as of 2019, the expected pace of improvement was pared back to 50 TB by 2026.

Q

How to permanently mount the hard disk?

A

Add the disk permanently /etc/fstab

Q

How do you calculate disk capacity?

A

The first way would be to multiply bytes per sector times sector per track. This gives us bytes per track. Multiplying this times tracks per cylinder, we end up with bytes per cylinder. Multiplying this times the number of cylinders, we get the bytes for the disk

Related Tutorials in How to create, attach, and mount a disk to Linux VM (Microsoft Azure)

Related Tutorials in How to create, attach, and mount a disk to Linux VM (Microsoft Azure)

How to install Xrdp Server (Remote Desktop) on Oracle Linux 8.5
Oct 17, 2022
How to install and update OpenSSL on Debian 11.3
Oct 21, 2022
How to add and remove local storage repository in xenserver
Jul 1, 2016
How to Install and Configure Mega in Linux
Jul 19, 2016
How to use Aureport command on Linux
Nov 28, 2017
How to install Development tools on Linux
Jun 12, 2018
How to Install mod_ssl and SSL certificate on Oracle Linux
Dec 30, 2021
How to install Nextcloud on Ubuntu 22.04 version
Jun 23, 2023

Related Forums in How to create, attach, and mount a disk to Linux VM (Microsoft Azure)

Related Forums in How to create, attach, and mount a disk to Linux VM (Microsoft Azure)

Linux
jayce class=
shasum command not found
May 5, 2017
Linux
stephan class=
How to list all samba users
Jan 12, 2018
pv command
muhammad class=
pvcreate command not found error
May 9, 2017
Linux
henry class=
Starting NFS daemon: rpc.nfsd: writing fd to kernel failed: errno 111 (Connection refused)
Apr 25, 2017
ifconfig command
jackbrookes class=
what is the location of the ifconfig program on your machine?
Jan 4, 2018
Linux
baseer class=
single command to apply setfacl for multiple user at a time
Jan 23, 2018
Linux
beulah class=
What does mean by 0 0 value in fstab file
Jan 2, 2018
CentOS
mason class=
Error getting authority: Error initializing authority: Could not connect: No such file or directory (g-io-error-quark, 1)
Nov 20, 2018

Related News in How to create, attach, and mount a disk to Linux VM (Microsoft Azure)

Related News in How to create, attach, and mount a disk to Linux VM (Microsoft Azure)

Anbox, the Android-to-Linux tool the developers have been waiting for
Apr 17, 2017
Linus Torvalds stops signing Linux kernel RC tarballs
May 17, 2017
Capsule8 Launches Linux-Based Container Security Platform
Feb 14, 2017
Symantec updates Management console product
Nov 22, 2017
Latest Linux driver release feature seven AMD Vega
Mar 23, 2017
A Newer and a Faster Window Manager for Tina (Linux Mint 19.2)
Apr 9, 2019
Microsoft makes its Azure App service now available on Linux Systems
Sep 7, 2017
Docker friendly Alpine Linux gets hardened Node.js
Apr 19, 2017
Back To Top!
Rank
User
Points

Top Contributers

userNamenaveelansari
135850

Top Contributers

userNameayanbhatti
92510

Top Contributers

userNamehamzaahmed
32150

Top Contributers

1
userNamelinuxhelp
31040

Top Contributers

userNamemuhammadali
24500
Can you help Lucas ?
Various options in Top command

Am using Top command only to view the load average, what are the various options in Top command..??

Networking
  • Routing
  • trunk
  • Netmask
  • Packet Capture
  • domain
  • HTTP Proxy
Server Setup
  • NFS
  • KVM
  • Memory
  • Sendmail
  • WebDAV
  • LXC
Shell Commands
  • Cloud commander
  • Command line archive tools
  • last command
  • Shell
  • terminal
  • Throttle
Desktop Application
  • Linux app
  • Pithos
  • Retrospect
  • Scribe
  • TortoiseHg
  • 4Images
Monitoring Tool
  • Monit
  • Apache Server Monitoring
  • EtherApe 
  • Arpwatch Tool
  • Auditd
  • Barman
Web Application
  • Nutch
  • Amazon VPC
  • FarmWarDeployer
  • Rukovoditel
  • Mirror site
  • Chef
Contact Us | Terms of Use| Privacy Policy| Disclaimer
© 2025 LinuxHelp.com All rights reserved. Linux™ is the registered trademark of Linus Torvalds. This site is not affiliated with linus torvalds in any way.