How to create 19c Database on Oracle Linux
- 00:42 00:42 cat /etc/os-release 00:42
- 00:44 ip a
- 00:50 vi /etc/hosts
- 01:26 dnf install -y oracle-database-preinstall-19c
- 02:33 dnf update -y
- 02:49 dnf install -y bc binutils compat-openssl11
- 03:04 groupadd -g 54321 oinstall
- 03:04 groupadd -g 54322 dba
- 03:04 groupadd -g 54323 oper
- 03:14 useradd -u 54321 -g oinstall -G dba,oper oracle
- 03:27 passwd oracle
- 03:59 vi /etc/selinux/config
- 04:32 systemctl stop firwalld.service
- 04:43 systemctl disable firewall
- 04:51 chmod -R 775 /u01 /u02
- 04:51 chown -R oracle:oinstall /u01 /u02
- 04:51 mkdir -p /u02/oradata
- 04:51 mkdir -p /u01/app/oracle/product/19.0.0/dbhome_1
- 05:06 xhost +linuxhelp
- 05:26 mkdir /home/oracle/scripts
-
05:40
cat > /home/oracle/scripts/setEnv.sh <
- 05:52 echo ". /home/oracle/scripts/setEnv.sh" >> /home/oracle/.bash_profile
-
06:09
cat > /home/oracle/scripts/start_all.sh <
-
06:48
cat > /home/oracle/scripts/stop_all.sh <
- 07:06 chmod u+x /home/oracle/scripts/*.sh
- 07:14 ll
- 07:19 cp LINUX.X64_193000_db_home.zip /u02
- 07:23 cd /u02
- 07:35 chmod 777 LINUX.X64_193000_db_home.zip
- 07:46 sudo su - oracle
- 07:58 cd $ORACLE_HOME
- 08:16 unzip -oq /u02/LINUX.X64_193000_db_home.zip
- 08:48 ./runInstaller
To Create 19c Database In Oracle Linux
Introduction:
Oracle Database Release 19c offers comprehensive backup and recovery options for both multitenant container databases (CDB) and pluggable databases (PDB), along with recovery catalog support. This video presents a detailed guide on the creation of a 19c database on Oracle Linux 9.4.
Procedure:
Step1: Check the OS version using the below command
[root@linuxhelp ~]# cat /etc/os-release
NAME="Oracle Linux Server"
VERSION="9.4"
ID="ol"
ID_LIKE="fedora"
VARIANT="Server"
VARIANT_ID="server"
VERSION_ID="9.4"
PLATFORM_ID="platform:el9"
PRETTY_NAME="Oracle Linux Server 9.4"
ANSI_COLOR="0;31"
CPE_NAME="cpe:/o:oracle:linux:9:4:server"
HOME_URL="https://linux.oracle.com/"
BUG_REPORT_URL="https://github.com/oracle/oracle-linux"
ORACLE_BUGZILLA_PRODUCT="Oracle Linux 9"
ORACLE_BUGZILLA_PRODUCT_VERSION=9.4
ORACLE_SUPPORT_PRODUCT="Oracle Linux"
ORACLE_SUPPORT_PRODUCT_VERSION=9.4
Step2: Check the IP Address by using the below command
[root@linuxhelp ~]# ip a
1: lo: <LOOPBACK,UP,LOWER_UP> mtu 65536 qdisc noqueue state UNKNOWN group default qlen 1000
    link/loopback 00:00:00:00:00:00 brd 00:00:00:00:00:00
    inet 127.0.0.1/8 scope host lo
       valid_lft forever preferred_lft forever
    inet6 ::1/128 scope host
       valid_lft forever preferred_lft forever
2: ens160: <BROADCAST,MULTICAST,UP,LOWER_UP> mtu 1500 qdisc mq state UP group default qlen 1000
    link/ether 00:0c:29:89:37:86 brd ff:ff:ff:ff:ff:ff
    altname enp3s0
    inet 192.168.6.138/23 brd 192.168.7.255 scope global noprefixroute ens160
       valid_lft forever preferred_lft forever
    inet6 fe80::20c:29ff:fe89:3786/64 scope link noprefixroute
       valid_lft forever preferred_lft forever
Step3: Make entry in /etc/hosts file
[root@linuxhelp ~]# vi /etc/hosts
Step4: Check the correct hostname is mentioned in /etc/hosts
[root@linuxhelp ~]# vi /etc/hostname
Step5: Install 19c database preinstall packages
[root@linuxhelp ~]# dnf install -y oracle-database-preinstall-19c
Last metadata expiration check: 1 day, 20:16:34 ago on Tue 06 Aug 2024 04:59:45 AM EDT.
Dependencies resolved.
====================================================================================================================================================================================================================
Package Architecture Version Repository Size
====================================================================================================================================================================================================================
Installing:
oracle-database-preinstall-19c x86_64 1.0-1.el9 ol9_appstream 33 k
Installing dependencies:
glibc-devel x86_64 2.34-100.0.1.el9_4.2 ol9_appstream 55 k
glibc-headers x86_64 2.34-100.0.1.el9_4.2 ol9_appstream 911 k
gssproxy x86_64 0.8.4-6.el9 ol9_baseos_latest 120 k
initscripts x86_64 10.11.6-1.el9 ol9_baseos_latest 285 k
kernel-headers x86_64 5.14.0-427.28.1.el9_4 ol9_appstream 7.4 M
keyutils x86_64 1.6.3-1.el9 ol9_baseos_latest 84 k
ksh x86_64 3:1.0.6-3.0.1.el9 ol9_appstream 886 k
libaio-devel x86_64 0.3.111-13.el9 ol9_appstream 11 k
libev x86_64 4.33-5.el9 ol9_baseos_latest 53 k
libnfsidmap x86_64 1:2.5.4-25.0.2.el9 ol9_baseos_latest 71 k
libnsl x86_64 2.34-100.0.1.el9_4.2 ol9_baseos_latest 67 k
libstdc++-devel x86_64 11.4.1-3.0.1.el9 ol9_appstream 3.1 M
libverto-libev x86_64 0.3.2-3.el9 ol9_baseos_latest 14 k
libxcrypt-devel x86_64 4.4.18-3.el9 ol9_appstream 42 k
lm_sensors-libs x86_64 3.6.0-10.el9 ol9_appstream 42 k
make x86_64 1:4.3-8.el9 ol9_baseos_latest 570 k
nfs-utils x86_64 1:2.5.4-25.0.2.el9 ol9_baseos_latest 518 k
pcp-conf x86_64 6.2.0-2.0.1.el9_4 ol9_appstream 36 k
pcp-libs x86_64 6.2.0-2.0.1.el9_4 ol9_appstream 640 k
rpcbind x86_64 1.2.6-7.el9 ol9_baseos_latest 69 k
sssd-nfs-idmap x86_64 2.9.4-6.0.1.el9_4.1 ol9_baseos_latest 46 k
sysstat x86_64 12.5.4-8.0.1.el9_4 ol9_appstream 540 k
Verifying : gssproxy-0.8.4-6.el9.x86_64 1/23
Verifying : initscripts-10.11.6-1.el9.x86_64 2/23
Verifying : keyutils-1.6.3-1.el9.x86_64 3/23
Verifying : libev-4.33-5.el9.x86_64 4/23
Verifying : libnfsidmap-1:2.5.4-25.0.2.el9.x86_64 5/23
Verifying : libnsl-2.34-100.0.1.el9_4.2.x86_64 6/23
Verifying : libverto-libev-0.3.2-3.el9.x86_64 7/23
Verifying : make-1:4.3-8.el9.x86_64 8/23
Verifying : nfs-utils-1:2.5.4-25.0.2.el9.x86_64 9/23
Verifying : rpcbind-1.2.6-7.el9.x86_64 10/23
Verifying : sssd-nfs-idmap-2.9.4-6.0.1.el9_4.1.x86_64 11/23
Verifying : glibc-devel-2.34-100.0.1.el9_4.2.x86_64 12/23
Verifying : glibc-headers-2.34-100.0.1.el9_4.2.x86_64 13/23
Verifying : kernel-headers-5.14.0-427.28.1.el9_4.x86_64 14/23
Verifying : ksh-3:1.0.6-3.0.1.el9.x86_64 15/23
Verifying : libaio-devel-0.3.111-13.el9.x86_64 16/23
Verifying : libstdc++-devel-11.4.1-3.0.1.el9.x86_64 17/23
Verifying : libxcrypt-devel-4.4.18-3.el9.x86_64 18/23
Verifying : lm_sensors-libs-3.6.0-10.el9.x86_64 19/23
Verifying : oracle-database-preinstall-19c-1.0-1.el9.x86_64 20/23
Verifying : pcp-conf-6.2.0-2.0.1.el9_4.x86_64 21/23
Verifying : pcp-libs-6.2.0-2.0.1.el9_4.x86_64 22/23
Verifying : sysstat-12.5.4-8.0.1.el9_4.x86_64 23/23
Installed:
glibc-devel-2.34-100.0.1.el9_4.2.x86_64 glibc-headers-2.34-100.0.1.el9_4.2.x86_64 gssproxy-0.8.4-6.el9.x86_64 initscripts-10.11.6-1.el9.x86_64 kernel-headers-5.14.0-427.28.1.el9_4.x86_64
keyutils-1.6.3-1.el9.x86_64 ksh-3:1.0.6-3.0.1.el9.x86_64 libaio-devel-0.3.111-13.el9.x86_64 libev-4.33-5.el9.x86_64 libnfsidmap-1:2.5.4-25.0.2.el9.x86_64
libnsl-2.34-100.0.1.el9_4.2.x86_64 libstdc++-devel-11.4.1-3.0.1.el9.x86_64 libverto-libev-0.3.2-3.el9.x86_64 libxcrypt-devel-4.4.18-3.el9.x86_64 lm_sensors-libs-3.6.0-10.el9.x86_64
make-1:4.3-8.el9.x86_64 nfs-utils-1:2.5.4-25.0.2.el9.x86_64 oracle-database-preinstall-19c-1.0-1.el9.x86_64 pcp-conf-6.2.0-2.0.1.el9_4.x86_64 pcp-libs-6.2.0-2.0.1.el9_4.x86_64
rpcbind-1.2.6-7.el9.x86_64 sssd-nfs-idmap-2.9.4-6.0.1.el9_4.1.x86_64 sysstat-12.5.4-8.0.1.el9_4.x86_64
Complete!
Step 6: Run the update command
[root@linuxhelp ~]# dnf update -y
Last metadata expiration check: 1 day, 20:19:29 ago on Tue 06 Aug 2024 04:59:45 AM EDT.
Dependencies resolved.
Nothing to do.
Complete!
Step 7: Install the dependencies by using following command
[root@linuxhelp ~]# dnf install -y bc binutils compat-openssl11 elfutils-libelf fontconfig glibc glibc-devel ksh libaio libasan liblsan libX11 libXau libXi libXrender libXtst libxcrypt-compat libgcc libibverbs libnsl librdmacm libstdc++ libxcb libvirt-libs make policycoreutils policycoreutils-python-utils smartmontools sysstat glibc-headers ipmiutil libnsl2 libnsl2-devel net-tools nfs-utils  gcc unixODBC
Last metadata expiration check: 1 day, 20:23:06 ago on Tue 06 Aug 2024 04:59:45 AM EDT.
Package bc-1.07.1-14.el9.x86_64 is already installed.
Package binutils-2.35.2-43.0.1.el9.x86_64 is already installed.
Package elfutils-libelf-0.190-2.el9.x86_64 is already installed.
Package fontconfig-2.14.0-2.el9_1.x86_64 is already installed.
Package glibc-2.34-100.0.1.el9_4.2.x86_64 is already installed.
Package glibc-devel-2.34-100.0.1.el9_4.2.x86_64 is already installed.
Package ksh-3:1.0.6-3.0.1.el9.x86_64 is already installed.
Package libaio-0.3.111-13.el9.x86_64 is already installed.
Package libX11-1.7.0-9.el9.x86_64 is already installed.
Package libXau-1.0.9-8.el9.x86_64 is already installed.
Package libXi-1.7.10-8.el9.x86_64 is already installed.
Package libXrender-0.9.10-16.el9.x86_64 is already installed.
Package libXtst-1.2.3-16.el9.x86_64 is already installed.
Package libxcrypt-compat-4.4.18-3.el9.x86_64 is already installed.
Package libgcc-11.4.1-3.0.1.el9.x86_64 is already installed.
Package libibverbs-48.0-1.el9.x86_64 is already installed.
Package libnsl-2.34-100.0.1.el9_4.2.x86_64 is already installed.
Package libstdc++-11.4.1-3.0.1.el9.x86_64 is already installed.
Package libxcb-1.13.1-9.el9.x86_64 is already installed.
Package make-1:4.3-8.el9.x86_64 is already installed.
Package policycoreutils-3.6-2.1.el9.x86_64 is already installed.
Package policycoreutils-python-utils-3.6-2.1.el9.noarch is already installed.
Package smartmontools-1:7.2-9.el9.x86_64 is already installed.
Package sysstat-12.5.4-8.0.1.el9_4.x86_64 is already installed.
Package glibc-headers-2.34-100.0.1.el9_4.2.x86_64 is already installed.
No match for argument: ipmiutil
No match for argument: libnsl2-devel
Package net-tools-2.0-0.62.20160912git.el9.x86_64 is already installed.
Package nfs-utils-1:2.5.4-25.0.2.el9.x86_64 is already installed.
Error: Unable to find a match: ipmiutil libnsl2-devel
Step 8: Add primary groups by following command
[root@linuxhelp ~]# groupadd -g 54321 oinstall
groupadd -g 54322 dba
groupadd -g 54323 oper
groupadd: group 'oinstall' already exists
groupadd: group 'dba' already exists
groupadd: group 'oper' already exists
Step 9: useradd -u 54321 -g oinstall -G dba,oper oracle
[root@linuxhelp ~]# useradd -u 54321 -g oinstall -G dba,oper oracle
useradd: user 'oracle' already exists
Step 10: Set Password for oracle user
[root@linuxhelp ~]# passwd oracle
Changing password for user oracle.
New password:
Retype new password:
passwd: all authentication tokens updated successfully.
Step 11: Edit The selinux config file and make SELINUX=permissive After change , reboot the system to apply the changes
[root@linuxhelp ~]# vi /etc/selinux/config
Step 12: Stop the firewall service by using following command
[root@linuxhelp ~]# systemctl stop firewalld.service
Step 13: Disable the firewall service by using following command
[root@linuxhelp ~]# systemctl disable firewalld.service
Removed "/etc/systemd/system/multi-user.target.wants/firewalld.service".
Removed "/etc/systemd/system/dbus-org.fedoraproject.FirewallD1.service".
Step 14: Make directories by using following commands
[root@linuxhelp ~]# mkdir -p /u01/app/oracle/product/19.0.0/dbhome_1
[root@linuxhelp ~]# mkdir -p /u02/oradata
Step 15: Change the ownership of directories
[root@linuxhelp ~]# chown -R oracle:oinstall /u01 /u02
Step 16: Change the permission of directories
[root@linuxhelp ~]# chmod -R 775 /u01 /u02
Step 17: To add the hostname into Access control list by using following command
[root@linuxhelp ~]# xhost +linuxhelp
linuxhelp being added to access control list
Step 18: To make the scripts directory by using following command
[root@linuxhelp ~]# mkdir /home/oracle/scripts
Step 19: To create the scriptfile named setEnv.sh and insert the variables by using following commands
[root@linuxhelp ~]# cat > /home/oracle/scripts/setEnv.sh <<EOF
export TMP=/tmp
export TMPDIR=\$TMP
export ORACLE_HOSTNAME=linuxhelp
export ORACLE_UNQNAME=cdb1
export ORACLE_BASE=/u01/app/oracle
export ORACLE_HOME=\$ORACLE_BASE/product/19.0.0/dbhome_1
export ORA_INVENTORY=/u01/app/oraInventory
export ORACLE_SID=cdb1
export PDB_NAME=pdb1
export DATA_DIR=/u02/oradata
export PATH=/usr/sbin:/usr/local/bin:\$PATH
export PATH=\$ORACLE_HOME/bin:\$PATH
export LD_LIBRARY_PATH=\$ORACLE_HOME/lib:/lib:/usr/lib
export CLASSPATH=\$ORACLE_HOME/jlib:\$ORACLE_HOME/rdbms/jlib
EOF
Step 20: Add a reference to the "setEnv.sh" file at the end of the "/home/oracle/.bash_profile" file by using following command
echo ". /home/oracle/scripts/setEnv.sh" >> /home/oracle/.bash_profile
Step 21: Create a "start_all.sh" script that can be called from a startup service after installation of database by using following command
[root@linuxhelp ~]# cat > /home/oracle/scripts/start_all.sh <<EOF
#!/bin/bash
. /home/oracle/scripts/setEnv.sh
export ORAENV_ASK=NO
. oraenv
export ORAENV_ASK=YES
dbstart \$ORACLE_HOME
EOF
Step 22: Create a "stop_all.sh" script that can be called from a shutdown service after installation of database by using following command
[root@linuxhelp ~]# cat > /home/oracle/scripts/stop_all.sh <<EOF
#!/bin/bash
. /home/oracle/scripts/setEnv.sh

export ORAENV_ASK=NO
. oraenv
export ORAENV_ASK=YES
dbshut \$ORACLE_HOME
EOF
Step 23: Change the ownership of the directory by following command
[root@linuxhelp ~]# chown -R oracle:oinstall /home/oracle/scripts
**Step 24: Change the permissions of the files under the scripts directory **
root@linuxhelp ~]# chmod u+x /home/oracle/scripts/*.sh
Step 25: To list the downloaded Zip file using following command
[root@linuxhelp ~]# ll
total 2988000
-rw-------. 1 root root        833 Aug  6 09:13 anaconda-ks.cfg
-rwx------. 1 1002  513 3059705302 Aug  6 06:22 LINUX.X64_193000_db_home.zip
Step 26: Copy the downloaded zip file to /u02 by using following command
[root@linuxhelp ~]# cp LINUX.X64_193000_db_home.zip /u02
Step 27: Navigate to the u02 directory by using following command
[root@linuxhelp ~]# cd /u02
Step 28: Give the full permission to the zip file by using following command
[root@linuxhelp u02]# chmod 777 LINUX.X64_193000_db_home.zip
Step 29: Login as the oracle user
[root@linuxhelp u02]# sudo su - oracle
[oracle@linuxhelp ~]$
Step 30: To navigate to the $ORACLE_HOME directory by using following command
[oracle@linuxhelp ~]$ cd $ORACLE_HOME
Step 31: unzip the package by using the following command
[oracle@linuxhelp dbhome_1]$ unzip -oq /u02/LINUX.X64_193000_db_home.zip
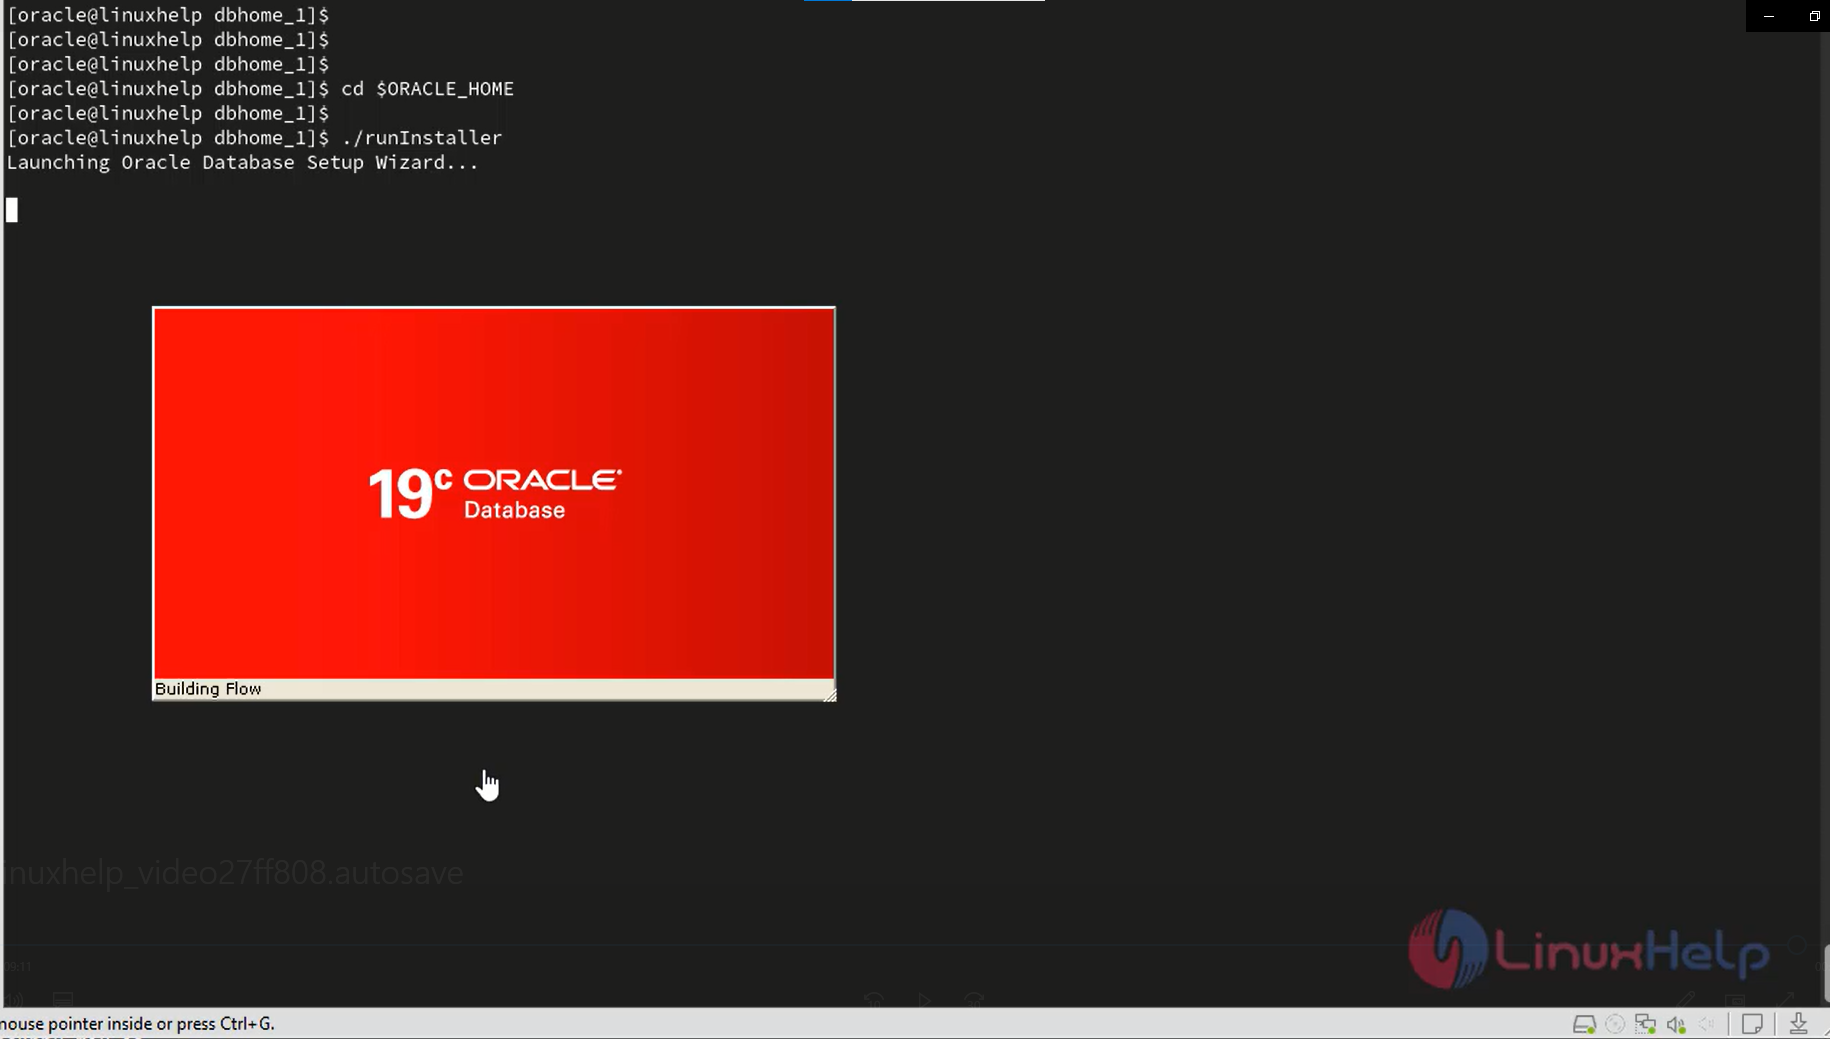
Step 32: To run the script file by using the following command
[oracle@linuxhelp dbhome_1]$ ./runInstaller
Launching Oracle Database Setup Wizard…
Snap 1
Conclusion :
We have reached the end of this article. In this guide, we have walked you through the steps required to create 19c Database in Oracle Linux . Your feedback is much welcome.


Comments ( 0 )
No comments available