How to configure Asterisk CDR & CEL Logging with ODBC Connecter on Debian 12
- 00:37 cat /etc/os-release
- 00:53 apt install default-mysql-server -y
- 01:32 mysql
- 01:37 create database asterisk;
- 01:47 create user 'asterisk'@'localhost' identified by 'asterisk@123';
- 02:16 grant all privileges on *.* to 'asterisk'@'localhost';
- 02:41 flush privileges;
- 02:51 use asterisk;
- 03:03 CREATE TABLE cdr (calldate DATETIME NOT NULL DEFAULT '0000-00-00 00:00:00',clid VARCHAR(80) NOT NULL DEFAULT '',src VARCHAR(80) NOT NULL DEFAULT '', dst VARCHAR(80) NOT NULL DEFAULT '', dcont
- 03:11 CREATE TABLE cel ( id BIGINT(20) NOT NULL AUTO_INCREMENT, eventtype VARCHAR(30) NOT NULL DEFAULT '', eventtime DATETIME NOT NULL DEFAULT '0000-00-00 00:00:00', cid_name VARCHAR(80) NOT NULL D
- 03:26 select * from cdr;
- 03:36 select * from cel;
- 03:50 exit
- 03:53 apt install unixodbc unixodbc-dev -y
- 04:24 wget https://downloads.mysql.com/archives/get/p/23/file/mysql-community-client-plugins_8.3.0-1debian12_amd64.deb
- 04:36 dpkg -i mysql-community-client-plugins_8.3.0-1debian12_amd64.deb
- 04:49 wget https://downloads.mysql.com/archives/get/p/10/file/mysql-connector-odbc_8.3.0-1debian12_amd64.deb
- 04:59 dpkg -i mysql-connector-odbc_8.3.0-1debian12_amd64.deb
- 05:11 wget https://downloads.mysql.com/archives/get/p/10/file/mysql-connector-odbc-setup_8.3.0-1debian12_amd64.deb
- 05:23 dpkg -i mysql-connector-odbc-setup_8.3.0-1debian12_amd64.deb
- 05:37 vim /etc/odbcinst.ini
- 06:01 vim /etc/odbc.ini
- 08:51 isql -v asterisk
- 09:09 vim /etc/asterisk/res_odbc.conf
- 10:25 vim /etc/asterisk/cdr_odbc.conf
- 11:37 vim /etc/asterisk/cel_odbc.conf
- 12:53 asterisk -rvvvvvvvvvvvvvvvvvvvv
- 13:05 module load res_odbc
- 13:25 module load res_odbc_transaction
- 13:45 module load res_odbc
- 14:04 module load cdr_odbc
- 14:23 module load cel_odbc
- 14:39 odbc show
- 14:54 exit
- 15:06 vim /etc/asterisk/res_odbc.conf
- 15:47 asterisk -rvvvvvvvvvvvvvvvvvvvv
- 16:13 module reload res_odbc
- 16:37 odbc show
- 17:21 exit
- 17:24 mysql
- 17:31 use asterisk;
- 17:41 select * from cdr;
To Configure Asterisk CDR & CEL Logging With ODBC Connecter On Debian 12
Introduction:
Asterisk, a highly-effective open-source PBX (Private Branch Exchange) software, offers robust logging capabilities through its Call Detail Records (CDR) and Call Event Logging (CEL) features. These logs contain vital information about calls, allowing administrators to track and analyze call activities for reporting, issue resolution, and billing needs.
Procedure:
Step 1 : Check the OS version by using following command.
root@linuxhelp:~# cat /etc/os-release
PRETTY_NAME="Debian GNU/Linux 12 (bookworm)"
NAME="Debian GNU/Linux"
VERSION_ID="12"
VERSION="12 (bookworm)"
VERSION_CODENAME=bookworm
ID=debian
HOME_URL="https://www.debian.org/"
SUPPORT_URL="https://www.debian.org/support"
BUG_REPORT_URL="https://bugs.debian.org/"
Step 2 : Install the MySQL by using following command.
root@linuxhelp:~# apt install default-mysql-server -y
Reading package lists... Done
Building dependency tree... Done
Reading state information... Done
The following additional packages will be installed:
  galera-4 gawk libcgi-fast-perl libcgi-pm-perl libconfig-inifiles-perl libdaxctl1 libdbd-mariadb-perl libdbi-perl libfcgi-bin
  libfcgi-perl libfcgi0ldbl libhtml-template-perl libmariadb3 libndctl6 libpmem1 libsigsegv2 libterm-readkey-perl liburing2 mariadb-client
  mariadb-client-core mariadb-common mariadb-plugin-provider-bzip2 mariadb-plugin-provider-lz4 mariadb-plugin-provider-lzma
  mariadb-plugin-provider-lzo mariadb-plugin-provider-snappy mariadb-server mariadb-server-core pv rsync socat
Suggested packages:
  gawk-doc libmldbm-perl libnet-daemon-perl libsql-statement-perl libipc-sharedcache-perl mailx mariadb-test netcat-openbsd doc-base
  python3-braceexpand
The following NEW packages will be installed:
  default-mysql-server galera-4 gawk libcgi-fast-perl libcgi-pm-perl libconfig-inifiles-perl libdaxctl1 libdbd-mariadb-perl libdbi-perl
  libfcgi-bin libfcgi-perl libfcgi0ldbl libhtml-template-perl libndctl6 libpmem1 libsigsegv2 libterm-readkey-perl liburing2 mariadb-client
  mariadb-client-core mariadb-plugin-provider-bzip2 mariadb-plugin-provider-lz4 mariadb-plugin-provider-lzma mariadb-plugin-provider-lzo
  mariadb-plugin-provider-snappy mariadb-server mariadb-server-core pv rsync socat
The following packages will be upgraded:
  libmariadb3 mariadb-common
2 upgraded, 30 newly installed, 0 to remove and 72 not upgraded.
Created symlink /etc/systemd/system/multi-user.target.wants/mariadb.service → /lib/systemd/system/mariadb.service.
Setting up mariadb-plugin-provider-bzip2 (1:10.11.6-0+deb12u1) ...
Setting up mariadb-plugin-provider-lzma (1:10.11.6-0+deb12u1) ...
Setting up mariadb-plugin-provider-lzo (1:10.11.6-0+deb12u1) ...
Setting up mariadb-plugin-provider-lz4 (1:10.11.6-0+deb12u1) ...
Setting up mariadb-plugin-provider-snappy (1:10.11.6-0+deb12u1) ...
Setting up default-mysql-server (1.1.0) ...
Processing triggers for libc-bin (2.36-9+deb12u3) ...
Processing triggers for man-db (2.11.2-2) ...
Processing triggers for mariadb-server (1:10.11.6-0+deb12u1) ...
Step 3 : Login to the MySQL by using following command.
root@linuxhelp:~# mysql
Welcome to the MariaDB monitor.  Commands end with ; or \g.
Your MariaDB connection id is 31
Server version: 10.11.6-MariaDB-0+deb12u1 Debian 12

Copyright (c) 2000, 2018, Oracle, MariaDB Corporation Ab and others.

Type 'help;' or '\h' for help. Type '\c' to clear the current input statement.
Step 4 : Create database by using following command.
MariaDB [(none)]> create database asterisk;
Query OK, 1 row affected (0.000 sec)
Step 5 : Create user by using following command.
MariaDB [(none)]> create user 'asterisk'@'localhost' identified by 'asterisk@123';
Query OK, 0 rows affected (0.001 sec)
Step 6 : Make Grant privileges to the user by using following command.
MariaDB [(none)]> grant all privileges on *.* to 'asterisk'@'localhost';
Query OK, 0 rows affected (0.001 sec)
Step 7 : Refresh the privileges by using following command.
MariaDB [(none)]> flush privileges;
Query OK, 0 rows affected (0.000 sec)
Step 8 : Changed to the Asterisk DB by using following command.
MariaDB [(none)]> use asterisk;
Database changed
Step 9 : Create CDR table by using following command.
MariaDB [asterisk]> CREATE TABLE cdr (
    ->     calldate DATETIME NOT NULL DEFAULT '0000-00-00 00:00:00',
    ->     clid VARCHAR(80) NOT NULL DEFAULT '',
    ->     src VARCHAR(80) NOT NULL DEFAULT '',
    ->     dst VARCHAR(80) NOT NULL DEFAULT '',
    ->     dcontext VARCHAR(80) NOT NULL DEFAULT '',
    ->     channel VARCHAR(80) NOT NULL DEFAULT '',
    ->     dstchannel VARCHAR(80) NOT NULL DEFAULT '',
    ->     lastapp VARCHAR(80) NOT NULL DEFAULT '',
    ->     lastdata VARCHAR(80) NOT NULL DEFAULT '',
    ->     duration INT(11) NOT NULL DEFAULT '0',
    ->     billsec INT(11) NOT NULL DEFAULT '0',
    ->     disposition VARCHAR(45) NOT NULL DEFAULT '',
    ->     amaflags INT(11) NOT NULL DEFAULT '0',
    ->     accountcode VARCHAR(20) NOT NULL DEFAULT '',
    ->     uniqueid VARCHAR(32) NOT NULL DEFAULT '',
    ->     userfield VARCHAR(255) NOT NULL DEFAULT ''
    -> );
Query OK, 0 rows affected (0.011 sec)
Step 10 : Create CEL table by using following command.
MariaDB [asterisk]> CREATE TABLE cel (
    ->     id BIGINT(20) NOT NULL AUTO_INCREMENT,
    ->     eventtype VARCHAR(30) NOT NULL DEFAULT '',
    ->     eventtime DATETIME NOT NULL DEFAULT '0000-00-00 00:00:00',
    ->     cid_name VARCHAR(80) NOT NULL DEFAULT '',
    ->     cid_num VARCHAR(80) NOT NULL DEFAULT '',
    ->     cid_ani VARCHAR(80) NOT NULL DEFAULT '',
    ->     cid_rdnis VARCHAR(80) NOT NULL DEFAULT '',
    ->     cid_dnid VARCHAR(80) NOT NULL DEFAULT '',
    ->     exten VARCHAR(80) NOT NULL DEFAULT '',
    ->     context VARCHAR(80) NOT NULL DEFAULT '',
    ->     channel VARCHAR(80) NOT NULL DEFAULT '',
    ->     application VARCHAR(80) NOT NULL DEFAULT '',
    ->     appdata VARCHAR(255) NOT NULL DEFAULT '',
    ->     amaflags INT(11) NOT NULL DEFAULT '0',
    ->     accountcode VARCHAR(20) NOT NULL DEFAULT '',
    ->     uniqueid VARCHAR(150) NOT NULL DEFAULT '',
    ->     linkedid VARCHAR(150) NOT NULL DEFAULT '',
    ->     peer VARCHAR(80) NOT NULL DEFAULT '',
    ->     userdeftype VARCHAR(255) NOT NULL DEFAULT '',
    ->     eventextra VARCHAR(512) NOT NULL DEFAULT '',
    ->     PRIMARY KEY (id),
    ->     KEY cel_idx (eventtime,uniqueid)
    -> );
Query OK, 0 rows affected (0.012 sec)
Step 11 : Check the CDR table data's by using following command.
MariaDB [asterisk]> select * from cdr;
Empty set (0.001 sec)
Step 12 : Check the CEL table data's by using following command.
MariaDB [asterisk]> select * from cel;
Empty set (0.001 sec)
Step 13 : Exit from the MySQL console by using following command.
MariaDB [asterisk]> exit
Bye
Step 14 : Install Unix ODBCby using following command.
root@linuxhelp:~# apt install unixodbc unixodbc-dev -y
Reading package lists... Done
Building dependency tree... Done
Reading state information... Done
unixodbc-dev is already the newest version (2.3.11-2+deb12u1).
The following NEW packages will be installed:
  unixodbc
0 upgraded, 1 newly installed, 0 to remove and 72 not upgraded.
Need to get 28.0 kB of archives.
After this operation, 100 kB of additional disk space will be used.
Get:1 http://deb.debian.org/debian bookworm/main amd64 unixodbc amd64 2.3.11-2+deb12u1 [28.0 kB]
Fetched 28.0 kB in 0s (166 kB/s)
Selecting previously unselected package unixodbc.
(Reading database ... 170258 files and directories currently installed.)
Preparing to unpack .../unixodbc_2.3.11-2+deb12u1_amd64.deb ...
Unpacking unixodbc (2.3.11-2+deb12u1) ...
Setting up unixodbc (2.3.11-2+deb12u1) ...
Processing triggers for man-db (2.11.2-2) ...
Step 15 : Download the MySQL ODBC connector dependency by using following command.
root@linuxhelp:~# wget https://downloads.mysql.com/archives/get/p/23/file/mysql-community-client-plugins_8.3.0-1debian12_amd64.deb
--2024-06-20 05:37:00--  https://downloads.mysql.com/archives/get/p/23/file/mysql-community-client-plugins_8.3.0-1debian12_amd64.deb
Resolving downloads.mysql.com (downloads.mysql.com)... 23.58.39.183, 2600:140f:9800:191::2e31, 2600:140f:9800:1b8::2e31
Connecting to downloads.mysql.com (downloads.mysql.com)|23.58.39.183|:443... connected.
HTTP request sent, awaiting response... 302 Moved Temporarily
Location: https://cdn.mysql.com/archives/mysql-8.3/mysql-community-client-plugins_8.3.0-1debian12_amd64.deb [following]
--2024-06-20 05:37:01--  https://cdn.mysql.com/archives/mysql-8.3/mysql-community-client-plugins_8.3.0-1debian12_amd64.deb
Resolving cdn.mysql.com (cdn.mysql.com)... 23.58.42.45, 2600:140f:9800:197::1d68, 2600:140f:9800:1b1::1d68
Connecting to cdn.mysql.com (cdn.mysql.com)|23.58.42.45|:443... connected.
HTTP request sent, awaiting response... 200 OK
Length: 2353436 (2.2M) [application/x-debian-package]
Saving to: ‘mysql-community-client-plugins_8.3.0-1debian12_amd64.deb’

mysql-community-client-plugins_8.3 100%[================================================================>]   2.24M  11.1MB/s    in 0.2s

2024-06-20 05:37:02 (11.1 MB/s) - ‘mysql-community-client-plugins_8.3.0-1debian12_amd64.deb’ saved [2353436/2353436]
Step 16 : Install the MySQL ODBC connector dependency by using following command.
root@linuxhelp:~# dpkg -i mysql-community-client-plugins_8.3.0-1debian12_amd64.deb
Selecting previously unselected package mysql-community-client-plugins.
(Reading database ... 170268 files and directories currently installed.)
Preparing to unpack mysql-community-client-plugins_8.3.0-1debian12_amd64.deb ...
Unpacking mysql-community-client-plugins (8.3.0-1debian12) ...
Setting up mysql-community-client-plugins (8.3.0-1debian12) ...
Processing triggers for libc-bin (2.36-9+deb12u3) ...
Step 17 : Download the MySQL ODBC connector by using following command.
root@linuxhelp:~# wget https://downloads.mysql.com/archives/get/p/10/file/mysql-connector-odbc_8.3.0-1debian12_amd64.deb
--2024-06-20 05:37:28--  https://downloads.mysql.com/archives/get/p/10/file/mysql-connector-odbc_8.3.0-1debian12_amd64.deb
Resolving downloads.mysql.com (downloads.mysql.com)... 23.58.39.183, 2600:140f:9800:191::2e31, 2600:140f:9800:1b8::2e31
Connecting to downloads.mysql.com (downloads.mysql.com)|23.58.39.183|:443... connected.
HTTP request sent, awaiting response... 302 Moved Temporarily
Location: https://cdn.mysql.com/archives/mysql-connector-odbc-8.3/mysql-connector-odbc_8.3.0-1debian12_amd64.deb [following]
--2024-06-20 05:37:29--  https://cdn.mysql.com/archives/mysql-connector-odbc-8.3/mysql-connector-odbc_8.3.0-1debian12_amd64.deb
Resolving cdn.mysql.com (cdn.mysql.com)... 23.58.42.45, 2600:140f:9800:1b1::1d68, 2600:140f:9800:197::1d68
Connecting to cdn.mysql.com (cdn.mysql.com)|23.58.42.45|:443... connected.
HTTP request sent, awaiting response... 200 OK
Length: 1780780 (1.7M) [application/x-debian-package]
Saving to: ‘mysql-connector-odbc_8.3.0-1debian12_amd64.deb’

mysql-connector-odbc_8.3.0-1debian 100%[================================================================>]   1.70M  11.1MB/s    in 0.2s

2024-06-20 05:37:29 (11.1 MB/s) - ‘mysql-connector-odbc_8.3.0-1debian12_amd64.deb’ saved [1780780/1780780]
Step 18 : Install the MySQL ODBC connector by using following command.
root@linuxhelp:~# dpkg -i mysql-connector-odbc_8.3.0-1debian12_amd64.deb
Selecting previously unselected package mysql-connector-odbc:amd64.
(Reading database ... 170281 files and directories currently installed.)
Preparing to unpack mysql-connector-odbc_8.3.0-1debian12_amd64.deb ...
Unpacking mysql-connector-odbc:amd64 (8.3.0-1debian12) ...
Setting up mysql-connector-odbc:amd64 (8.3.0-1debian12) ...
Registering Unicode driver from in file
Success: Usage count is 1
Registering ANSI driver from in file
Success: Usage count is 1
Step 19 : Download the MySQL ODBC connector setup by using following command.
root@linuxhelp:~# wget https://downloads.mysql.com/archives/get/p/10/file/mysql-connector-odbc-setup_8.3.0-1debian12_amd64.deb
--2024-06-20 05:37:59--  https://downloads.mysql.com/archives/get/p/10/file/mysql-connector-odbc-setup_8.3.0-1debian12_amd64.deb
Resolving downloads.mysql.com (downloads.mysql.com)... 23.58.39.183, 2600:140f:9800:191::2e31, 2600:140f:9800:1b8::2e31
Connecting to downloads.mysql.com (downloads.mysql.com)|23.58.39.183|:443... connected.
HTTP request sent, awaiting response... 302 Moved Temporarily
Location: https://cdn.mysql.com/archives/mysql-connector-odbc-8.3/mysql-connector-odbc-setup_8.3.0-1debian12_amd64.deb [following]
--2024-06-20 05:37:59--  https://cdn.mysql.com/archives/mysql-connector-odbc-8.3/mysql-connector-odbc-setup_8.3.0-1debian12_amd64.deb
Resolving cdn.mysql.com (cdn.mysql.com)... 23.58.42.45, 2600:140f:9800:197::1d68, 2600:140f:9800:1b1::1d68
Connecting to cdn.mysql.com (cdn.mysql.com)|23.58.42.45|:443... connected.
HTTP request sent, awaiting response... 200 OK
Length: 1486428 (1.4M) [application/x-debian-package]
Saving to: ‘mysql-connector-odbc-setup_8.3.0-1debian12_amd64.deb’

mysql-connector-odbc-setup_8.3.0-1 100%[================================================================>]   1.42M  --.-KB/s    in 0.1s

2024-06-20 05:38:00 (11.1 MB/s) - ‘mysql-connector-odbc-setup_8.3.0-1debian12_amd64.deb’ saved [1486428/1486428]
Step 20 : Install the MySQL ODBC connector setup by using following command.
root@linuxhelp:~# dpkg -i mysql-connector-odbc-setup_8.3.0-1debian12_amd64.deb
Selecting previously unselected package mysql-connector-odbc-setup:amd64.
(Reading database ... 170293 files and directories currently installed.)
Preparing to unpack mysql-connector-odbc-setup_8.3.0-1debian12_amd64.deb ...
Unpacking mysql-connector-odbc-setup:amd64 (8.3.0-1debian12) ...
Setting up mysql-connector-odbc-setup:amd64 (8.3.0-1debian12) ...
Registering Unicode driver using setup package
Success: Usage count is 0
Success: Usage count is 1
Registering ANSI driver using setup
Success: Usage count is 0
Success: Usage count is 1
Step 21 : Check the Driver update in the ODBC inst.ini file by using following command.
root@linuxhelp:~# vim /etc/odbcinst.ini
[MySQL ODBC 8.3 Unicode Driver]
DRIVER=/usr/lib/x86_64-linux-gnu/odbc/libmyodbc8w.so
SETUP=/usr/lib/x86_64-linux-gnu/odbc/libmyodbc8S.so
UsageCount=1

[MySQL ODBC 8.3 ANSI Driver]
DRIVER=/usr/lib/x86_64-linux-gnu/odbc/libmyodbc8a.so
SETUP=/usr/lib/x86_64-linux-gnu/odbc/libmyodbc8S.so
UsageCount=1
Step 22 : Make the configuration for database connection by using following command.
root@linuxhelp:~# vim /etc/odbc.ini
[asterisk]
Description = MySQL connection to Asterisk CDR database
Driver = MySQL ODBC 8.3 Unicode Driver
Server = localhost
Database = asterisk
User = asterisk
Password = asterisk@123
Port = 3306
Option = 3
Step 23 : Check the ODBC connection by using following command.
root@linuxhelp:~# isql -v asterisk
+---------------------------------------+
| Connected!                            |
|                                       |
| sql-statement                         |
| help [tablename]                      |
| echo [string]                         |
| quit                                  |
|                                       |
+---------------------------------------+
SQL> quit
Step 24 : Configure the Asterisk ODBC connection by using following command.
root@linuxhelp:~# vim /etc/asterisk/res_odbc.conf
[mysql2]
enabled => yes
dsn => asterisk
username => asterisk
password => asterisk@123
pre-connect => yes
Step 25 : Configure the Asterisk CDR oODBC connection by using following command.
root@linuxhelp:~# vim /etc/asterisk/cdr_odbc.conf
[global]
dsn=mysql2
username=asterisk
password=asterisk@123
loguniqueid=yes
table=cdr		;"cdr" is default table name
Step 26 : Configure the Asterisk CEL ODBCconnection by using following command.
root@linuxhelp:~# vim /etc/asterisk/cel_odbc.conf
[general]
connection=mysql2
table=cel
enabled=yes
Step 27 : Login to the Asterisk console by using following command.
root@linuxhelp:~# asterisk -rvvvvvvvvvvvvvvvvvvvv
Asterisk 20.4.0, Copyright (C) 1999 - 2022, Sangoma Technologies Corporation and others.
Created by Mark Spencer <markster@digium.com>
Asterisk comes with ABSOLUTELY NO WARRANTY; type 'core show warranty' for details.
This is free software, with components licensed under the GNU General Public
License version 2 and other licenses; you are welcome to redistribute it under
certain conditions. Type 'core show license' for details.
=========================================================================
Connected to Asterisk 20.4.0 currently running on linuxhelp (pid = 965)
linuxhelp*CLI>
Step 28 : Load the Asterisk ODBC module by using following command.
linuxhelp*CLI> module load res_odbc
Unable to load module res_odbc
Command 'module load res_odbc' failed.
[Jun 20 05:47:22] ERROR[3947]: loader.c:283 module_load_error: res_odbc has one or more unknown dependencies.
Step 29 : Load the Asterisk ODBC dependency module to troubleshoot the error by using following command.
linuxhelp*CLI> module load res_odbc_transaction
Loaded res_odbc_transaction
  == Registered application 'ODBC_Commit'
  == Registered application 'ODBC_Rollback'
  == Registered custom function 'ODBC'
 Loaded res_odbc_transaction.so => (ODBC transaction resource)
Step 30 : Again Load the Asterisk ODBC module by using following command.
linuxhelp*CLI> module load res_odbc
Loaded res_odbc
[Jun 20 05:48:11] NOTICE[3947]: res_odbc.c:697 load_odbc_config: Registered ODBC class 'mysql2' dsn->[asterisk]
 Loaded res_odbc.so => (ODBC resource)
Step 31 : Load the Asterisk CDR ODBC module by using following command.
linuxhelp*CLI> module load cdr_odbc
Loaded cdr_odbc
 Loaded cdr_odbc.so => (ODBC CDR Backend)
Step 32 : Load the Asterisk CEL ODBC module by using following command.
linuxhelp*CLI> module load cel_odbc
Loaded cel_odbc
 Loaded cel_odbc.so => (ODBC CEL backend)
Step 33 : Check the connection of the ODBC by using following command.
linuxhelp*CLI> odbc show

ODBC DSN Settings
-----------------

  Name:   mysql2
  DSN:    asterisk
    Number of active connections: 1 (out of 1)
    Logging: Disabled
Step 34 : Exit from the Asterisk console by using following command.
linuxhelp*CLI> exit
Asterisk cleanly ending (0).
Executing last minute cleanups
Step 35 : Edit the ODBC configuration file to enable the logging by using following command.
root@linuxhelp:~# vim /etc/asterisk/res_odbc.conf
[mysql2]
enabled => yes
dsn => asterisk
username => asterisk
password => asterisk@123
pre-connect => yes
logging => yes
Step 36 : Login to the Asterisk console by using following command.
root@linuxhelp:~# asterisk -rvvvvvvvvvvvvvvvvvvvv
Asterisk 20.4.0, Copyright (C) 1999 - 2022, Sangoma Technologies Corporation and others.
Created by Mark Spencer <markster@digium.com>
Asterisk comes with ABSOLUTELY NO WARRANTY; type 'core show warranty' for details.
This is free software, with components licensed under the GNU General Public
License version 2 and other licenses; you are welcome to redistribute it under
certain conditions. Type 'core show license' for details.
=========================================================================
Connected to Asterisk 20.4.0 currently running on linuxhelp (pid = 965)
linuxhelp*CLI>
Step 37 : Reload the ODBC module by using following command.
linuxhelp*CLI> module reload res_odbc
Module 'res_odbc' reloaded successfully.
	-- Reloading module 'res_odbc.so' (ODBC resource)
[Jun 20 05:55:14] NOTICE[3992]: res_odbc.c:697 load_odbc_config: Registered ODBC class 'mysql2' dsn->[asterisk]
Step 38 : Check the connection of the ODBC by using following command.
linuxhelp*CLI> odbc show

ODBC DSN Settings
-----------------

  Name:   mysql2
  DSN:    asterisk
    Number of active connections: 1 (out of 1)
    Logging: Enabled
    Number of prepares executed: 0
    Number of queries executed: 0
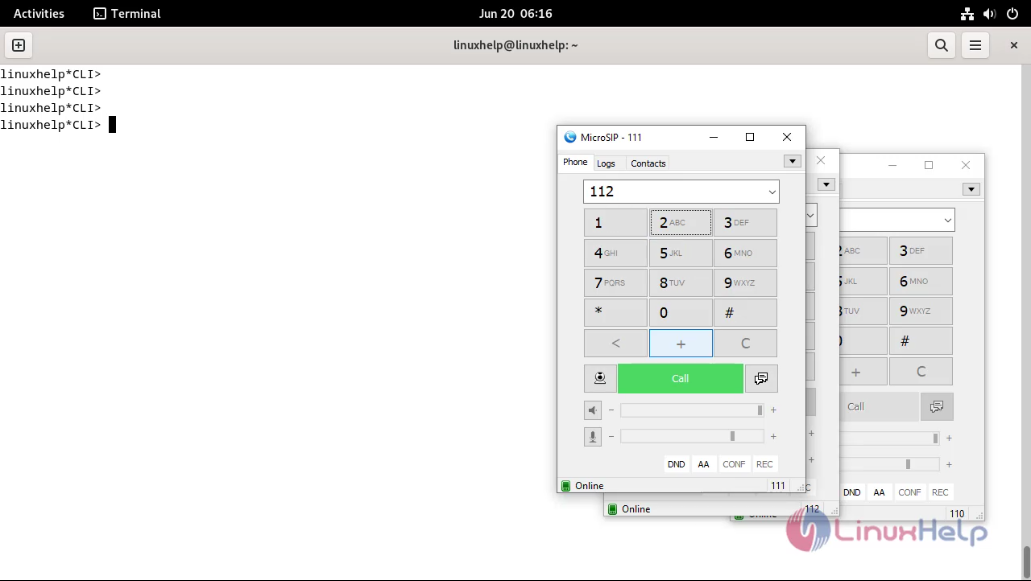
Step 39 : Make the Call to check the CDR and CEL logging by using microsip applications as shown in below image.
    -- Executing [112@internal:1] Dial("PJSIP/111-00000016", "PJSIP/112") in new stack
    -- Called PJSIP/112
    -- PJSIP/112-00000017 is ringing
       > 0x7f19c001d530 -- Strict RTP learning after remote address set to: 192.168.6.104:4022
    -- PJSIP/112-00000017 answered PJSIP/111-00000016
       > 0x7f19c004ba80 -- Strict RTP learning after remote address set to: 192.168.6.104:4000
    -- Channel PJSIP/112-00000017 joined 'simple_bridge' basic-bridge <3b56634f-f298-41ba-b219-db8dfd24fb68>
    -- Channel PJSIP/111-00000016 joined 'simple_bridge' basic-bridge <3b56634f-f298-41ba-b219-db8dfd24fb68>
       > Bridge 3b56634f-f298-41ba-b219-db8dfd24fb68: switching from simple_bridge technology to native_rtp
       > Locally RTP bridged 'PJSIP/111-00000016' and 'PJSIP/112-00000017' in stack
       > 0x7f19c004ba80 -- Strict RTP switching to RTP target address 192.168.6.104:4000 as source
       > 0x7f19c001d530 -- Strict RTP switching to RTP target address 192.168.6.104:4022 as source
       > Locally RTP bridged 'PJSIP/111-00000016' and 'PJSIP/112-00000017' in stack
       > 0x7f19c004ba80 -- Strict RTP learning complete - Locking on source address 192.168.6.104:4000
       > 0x7f19c001d530 -- Strict RTP learning complete - Locking on source address 192.168.6.104:4022
    -- Channel PJSIP/112-00000017 left 'native_rtp' basic-bridge <3b56634f-f298-41ba-b219-db8dfd24fb68>
    -- Channel PJSIP/111-00000016 left 'native_rtp' basic-bridge <3b56634f-f298-41ba-b219-db8dfd24fb68>
  == Spawn extension (internal, 112, 1) exited non-zero on 'PJSIP/111-00000016'
Step 40 : Exit from the Asterisk console by using following command.
linuxhelp*CLI> exit
Asterisk cleanly ending (0).
Executing last minute clean-ups
Step 41 : Login to the MySQL console by using following command.
root@linuxhelp:~# mysql
Welcome to the MariaDB monitor.  Commands end with ; or \g.
Your MariaDB connection id is 42
Server version: 10.11.6-MariaDB-0+deb12u1 Debian 12

Copyright (c) 2000, 2018, Oracle, MariaDB Corporation Ab and others.

Type 'help;' or '\h' for help. Type '\c' to clear the current input statement.

MariaDB [(none)]>
Step 42 : Changed to Asterisk DB by using following command.
MariaDB [(none)]> use asterisk;
Reading table information for completion of table and column names
You can turn off this feature to get a quicker startup with -A

Database changed
Step 43 : Check the CDR table by using following command.
MariaDB [asterisk]> select * from cdr;
+---------------------+--------------------+-----+-----+----------+--------------------+--------------------+---------+-----------+----------+---------+-------------+----------+-------------+---------------+-----------+
| calldate            | clid               | src | dst | dcontext | channel            | dstchannel         | lastapp | lastdata  | duration | billsec | disposition | amaflags | accountcode | uniqueid      | userfield |
+---------------------+--------------------+-----+-----+----------+--------------------+--------------------+---------+-----------+----------+---------+-------------+----------+-------------+---------------+-----------+
| 2024-06-20 06:15:08 | "linuxhelp2" <111> | 111 | 110 | internal | PJSIP/111-00000014 | PJSIP/110-00000015 | Dial    | PJSIP/110 |        3 |       1 | 8           |        3 |             | 1718844308.30 |           |
| 2024-06-20 06:16:29 | "linuxhelp2" <111> | 111 | 112 | internal | PJSIP/111-00000016 | PJSIP/112-00000017 | Dial    | PJSIP/112 |       17 |      14 | 8           |        3 |             | 1718844389.33 |           |
+---------------------+--------------------+-----+-----+----------+--------------------+--------------------+---------+-----------+----------+---------+-------------+----------+-------------+---------------+-----------+
2 rows in set (0.001 sec)
Conclusion:
We have reached the end of this article. In this guide, we have walked you through the steps required to configure Asterisk CDR and CEL logging with ODBC On Debian 12. Your feedback is much welcome.
Comments ( 0 )
No comments available