• Categories
    Category
  • Categories
    Category
  • News
  • Tutorials
  • Forums
  • Tags
  • Users
Tutorial Comments FAQ Related Articles

How to install RabbitMQ on linuxmint 18.3

2589

To install RabbitMQ on Linux Mint 18.3

RabbitMQ is an open source message broker software (sometimes called message-oriented middleware) that originally implemented the Advanced Message Queuing Protocol (AMQP) and has since been extended with a plug-in architecture to support Streaming Text Oriented Messaging Protocol (STOMP), MQTT, and other protocols

Installing RabbitMQ

First, make sure you update your system by making use of the following command.

linuxhelp ~ # apt-get update 
Hit:1 http://archive.ubuntu.com/ubuntu xenial InRelease
Hit:2 http://archive.canonical.com/ubuntu xenial InRelease                                                          
Ign:3 http://packages.linuxmint.com sylvia InRelease                                           
Get:4 http://archive.ubuntu.com/ubuntu xenial-updates InRelease [102 kB]                       
Get:5 http://packages.linuxmint.com sylvia Release [24.2 kB]                                  
Get:6 http://packages.linuxmint.com sylvia Release.gpg [819 B]                                          
Get:7 http://archive.ubuntu.com/ubuntu xenial-backports InRelease [102 kB]
.
.
Get:23 http://security.ubuntu.com/ubuntu xenial-security/universe i386 Packages [281 kB]                                                         
Get:24 http://security.ubuntu.com/ubuntu xenial-security/universe Translation-en [121 kB]                                                        
Fetched 5,296 kB in 9s (540 kB/s)                                                                                                                
Reading package lists... Done

Once this is done, we can enable the RabbitMQ application repository.

linuxhelp ~ # echo " deb http://www.rabbitmq.com/debian/ testing main"  > >  /etc/apt/sources.list

Now, we can add the verification key of The RabbitMQ package.

linuxhelp ~ # curl http://www.rabbitmq.com/rabbitmq-signing-key-public.asc | sudo apt-key add -
  % Total    % Received % Xferd  Average Speed   Time    Time     Time  Current
                                 Dload  Upload   Total   Spent    Left  Speed
100  1702    0  1702    0     0  19573      0 --:--:-- --:--:-- --:--:-- 19790
OK

Once it is done, you need to update your system again.

linuxhelp ~ # apt-get update 
Get:1 http://www.rabbitmq.com/debian testing InRelease [33.0 kB]
Ign:1 http://www.rabbitmq.com/debian testing InRelease                                                                 
Get:2 http://www.rabbitmq.com/debian testing/main amd64 Packages [455 B]                                             
Get:3 http://www.rabbitmq.com/debian testing/main i386 Packages [455 B]     
.
.
Hit:9 http://archive.ubuntu.com/ubuntu xenial-backports InRelease        
Hit:10 http://packages.linuxmint.com sylvia Release                      
Fetched 33.9 kB in 0s (36.5 kB/s)                 
Reading package lists... Done

You can now finally install the RabbitMQ server by running the following command.

linuxhelp ~ # apt-get install rabbitmq-server
Reading package lists... Done
Building dependency tree       
Reading state information... Done
The following additional packages will be installed:
  erlang-asn1 erlang-base erlang-corba erlang-crypto erlang-diameter erlang-edoc erlang-eldap erlang-erl-docgen erlang-eunit erlang-ic
.
.
dding system user `rabbitmq'  (UID 124) ...
Adding new user `rabbitmq'  (UID 124) with group `rabbitmq'  ...
Not creating home directory `/var/lib/rabbitmq' .
Processing triggers for libc-bin (2.23-0ubuntu9) ...
Processing triggers for systemd (229-4ubuntu21) ...
Processing triggers for ureadahead (0.100.0-19) ...
Enable RabbitMQ Management console

And then, run the following command to enable the RabbitMQ Management Console.

linuxhelp ~ # rabbitmq-plugins enable rabbitmq_management
The following plugins have been enabled:
  amqp_client
  cowlib
  cowboy
  rabbitmq_web_dispatch
  rabbitmq_management_agent
  rabbitmq_management

After that, you need to apply plugin configuration

linuxhelp ~ # rabbitmq-plugins enable rabbitmq_management
The following plugins have been enabled:
  amqp_client
  cowlib
  cowboy
  rabbitmq_web_dispatch
  rabbitmq_management_agent
  rabbitmq_management

Applying plugin configuration to rabbit started 6 plugins.Once this is done, you can see that management plugin is enabled and console is up on the URL - http://localhost:15672/
Plugin


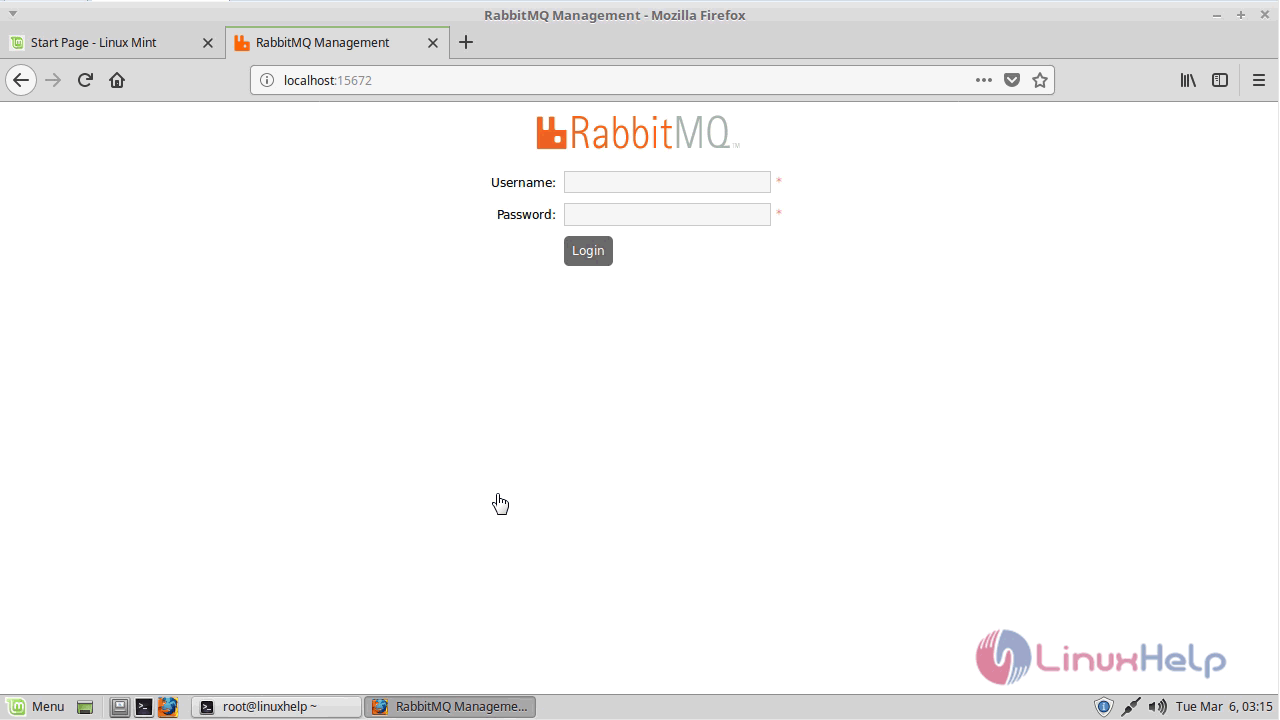
You can log in and see what all operations we can perform.
Login
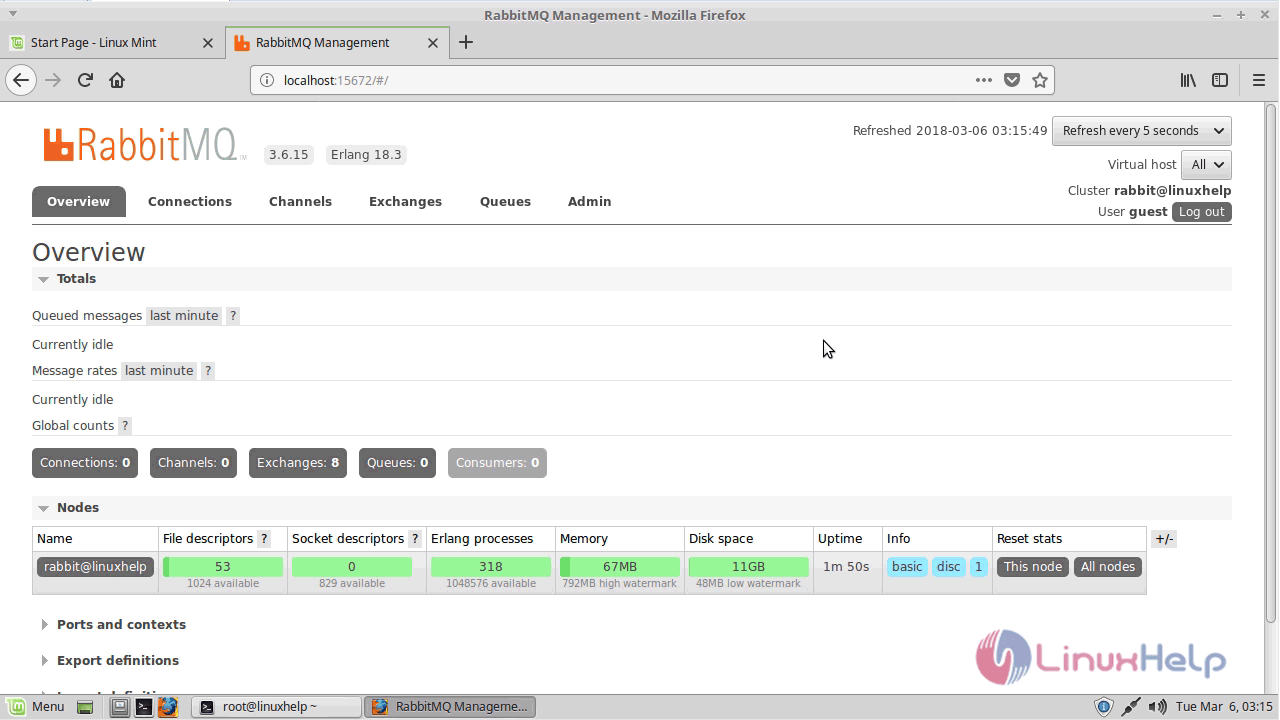
In general, no manual configuration will be needed with RabbitMQ as it already comes packaged with production-grade configuration.

Tags:
elijah
Author: 

Comments ( 0 )

No comments available

Add a comment

Frequently asked questions ( 5 )

Q

how to remove RabbitMQ application?

A

to remove RabbitMQ application Run the following command on termianl

"# apt-get remove rabbitmq-server".

Q

What is an exchange in RabbitMQ?

A

An exchange in RabbitMQ is a message routing agent that routes the message to different queues after accepting the same from the producer application. It routes the messages with the help of

Q

What is “binding” and “routing key”?

A

A binding in rabbitMQ is a "link" that one sets up to bind a queue to an exchange.

The routing key is a message attribute. This is how the routing algorithm is formed - a message is sent to client

Q

What is Rabbitq & its uses?

A

RabbitMQ is an open source message broker software (sometimes called message-oriented middleware) that originally implemented the Advanced Message Queuing Protocol (AMQP) and has since been extended with a plug-in architecture to support Streaming Text Oriented Messaging Protocol (STOMP), MQTT, and other protocols

Q

HOw to verify the rabbitmq package ?

A

To verify the rabbitmq package use the following command

#curl http://www.rabbitmq.com/rabbitmq-signing-key-public.asc | sudo apt-key add -

Related Tutorials in How to install RabbitMQ on linuxmint 18.3

Related Tutorials in How to install RabbitMQ on linuxmint 18.3

How to install WinRAR 5.11 on Linuxmint 18.03
May 22, 2018
How to Setup VNC Server on Linux Mint 20
Dec 22, 2020
How to install and configure samba setup in Linux mint - 18.3
Mar 26, 2018
Installation SSL Certificate on Ubuntu/Linuxmint/Debian to Secure Apache
Sep 19, 2018
How to Install and Configure Samba on Linux Mint 20
Nov 9, 2020
How to Install NextCloud on Linux Mint 18.3
Feb 27, 2018
How To Install And Update OpenSSL On Linuxmint 18.3
Jun 8, 2018
How To Install AnyDesk on Linux Mint 18.3
Apr 11, 2018

Related Forums in How to install RabbitMQ on linuxmint 18.3

Related Forums in How to install RabbitMQ on linuxmint 18.3

Linux
isaac class=
Failed to fetch http://security.ubuntu.com/ubuntu/pool/main/m/mysql-8.0/mysql-client-core-8.0_8.0.21-0ubuntu0.20.04.4_amd64.deb 404 Not Found
Dec 4, 2020
Linux Mint
AlxH class=
Complete beginner, install bluegriffon
Jul 1, 2020
Linux
AadrikaAnshu class=
How to add timestamps to history On Any Linux Machine
Jun 18, 2019
Linux Mint
bz0 class=
How to change a function of a key
Jun 7, 2019
Linux Mint
who class=
How to compare multiple files
Nov 10, 2019
NFS (Network File System)
Mike class=
Linux Mint 18.3 - NFS Shares - Only Root Can Mount Share
Oct 4, 2019
Command Line Tools
wayne class=
Deleting windows files booting from mint(usb)
Sep 16, 2017
Ubuntu
Kirin class=
Videos Always Micro-Shutter
Mar 8, 2019

Related News in How to install RabbitMQ on linuxmint 18.3

Related News in How to install RabbitMQ on linuxmint 18.3

A Newer and a Faster Window Manager for Tina (Linux Mint 19.2)
Apr 9, 2019
Linux Mint 18.2 Ubuntu based Operating System is named Sonya
May 2, 2017
Refreshed Linux Mint Debian Edition (LMDE) 2 'Betsy' ISO images now available
Mar 14, 2017
The Best Linux Operating System is in the house: Mint 18.2
Aug 12, 2017
Linux Mint 18.1 released with smooth features and offers long-term support
Apr 11, 2017
Linux Mint 18.2 Sonya Beta version now available for download
Jun 7, 2017
Back To Top!
Rank
User
Points

Top Contributers

userNamenaveelansari
135850

Top Contributers

userNameayanbhatti
92510

Top Contributers

userNamehamzaahmed
32150

Top Contributers

1
userNamelinuxhelp
31040

Top Contributers

userNamemuhammadali
24500
Can you help Isaiah ?
What is the use of SUID & SGID commands

How to set the special permissions to the files and folders using SUID and SGID commands...

Networking
  • Routing
  • trunk
  • Netmask
  • Packet Capture
  • domain
  • HTTP Proxy
Server Setup
  • NFS
  • KVM
  • Memory
  • Sendmail
  • WebDAV
  • LXC
Shell Commands
  • Cloud commander
  • Command line archive tools
  • last command
  • Shell
  • terminal
  • Throttle
Desktop Application
  • Linux app
  • Pithos
  • Retrospect
  • Scribe
  • TortoiseHg
  • 4Images
Monitoring Tool
  • Monit
  • Apache Server Monitoring
  • EtherApe 
  • Arpwatch Tool
  • Auditd
  • Barman
Web Application
  • Nutch
  • Amazon VPC
  • FarmWarDeployer
  • Rukovoditel
  • Mirror site
  • Chef
Contact Us | Terms of Use| Privacy Policy| Disclaimer
© 2025 LinuxHelp.com All rights reserved. Linux™ is the registered trademark of Linus Torvalds. This site is not affiliated with linus torvalds in any way.