How to install PHP Fusion in Ubuntu 16.04
To install PHP Fusion in Ubuntu 16.04
PHP-Fusion is a lightweight and open source Content Management System (CMS) built based on PHP and uses MySQL database for storage purposes. With PHP Fusion, you shall easily create a web content in minutes. Since, it includes a simple yet comprehensible administration system it can be used for efficiently creating and managing your sites. You shall use the PHP Fusion for creating news, articles, forums, polls, shoutbox, comments, ratings, much more. It is really simple to install PHP Fusion, and in this article, you will learn about the method to install PHP fusion on Ubuntu 16.04. But, before you start installing your PHP Fusion application, make sure you have the LAMP stack installed in your system.
Installing PHP Fusion
Before you start you should download the php fusion package, and for that, you need to run the following command.
root@example:/home/user1# wget https://excellmedia.dl.sourceforge.net/project/php-fusion/PHP-Fusion%20Archives/9.x/PHP-Fusion%209.0.zip
--2017-11-10 06:10:55-- https://excellmedia.dl.sourceforge.net/project/php-fusion/PHP-Fusion%20Archives/9.x/PHP-Fusion%209.0.zip
Resolving excellmedia.dl.sourceforge.net (excellmedia.dl.sourceforge.net)... 202.153.32.19
Connecting to excellmedia.dl.sourceforge.net (excellmedia.dl.sourceforge.net)|202.153.32.19|:443... connected.
HTTP request sent, awaiting response... 200 OK
Length: 11377772 (11M) [application/octet-stream]
Saving to: ‘ PHP-Fusion 9.0.zip’
PHP-Fusion 9.0.zip 100%[====================================> ] 10.85M 1.10MB/s in 10s
2017-11-10 06:11:05 (1.08 MB/s) - ‘ PHP-Fusion 9.0.zip’  saved [11377772/11377772]
Once it is downloaded, you shall extract the package by running the following command.
root@example:/home/user1# unzip PHP-Fusion 9.0.zip
Archive: PHP-Fusion 9.0.zip
creating: PHP-Fusion 9.0/
inflating: PHP-Fusion 9.0/agpl.txt
creating: PHP-Fusion 9.0/files/
creating: PHP-Fusion 9.0/files/administration/
&hellip
&hellip
&hellip
inflating: PHP-Fusion 9.0/files/widgets/slider/slider.svg
inflating: PHP-Fusion 9.0/files/widgets/slider/slider_admin.php
inflating: PHP-Fusion 9.0/files/widgets/slider/slider_widget.php
inflating: PHP-Fusion 9.0/readme-en.html
Later, you should create php-fusion directory in /var/www/html directory as follows.
root@example:/home/user1# mkdir /var/www/html/php-fusion
And then, copy the contents of the file in PHP-Fusion 9.0 directory to the /var/www/html/php-fusion directory. Run the following command for the same purpose.
root@example:/home/user1# cp -R PHP-Fusion 9.0/files/* /var/www/html/php-fusion/
Then, change the ownership for the php-fusion directory as follows.
root@example:/var/www/html# chown -R www-data:www-data php-fusion
After that, you need to configure the database for php fusion. So log into your MySQL server by running the following command. And make all the necessary configuration.
root@example:/var/www/html# mysql -u root -p
Enter password:
Welcome to the MySQL monitor. Commands end with   or g.
Your MySQL connection id is 4
Server version: 5.7.19-0ubuntu0.16.04.1 (Ubuntu)
Copyright (c) 2000, 2017, Oracle and/or its affiliates. All rights reserved.
Oracle is a registered trademark of Oracle Corporation and/or its
affiliates. Other names may be trademarks of their respective
owners.
Type ' help '  or ' h'  for help. Type ' c'  to clear the current input statement.
mysql>  CREATE DATABASE phpfusion
Query OK, 1 row affected (0.00 sec)
mysql>  GRANT ALL PRIVILEGES ON phpfusion.* to phpfusionuser@localhost identified by ' password'
Query OK, 0 rows affected, 1 warning (0.01 sec)
mysql>  flush privileges
Query OK, 0 rows affected (0.00 sec)
mysql>  exit
Bye
Once it is done, you shall configure the Apache VirtualHost for php fusion. So for that, create phpfusion.conf file in /etc/apache2/sites-available/ directory.
root@example:/var/www/html# touch /etc/apache2/sites-available/phpfusion.conf
And then, create a soft link for the phpfusion.conf in /etc/apache2/sistes-enabled/ directory as follows.
root@example:/var/www/html# ln -s /etc/apache2/sites-available/phpfusion.conf /etc/apache2/sistes-enabled/phpfusion.conf
root@example:/var/www/html# nano /etc/apache2/sites-available/phpfusion.conf
You shall now make the necessary modification in the .conf file as follows.
< VirtualHost 192.168.7.201:80>
ServerAdmin linuxhelpserver@gmail.com
DocumentRoot " /var/www/html/php-fusion/"
ServerName example.linuxhelp1.com
ServerAlias www.example.linuxhelp1.com
ErrorLog " /var/log/apache2/test-error_log"
CustomLog " /var/log/apache2/test-access_log"  combined

Directory " /var/www/html/php-fusion/" >
DirectoryIndex index.html index.php
Options FollowSymLinks
AllowOverride All
Require all granted
< /Directory>
< /VirtualHost>
Now save the file and exit.
Once the configuration is done, you should restart the Apache Web Server. Run the following command for the same purpose.
root@example:/var/www/html# service apache2 restart
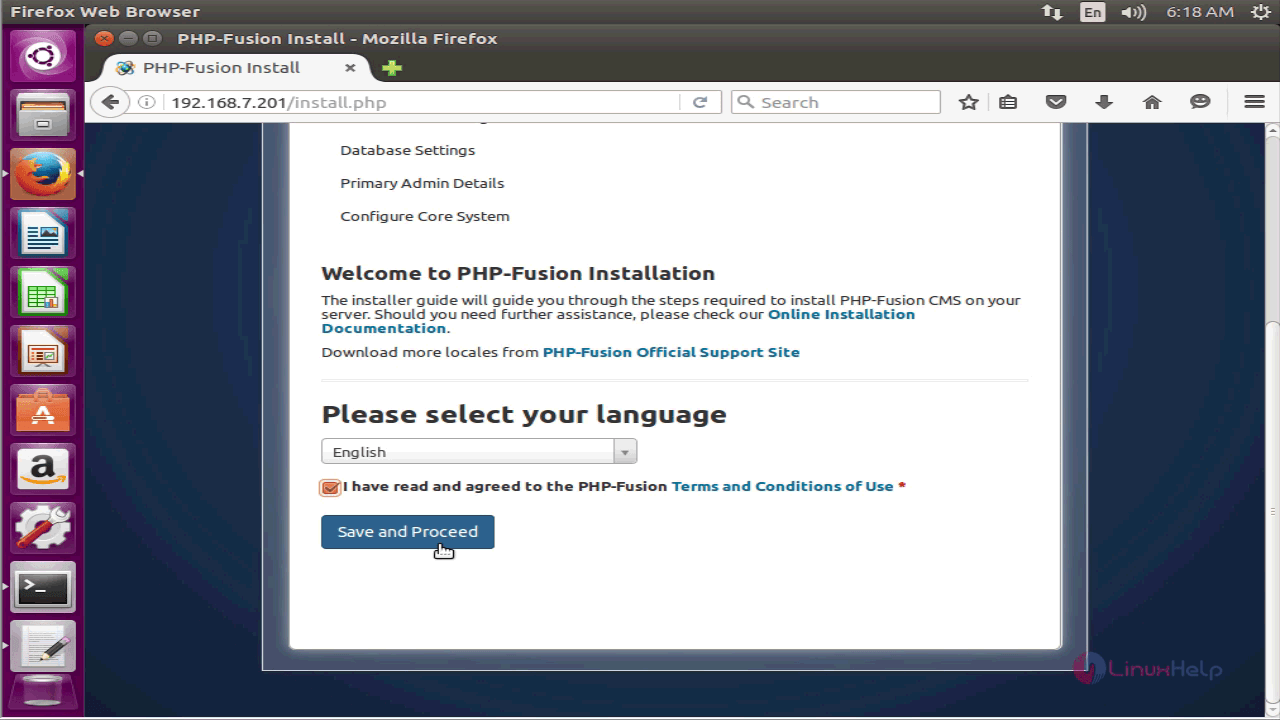
And then, switch over to your browser and navigate to http://192.168.7.201. The installation page of the PHP Fusion appears. Select your language and proceed.
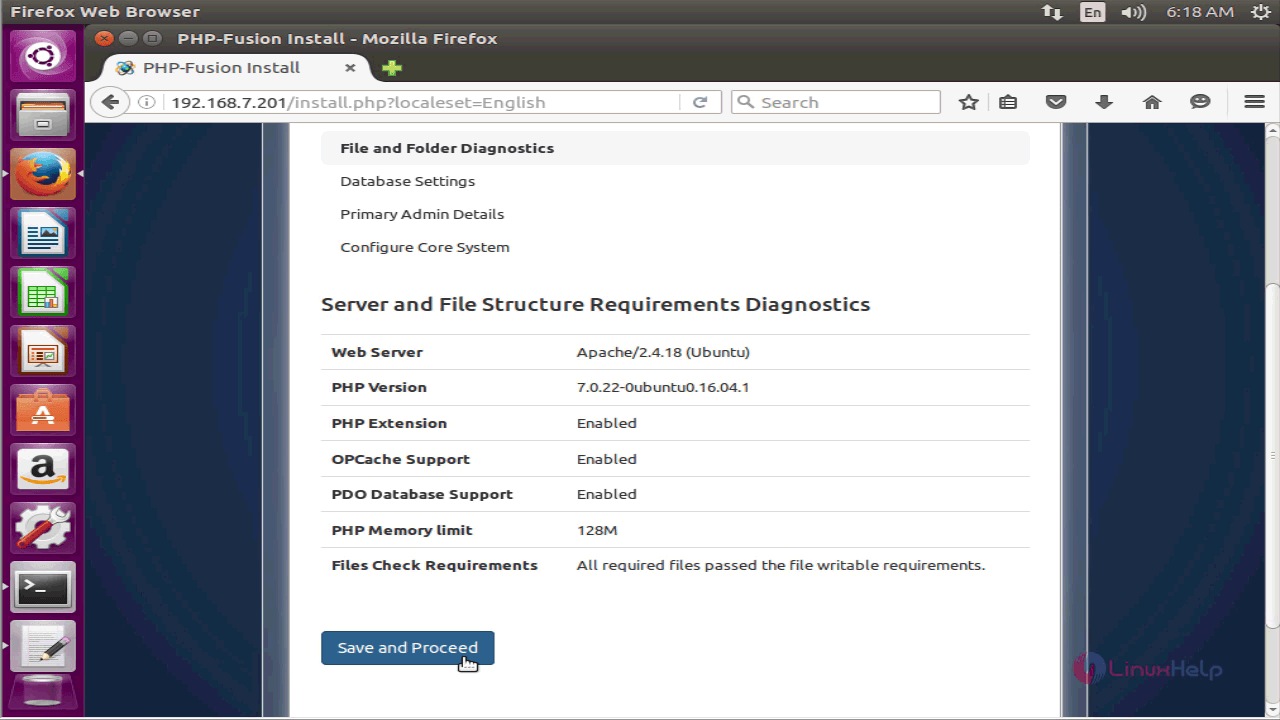
Check if all the folder and file permissions are correct, Save and Proceed further.
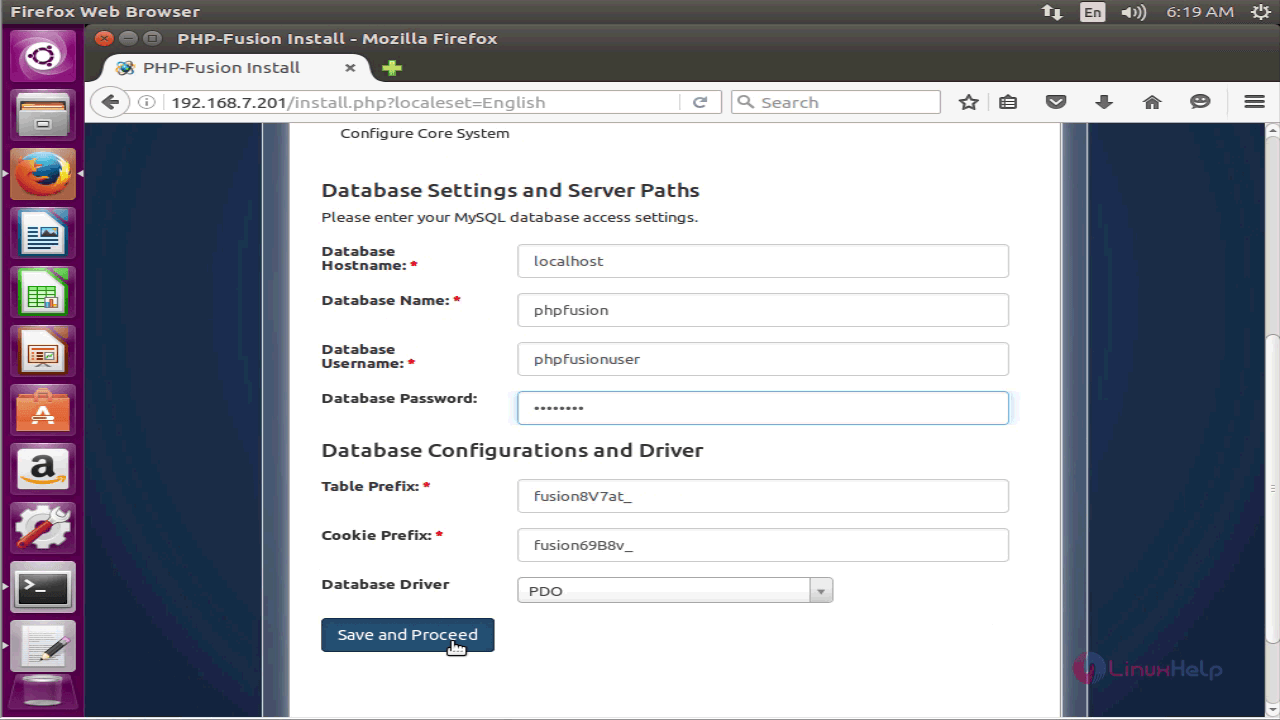
Enter the database information and proceed further.
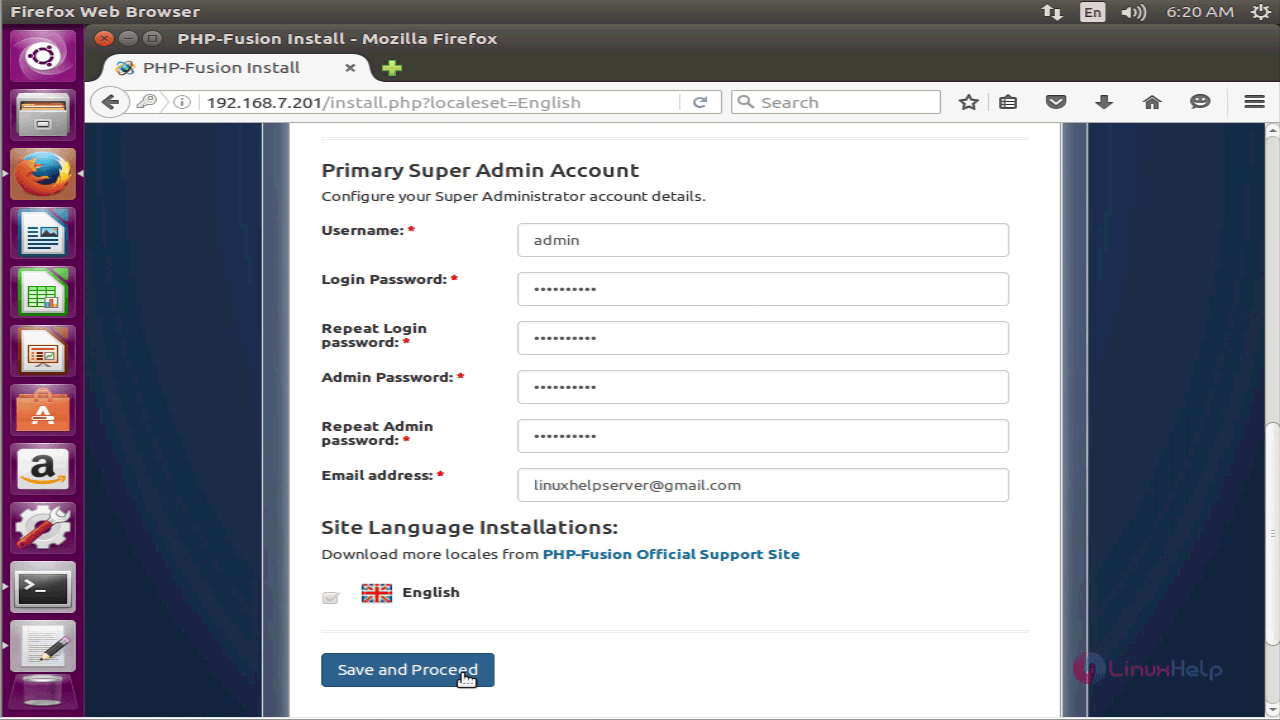
In the next page, you need to give all the primary admin details.
Finally, you need to configure your core system.

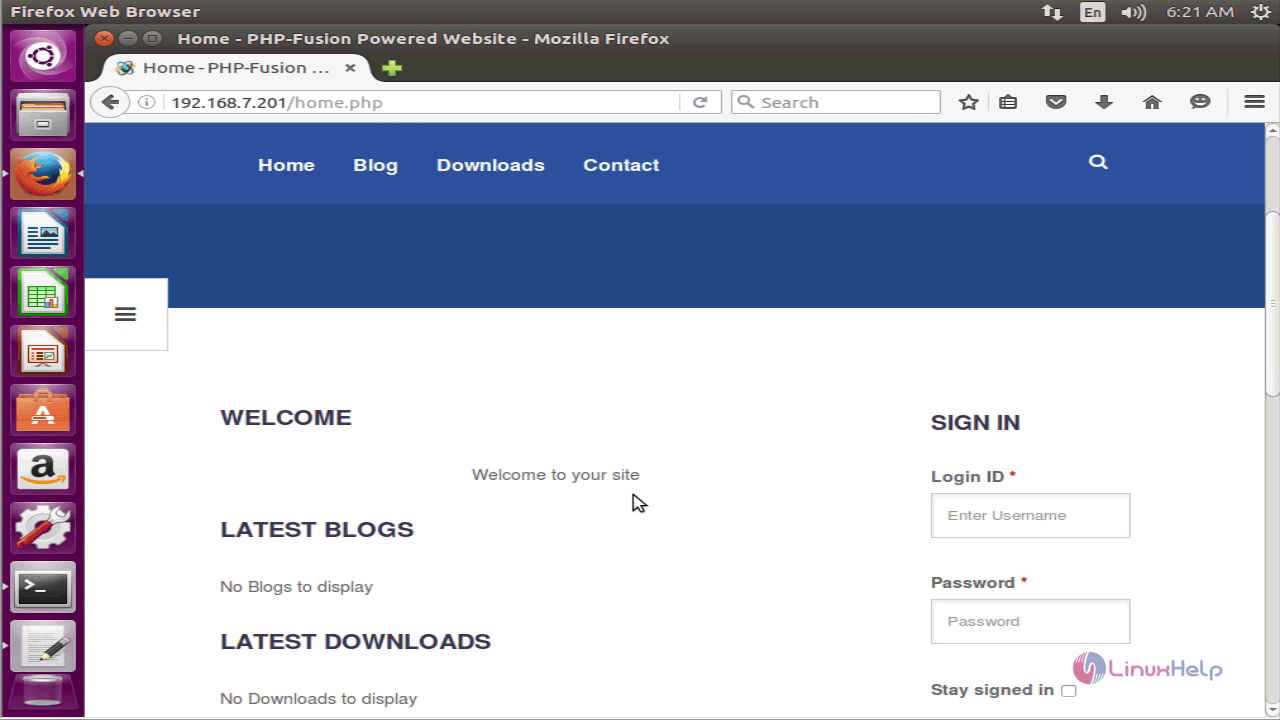
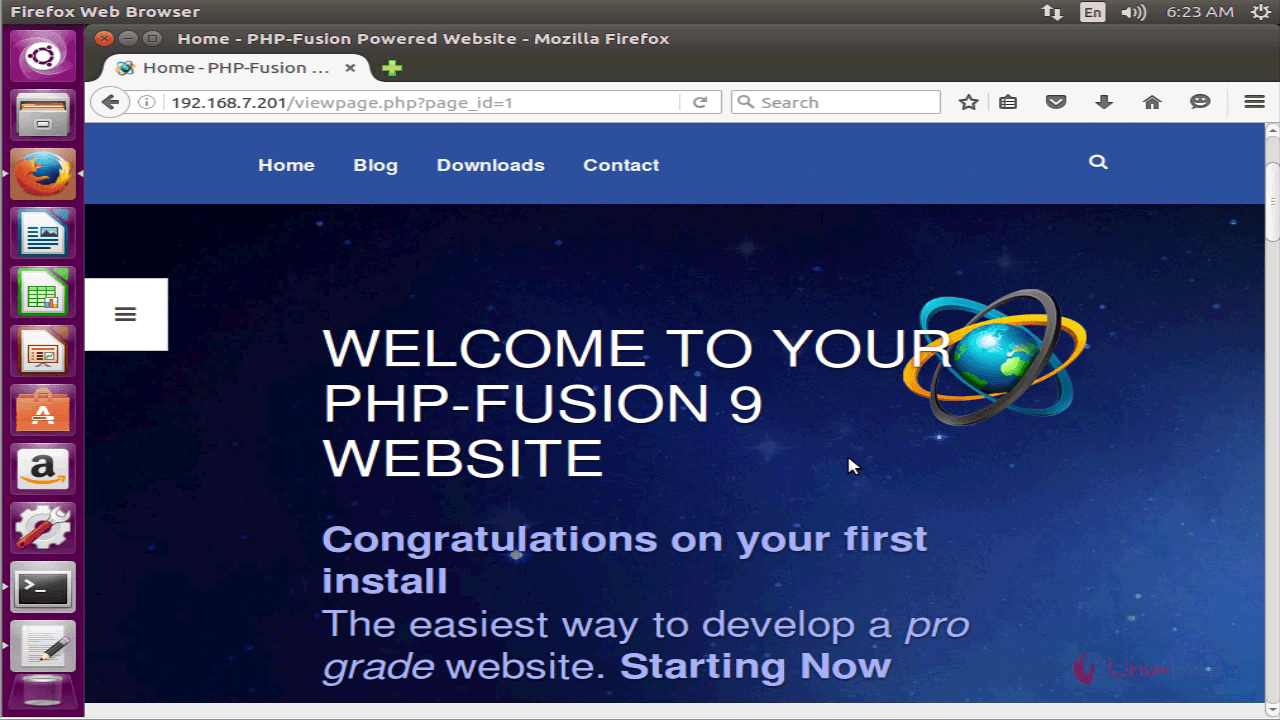
Once the installation is done, the PHP Fusion home page appears.
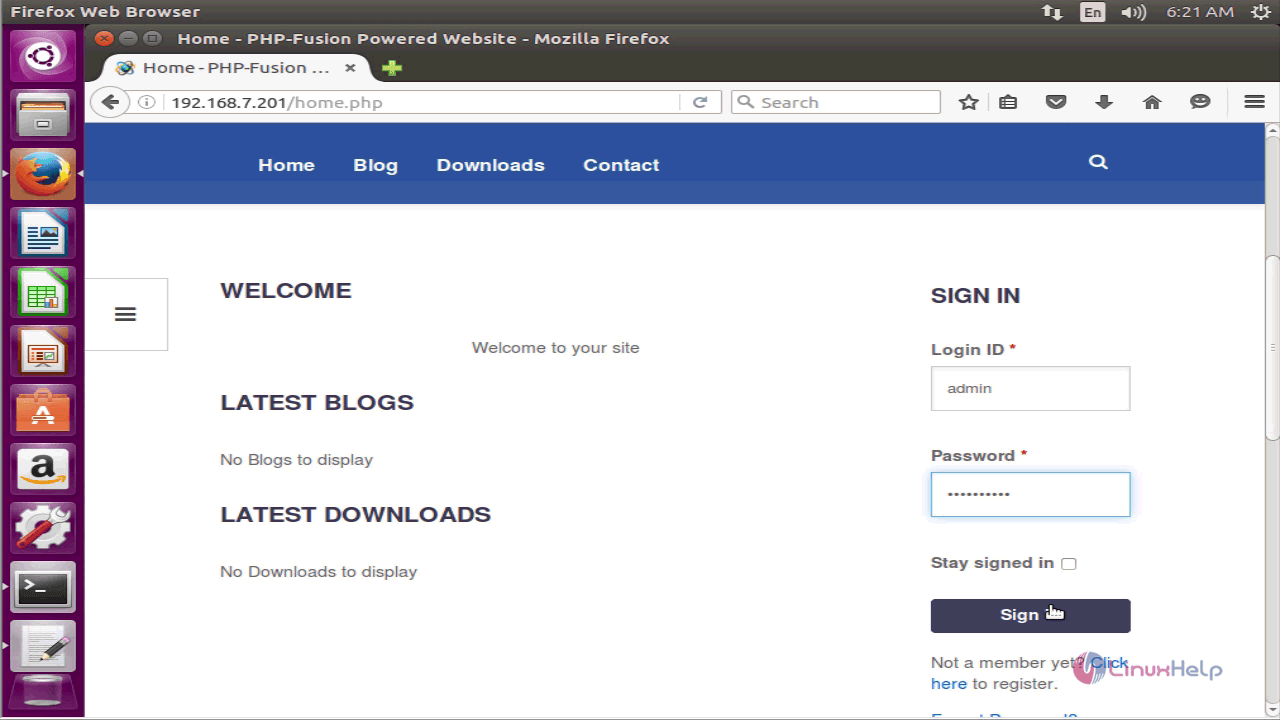
Enter your login credentials and click on ' Sign in.'
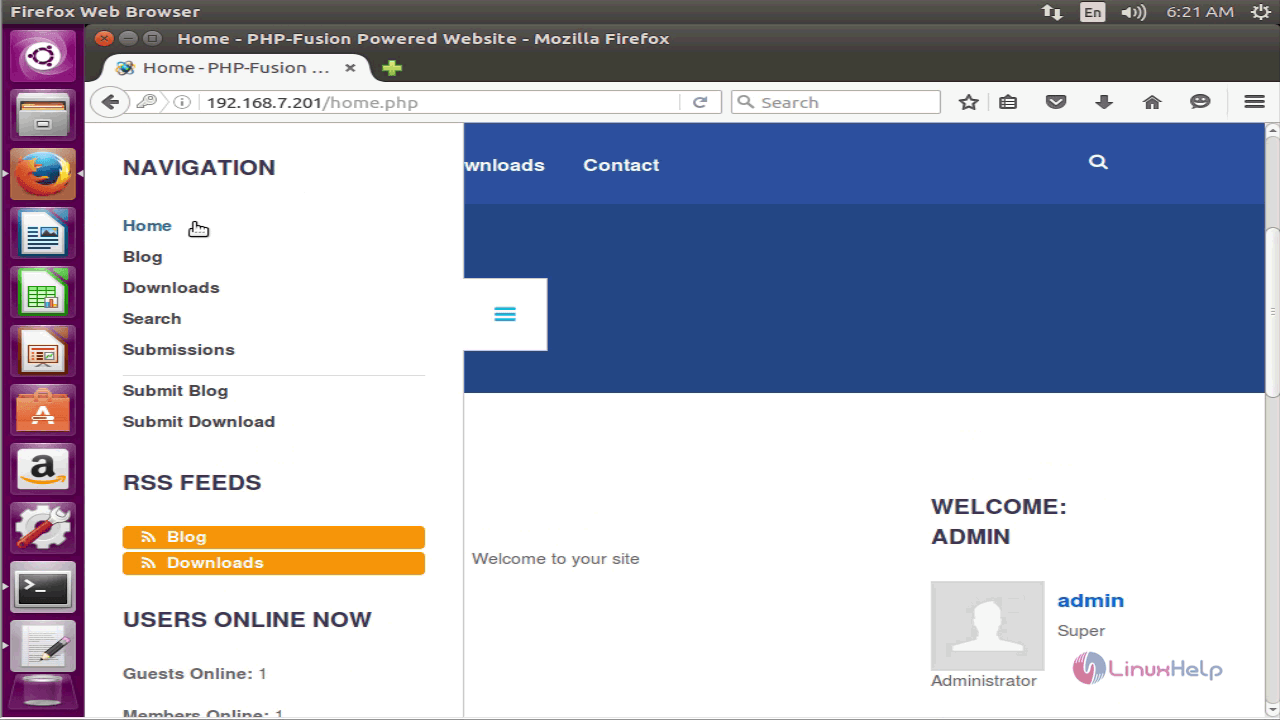
Through the Navigation option, you shall toggle between the menus available on the site.
You shall install the default theme by clicking on the Yes, Install the Page option.
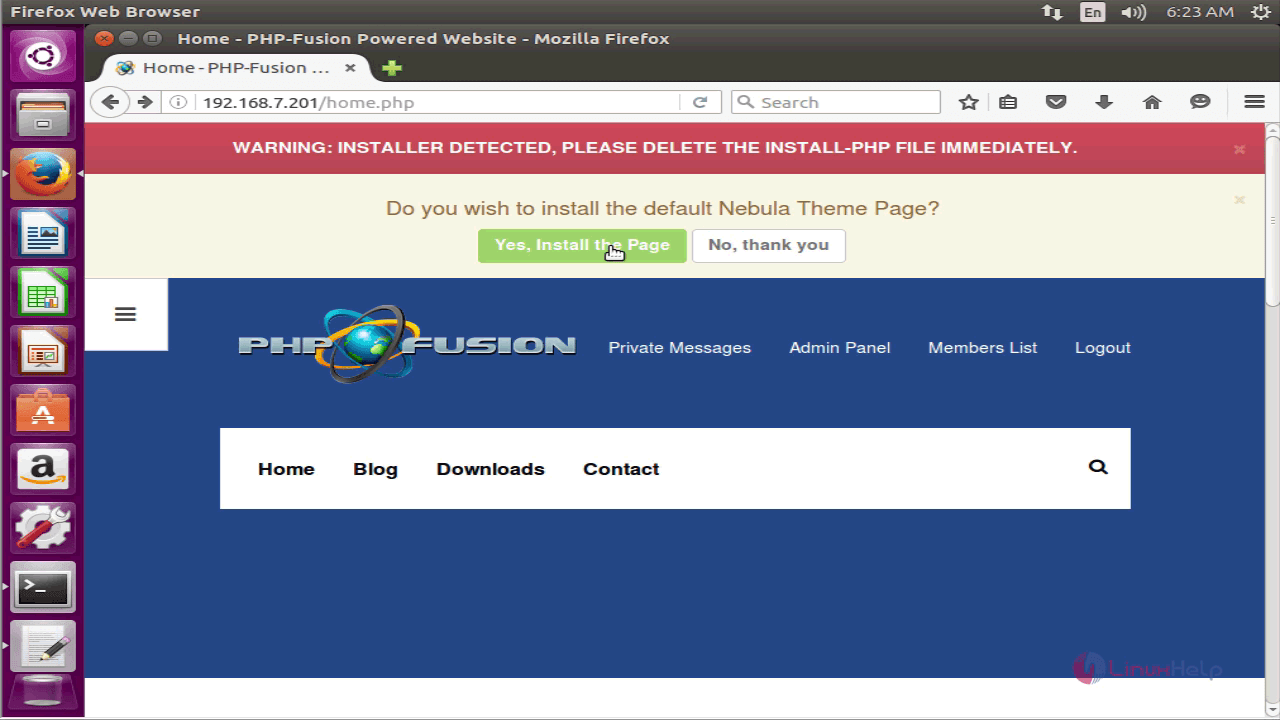
Nebula theme has been installed
With this, the installation of PHP Fusion comes to an end.


Comments ( 0 )
No comments available