How to install LEMP on Linux mint 18.3
To install LEMP on Linux mint 18.3
The LEMPis a software stack and it is a group of software that can be used to serve dynamic web pages and web applications. The acronym describes a Linux operating system, with an Nginx web Server. The backend data is stored in the MySQL database and the dynamic processing is handled by PHP. It is so simple to install LEMP on Linux Mint 18.3 and this tutorial covers the ground on the same issue.
Installing LEMP
Install the Nginx Web Server
You can begin the process by installing Nginx web server by using the following set of commands.
linuxhelp ~ # apt-get install Nginx
Reading package lists... Done
Building dependency tree
Reading state information... Done
The following additional packages will be installed:
  nginx-common nginx-core
Suggested packages:
  fcgiwrap nginx-doc
The following NEW packages will be installed:
.
.
Setting up nginx-common (1.10.3-0ubuntu0.16.04.2) ...
Setting up nginx-core (1.10.3-0ubuntu0.16.04.2) ...
Setting up nginx (1.10.3-0ubuntu0.16.04.2) ...
Processing triggers for systemd (229-4ubuntu21) ...
Processing triggers for ureadahead (0.100.0-19) ...
Processing triggers for ufw (0.35-0ubuntu2) ...
Check the status using the following command
linuxhelp ~ # systemctl status nginx
● nginx.service - A high performance web server and a reverse proxy server
   Loaded: loaded (/lib/systemd/system/nginx.service  enabled  vendor preset: enabled)
   Active: active (running) since Thu 2018-03-15 15:32:06 IST  51s ago
 Main PID: 7693 (nginx)
   CGroup: /system.slice/nginx.service
           ├─7693 nginx: master process /usr/sbin/nginx -g daemon on  master_process on
           └─7694 nginx: worker process

Mar 15 15:32:06 linuxhelp systemd[1]: Starting A high performance web server and a reverse proxy server...
Mar 15 15:32:06 linuxhelp systemd[1]: nginx.service: Failed to read PID from file /run/nginx.pid: Invalid argument
Mar 15 15:32:06 linuxhelp systemd[1]: Started A high performance web server and a reverse proxy server.
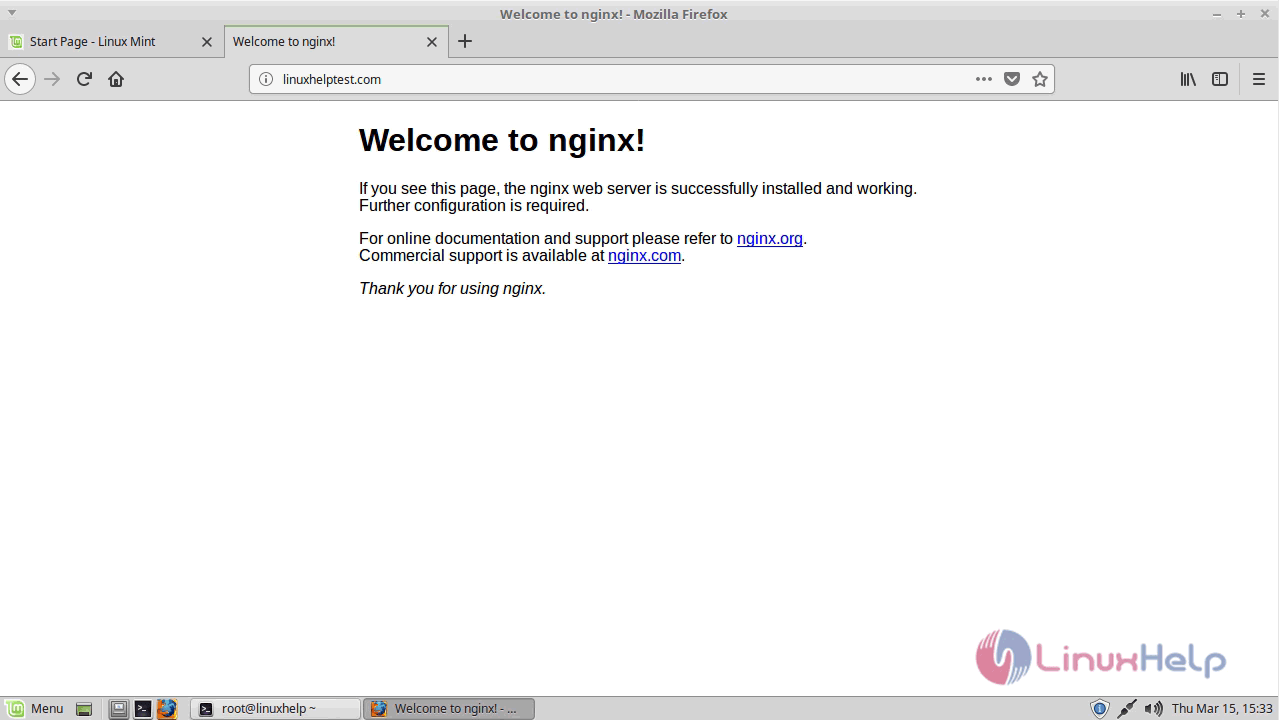
Now, that Nginx is up and running from installation, you can once again test the installation through your browser. So go to your browser and navigate the ip address or domain name. You should be able to see the following output.
Installing MySQL
Now we have a web server, we need to install MySQL, a database management system, to store and manage the data for our site.
linuxhelp ~ # apt-get install mysql-server
Reading package lists... Done
Building dependency tree
Reading state information... Done
The following additional packages will be installed:
  libaio1 libevent-core-2.0-5 mysql-client-5.7 mysql-client-core-5.7 mysql-common mysql-server-5.7 mysql-server-core-5.7
Suggested packages:
  mailx tinyca
Recommended packages:
  libhtml-template-perl
The following NEW packages will be installed:
.
.
Renaming removed key_buffer and myisam-recover options (if present)
Setting up mysql-server (5.7.21-0ubuntu0.16.04.1) ...
Processing triggers for libc-bin (2.23-0ubuntu9) ...
Processing triggers for systemd (229-4ubuntu21) ...
Processing triggers for ureadahead (0.100.0-19) ...
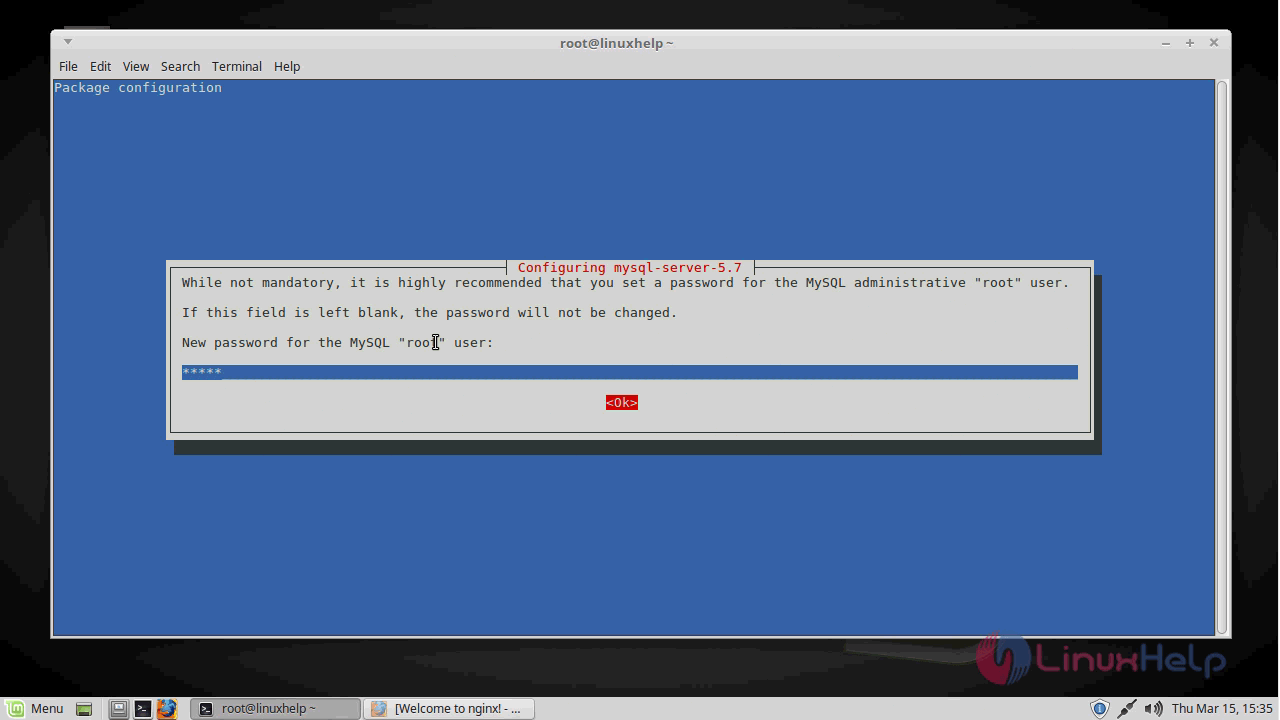
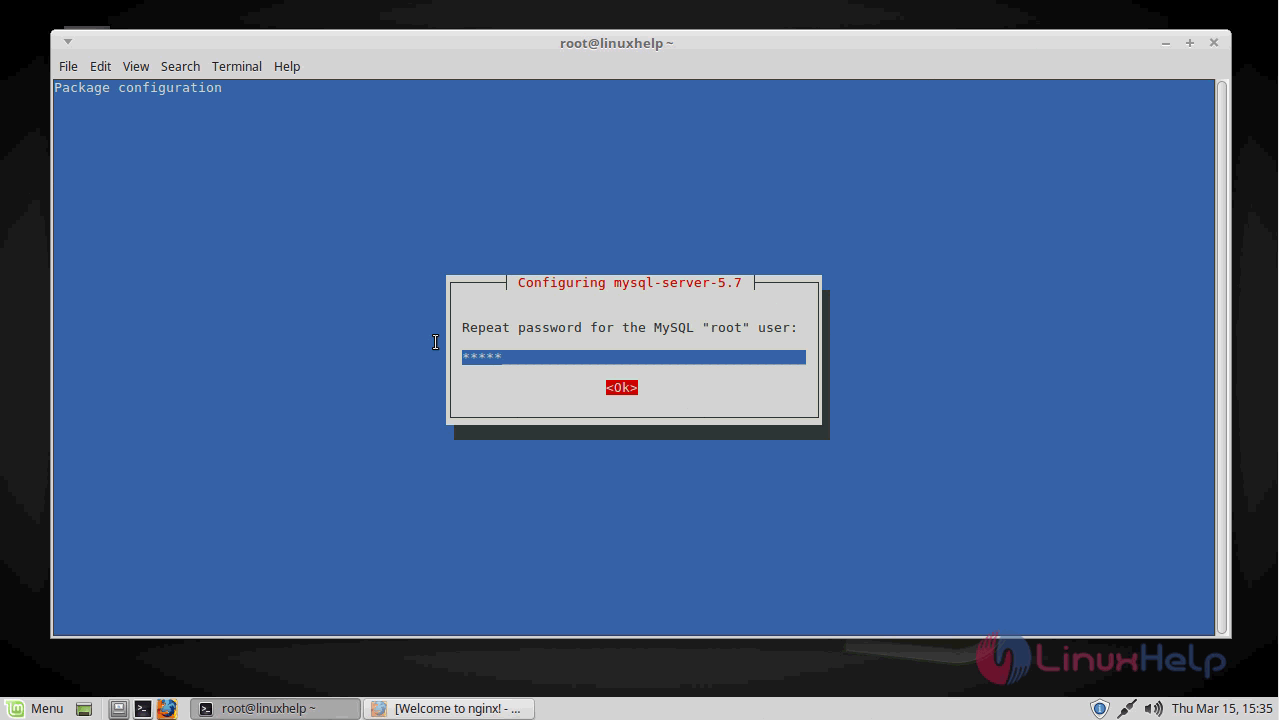
In-between you will be asked to supply root password so just enter password of your wish.
The MySQL database software is now installed, To secure the installation, we can run a simple security script that will ask whether we want to modify some insecure defaults. Begin the script by typing:
linuxhelp ~ # mysql_secure_installation
Securing the MySQL server deployment.

Enter password for user root:

VALIDATE PASSWORD PLUGIN can be used to test passwords
and improve security. It checks the strength of password
and allows the users to set only those passwords which are
secure enough. Would you like to setup VALIDATE PASSWORD plugin?

Press y|Y for Yes, any other key for No: n
Using existing password for root.
Change the password for root ? ((Press y|Y for Yes, any other key for No) : n

 ... skipping.
By default, a MySQL installation has an anonymous user,
allowing anyone to log into MySQL without having to have
a user account created for them. This is intended only for
testing, and to make the installation go a bit smoother.
You should remove them before moving into a production
environment.

Remove anonymous users? (Press y|Y for Yes, any other key for No) : y
Success.

Normally, root should only be allowed to connect from
' localhost' . This ensures that someone cannot guess at
the root password from the network.

Disallow root login remotely? (Press y|Y for Yes, any other key for No) : y
Success.

By default, MySQL comes with a database named ' test'  that
anyone can access. This is also intended only for testing,
and should be removed before moving into a production
environment.

Remove test database and access to it? (Press y|Y for Yes, any other key for No) : y
 - Dropping test database...
Success.

 - Removing privileges on test database...
Success.

Reloading the privilege tables will ensure that all changes
made so far will take effect immediately.

Reload privilege tables now? (Press y|Y for Yes, any other key for No) : y
Success.

All done!
Installing PHP
After Nginx and MySQL are installed, you need to install PHP by making use of the following command.
linuxhelp ~ # apt-get install php-fp mphp-mysql
Reading package lists... Done
Building dependency tree
Reading state information... Done
The following additional packages will be installed:
  php-common php7.0-cli php7.0-common php7.0-fpm php7.0-json php7.0-mysql php7.0-opcache php7.0-readline
Suggested packages:
  php-pear
.
.
Creating config file /etc/php/7.0/mods-available/pdo_mysql.ini with new version
Setting up php-mysql (1:7.0+35ubuntu6.1) ...
Processing triggers for systemd (229-4ubuntu21) ...
Processing triggers for ureadahead (0.100.0-19) ...
Processing triggers for php7.0-fpm (7.0.25-0ubuntu0.16.04.1) ...
We now have our PHP components installed, but we need to make a slight configuration change to the setup for a more secure installation. So, Open the main php-fpm configuration file
linuxhelp ~ # vim /etc/php/7.0/fpm/php.ini
search for cgi.fix_pathinfo=0
The above line will be commented out with a semi-colon ( ) and set to " 1" by default.
We will change both of these conditions by uncommenting the line and setting it to " 0" like this:
cgi.fix_pathinfo=0
Once it is done, you need to restart PHP processor by running the following command.
linuxhelp ~ # systemctl restart php7.0-fpm
Once it is done, you need to configure Nginx to use the PHP Processor. Now, we have all of the required components installed. The only configuration change we still need is to tell Nginx to use our PHP processor for dynamic content.
linuxhelp ~ # vim /etc/nginx/sites-available/default
We need to make some changes to this file for our site

When you' ve made the above changes, you can save and close the file. You shall test your configuration file for syntax errors by typing:
linuxhelp ~ # nginx -t
nginx: the configuration file /etc/nginx/nginx.conf syntax is ok
nginx: configuration file /etc/nginx/nginx.conf test is successful
If any errors are reported, go back and recheck your file before continuing.
linuxhelp ~ # systemctl reload nginx.service
You need to create a PHP file to test configuration. You can do this by creating a test PHP file in our document root as follows.
linuxhelp ~ # vim /var/www/html/info.php
And add the following.
< ?php
phpinfo()
Now, you can visit this page in your web browser by visiting your server' s domain name or public IP address followed by /info.php:
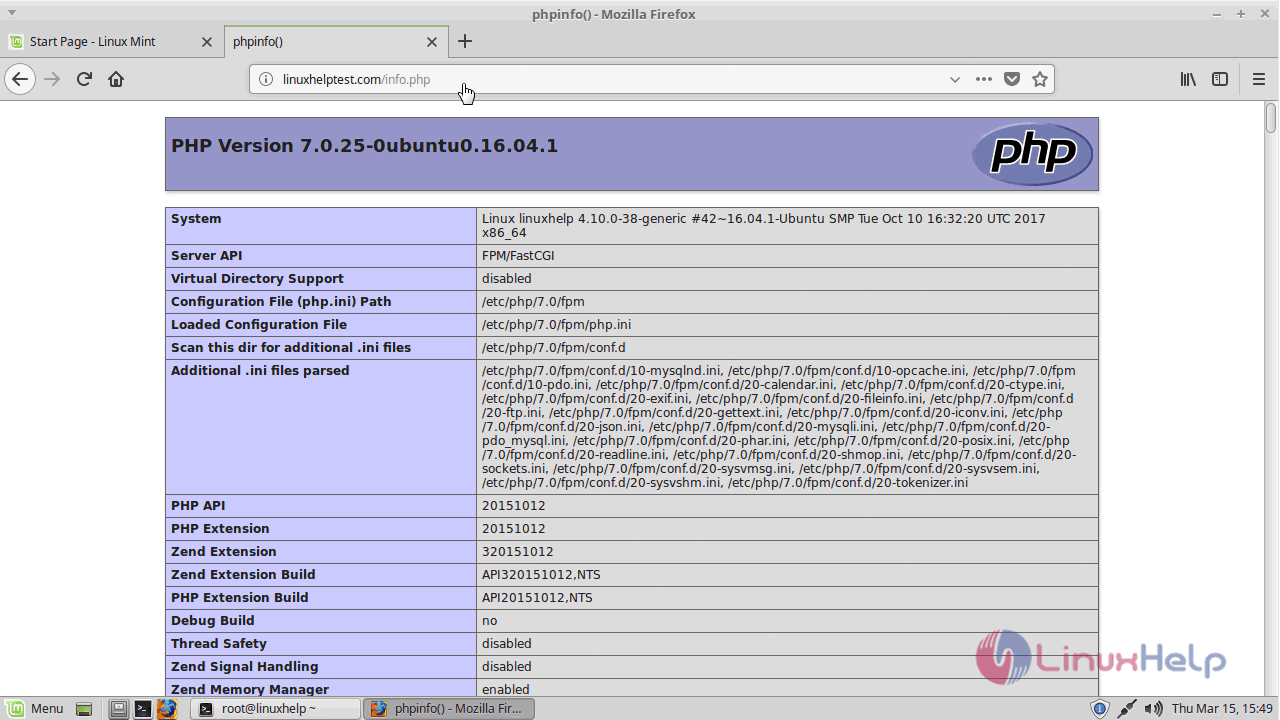
If you see a page that looks like this, you' ve set up PHP processing with Nginx successfully.
Let' s check the MySQL service
In order to do that run the following command
linuxhelp ~ # systemctl status mysql.service
mysql.service - MySQL Community Server
   Loaded: loaded (/lib/systemd/system/mysql.service  enabled  vendor preset: en
   Active: active (running) since Tue 2018-03-20 05:26:45 IST  1min 46s ago
  Process: 1303 ExecStartPost=/usr/share/mysql/mysql-systemd-start post (code=ex
  Process: 1255 ExecStartPre=/usr/share/mysql/mysql-systemd-start pre (code=exit
 Main PID: 1302 (mysqld)
   CGroup: /system.slice/mysql.service
           └─1302 /usr/sbin/mysqld

Mar 20 05:26:30 linuxhelp systemd[1]: Starting MySQL Community Server...
Mar 20 05:26:45 linuxhelp systemd[1]: Started MySQL Community Server.
With this, the LEMP installation of Linux Mint 18.3 comes to an end.
Comments ( 0 )
No comments available