How to install Jenkins on Debian 12
- 00:33 cat /etc/os-release
- 00:47 apt-get update
- 01:06 apt -y install openjdk-17-jdk
- 02:02 cat > /etc/profile.d/java.sh <<'EOF' export JAVA_HOME=$(dirname $(dirname $(readlink $(readlink $(which java))))) export PATH=$PATH:$JAVA_HOME/bin EOF
- 02:16 source /etc/profile.d/java.sh
- 02:21 java --version
- 02:34 cat > java_test.java <<'EOF' class java_test { public static void main(String[] args) { System.out.println("Hello Java World !"); } } EOF
- 02:44 javac java_test.java
- 02:51 java java_test
- 03:01 curl -fsSL https://pkg.jenkins.io/debian-stable/jenkins.io-2023.key | tee /usr/share/keyrings/jenkins-keyring.asc
- 03:23 echo deb [signed-by=/usr/share/keyrings/jenkins-keyring.asc] https://pkg.jenkins.io/debian-stable binary/ | tee /etc/apt/sources.list.d/jenkins.list
- 03:34 apt update
- 03:43 apt -y install jenkins
- 04:13 systemctl start jenkins
- 04:51 cat /var/lib/jenkins/secrets/initialAdminPassword
To Install Jenkins On Debian 12
Introduction:
Jenkins is an open-source automation tool written in Java programming language that allows continuous integration. Jenkins builds and tests our software projects, which continuously makes it easier for developers to integrate changes to the project, and makes it easier for users to obtain a fresh build.
Installation Steps:
Step 1: Check the OS version by using the below command.
root@linuxhelp:~# cat /etc/os-release
PRETTY_NAME="Debian GNU/Linux 12 (bookworm)"
NAME="Debian GNU/Linux"
VERSION_ID="12"
VERSION="12 (bookworm)"
VERSION_CODENAME=bookworm
ID=debian
HOME_URL="https://www.debian.org/"
SUPPORT_URL="https://www.debian.org/support"
BUG_REPORT_URL=https://bugs.debian.org/
Step 2: Update the system packages by using the below command.
root@linuxhelp:~# apt-get update
Hit:1 http://security.debian.org/debian-security bookworm-security InRelease
Hit:2 http://deb.debian.org/debian bookworm InRelease
Hit:3 http://deb.debian.org/debian bookworm-updates InRelease
Reading package lists... Done
Step 3: Install the Openjdk-17 by using the below command.
root@linuxhelp:~# apt -y install openjdk-17-jdk
Reading package lists... Done
Building dependency tree... Done
Reading state information... Done
The following package was automatically installed and is no longer required:
  linux-image-6.1.0-12-amd64
Use 'apt autoremove' to remove it.
The following additional packages will be installed:
  ca-certificates-java java-common libatk-wrapper-java libatk-wrapper-java-jni libice-dev libpthread-stubs0-dev libsm-dev libx11-dev libxau-dev
  libxcb1-dev libxdmcp-dev libxt-dev openjdk-17-jdk-headless openjdk-17-jre openjdk-17-jre-headless x11proto-dev xorg-sgml-doctools xtrans-dev
Suggested packages:
  default-jre libice-doc libsm-doc libx11-doc libxcb-doc libxt-doc openjdk-17-demo openjdk-17-source visualvm fonts-ipafont-gothic fonts-ipafont-mincho
  fonts-wqy-microhei | fonts-wqy-zenhei fonts-indic
The following NEW packages will be installed:
  ca-certificates-java java-common libatk-wrapper-java libatk-wrapper-java-jni libice-dev libpthread-stubs0-dev libsm-dev libx11-dev libxau-dev
  libxcb1-dev libxdmcp-dev libxt-dev openjdk-17-jdk openjdk-17-jdk-headless openjdk-17-jre openjdk-17-jre-headless x11proto-dev xorg-sgml-doctools
  xtrans-dev
0 upgraded, 19 newly installed, 0 to remove and 0 not upgraded.
Need to get 118 MB/120 MB of archives.
After this operation, 282 MB of additional disk space will be used.
Get:1 http://deb.debian.org/debian bookworm/main amd64 openjdk-17-jre-headless amd64 17.0.10+7-1~deb12u1 [43.7 MB]
Get:2 http://deb.debian.org/debian bookworm/main amd64 openjdk-17-jre amd64 17.0.10+7-1~deb12u1 [184 kB]
Get:3 http://deb.debian.org/debian bookworm/main amd64 openjdk-17-jdk-headless amd64 17.0.10+7-1~deb12u1 [71.3 MB]
Get:4 http://deb.debian.org/debian bookworm/main amd64 openjdk-17-jdk amd64 17.0.10+7-1~deb12u1 [2,426 kB]
Fetched 118 MB in 10s (11.3 MB/s)
update-alternatives: using /usr/lib/jvm/java-17-openjdk-amd64/bin/jrunscript to provide /usr/bin/jrunscript (jrunscript) in auto mode
update-alternatives: using /usr/lib/jvm/java-17-openjdk-amd64/bin/jshell to provide /usr/bin/jshell (jshell) in auto mode
update-alternatives: using /usr/lib/jvm/java-17-openjdk-amd64/bin/jstack to provide /usr/bin/jstack (jstack) in auto mode
update-alternatives: using /usr/lib/jvm/java-17-openjdk-amd64/bin/jstat to provide /usr/bin/jstat (jstat) in auto mode
update-alternatives: using /usr/lib/jvm/java-17-openjdk-amd64/bin/jstatd to provide /usr/bin/jstatd (jstatd) in auto mode
update-alternatives: using /usr/lib/jvm/java-17-openjdk-amd64/bin/serialver to provide /usr/bin/serialver (serialver) in auto mode
update-alternatives: using /usr/lib/jvm/java-17-openjdk-amd64/bin/jhsdb to provide /usr/bin/jhsdb (jhsdb) in auto mode
Setting up openjdk-17-jdk:amd64 (17.0.10+7-1~deb12u1) ...
update-alternatives: using /usr/lib/jvm/java-17-openjdk-amd64/bin/jconsole to provide /usr/bin/jconsole (jconsole) in auto mode
Step 4: Make the Java script file with content by using the below command.
root@linuxhelp:~# cat > /etc/profile.d/java.sh <<'EOF'
export JAVA_HOME=$(dirname $(dirname $(readlink $(readlink $(which java)))))
export PATH=$PATH:$JAVA_HOME/bin
EOF
Step 5: Execute the file by using the below command.
root@linuxhelp:~# source /etc/profile.d/java.sh
Step 6: Check the java version by using the below command.
root@linuxhelp:~# java --version
openjdk 17.0.10 2024-01-16
OpenJDK Runtime Environment (build 17.0.10+7-Debian-1deb12u1)
OpenJDK 64-Bit Server VM (build 17.0.10+7-Debian-1deb12u1, mixed mode, sharing)
Step 7: Create a test program to verify by using the below command.
root@linuxhelp:~# cat > java_test.java <<'EOF'
class java_test {
    public static void main(String[] args) {
        System.out.println("Hello Java World !");
    }
}
EOF
Step 8: Make as java file by using the below command.
root@linuxhelp:~# javac java_test.java
Step 9: Run the java file by using the below command.
root@linuxhelp:~# java java_test
Hello Java World !
Step 10: Add the Jenkins key by using the below command.
root@linuxhelp:~# curl -fsSL https://pkg.jenkins.io/debian-stable/jenkins.io-2023.key | tee /usr/share/keyrings/jenkins-keyring.asc
-----BEGIN PGP PUBLIC KEY BLOCK-----

mQINBGQhzisBEAC7yUhIqVCcyCXJWeZZf/BA6/+KguDQpycck0xUomj5ogT1+lwJ
Mnr6XsPFdTt5DgzjHKg6SM8PTIpLpzOcpqIG9eB8MnvtTp6qFSfIdZnEZccTot1e
cArnM2H6yw/4OW+8QHx9Zgj1miiqolVZ1RusHT3cvPdkF4GFTZnChiF0epd+6iKi
Em8gfzECIltl+McYCwjPXlx38p1mwPI0tgQ7GGD1VzjS/GycuD+shM7lPQ9PmCnC
8zkZIBsbGbSTbAYqnARrbczmg9BKCyErfdQJKi6+r/fg6cWAairXsiOlzqCLCBoZ
ssLKkRAc2ib3cm/RHBm+MK2wLZ5q8xgh9e/iBoBOpJXXARvfu67uQjfLPj/o4FwM
ZWxGZlj2b3cL5q+thjGWOliEh15gciGU17vT15YGcEPVMeDVBYKp/Z+TgkJIlUmD
4bU+K89qYCzp/AP3tsozFwazQRultkjuHVCZrJQtCaVu3/wjtkVd101Oj/Gi4ajn
2WU2KkGWkM0jArUCohJPsZodLHj8DAT2V5SqrEq6jF6ONnAlK1MNmPTKAoDmP6LJ
3of4VHcIbGq1p+I6R9292Lv3Avs/uMbWtR7nae4XWT9l49hY3p8gc5rPOs2wzPgV
v8X6vaQSlgjJDaNVPSZCo8hQkqHsoskri5BHVhxBpjaJ0mNKCeSHWfP+RwARAQAB
tDJKZW5raW5zIFByb2plY3QgPGplbmtpbnNjaS1ib2FyZEBnb29nbGVncm91cHMu
Y29tPokCVwQTAQgAQRYhBGNmfudLuh8KCKaYclujHVfvWXXKBQJkIc4rAhsDBQkF
o5qABQsJCAcCAiICBhUKCQgLAgQWAgMBAh4HAheAAAoJEFujHVfvWXXK4+kP/0cR
nNYrjb4gWG/rcwJ8zo0YKZBO30RPul1INnyufDediDb0UCOJwT+CnEZULx+HeUOi
xHVBMD70LRP3ym+40Naw3s4nJWvBpOYIqQhjoRqrWkdIrMgNSAwRrufgXqSBvvfZ
+xQYrNRuu8/00U6Bz2eeCL2SNZpShL0iPjP9Bcu7763jaGvnS/WUVaAqqyNwxGRl
afffRvCV/Wjy47W+ifCPgku4SKZgG+QPMuthI842+lLSl2BXhiEVJ4auK5rjFHsv
RrUEQrjEGZ9vEoitZAQL/CDWmlkhrqYSpgTVsMCoByRzZqQG9fOAJNFniFqrANQQ
m9NkZN0ZljOnZfJh+ZzbjjVUS522piJtVqdOU0noT6awMtSO/CO4EmuElj8LkVI6
jbP0FqxYecNQtlAzBguRD5UWjAi3jgkdbap0ooqZm2YQPNaLD3OLWdvtj/jx+EI4
DTrSoSSoHea5xiAFQNB3ab2fk5kN5ufVWIV5F9AQHU+kWE9jgS+zl8apzbwMinm8
ZW0KeIcW63MH5hvbmsfBjdyroTTy2mwy096mB2vvqwWv6nt9mQy1YCmBeyp7oshI
qNeXIunP1NekAfGY+dRlldA3SoxNuJhVGd5eCOFWYmipb9XD+JrSgncHjCgewHq1
ycptdm1q8OZ26ZOaAIVOYENk8WUOz5DzOuOS81EJuQINBGQhzisBEADtvyAOnz23
gKKKVzSY9bhEvQxJWQUY/jXek7LjhflLw4xugGARMrTMc6zzabOJefyrVkucWqso
spCWoj+M8HGfhHXpNDHbn21fyHB6jpOh8Ors2ZHH2skswcAcWcLlWQWrUtqQFuje
1rXShp8IhYz308MIZ65VYf/Z9Bk7VNNTgRLmOMTn+KlN8qiQZ0SZbPj/wFK1iwAh
/xPu586a7xVN4xdy6RJNfrSCG84kMNyaHTDFOEKchWPoGe5D6EqF8dufvrcKoSxc
T2sC6WzDqG/+Jfk//xrHblxeCXiOAX/Dm+McvceV0dBSVJJx67FoHUyWBRj5coHU
4YfrUTHREEKdYcpUAHQGPJBLyx0QNs2URhYSCwNU5yYL+z3UIpsS93HosUPEzrTD
XE1D2eV1gGf0YzCWxWTAuOjoUD8D22p//GAaLXYpuwSgVzgKwvPefkWJ94Euvz6T
sKrljMPsxOdPLBs8AJgrqmYIwbRXoxNEzv/PT/9sST5nl5tlWc9PonzwzHqStU4Y
f8jQhIv1yq2wAE2OB0Q7B6i62QWqSWAWEAc6LPRdSalgS8ooj/MIQFGwsd4VuNSN
JD9p7bHHlHceeXMR2F0JeG8G91RqlTkxu7cUMkqheXXAyTa/OuG5xauHyLzt4xVp
fnHd5fNjxcc02ADF46X6/nze6hClUBqMAQARAQABiQI8BBgBCAAmFiEEY2Z+50u6
HwoIpphyW6MdV+9ZdcoFAmQhzisCGwwFCQWjmoAACgkQW6MdV+9ZdcoRGA/+JmjW
09ZmAlBM846GgI0B00YtXMu3PuhhOq8sJEXvcvlCfSAlVpHfnwUJE7q5QaUrD3wT
VKT4pe/zBRN+zD84gXxGANJY813EhpngBEJmptIjNkKvWclr/nG4MI8yezZmeEgP
142LviJmNYb0+3s1CU7Q03g3b/wsHNFpuA9zVJu24xVAM/Af65N1STvnSQAjcXa9
rgIwdiZ7XbCD6rpF1ms8i6RYsflB+dGLgEOiAlX+lZ6843WpMWlDUBd2v+OHtXvm
zLYbg8SYtHV8xMJWPjz6e9yoKuyjvWAwAiDcjO0SpCqlkHsUzWRS44z3hQssgywP
iFKGqP5eHDaSCqUHF5VkGdtg/a9M7vthhEoB/2IKSf82CQE9IdmNtEJHAPgWamgm
VPpyMliDTd2gyqD+FmduRdY/yHMP0QV6G/VRTV4gfQ80qU/U2JXWAQdw6ok1+k5V
t0ur8buQo+49diyr8WPHA4CwpSwriwIClDZdq38JiCdnfICfFxAQYdBMbL6S4wqA
Sv+OqcDBvu7m5yV/hrfcVztRkWUwr21kUmvx04xpvvpG/cUAnQOog3Q7Ce5xkaX7
99Ewd0xUXma/H++IGX77jxU7jW5n2FPeVEn+zcNF8of/XAi1uaP1WL5T/iEl6EsI
MetBbjkOnNXyWrP3SAPwqQMMg/vNa+mJIjoNByw=
=sdsH
-----END PGP PUBLIC KEY BLOCK-----
Step 11: Add the Jenkins Repository by using the below command.
root@linuxhelp:~# echo deb [signed-by=/usr/share/keyrings/jenkins-keyring.asc] https://pkg.jenkins.io/debian-stable binary/ | tee /etc/apt/sources.list.d/jenkins.list
deb [signed-by=/usr/share/keyrings/jenkins-keyring.asc] https://pkg.jenkins.io/debian-stable binary/
Step 12: Update the system packages by using the below command.
root@linuxhelp:~# apt update
Ign:1 https://pkg.jenkins.io/debian-stable binary/ InRelease
Get:2 https://pkg.jenkins.io/debian-stable binary/ Release [2,044 B]
Get:3 https://pkg.jenkins.io/debian-stable binary/ Release.gpg [833 B]
Hit:4 http://security.debian.org/debian-security bookworm-security InRelease
Get:5 https://pkg.jenkins.io/debian-stable binary/ Packages [26.4 kB]
Hit:6 http://deb.debian.org/debian bookworm InRelease
Hit:7 http://deb.debian.org/debian bookworm-updates InRelease
Fetched 29.3 kB in 1s (47.0 kB/s)
Reading package lists... Done
Building dependency tree... Done
Reading state information... Done
All packages are up to date.
Step 13: Install the Jenkins by using the below command.
root@linuxhelp:~# apt -y install jenkins
Reading package lists... Done
Building dependency tree... Done
Reading state information... Done
The following package was automatically installed and is no longer required:
  linux-image-6.1.0-12-amd64
Use 'apt autoremove' to remove it.
The following additional packages will be installed:
  net-tools
The following NEW packages will be installed:
  jenkins net-tools
0 upgraded, 2 newly installed, 0 to remove and 0 not upgraded.
Need to get 86.1 MB of archives.
After this operation, 87.6 MB of additional disk space will be used.
Get:1 http://deb.debian.org/debian bookworm/main amd64 net-tools amd64 2.10-0.1 [243 kB]
Get:2 https://pkg.jenkins.io/debian-stable binary/ jenkins 2.440.1 [85.8 MB]
Fetched 86.1 MB in 11s (7,877 kB/s)
Selecting previously unselected package net-tools.
(Reading database ... 175307 files and directories currently installed.)
Preparing to unpack .../net-tools_2.10-0.1_amd64.deb ...
Unpacking net-tools (2.10-0.1) ...
Selecting previously unselected package jenkins.
Preparing to unpack .../jenkins_2.440.1_all.deb ...
Unpacking jenkins (2.440.1) ...
Setting up net-tools (2.10-0.1) ...
Setting up jenkins (2.440.1) ...
Created symlink /etc/systemd/system/multi-user.target.wants/jenkins.service → /lib/systemd/system/jenkins.service.
Processing triggers for man-db (2.11.2-2) ...
Step 14: Start the Jenkins by using the below command.
root@linuxhelp:~# systemctl start jenkins
Step 15: Goto the browser and type the IP address with the port number as shown in below image.

Step 16: Get the Jenkins admin password in terminal by using the below command.
root@linuxhelp:~# cat /var/lib/jenkins/secrets/initialAdminPassword
c71b84057b504916ab24a64fb1451463
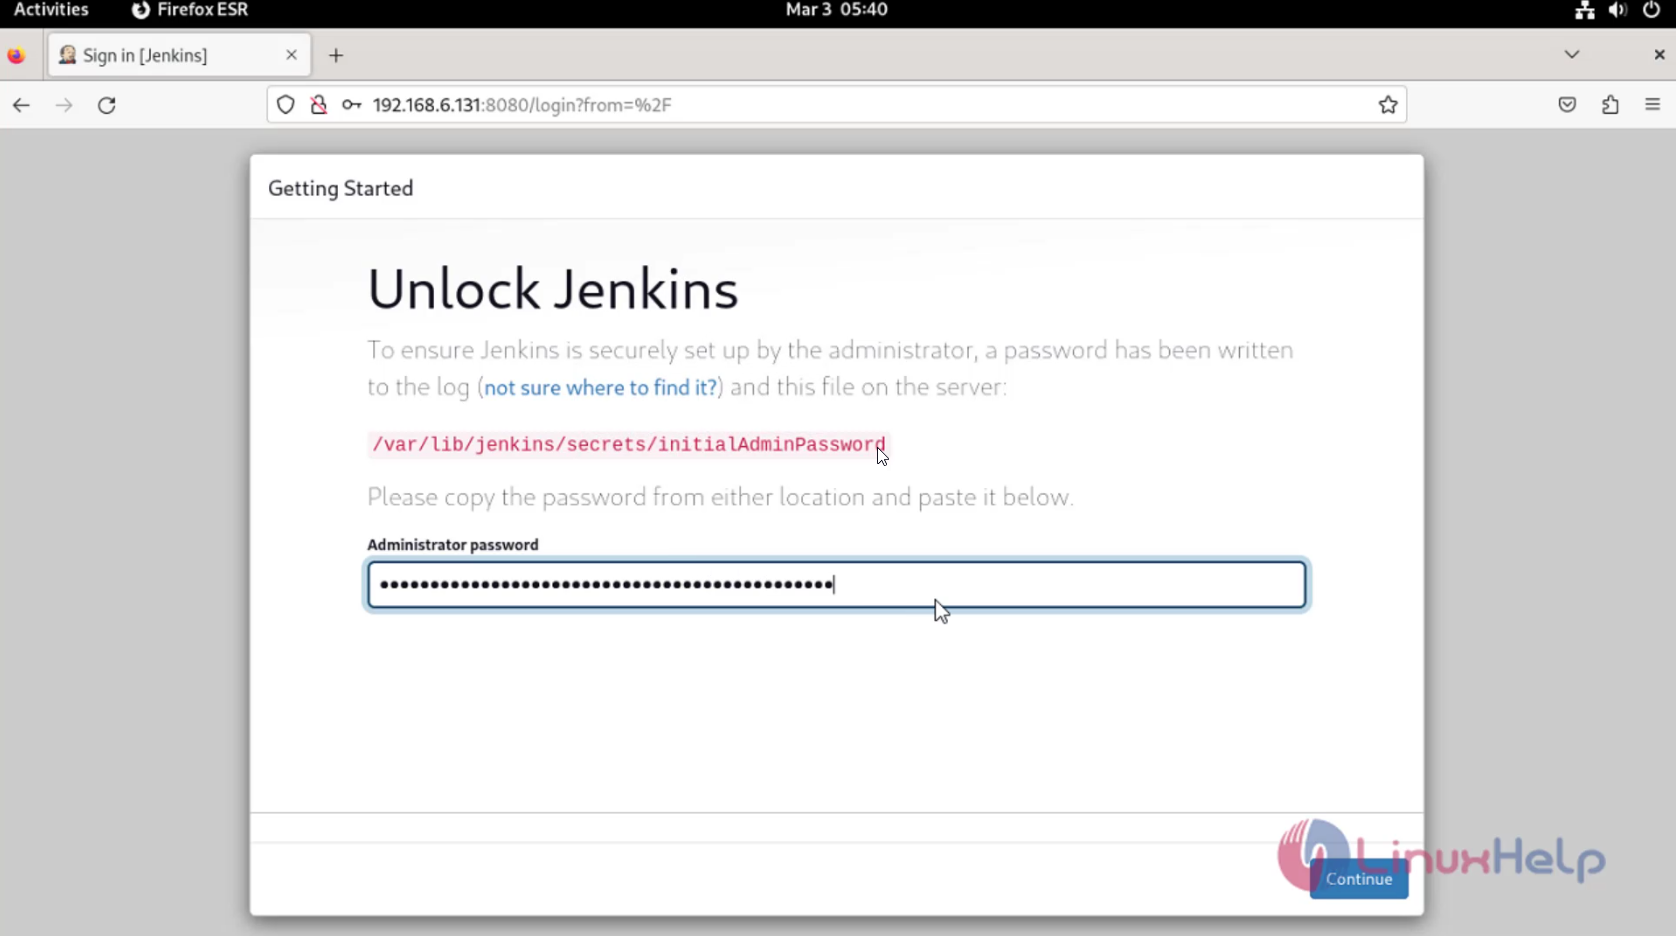
Step 17: Copy and paste the administrator password as shown in below image.
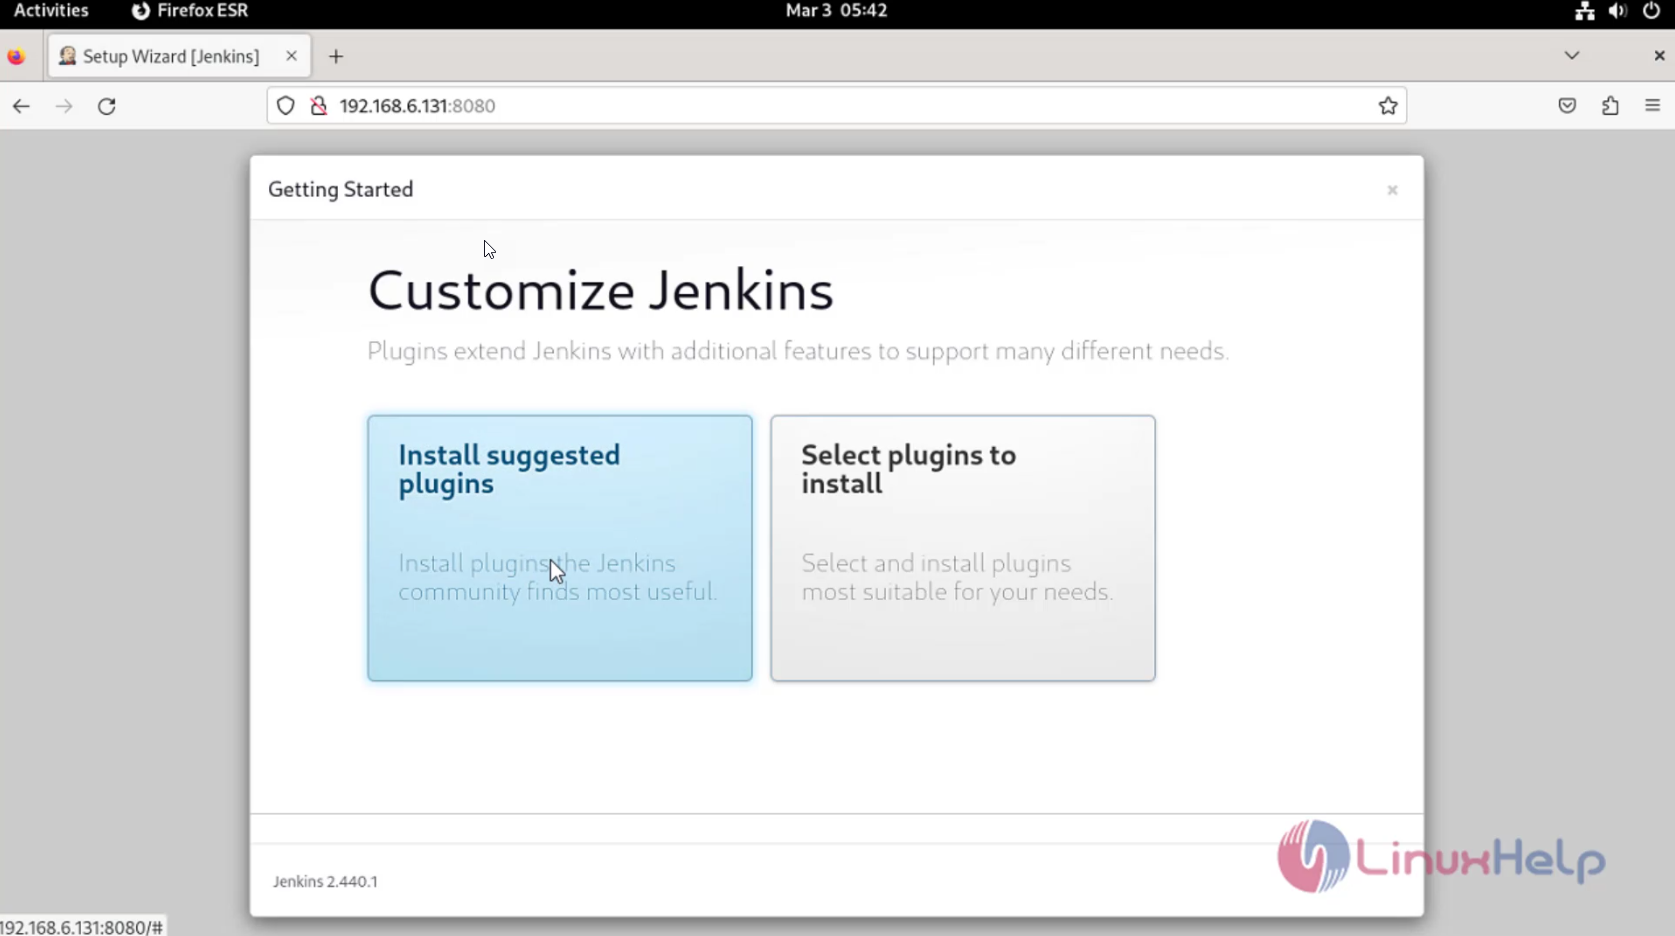
Step 18: Click install suggested plugins as shown in below image.
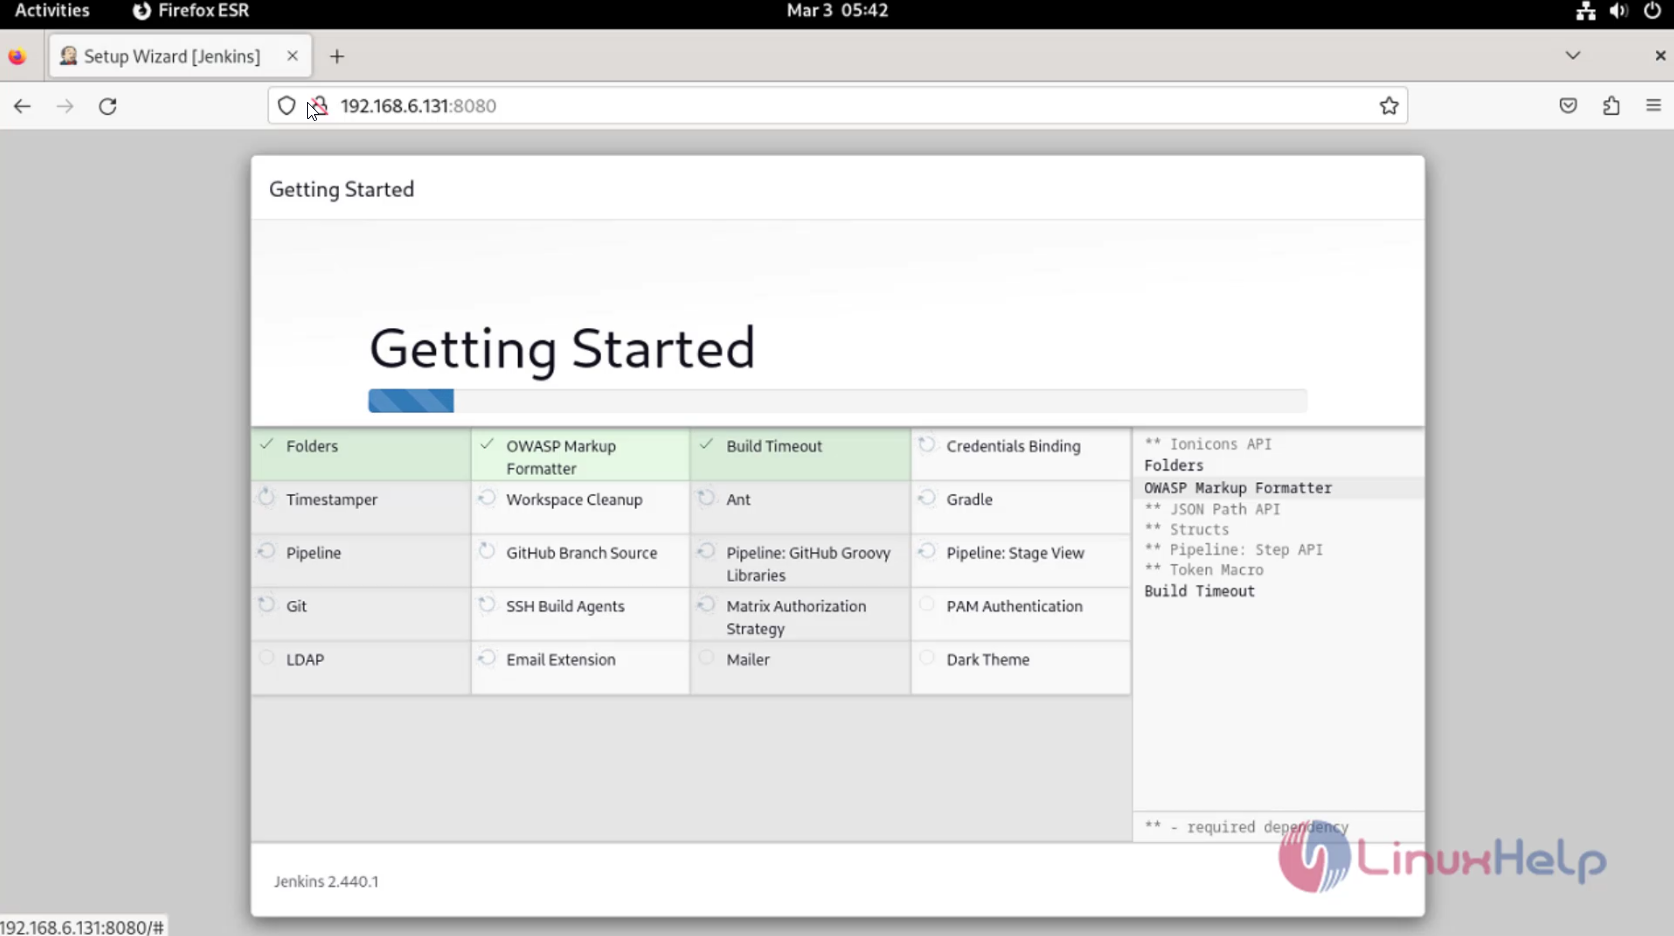
Step 19: After click install suggested plugins the installation page will be shown as shown in below image.
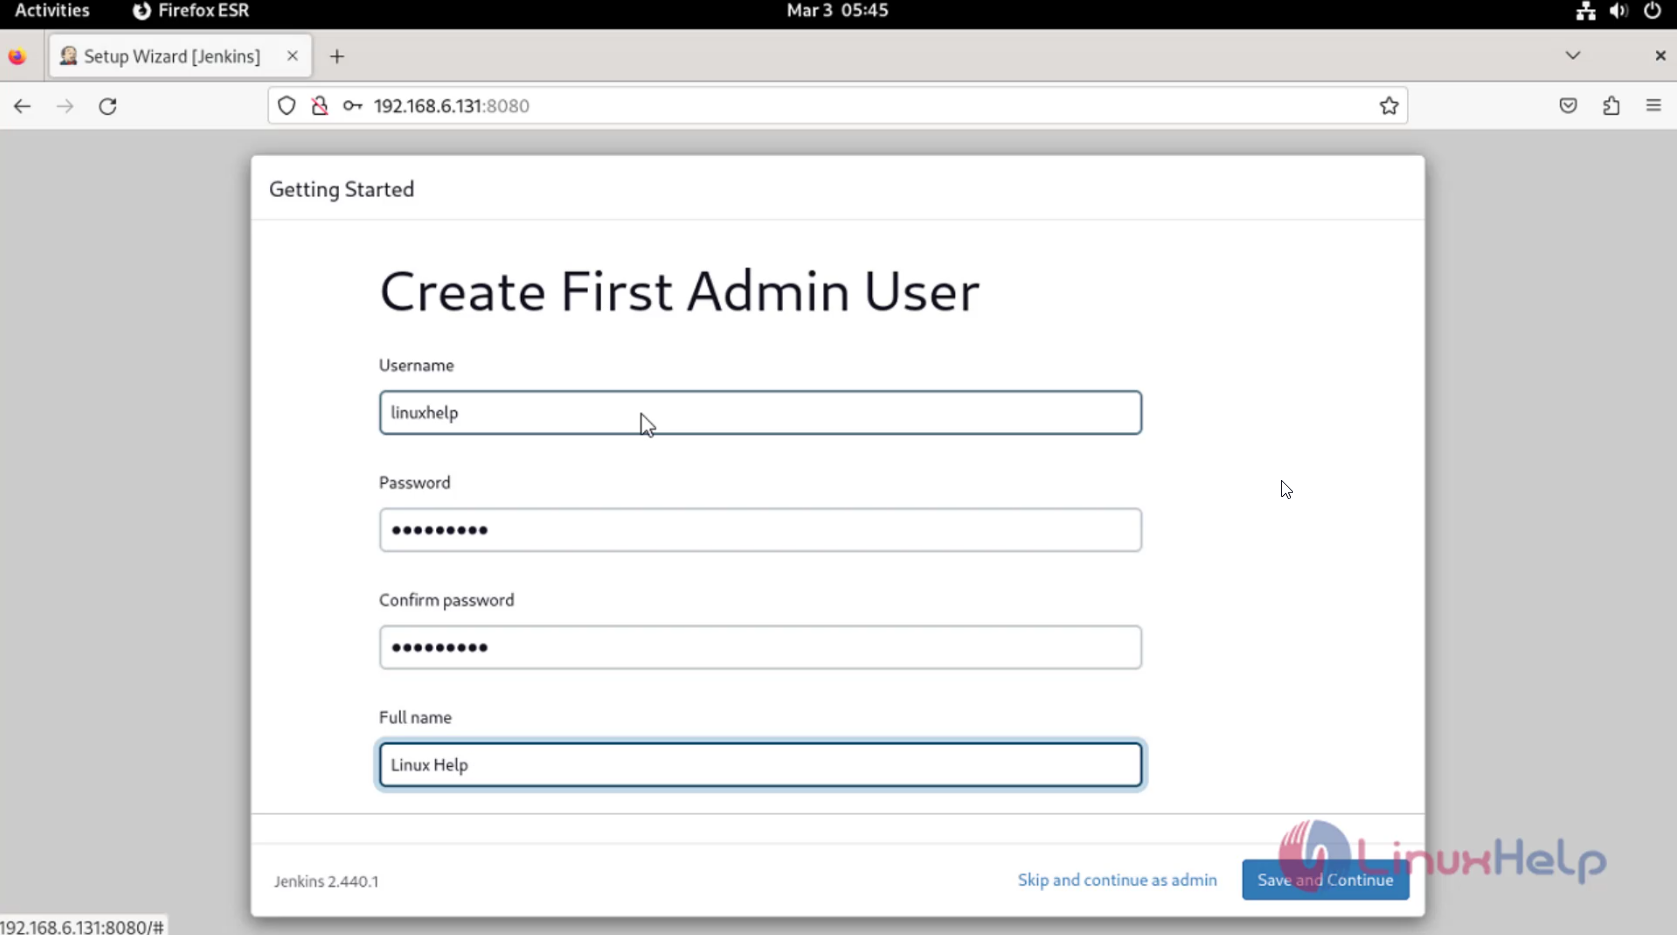
Step 20: Create admin username password as shown in below image.

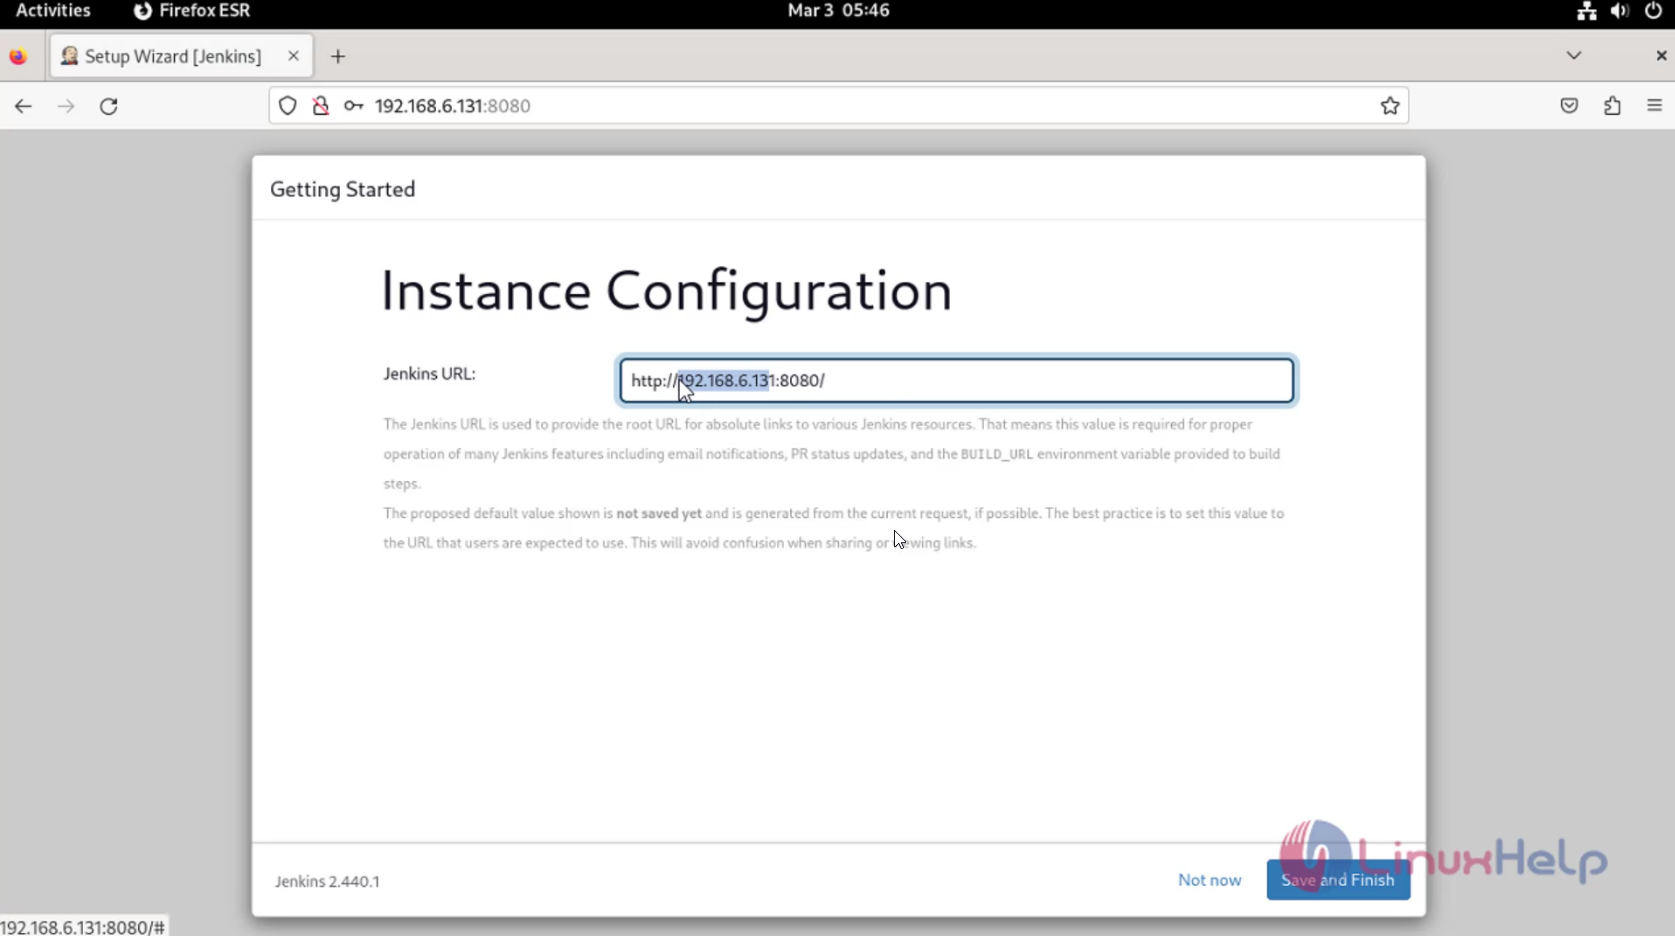
Step 21: Make the Jenkins url as your preference and click save and finish as shown in below image.
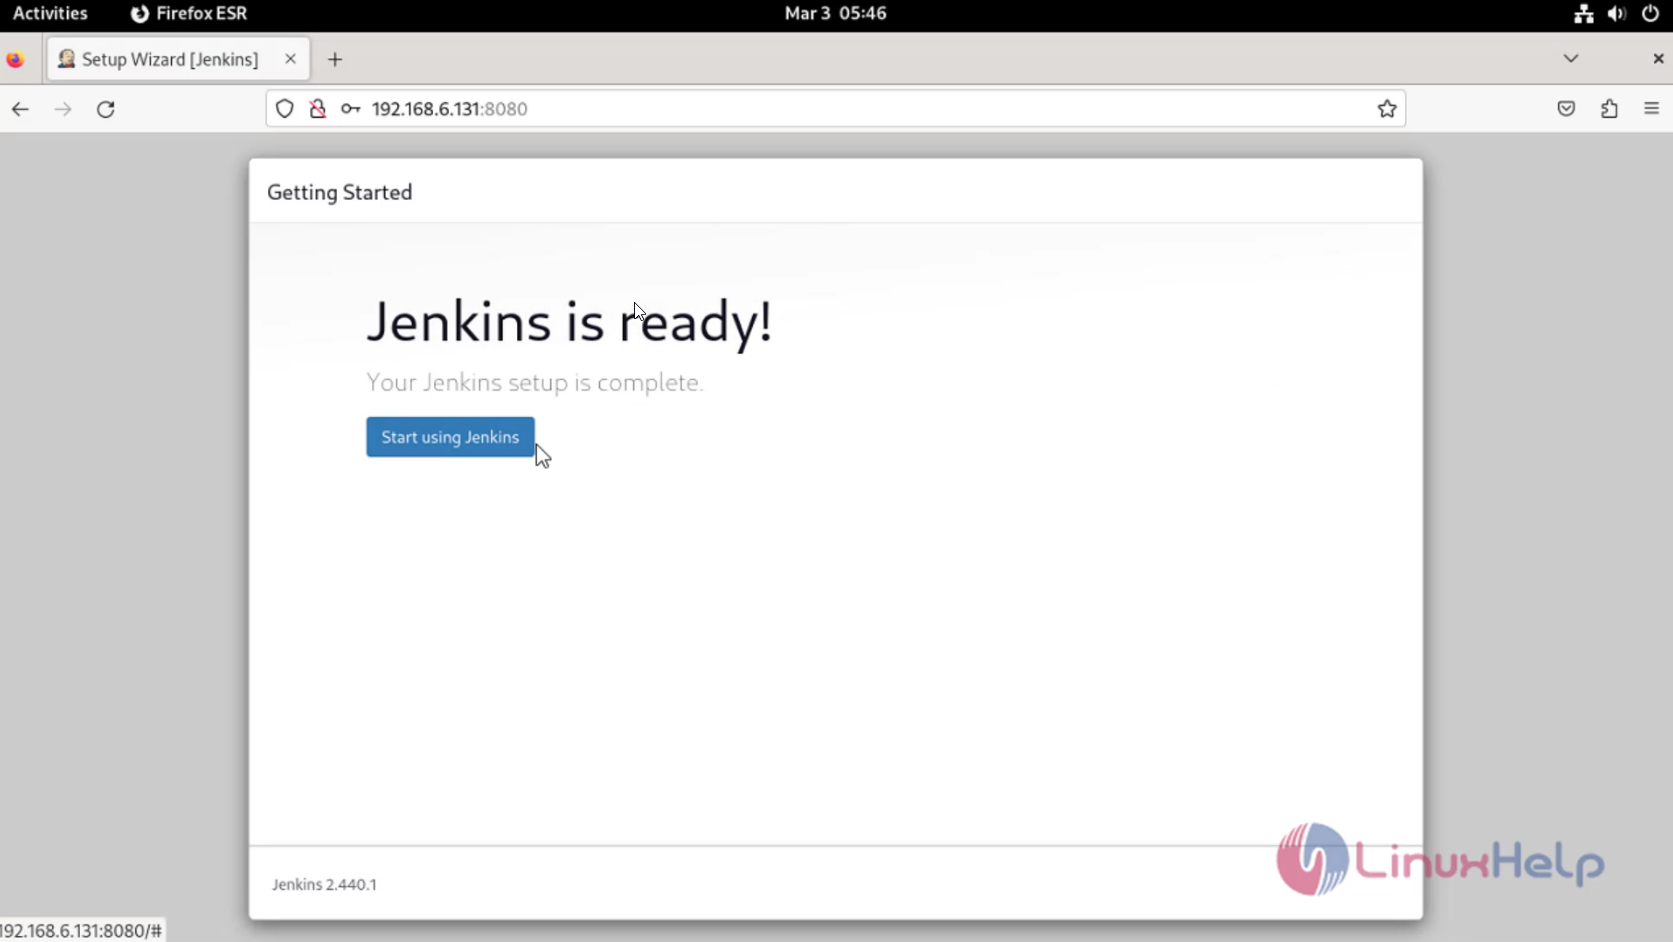
Step 22: After that Jenkins Ready and click start susing Jenkins as shown in below image.
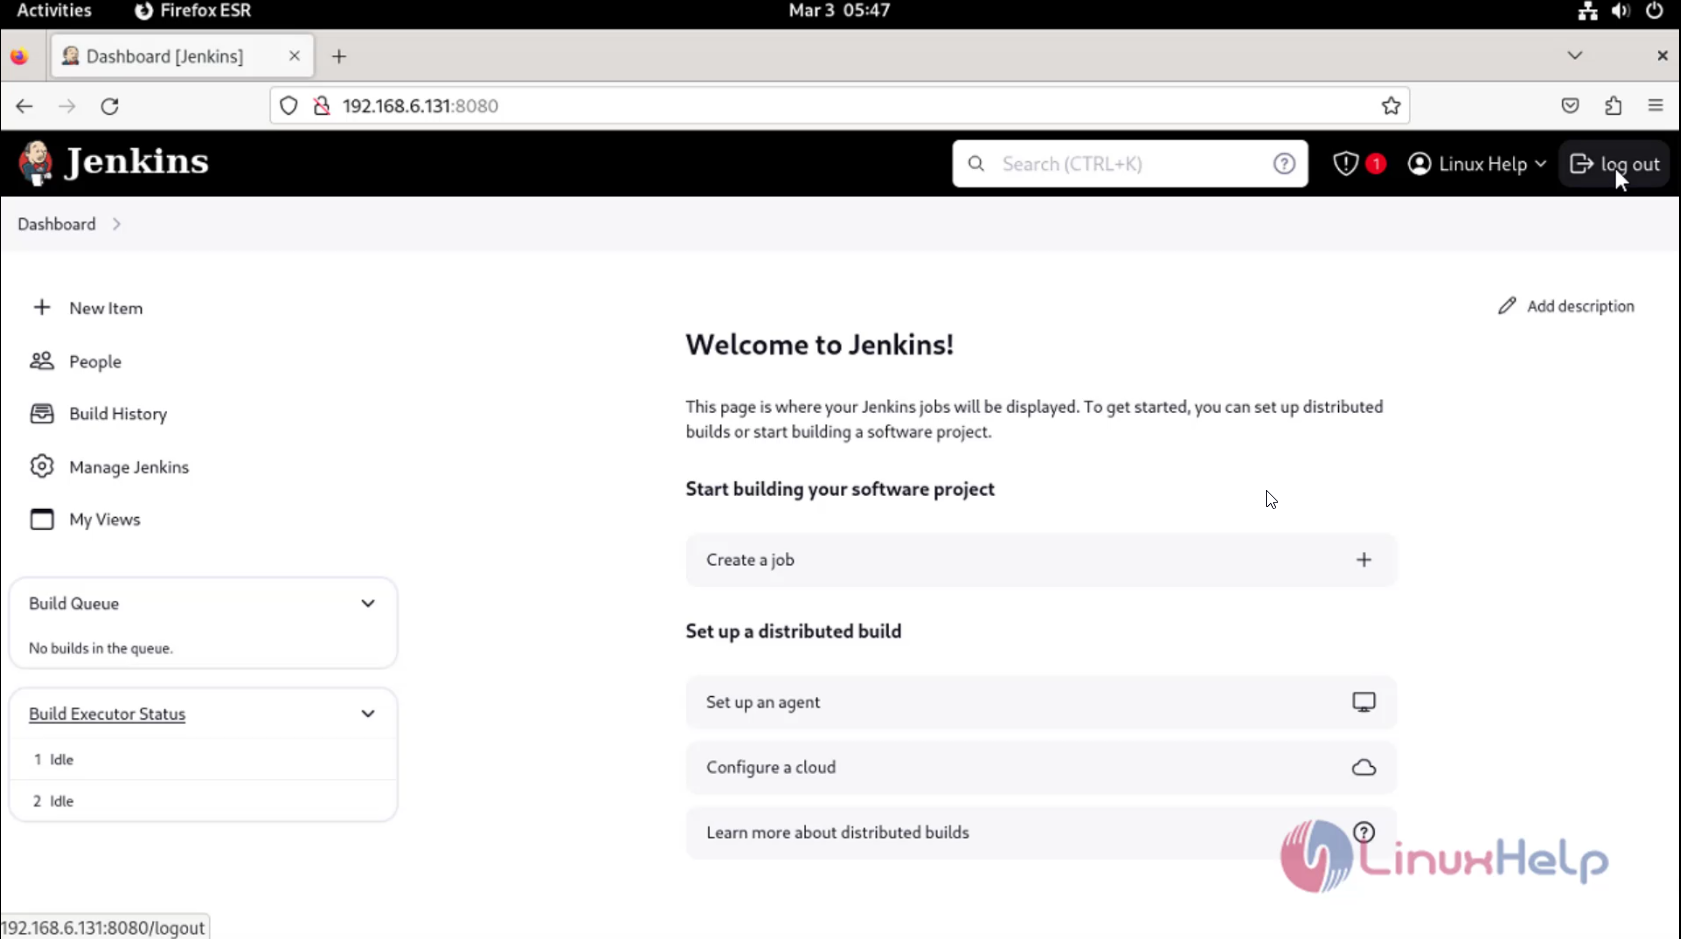
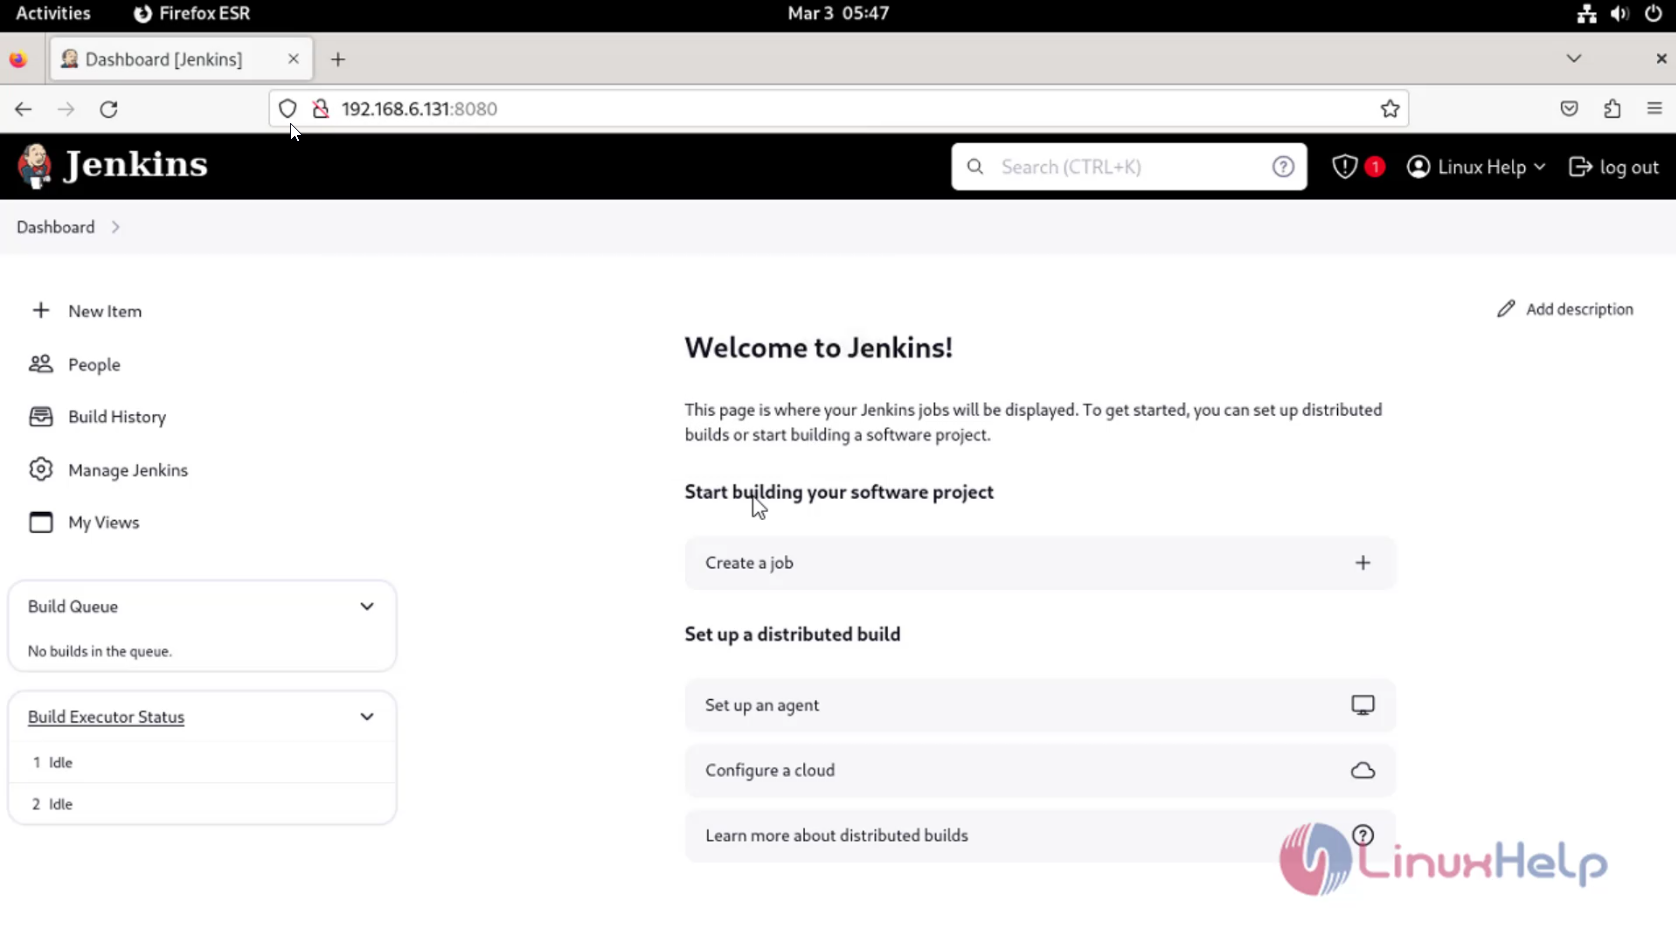
Step 23: You can see the Jenkins dashboard to check login credentials click logout as shown below image.
Step 24: Given the Credentials and click sign in as shown below image.

Step 25: After that the Jenkins dashboard will shown as shown in below image.
Conclusion:
We have reached the end of this article. In this guide, we have walked you through the steps required to install Jenkins on Debian 12. Your feedback is much welcome.
Comments ( 0 )
No comments available