How to Install FreeBSD 10.3 and Configure Network
To Install a Unix Like Operating System " FreeBSD 10.3" and Configuring Network
Installation process of a Unix Like Operating System " FreeBSD 10.1" and to Configure Network. It will be available for all major platforms POWER PC, x86_64, IA-32, ARM and etc.
Environment Setup
| IP Address | 192.168.5.229 |
| Hostname | linuxhelp.com |
| Hard Disk | 10GB |
| Memory | 1GB |
To install FreeBSD 10.3
Step 1: To download FreeBSD installer, the installer comes in a variety of different formats such as CD, DVD, USB images, Virtual Machine images and Network Install.
Step 2: Download the installer image, burn it to the media and insert the media then reboot the machine.
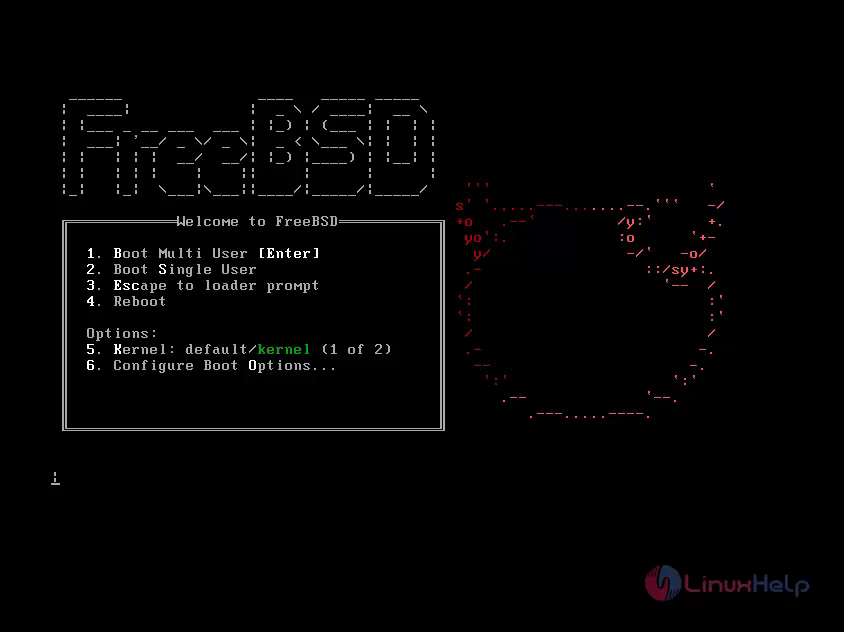
Step 3: Then click Enter to booting into FreeBSD Installer. After booting, below screen will appear.
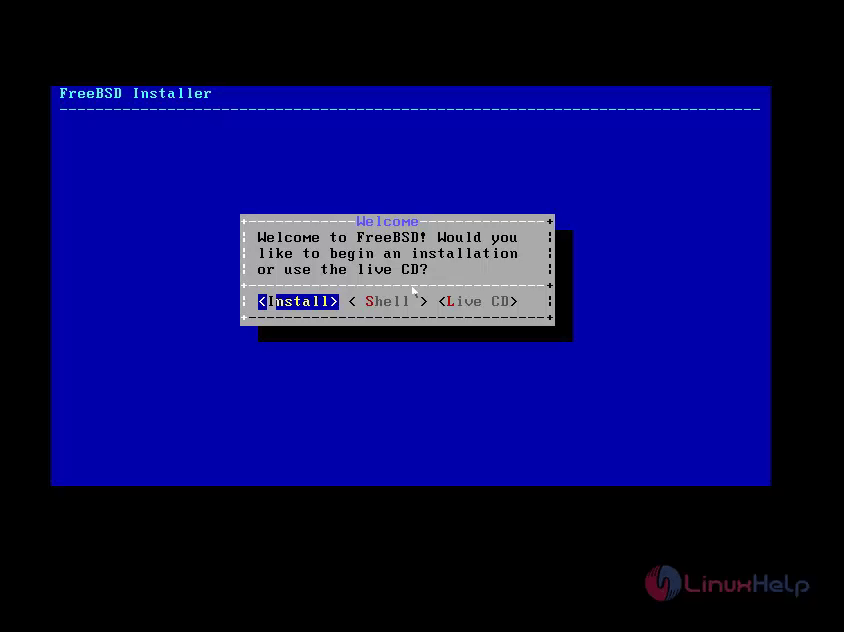
Select Install to proceed with the installation in multiuser mode or select shell to perform installation in command line mode and Live cd for preview.
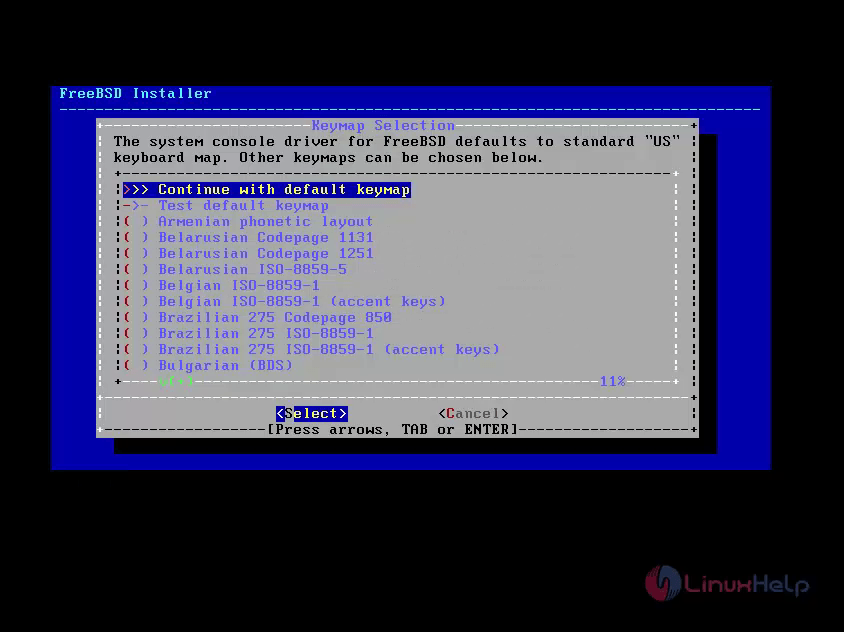
Step 4: To select Keymap and continue.
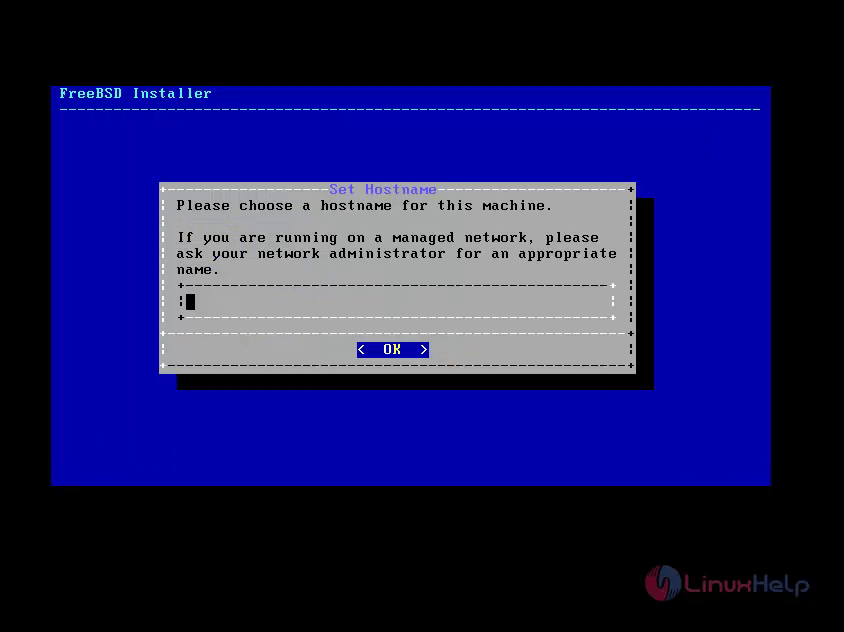
Step 5: To give a hostname for your system
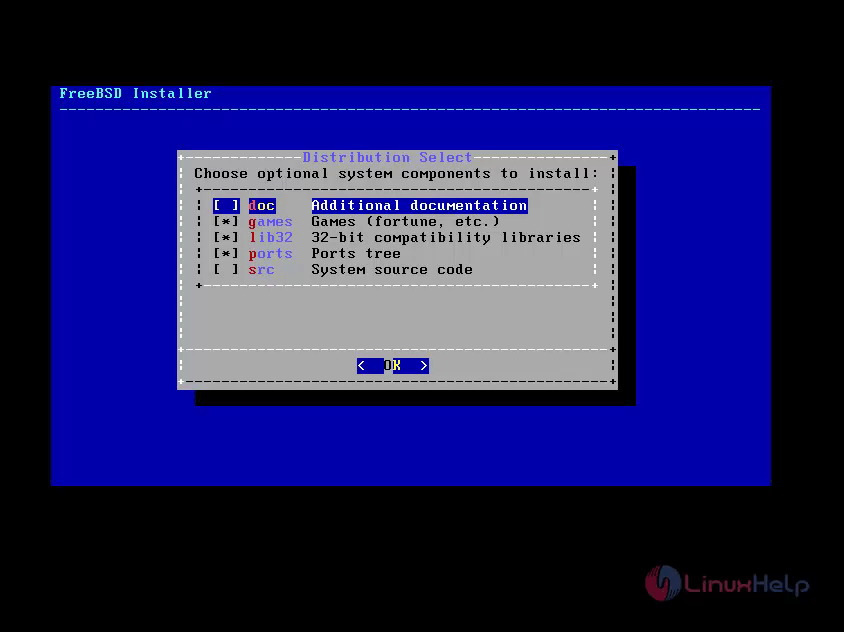
Step 6: Selecting components for installing FreeBSD, all option is preselected except Documentation and Source by default.
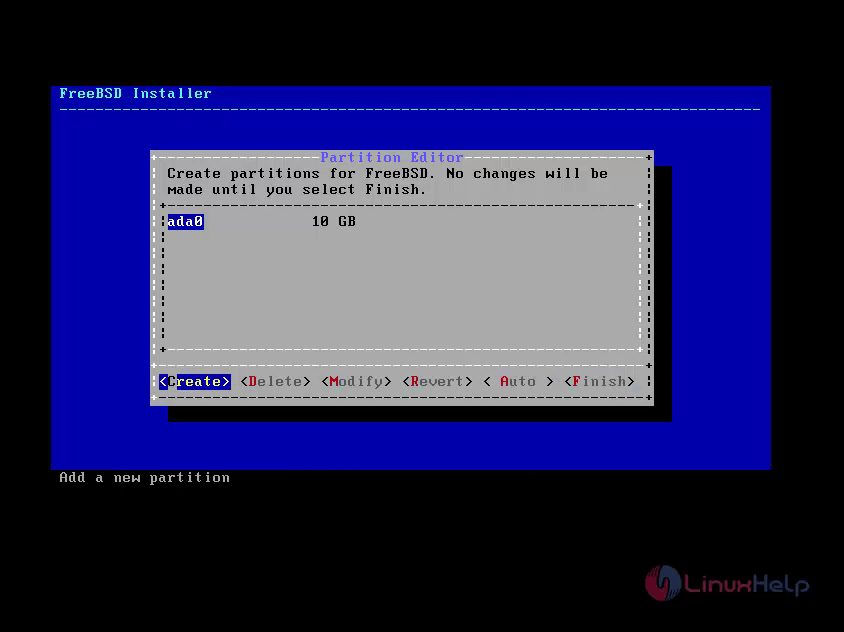
Step 7: We would like to partition the Disk for our installation
- Guided option automatically creates disk partitions.
- Manual option enables advance users creating customized partitions from menu.
- Shell option allows users to create customized partitions using command line tools like fdisk and gpart.
- ZFS option allows us to create encrypted root-on-ZFS machine with supports to start environment.
Select the partitioning as per your requirement. Here we have choose to select " Manual" to create partitions.

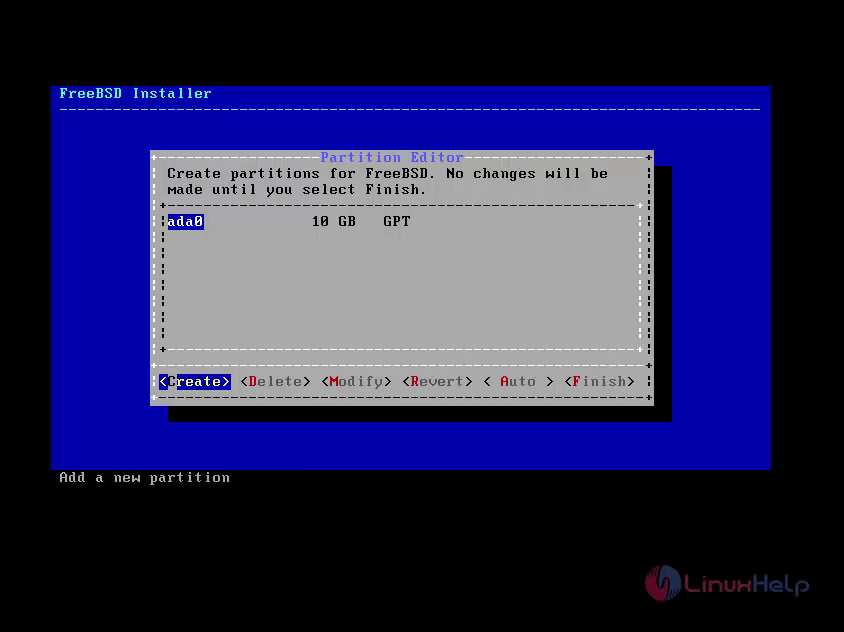
Step 8: Select " Manual Partitioning" , a partition editor opens with highlighted drive " ada0" and select to create the partition.
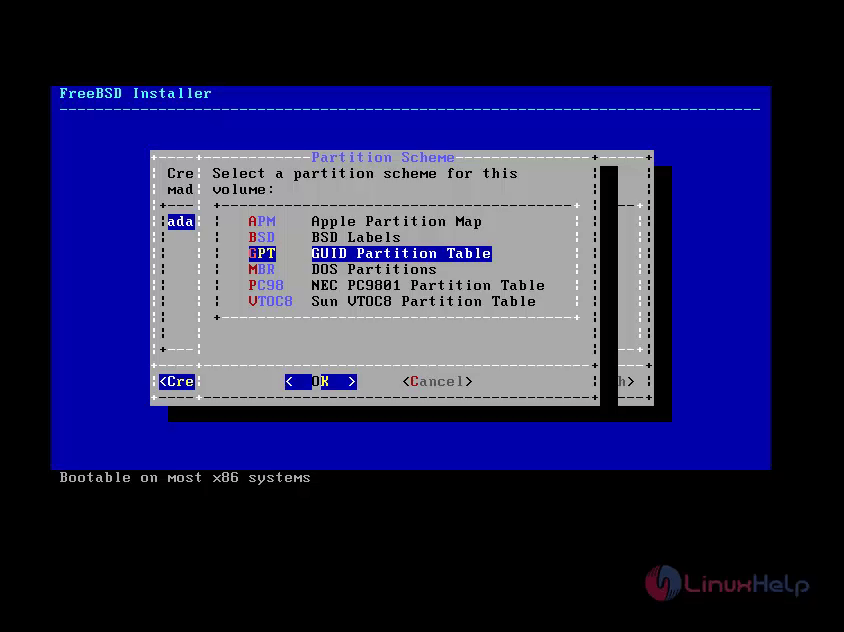
Step 9: Select GPT for creating a Partition table. GPT is the frequently used method for amd64 computers.
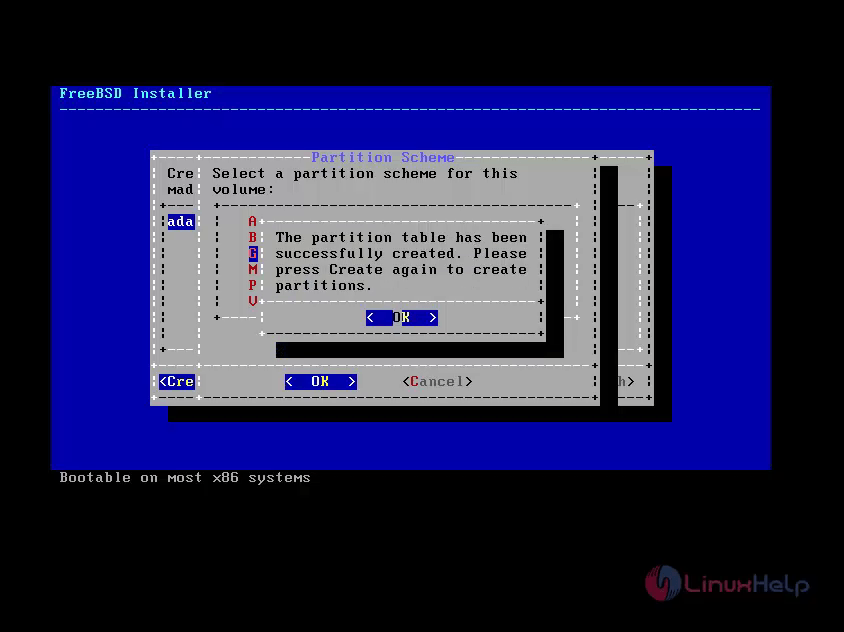
Step 10: After Partitioning table is completed, Select " Create" to specify the partitions.
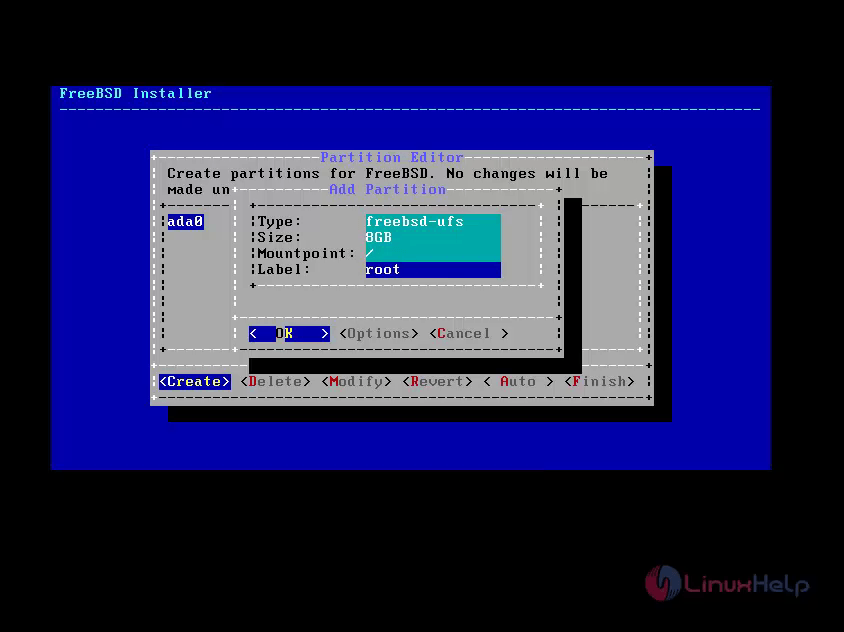
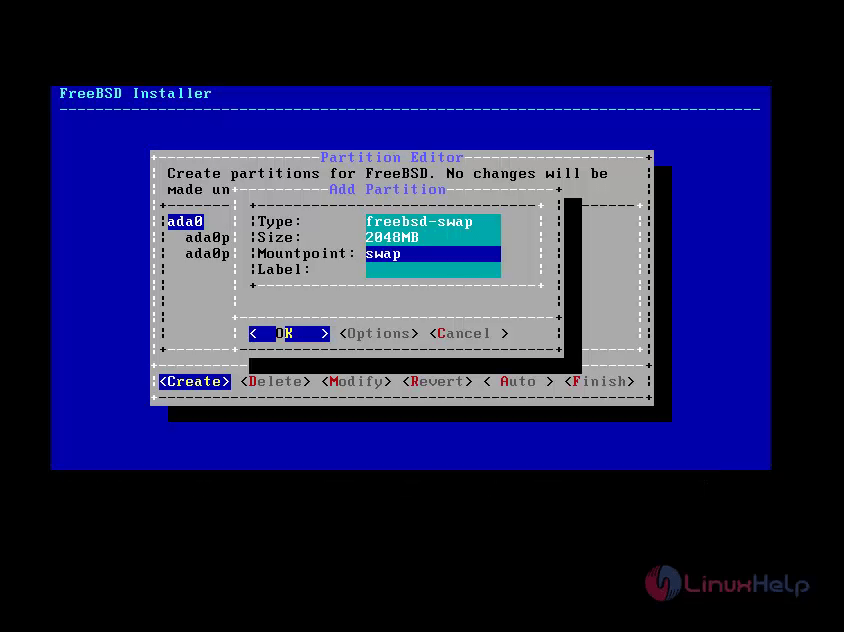
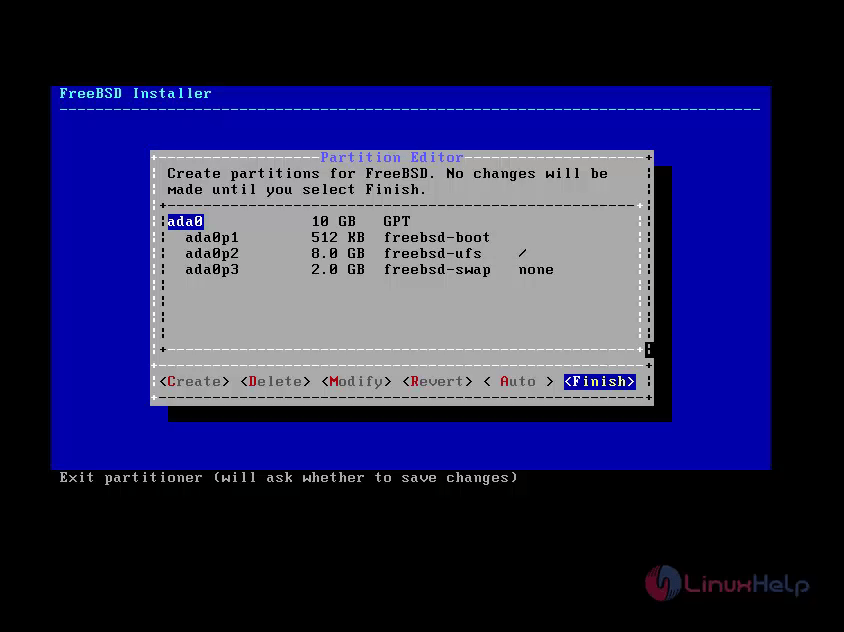
Step 11: To define three Partitions for /boot, Swap, /.
/ 8GB in Size
/boot &ndash 512 MB in Size
Swap 2GB in Size(Double size of RAM)
Select " Create" option and define the partitions one by one. " Type" needs to be " freebsd-ufs" and size here I has used 8g and click OK to create next Partition Swap. (At first you create /boot partition if you not create it, it will create automatically )
Select " Create" and define the swap as 2GB and click OK.
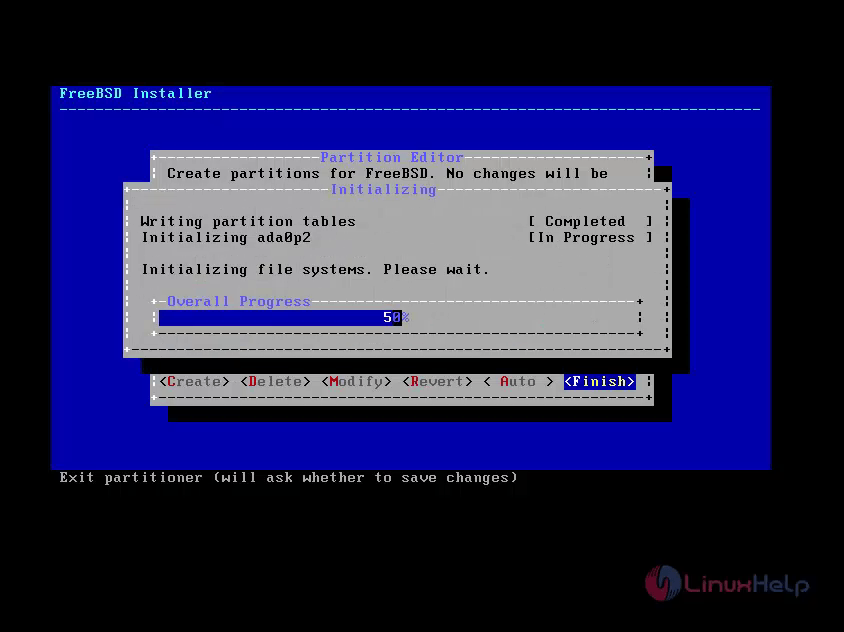
Step 12: After finishing all partition, select " Finish" to move forward.
Step 13: If you like to do changes, choose Back key and go back to the main partition menu. But, here we have to choose " Commit" to start the installation and click " Enter" .

Step 14: After formats all needed disks, initializes the partitions to download and also verifying all the selected components and extracts it to the disk.
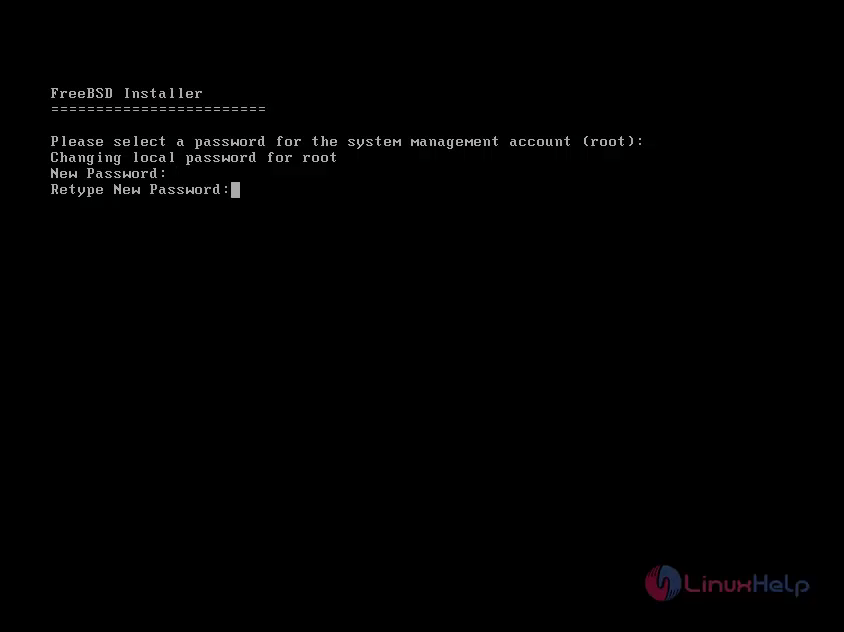
Step 15: After all requested distribution packages extracted in the disk, then the system screen displays the first post installation configuration window. Now set " root" password for our FreeBSD server.
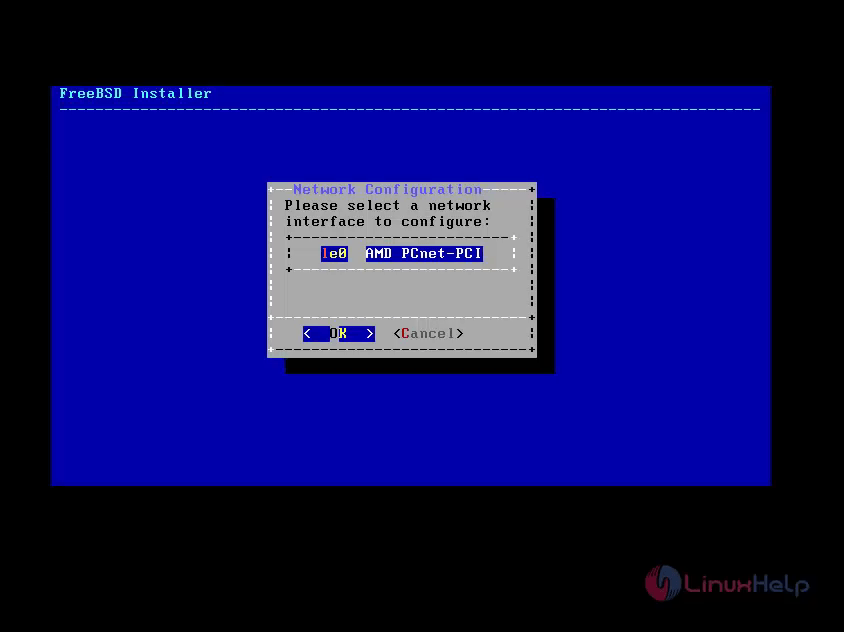
To Configure a Network Interfaces
Step 16: All available network interfaces will be displayed on the window, select the network interface and adapter what you want to use.
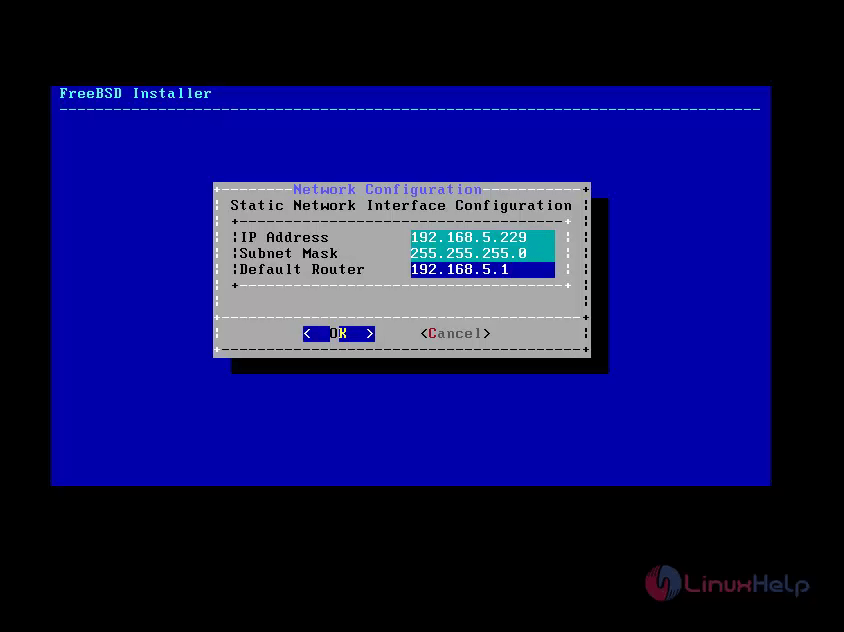
Step 17: To assign a static IP address to the system.
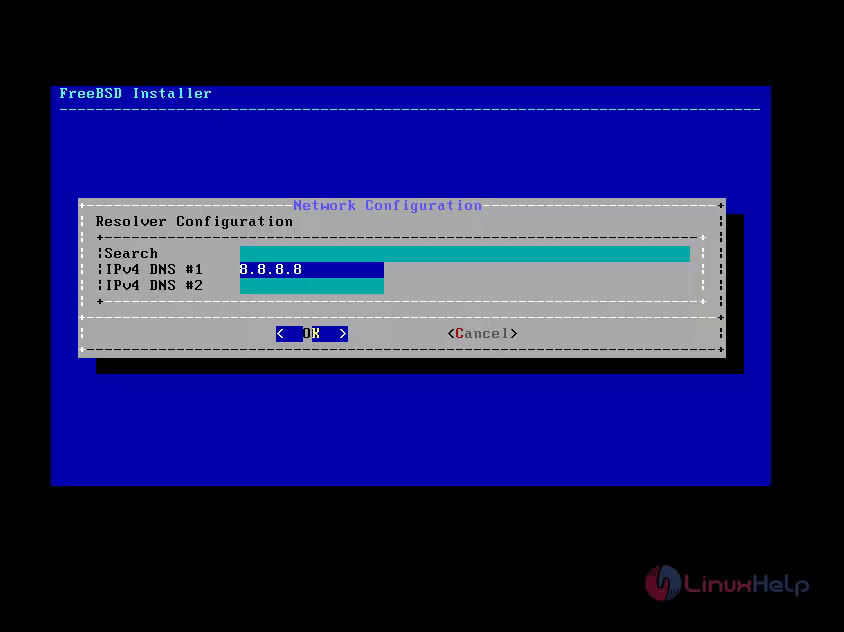
Step 18: To enter a valid DNS server and click OK to continue.
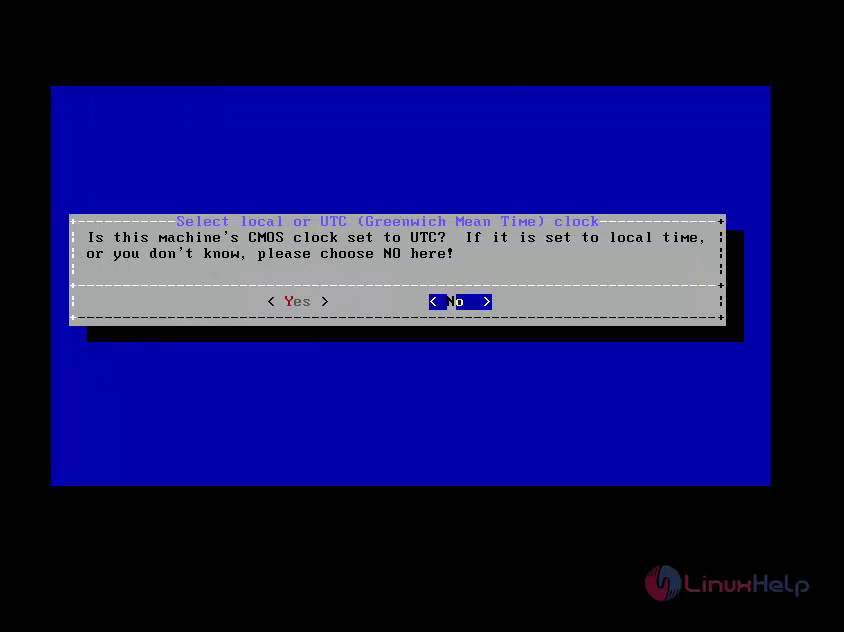
Step 19: Choose " No" for selecting the commonly used local time.
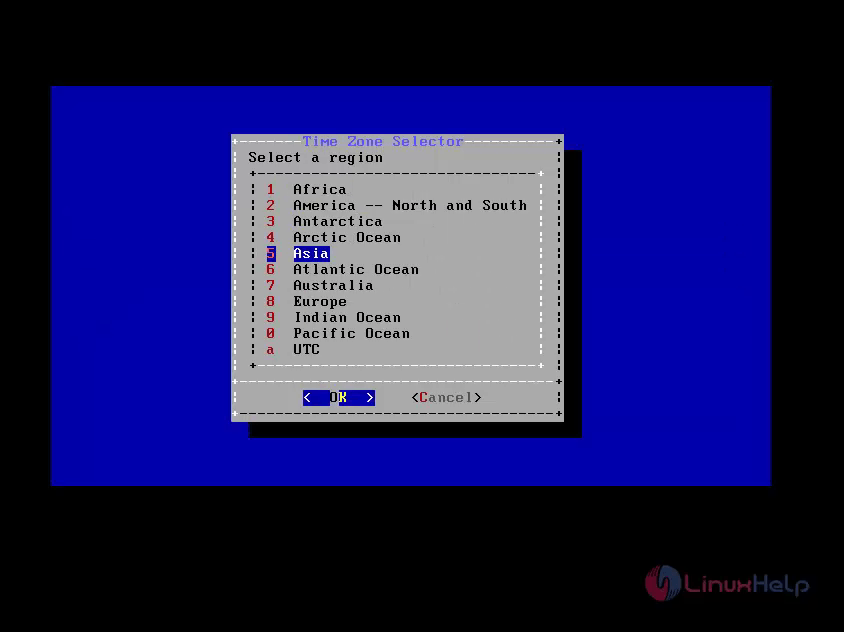
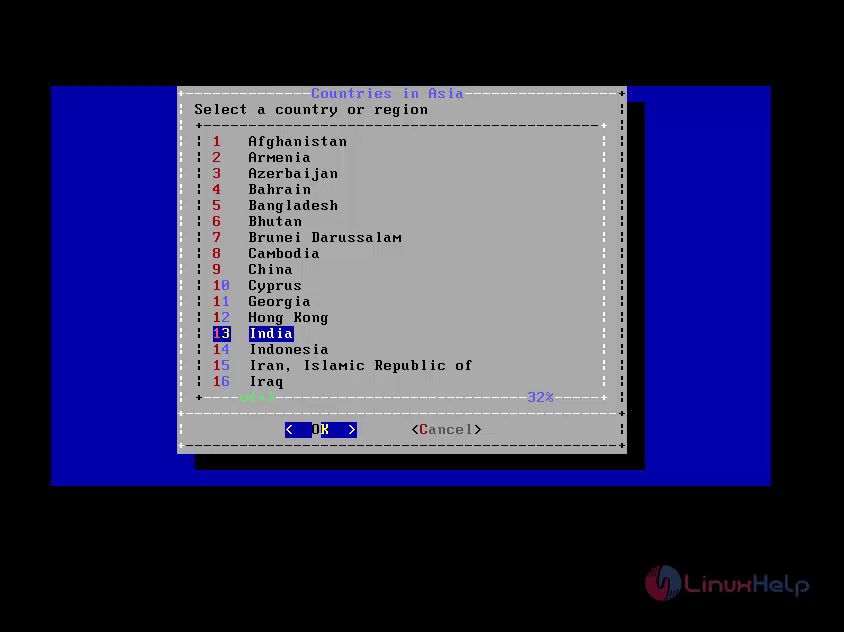
Step 20: Set the time zone and correct local time.
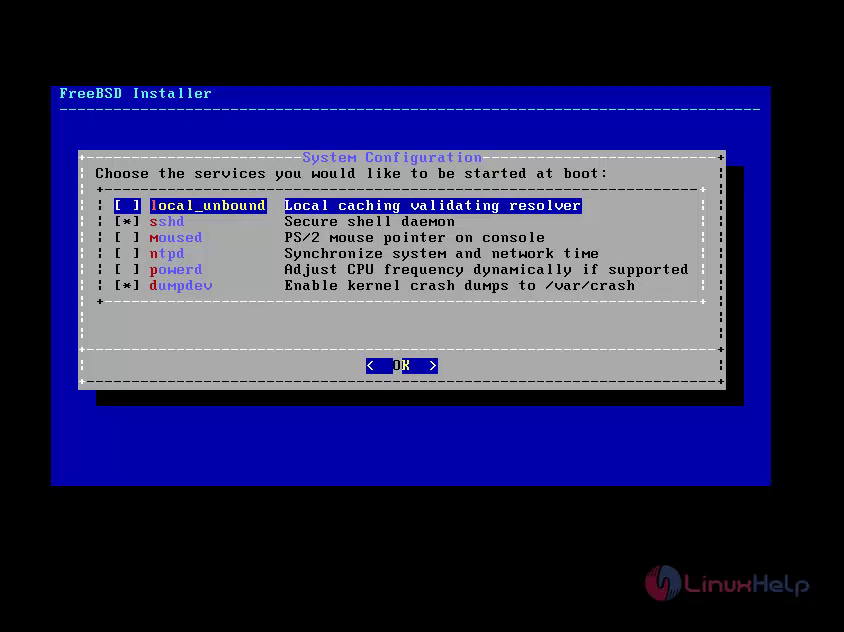
Step 21: Selecting the services that you like to start at machine boots.
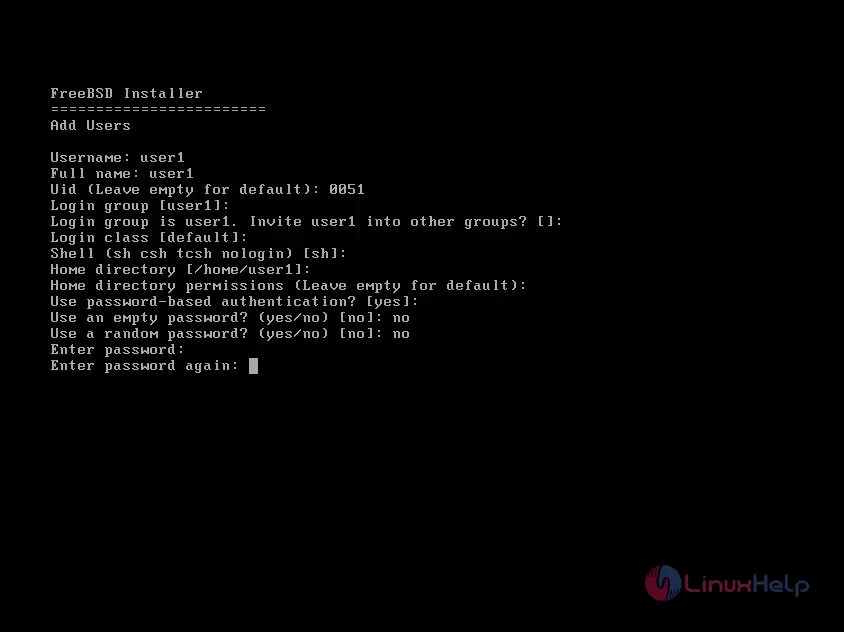
Step 22: To create minimum one user account to login into computer as non-root user account to maintain system more secure and safe. Choose Yes to include new users.
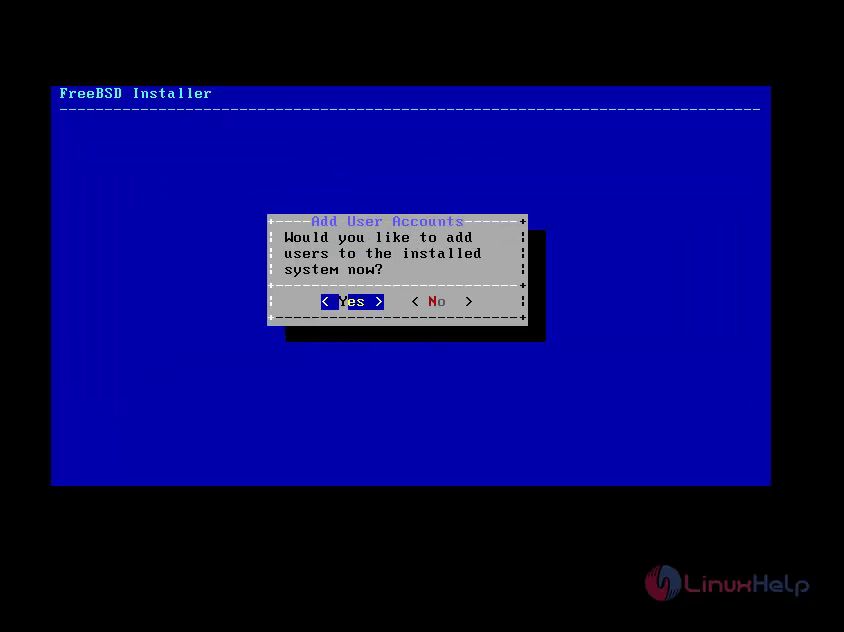
To enter yes for creating the new user. FreeBSD installer page opens where you have to enter the details required. Now the user will be added successfully.
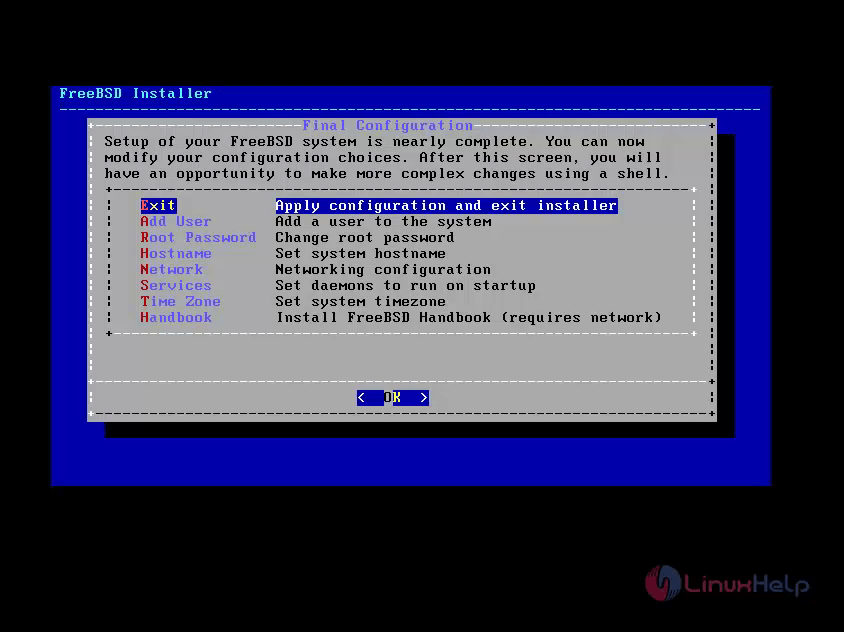
Step 23: To modify settings. After completes configuration, choose Exit.
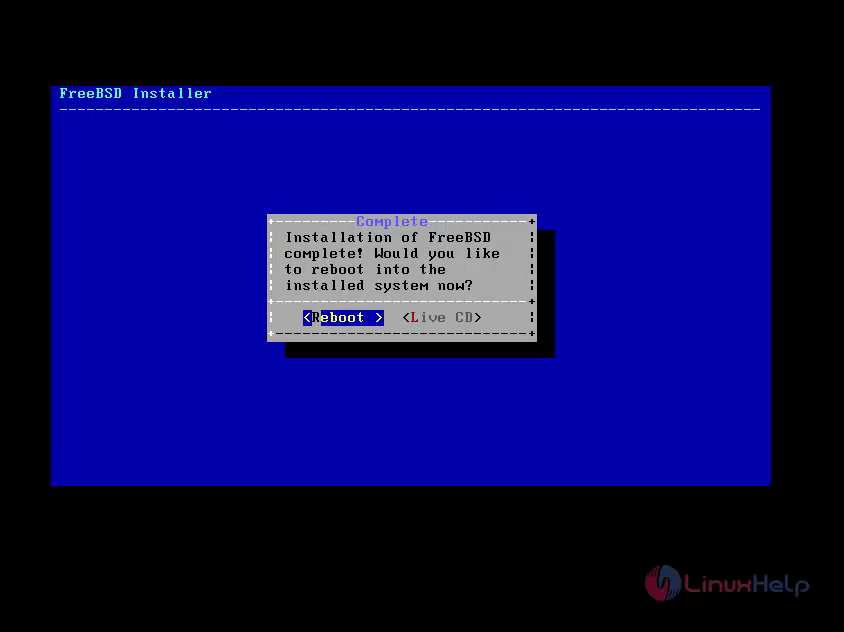
Step 24: To choose " Reboot" using your new FreeBSD system.
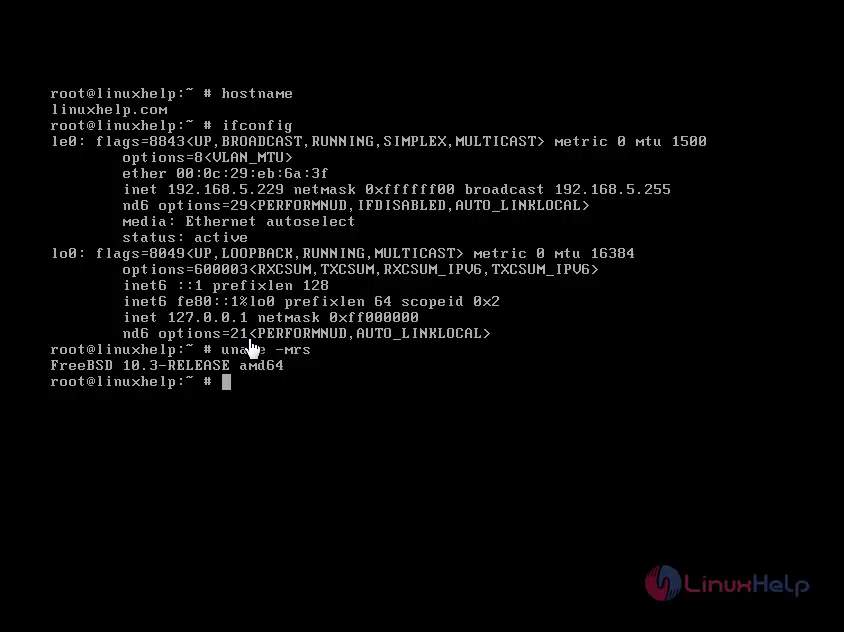
Step 25: After rebooting, login to root account and also check for the system information' s like IP Address, file system disk space, host-name.
# hostname
# ifconfig | grep inet
# uname -mrs // To get the Installed FreeBSD release version.
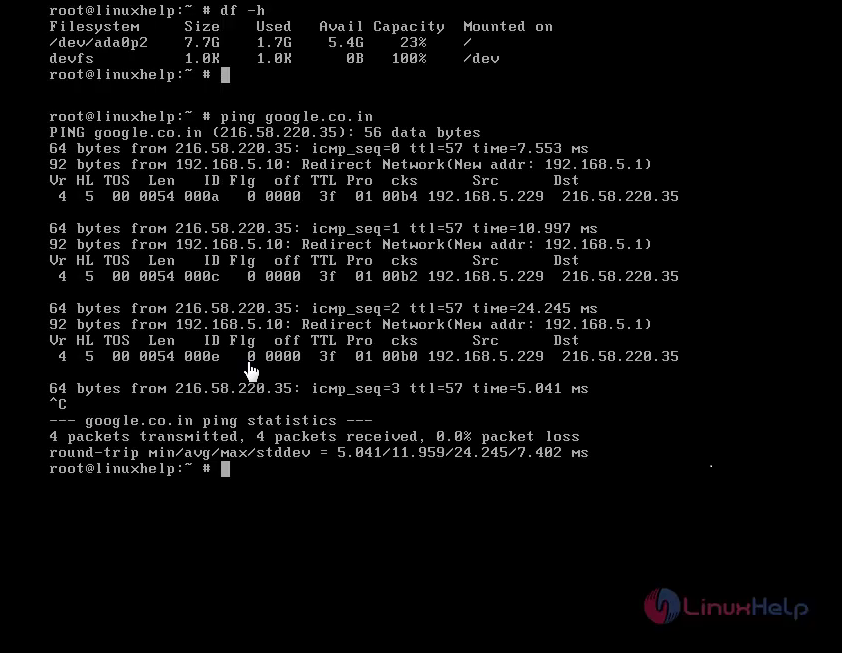
# df -h // Disk space check.
#ping google.co.in


Comments ( 0 )
No comments available