How to install and configure Nagios in FreeBSD
To install and configure Nagios on FreeBSD
Nagios is an open source system and network monitoring tool. Nagios can monitor and alter its services for servers, switches, applications and servers. It alerts the user when there is an error, and notifies them again once the error is resolved.
Features
- Monitoring network services such as SMTP, POP3, HTTP, PING, etc
- Monitoring host resources
- Simple plug-in design
- Contact Notifications for problems
- Automatic Log Rotation
- Can define network host hierarchy using parent hosts
- Support for implementing redundant monitoring hosts
To configure the FAMP stack
Before installing Nagios, verify whether the FAMP stack is configured by utilizing the following command.
root@linuxhelp:~ # service -e
.
.
.
/usr/local/etc/rc.d/mysql-server
/usr/local/etc/rc.d/apache24
.
.
Now restart the Apache service by triggering the following command.
root@linuxhelp:~ # service apache24 restart
Performing sanity check on apache24 configuration:
Syntax OK
Stopping apache24.
Waiting for PIDS: 809.
Performing sanity check on apache24 configuration:
Syntax OK
Starting apache24.
Once the Apache service is restarted, use the following command to restart MySQL.
root@linuxhelp:~ # service mysql-server restart
Stopping mysql.
Waiting for PIDS: 747.
Starting mysql.
The next step is to update the repository by invoking the following command.
root@linuxhelp:~ # pkg update -f
Updating FreeBSD repository catalogue...
Fetching meta.txz: 100% 944 B 0.9kB/s 00:01
Fetching packagesite.txz: 100% 6 MiB 444.2kB/s 00:13
Processing entries: 100%
FreeBSD repository update completed. 25377 packages processed.
To Install Nagios
Once the LAMP stack is configured, Nagios can be installed by utilizing the following command.
root@linuxhelp:~ # pkg install nagios
Updating FreeBSD repository catalogue...
FreeBSD repository is up-to-date.
All repositories are up-to-date.
The following 2 package(s) will be affected (of 0 checked):

New packages to be INSTALLED:
nagios: 3.5.1_10
nagios-plugins: 2.1.3,1

.
.
.
[2/2] Extracting nagios-3.5.1_10: 100%
Message from nagios-3.5.1_10:
**********************************************************************

Enable Nagios in /etc/rc.conf with the following line:

nagios_enable=" YES"

Configuration templates are available in /usr/local/etc/nagios as
*.cfg-sample files. Copy them to *.cfg files where required and
edit to suit your needs.

If you don' t already have a web server running, you will need to
install and configure one to finish off your Nagios installation.
When used with Apache, the following should be sufficient to publish
the web component of Nagios (modify the allow list to suit):

< Directory /usr/local/www/nagios>
Order deny,allow
Deny from all
Allow from 127.0.0.1
php_flag engine on
php_admin_value open_basedir /usr/local/www/nagios/:/var/spool/nagios/
< /Directory>

< Directory /usr/local/www/nagios/cgi-bin>
Options ExecCGI
< /Directory>

ScriptAlias /nagios/cgi-bin/ /usr/local/www/nagios/cgi-bin/
Alias /nagios/ /usr/local/www/nagios/

**********************************************************************
root@linuxhelp:~ #
next enable the nagios service and add to rc.conf file
root@linuxhelp:~ # nano /etc/rc.conf

nagios_enable=" YES"
To configure Nagios
Now enter the Nagios directory to configure it. Utilize the following command to access the directory.
root@linuxhelp:~ # cd /usr/local/etc/nagios/
root@linuxhelp:/usr/local/etc/nagios # ls
cgi.cfg-sample objects
nagios.cfg-sample resource.cfg-sample
Inside the directory rename all the " .cfg-sample" file to " .cfg" as follows.
root@linuxhelp:/usr/local/etc/nagios # cp cgi.cfg-sample cgi.cfg
root@linuxhelp:/usr/local/etc/nagios # cp nagios.cfg-sample nagios.cfg
root@linuxhelp:/usr/local/etc/nagios # cp resource.cfg-sample resource.cfg
Once it is done, run the following command to enter the object directory.
root@linuxhelp:/usr/local/etc/nagios # cd objects/
root@linuxhelp:/usr/local/etc/nagios/objects # ll
total 44
-rw-r--r-- 1 root wheel 7716 Oct 11 19:06 commands.cfg-sample
-rw-r--r-- 1 root wheel 2166 Oct 11 19:06 contacts.cfg-sample
-rw-r--r-- 1 root wheel 5415 Oct 11 19:06 localhost.cfg-sample
-rw-r--r-- 1 root wheel 3124 Oct 11 19:06 printer.cfg-sample
-rw-r--r-- 1 root wheel 3293 Oct 11 19:06 switch.cfg-sample
-rw-r--r-- 1 root wheel 10824 Oct 11 19:06 templates.cfg-sample
-rw-r--r-- 1 root wheel 3208 Oct 11 19:06 timeperiods.cfg-sample
Now again rename all the “ .cfg-sample” files to “ .cfg” as follows.
root@linuxhelp:/usr/local/etc/nagios/objects # cp commands.cfg-sample commands.cfg
root@linuxhelp:/usr/local/etc/nagios/objects # cp contacts.cfg-sample co
commands.cfg commands.cfg-sample contacts.cfg-sample
root@linuxhelp:/usr/local/etc/nagios/objects # cp contacts.cfg-sample contacts.cfg
root@linuxhelp:/usr/local/etc/nagios/objects # cp localhost.cfg-sample localhost.cfg
root@linuxhelp:/usr/local/etc/nagios/objects # cp printer.cfg-sample printer.cfg
root@linuxhelp:/usr/local/etc/nagios/objects # cp switch.cfg-sample switch.cfg
root@linuxhelp:/usr/local/etc/nagios/objects # cp templates.cfg-sample templates.cfg
root@linuxhelp:/usr/local/etc/nagios/objects # cp timeperiods.cfg-sample timeperiods.cfg
After renaming the files, invoke the following command to check the Nagios configuration.
root@linuxhelp:/usr/local/etc/nagios/objects # nagios -v /usr/local/etc/nagios/nagios.cfg

Nagios Core 3.5.1
Copyright (c) 2009-2011 Nagios Core Development Team and Community Contributors
Copyright (c) 1999-2009 Ethan Galstad
Last Modified: 08-30-2013
License: GPL

.
.
.
Checking for circular paths between hosts...
Checking for circular host and service dependencies...
Checking global event handlers...
Checking obsessive compulsive processor commands...
Checking misc settings...

Total Warnings: 0
Total Errors: 0

Things look okay - No serious problems were detected during the pre-flight check
root@linuxhelp:/usr/local/etc/nagios/objects #
Add nagios admin user
root@linuxhelp:/usr/local/etc/nagios/objects # htpasswd -c /usr/local/etc/nagios/htpasswd.users nagiosadmin
New password:
Re-type new password:
Adding password for user nagiosadmin
Use the following command to configure the httpd.conf file as follows.
root@linuxhelp:/usr/local/etc/nagios/objects # nano /usr.local/etc/apache24/httpd.conf
.
.
.
< IfModule !mpm_prefork_module>
LoadModule cgid_module libexec/apache24/mod_cgid.so
< /IfModule>
< IfModule mpm_prefork_module>
LoadModule cgi_module libexec/apache24/mod_cgi.so
< /IfModule>
.
.
.
< Directory />
AllowOverride none
#Require all denied
Order Allow,Deny
Allow from All
< /Directory>
.
.
.

.
< FilesMatch " .php$" >
SetHandler application/x-httpd-php
< /FilesMatch>
< FilesMatch " .phps$" >
SetHandler application/x-httpd-php-source
< /FilesMatch>

< Directory /usr/local/www/nagios>
AllowOverride None
Order deny,allow
Deny from all
Allow from all
php_flag engine on
php_admin_value open_basedir /usr/local/www/nagios/:/var/spool/nagios/
AuthName " admin"
AuthType Basic
AuthUSerFile /usr/local/etc/nagios/htpasswd.users
Require valid-user
< /Directory>

< Directory /usr/local/www/nagios/cgi-bin>
Options ExecCGI
AllowOverride None
Order allow,deny
Allow from All
AuthName " admin"
AuthType Basic
AuthUSerFile /usr/local/etc/nagios/htpasswd.users
Require valid-user
< /Directory>

ScriptAlias /nagios/cgi-bin/ /usr/local/www/nagios/cgi-bin/
Alias /nagios/ /usr/local/www/nagios/
After the configuration, enable the Nagios service with the following command.
root@linuxhelp:~ # service nagios start
Performing sanity check of nagios configuration: OK
Starting nagios.
Once Nagios is enabled, run the following command to restart Apache service.
root@linuxhelp:~ # service apache24 restart
Performing sanity check on apache24 configuration:
Syntax OK
Stopping apache24.
Waiting for PIDS: 1928.
Performing sanity check on apache24 configuration:
Syntax OK
Starting apache24.
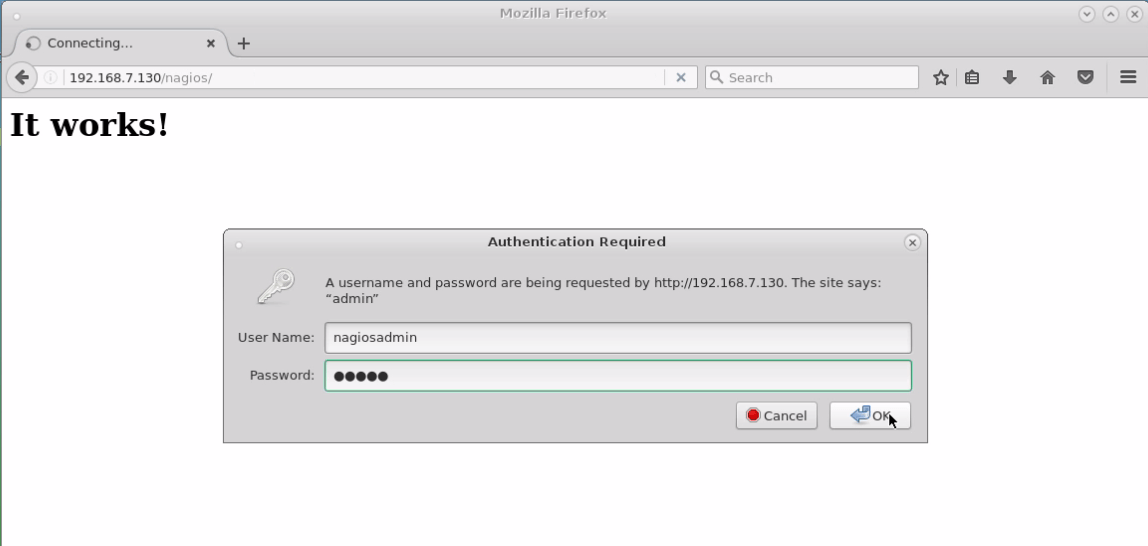
Now Nagios is ready to use. Open your web-browser and call your local host IP address as follows.
http://192.168.7.130/nagios/
Enter your user login credentials.
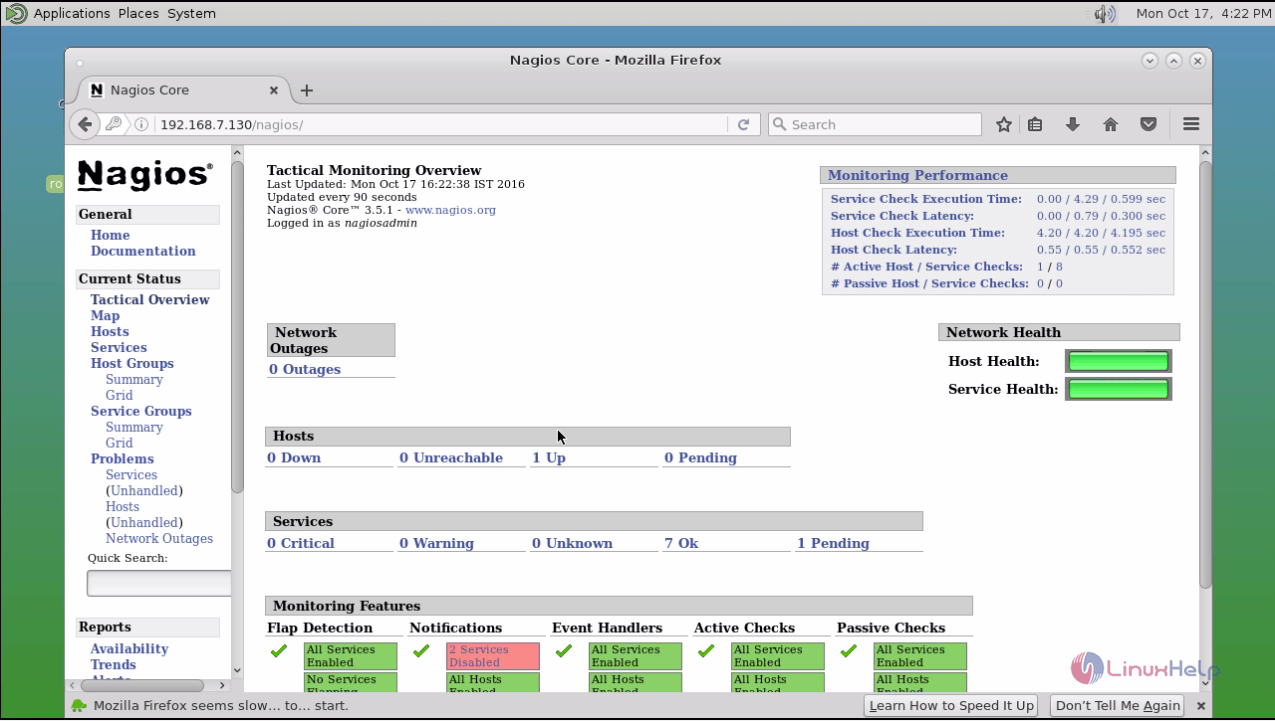
You' ll be taken to Nagios Dashboard.
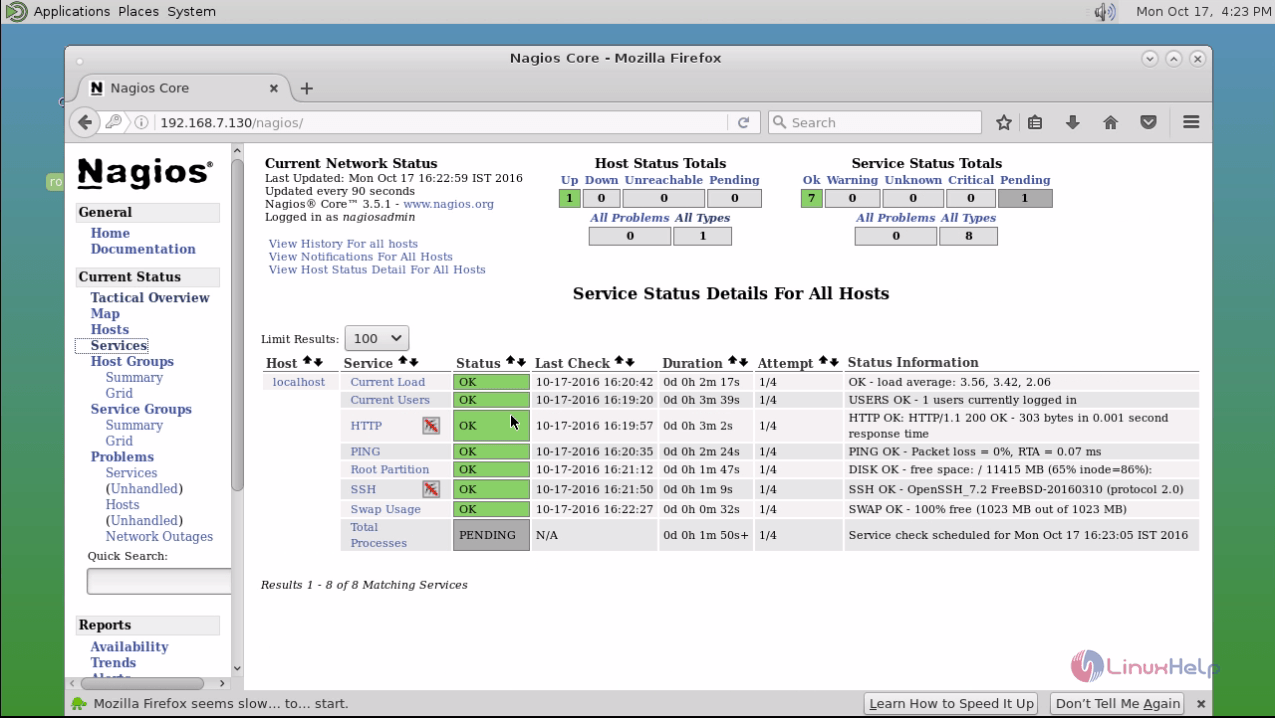
The service status details for all hosts are displayed.
Comments ( 1 )