How to install Cotonti CMS – 0.9.19 on Ubuntu – 17.04
To install Cotonti CMS 0.9.19 on Ubuntu 17.04
Cotonti is open source Content Management System and Content Management Framework built based on PHP and MySQL. It possesses both the flexibility of web development framework and also the feature set of a content manager with more focus on security, speed, and flexibility. It is simple to install Cotonti CMS and in this tutorial, you will learn about the method to install Cotonti CMS on Ubuntu 17.04
Prerequisites
Cotonti CMS requires a webserver to functionally based on LAMP setup on your system and also with following required PHP modules.
apt-get install php-mysql php-curl php-json php-cgi php libapache2-mod-php php-mcrypt php-xmlrpc php-gd php-mbstring php php-common php-xmlrpc php-soap php-xml php-intl php-cli php-ldap php-zip php-readline php-imap php-tidy php-recode php-sqlite3 php-xdebug php-gettext php-dev php-pear php-memcache php-memcached php-bz2
Installing Cotonti CMS
Let' s start with updating the system repositories by making use of the following command.
root@linuxhelp1:~# apt-get update
Hit:1 http://old-releases.ubuntu.com/ubuntu zesty InRelease
Hit:2 http://old-releases.ubuntu.com/ubuntu zesty-updates InRelease
Hit:3 http://old-releases.ubuntu.com/ubuntu zesty-backports InRelease
Hit:4 http://old-releases.ubuntu.com/ubuntu zesty-security InRelease
Reading package lists... Done
Now create a Database for the Cotonti and make the following configuration in it.
root@linuxhelp1:~# mysql -u root -p
Enter password:
Welcome to the MariaDB monitor.  Commands end with   or g.
Your MariaDB connection id is 10
Server version: 10.1.25-MariaDB- Ubuntu 17.04

Copyright (c) 2000, 2017, Oracle, MariaDB Corporation Ab and others.

Type ' help '  or ' h'  for help. Type ' c'  to clear the current input statement.

MariaDB [(none)]>  create database cotonti
Query OK, 1 row affected (0.00 sec)

MariaDB [(none)]>  grant all privileges on cotonti.* to ' cotonuser' @' localhost'  identified by ' 123'
Query OK, 0 rows affected (0.03 sec)

MariaDB [(none)]>  flush privileges
Query OK, 0 rows affected (0.00 sec)

MariaDB [(none)]>  exit
Bye
Navigate to any local Directory and download the cotonti package.
root@linuxhelp1:~# cd /tmp/
Download the package from the terminal using the wget command.
root@linuxhelp1:/tmp# wget https://github.com/Cotonti/Cotonti/archive/master.zip
--2018-04-02 05:40:48--  https://github.com/Cotonti/Cotonti/archive/master.zip
Resolving github.com (github.com)... 192.30.253.112, 192.30.253.113
Connecting to github.com (github.com)|192.30.253.112|:443... connected.
HTTP request sent, awaiting response... 302 Found
Location: https://codeload.github.com/Cotonti/Cotonti/zip/master [following]
--2018-04-02 05:40:50--  https://codeload.github.com/Cotonti/Cotonti/zip/master
Resolving codeload.github.com (codeload.github.com)... 192.30.253.120, 192.30.253.121
Connecting to codeload.github.com (codeload.github.com)|192.30.253.120|:443... connected.
HTTP request sent, awaiting response... 200 OK
Length: unspecified [application/zip]
Saving to: ‘ master.zip’

master.zip                  [  < =>                           ]   3.40M   617KB/s    in 13s

2018-04-02 05:41:06 (271 KB/s) - ‘ master.zip’  saved [3568937]
After downloading unzip the package as follows.
root@linuxhelp1:/tmp# unzip master.zip
Archive:  master.zip
cecfb7cff9d9d4ea106bf7038933b5e51ba3742a
   creating: Cotonti-master/
  inflating: Cotonti-master/.gitattributes
  inflating: Cotonti-master/.gitignore
 extracting: Cotonti-master/.htaccess
  inflating: Cotonti-master/Install.txt
  inflating: Cotonti-master/License.txt
  inflating: Cotonti-master/README.md
.
.
  inflating: Cotonti-master/themes/symisun-03/symisun-03.rc.php
  inflating: Cotonti-master/themes/symisun-03/symisun-03.readme.txt
  inflating: Cotonti-master/themes/symisun-03/symisun-03.ru.lang.php
  inflating: Cotonti-master/themes/symisun-03/users.details.tpl
  inflating: Cotonti-master/themes/symisun-03/users.edit.tpl
  inflating: Cotonti-master/themes/symisun-03/users.passrecover.tpl
  inflating: Cotonti-master/themes/symisun-03/users.profile.tpl
  inflating: Cotonti-master/themes/symisun-03/users.register.tpl
  inflating: Cotonti-master/themes/symisun-03/users.tpl
  inflating: Cotonti-master/themes/symisun-03/warnings.tpl
Let' s move the extracted package to the apache root directory in the following manner.
root@linuxhelp1:/tmp# mv Cotonti-master /var/www/cotonti
Now switch to apache root directory
root@linuxhelp1:/tmp# cd /var/www/
And change the ownership and permission of the files by using the following commands.
root@linuxhelp1:/var/www# chown -R www-data.www-data contonti
root@linuxhelp1:/var/www# chmod -R 775 contonti
After assigning the permissions, we are going to create a virtual host configuration
root@linuxhelp1:/var/www# vim /etc/apache2/sites-available/cotonti.conf
< VirtualHost *:80>
ServerName www.linuxhelp1.com
DocumentRoot /var/www/cotonti/

< Directory /var/www/cotonti/>
AllowOverride All
allow from all
< /Directory>

< /VirtualHost>
Save and quit the virtual host file and enable the site as follows.
root@linuxhelp1:/var/www# a2ensite cotonti.conf
Enabling site cotonti.
To activate the new configuration, you need to run:
  systemctl reload apache2
After that enable the rewrite module in the following manner.
root@linuxhelp1:/var/www# a2enmod rewrite
Enabling module rewrite.
To activate the new configuration, you need to run:
  systemctl restart apache2
Now disable the default site access of apache.
root@linuxhelp1:/var/www# a2dissite 000-default.conf
Site 000-default disabled.
To activate the new configuration, you need to run:
  systemctl reload apache2
Finally, restart the apache2 service to make the changes effect
root@linuxhelp1:/var/www# systemctl restart apache2
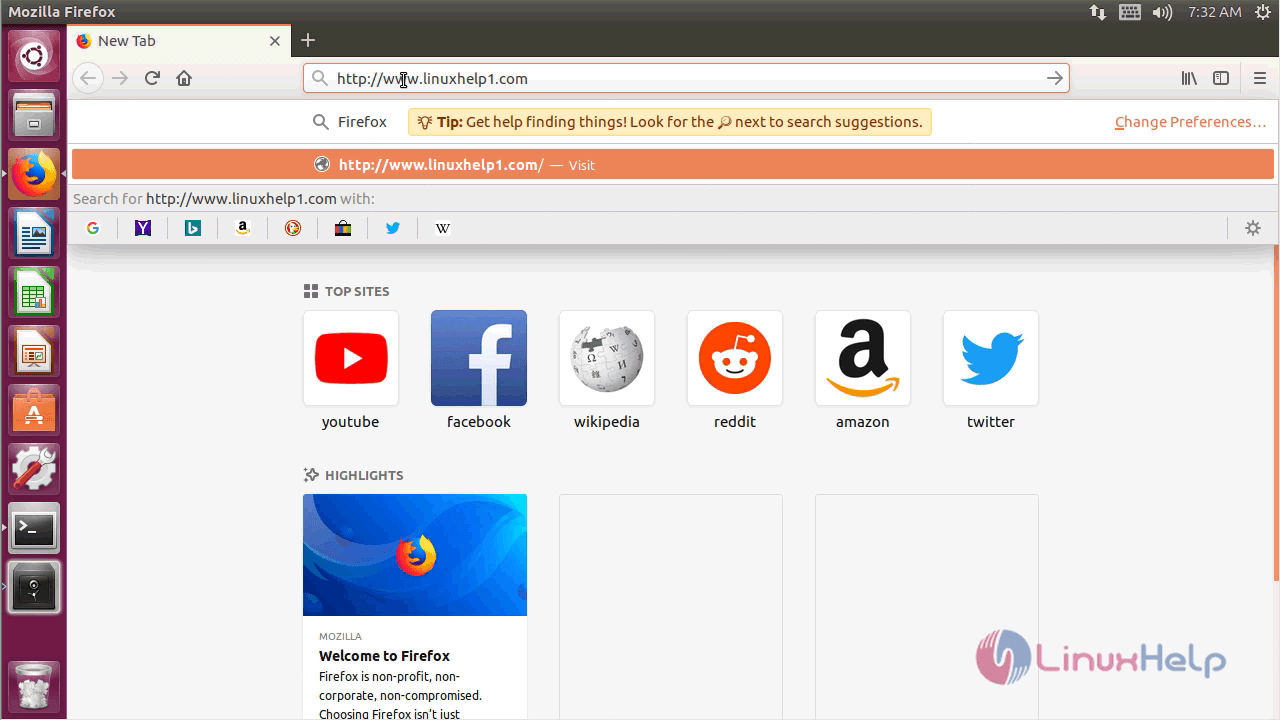
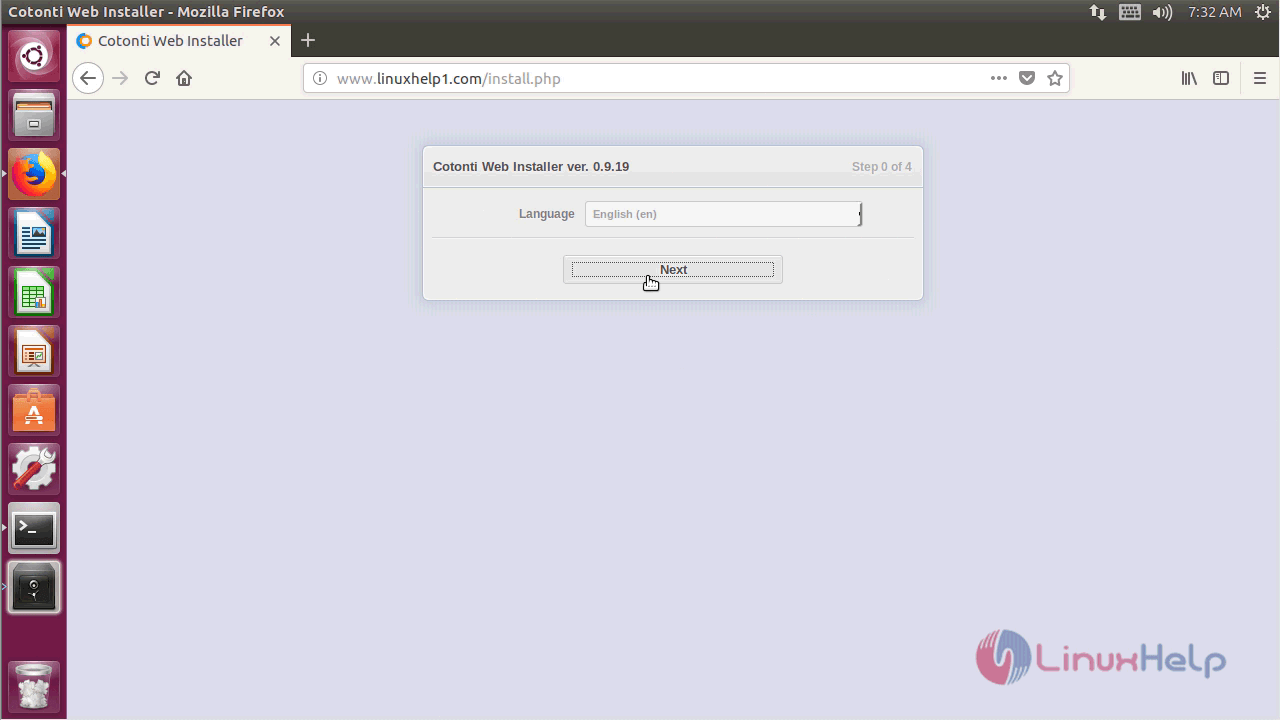
Continue the post-installation procedure through the browser. open the browser and navigate the following URL : http://< ip-address> or domain name.
You can start the installation by choosing the installation Langauge and click Next.
Now verify the web server configuration and make the changes based on your preference.

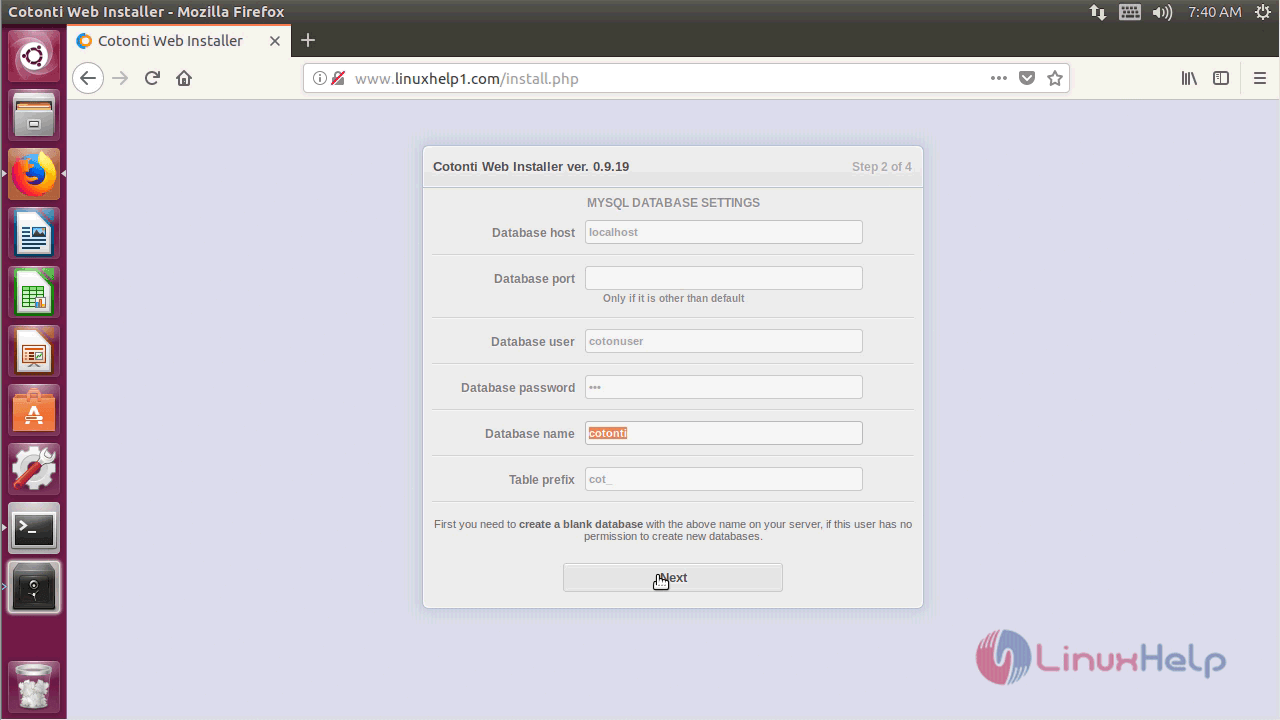
After web server configuration make the database configuration and click on Next.
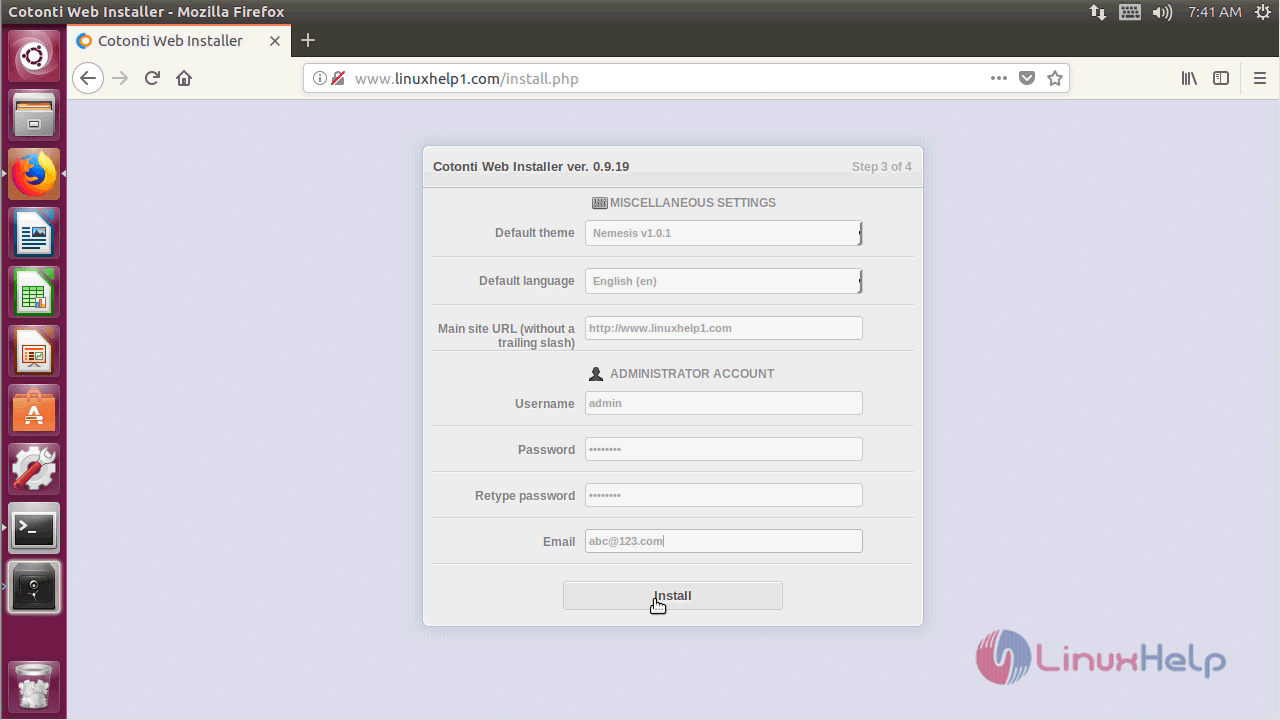
Configure admin account settings and enter details and proceed to install.
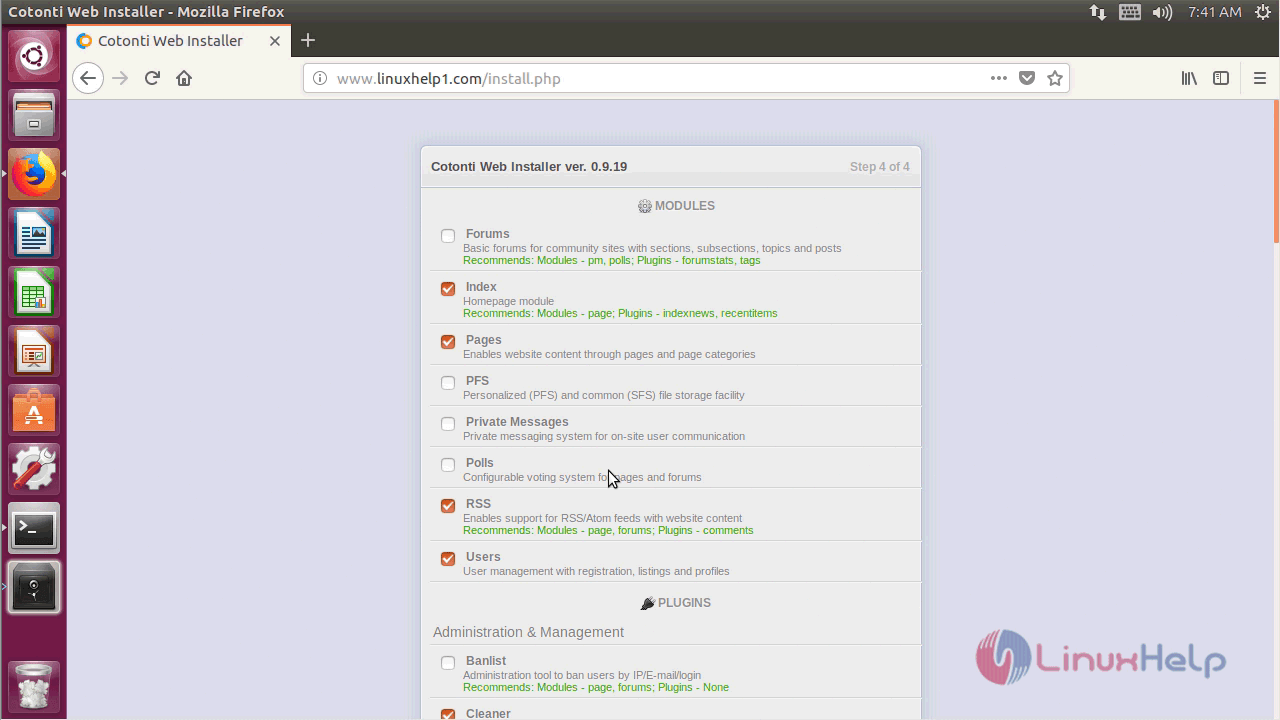
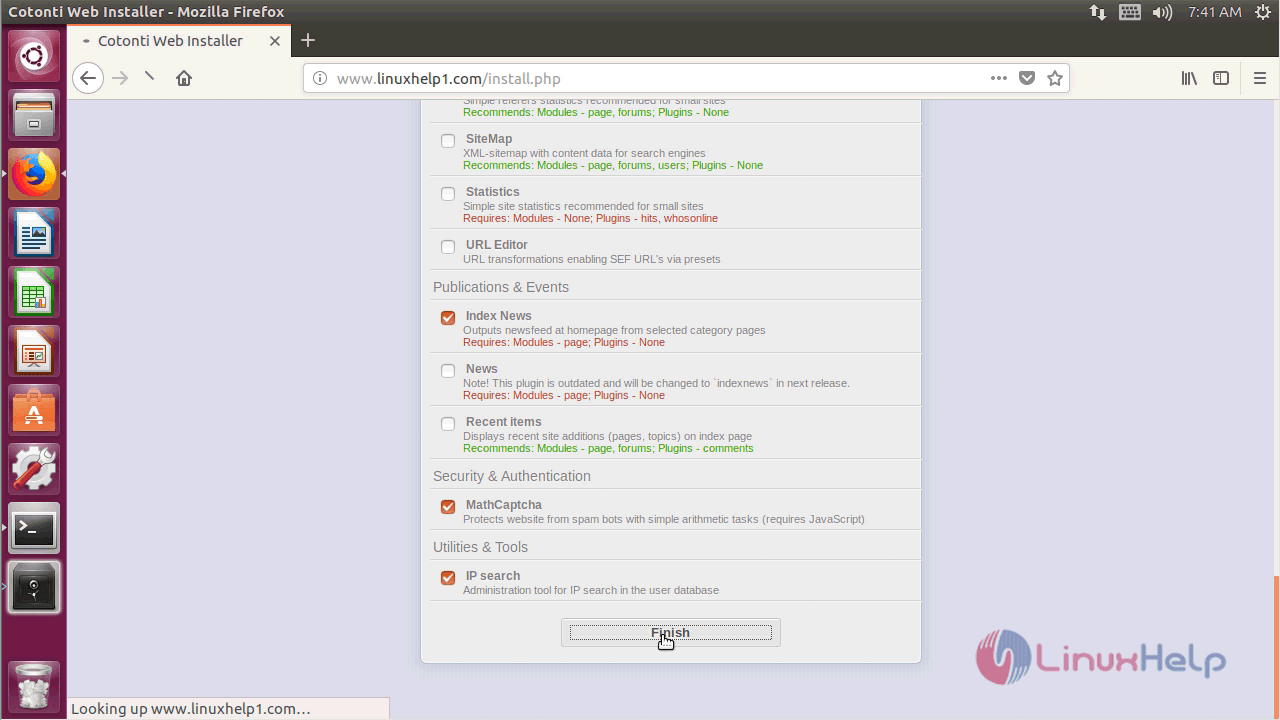
And then, choose and install the necessary modules of your preference.
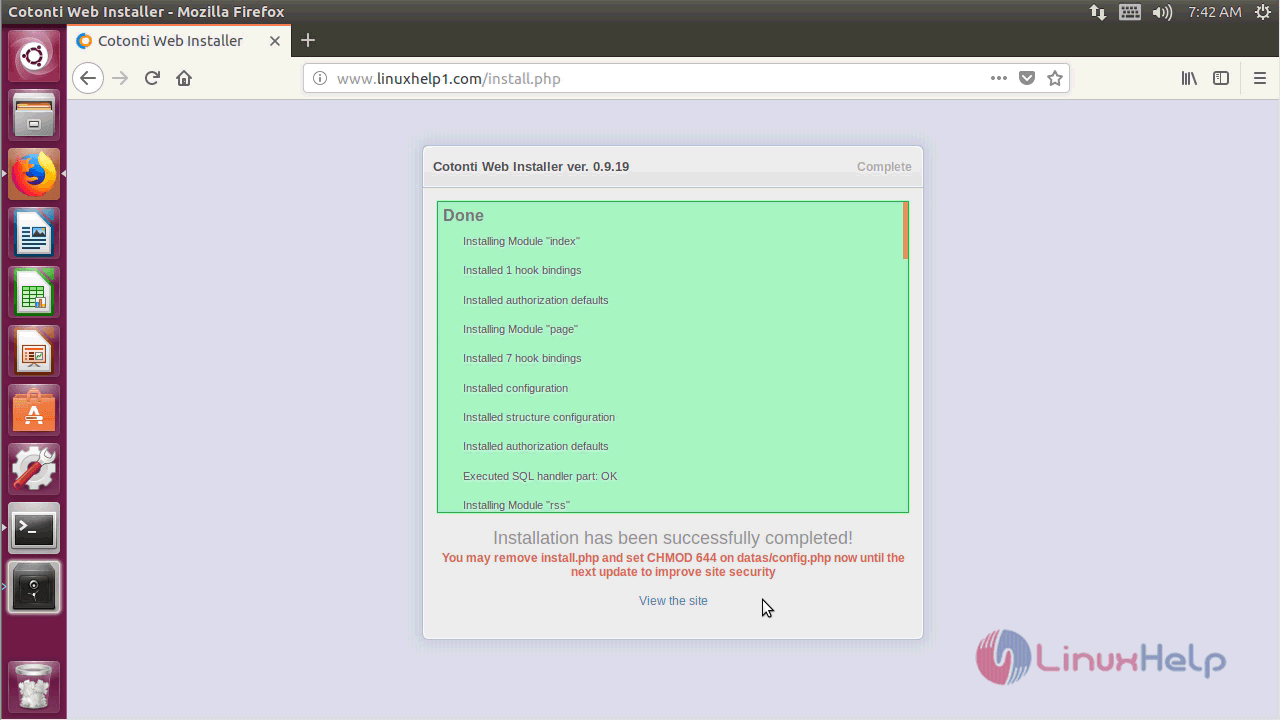
After the installation completes, a message will display along with security warnings and risk if any arises.
The post-installation requires the removal of PHP file and few permission changes for security purposes. So make sure you remove them.
root@linuxhelp1:/var/www/cotonti# rm -rf install.php
Switch to the directory and change permission.
root@linuxhelp1:/var/www/cotonti# cd datas/
root@linuxhelp1:/var/www/cotonti/datas# chmod 644 config.php
Finally, restart the apache to make the changes effect.
root@linuxhelp1:/var/www/cotonti/datas # systemctl restart apache2
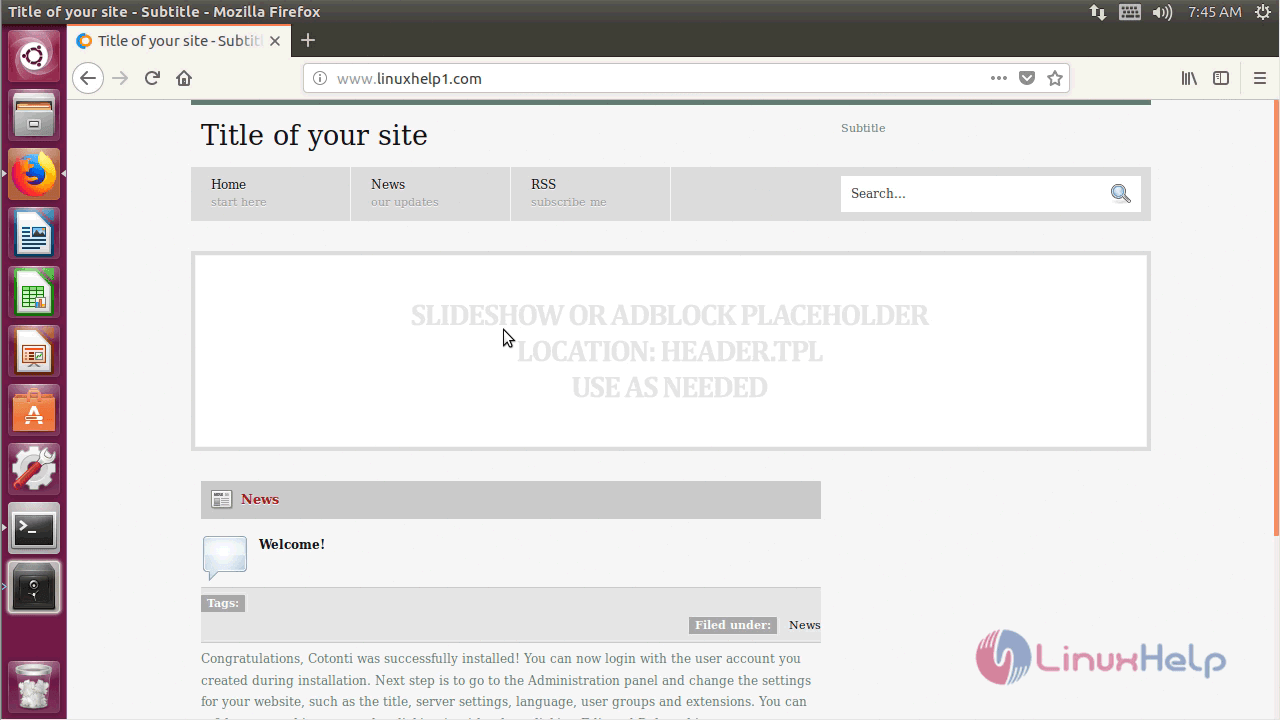
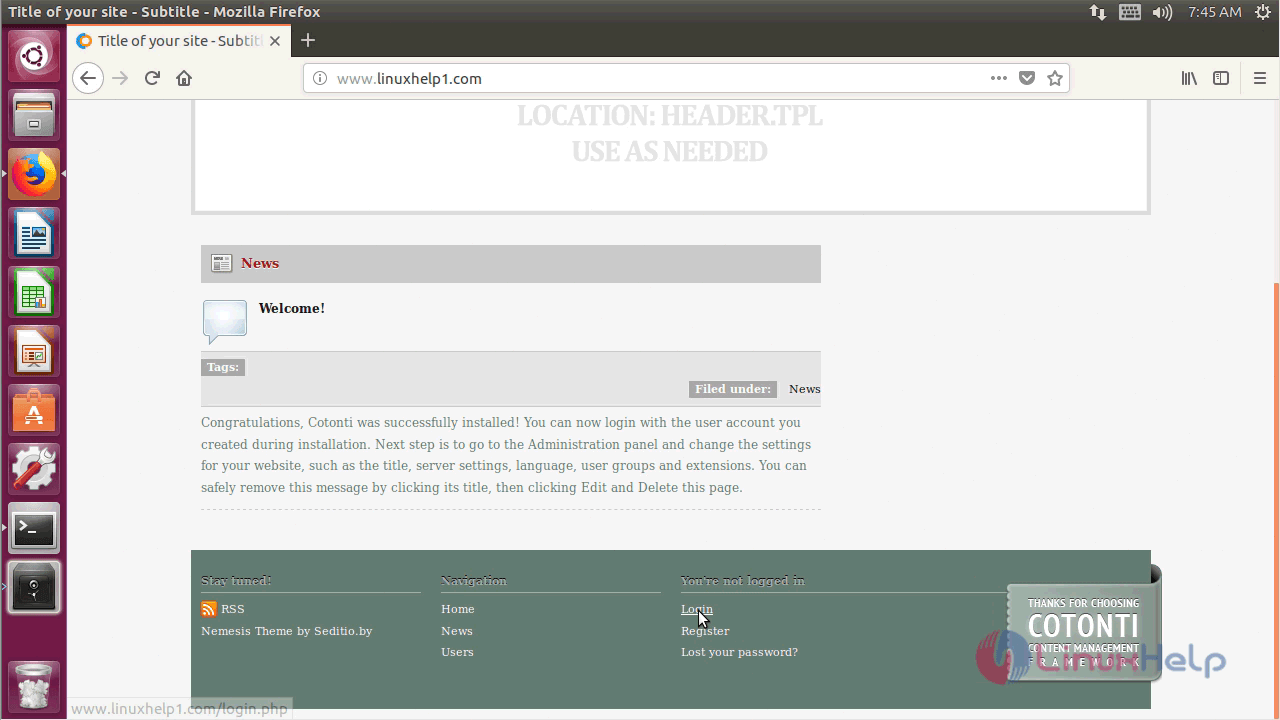
And then open the Cotonti site now.
For admin login navigate to the bottom and click login.
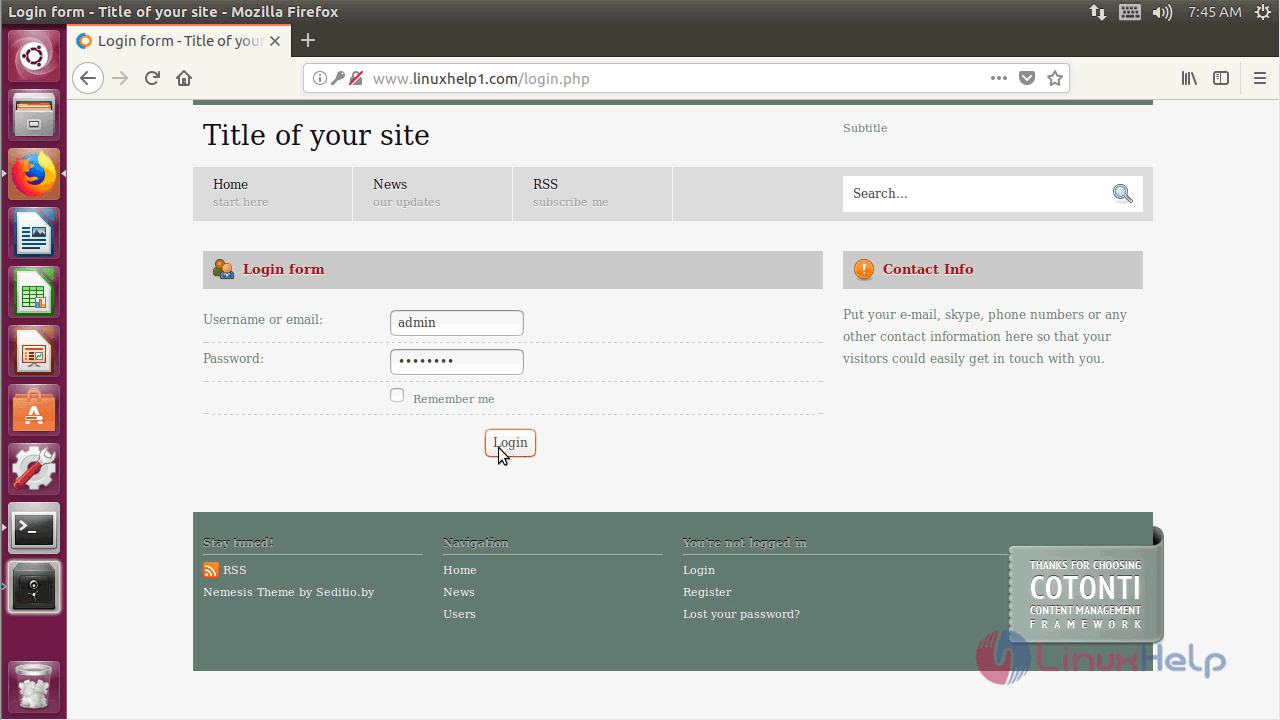
Log in with the Admin credentials.
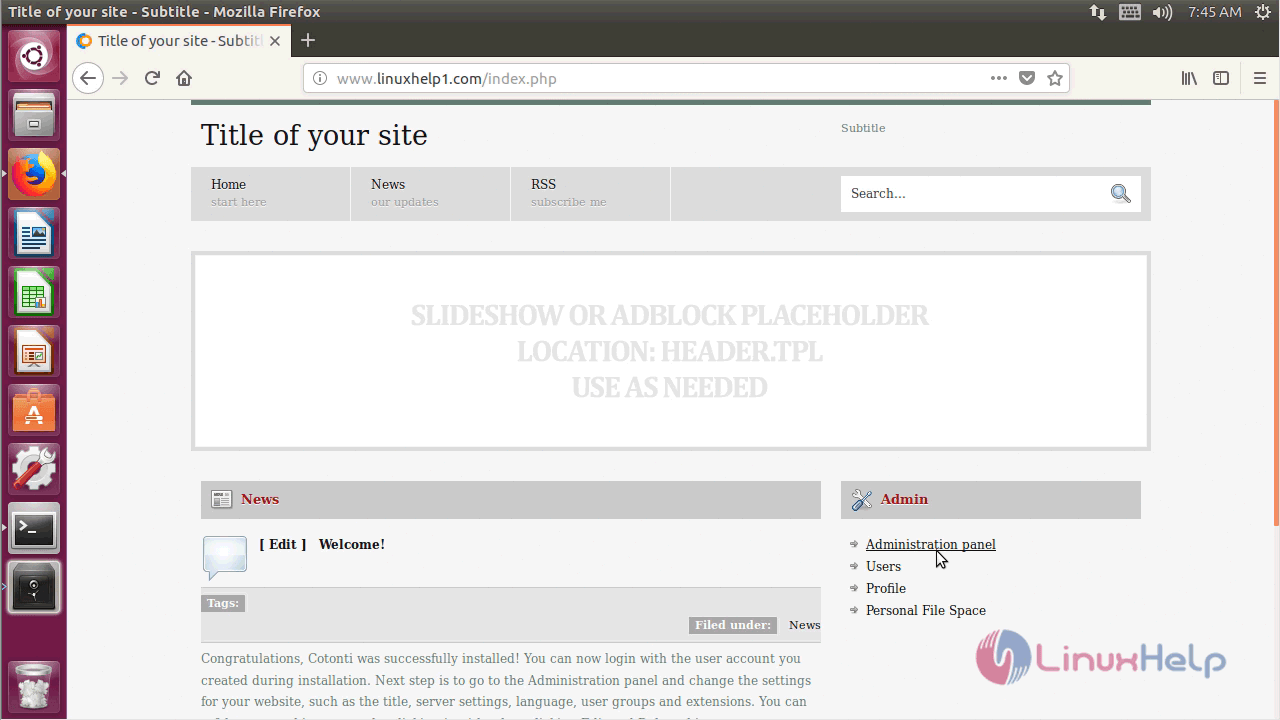
If you want to open an Administration page and click Administration panel.
This is the admin panel area where you can make changes as an admin.
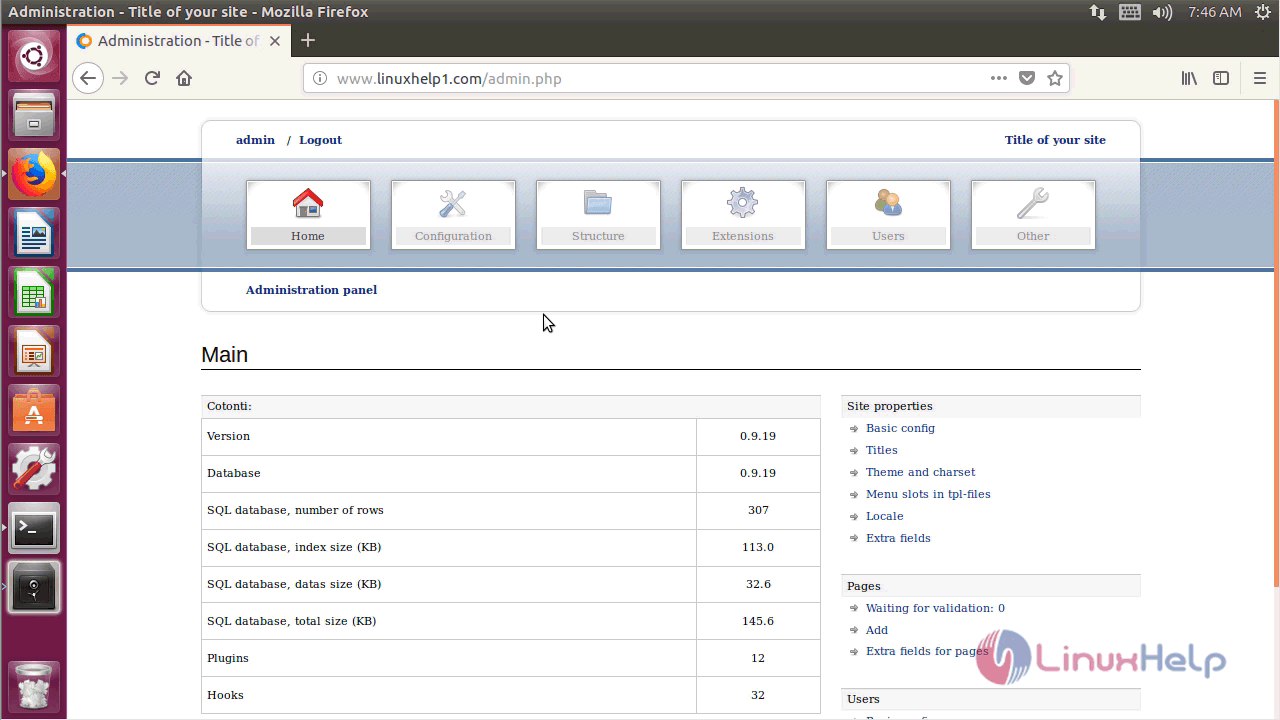
With this, the method to install Cotonti CMS &ndash 0.9.19 on Ubuntu &ndash 17.04 comes to an end.
Comments ( 0 )
No comments available