How To install and configure User Authentication in Squid on Debian 11.3
- 00:41 lsb_release -a
- 00:52 apt install squid -y
- 01:17 systemctl start squid
- 01:50 apt install apache2
- 02:00 systemctl start apache2
- 02:11 systemctl status apache2
- 02:30 htpasswd -c /etc/squid/squid_passwd user1
- 03:02 touch /etc/squid/passwd
- 03:23 vim /etc/squid/squid.conf
- 04:10 systemctl restart squid apache2
- 04:31 vim /etc/squid/block.txt
- 05:10 systemctl restart squid apache2
To Install And Configure User Authentication In Squid On Debian 11.3
Introduction:
Squid is a proxy server that works as an intermediate between the internet and a local network. The purpose of this configuration is to permit the Squid user to access the internet with their own login credentials using nsca_auth. This tutorial explains the installation and configuration process of User Authentication in Squid on Debian 11.3.
Installation and Configuration procedure.
Step 1: Check the OS version by using the below command
root@linuxhelp:~# lsb_release -a
Distributor ID: Debian
Description:    Debian GNU/Linux 11 (bullseye)
Release:        11
Codename:       bullseye
Step 2: Next install the Squid Proxy Server by using the below command
root@linuxhelp:~# apt install squid -y
Reading package lists... Done
Building dependency tree... Done
Reading state information... Done
The following additional packages will be installed:
  libdbi-perl libecap3 squid-common squid-langpack
Suggested packages:
  libmldbm-perl libnet-daemon-perl libsql-statement-perl squidclient squid-cgi squid-purge resolvconf smbclient winbind
The following NEW packages will be installed:
  libdbi-perl libecap3 squid squid-common squid-langpack
0 upgraded, 5 newly installed, 0 to remove and 157 not upgraded.
Need to get 3,909 kB of archives.
After this operation, 15.5 MB of additional disk space will be used.
Get:1 http://deb.debian.org/debian bullseye/main amd64 libecap3 amd64 1.0.1-3.2+b1 [17.2 kB]
Get:2 http://deb.debian.org/debian bullseye/main amd64 squid-langpack all 20200403-1 [170 kB]
Get:3 http://deb.debian.org/debian bullseye/main amd64 squid-common all 4.13-10+deb11u1 [315 kB]
Get:4 http://deb.debian.org/debian bullseye/main amd64 libdbi-perl amd64 1.643-3+b1 [780 kB]
Get:5 http://deb.debian.org/debian bullseye/main amd64 squid amd64 4.13-10+deb11u1 [2,627 kB]
Fetched 3,909 kB in 1s (3,876 kB/s)
Selecting previously unselected package libecap3:amd64.
(Reading database ... 155850 files and directories currently installed.)
Preparing to unpack .../libecap3_1.0.1-3.2+b1_amd64.deb ...
Unpacking libecap3:amd64 (1.0.1-3.2+b1) ...
Selecting previously unselected package squid-langpack.
Step 3: Start the Squid service by running the below command.
root@linuxhelp:~# systemctl start squid
Step 4: Next install Apache service in the system by executing the following apt install command.
root@linuxhelp:~# apt install apache2
Reading package lists... Done
Building dependency tree
Reading state information... Done
apache2 is already the newest version (2.4.18-2ubuntu3.5).
The following packages were automatically installed and are no longer required:
  gnome-software-common libgtkspell3-3-0
Use ' sudo apt autoremove'  to remove them.
0 upgraded, 0 newly installed, 0 to remove and 589 not upgraded.
Step 5: Start the Apache service by using the below command.
root@linuxhelp:~# systemctl start apache2
Step 6: Next, check the Apache server status by using the below command.
root@linuxhelp:~# systemctl status apache2
● apache2.service - The Apache HTTP Server
     Loaded: loaded (/lib/systemd/system/apache2.service; enabled; vendor preset: enabled)
     Active: active (running) since Thu 2022-07-14 15:19:13 IST; 2 months 11 days ago
       Docs: https://httpd.apache.org/docs/2.4/
   Main PID: 27502 (apache2)
      Tasks: 6 (limit: 3450)
     Memory: 34.1M
        CPU: 1.498s
     CGroup: /system.slice/apache2.service
             ├─27502 /usr/sbin/apache2 -k start
             ├─63152 /usr/sbin/apache2 -k start
             ├─63153 /usr/sbin/apache2 -k start
             ├─63154 /usr/sbin/apache2 -k start
             ├─63155 /usr/sbin/apache2 -k start
             └─63156 /usr/sbin/apache2 -k start

Jul 14 15:19:13 linuxhelp systemd[1]: Starting The Apache HTTP Server...
Jul 14 15:19:13 linuxhelp systemd[1]: Started The Apache HTTP Server.

Sep 24 21:35:32 linuxhelp systemd[1]: Reloading The Apache HTTP Server.
Sep 24 21:35:32 linuxhelp systemd[1]: Reloaded The Apache HTTP Server.
Step 7: Next add the password for the user by running the below command and enter the new password.
root@linuxhelp:~# htpasswd -c  /etc/squid/squid_passwd user1
New password:
Re-type new password:
Adding password for user user1
Step 8: Create a new file for user by executing the below command.
root@linuxhelp:~# touch /etc/squid/passwd
Step 9: Next configure the Squid configuration file using vim editor and add the rule location to the configuration file. Enter the following contents in the file and save it.
root@linuxhelp:~# vim /etc/squid/squid.conf
auth_param basic program /usr/lib/squid/basic_ncsa_auth /etc/squid/passwd
acl ncsa proxy_auth REQUIRED
acl google_users proxy_auth user1
acl block dstdomain " /etc/squid/block.txt"
http_access deny block google_users
http_access allow ncsa
Step 10: Restart the Squid service by using the below command.
root@linuxhelp:~# systemctl restart squid apache2
Step 11: Now create a file named block.txt for adding the domain name to the block list. Save and exit the file.
root@linuxhelp:~# vim /etc/squid/block.txt
.facebook.com
.twitter.com
Step 12: Restart the Squid service by using the below command.
root@linuxhelp:~# systemctl restart squid apache2
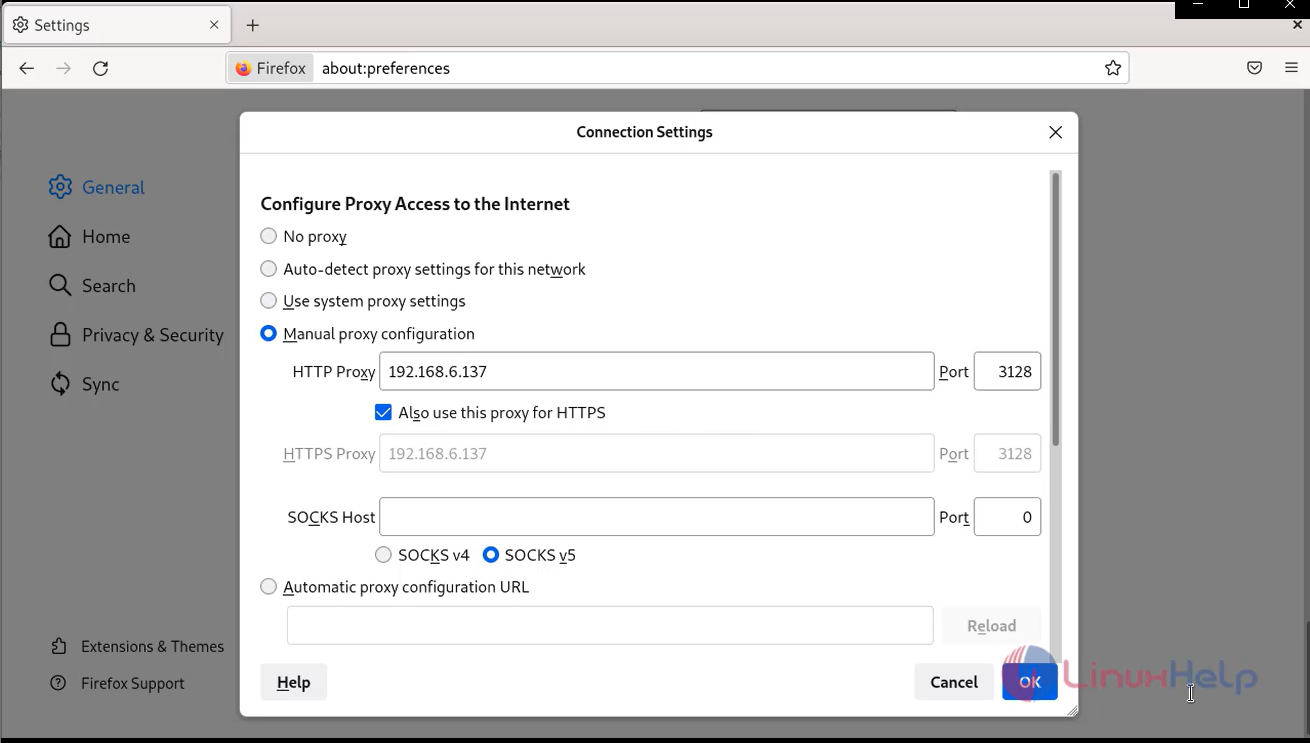
Step 13: Open the browser, go to setting set the manual proxy configuration as shown in the below image.
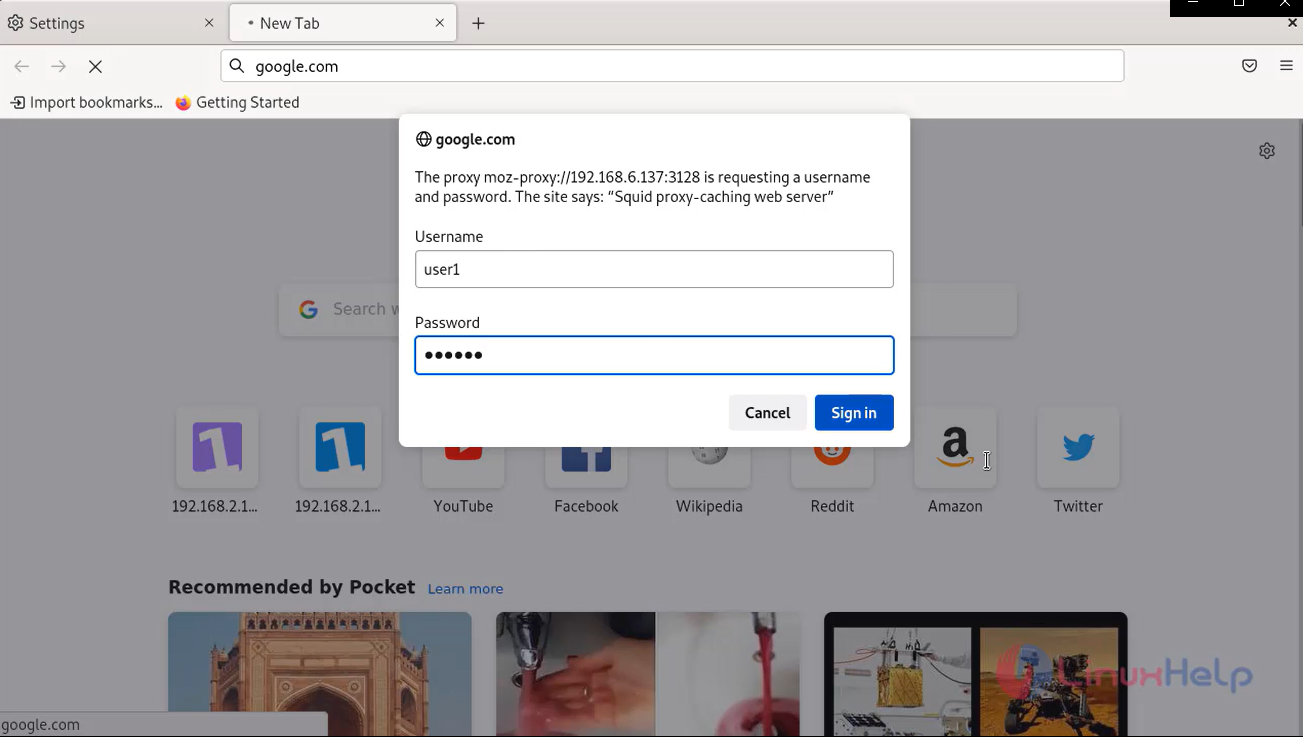
Step 14: To check the Squid proxy server authentication on client machines. Enter the Squid login credentials displayed on the pop-up window and click ok as shown in the below image.
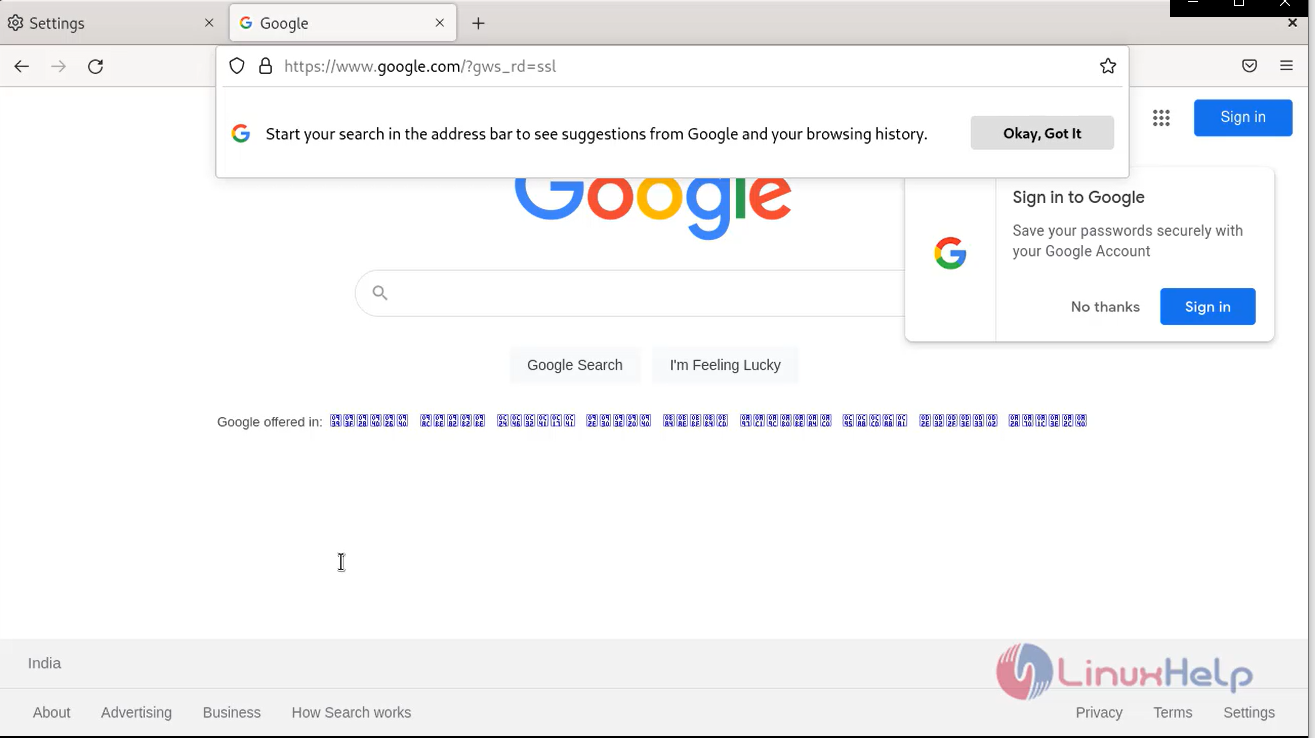
Step 15: Now the user able to access the internet and other websites as shown in the below image.
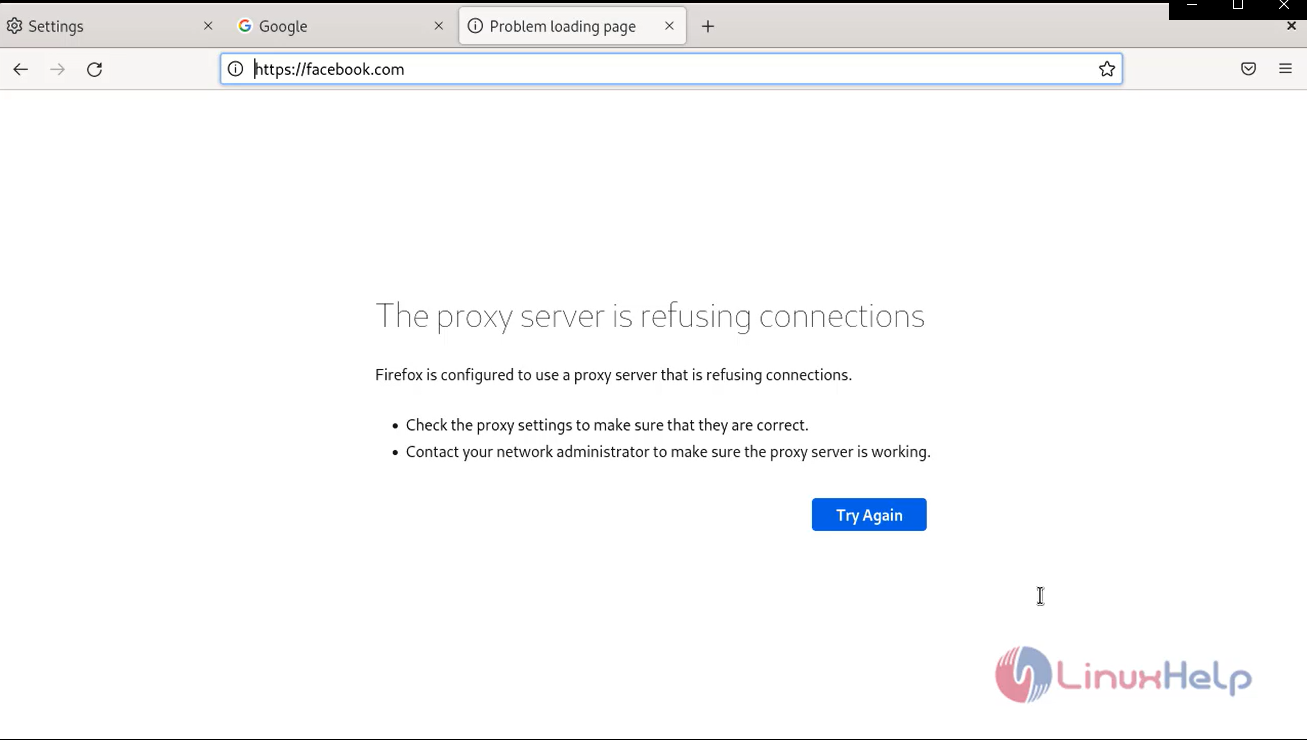
Step 16: Now to check the configuration for blocked site, try to access the site like Facebook. If the given domain is blocked in the configuration, then the site cannot be accessed and browser will be displayed as shown below.
Conclusion:
We have reached the end of this article. In this guide, we have walked you through the steps required to install and configure User Authentication in Squid on Debian 11.3. your feedback is much welcome.
Comments ( 0 )
No comments available