How to install and configure Samba file sharing on Ubuntu 22.04
To Install And Configure Samba File Sharing On Ubuntu 22.04
Introduction
Samba is a widely used open-source software that facilitates seamless communication between Linux and Windows machines within a network. By using a Samba file server, users can easily share files across various operating systems on a network. This enables efficient access to desktop files from different devices and fosters collaboration among Windows and macOS users.
Installation steps:
Step 1: Check the version of the OS by using the below command
root@linuxhelp:~#lsb_release -a
Step 2: Installing Samba Packages by using the below command
To install Samba, we run:
root@linuxhelp:~#sudo apt -get update
root@linuxhelp:~#sudo apt install samba
Step 3: Checking the Samba package by using the below command
We can check if the installation was successful by running:
root@linuxhelp:~#whereis samba
The following should be its output:
root@linuxhelp:~#samba: /usr/sbin/samba /usr/lib/samba /etc/samba /usr/share/samba /usr/share/man/man7/samba.7.gz /usr/share/man/man8/samba.8.gz
Step 4: Setting up Samba by using the below command
Now that Samba is installed, we need to create a directory for it to share:
root@linuxhelp:~#mkdir /home/username/sambashare/
The command above creates a new folder sambashare in our home directory which we will share later.
Step 5: Adding the configurations file by using the below command
The configuration file for Samba is located at /etc/samba/smb.conf. To add the new directory as a share, we edit the file by running:
root@linuxhelp:~# vim /etc/samba/smb.conf
press i to insert the changes At the bottom of the file, add the following lines:
[sambashare]
    comment = Samba on Ubuntu
    path = /home/username/sambashare
    read only = no
    browsable = yes
Then press Esc to exit from insertion mode and enter :wq to save
comment: A brief description of the share.
path: The directory of our share.
read only: Permission to modify the contents of the share folder is only granted when the value of this directive is no.
browsable: When set to yes, file managers such as Ubuntu’s default file manager will list this share under “Network” (it could also appear as browseable).
Step 6: Restart Samba server by using the below command
Now that we have our new share configured, save it and restart Samba for it to take effect:
root@linuxhelp:~#sudo service smbd restart
Step 7: Allow Samba traffic by using the below command
Update the firewall rules to allow Samba traffic using the command
root@linuxhelp:~#sudo ufw allow samba
Step 8: Setting up User Accounts and Connecting to Share by using the below command
Since Samba doesn’t use the system account password, we need to set up a Samba password for our user account:
root@linuxhelp:~#sudo smbpasswd -a username
Step 9: Connect to Share
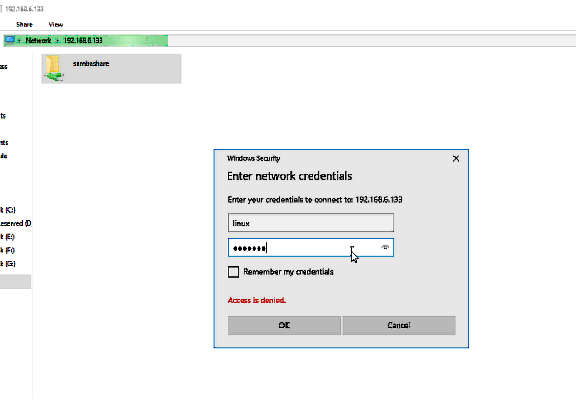
On Ubuntu: Open up the default file manager and click Connect to Server then enter:
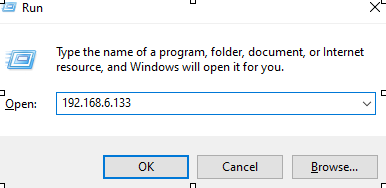
output: Enter the credentials and login in to Sambashare
Conclusion
We have reached the end of this article. In this guide, we have walked you through the steps required to install and configure Samba in Ubuntu 22.04. Your feedback is much welcome.


Comments ( 0 )
No comments available