How to Manage and Create LVM on CentOS 7
To Manage and Create LVM on CentOS 7
Logical Volumes Management (also known as LVM), which have become a default for the installation of most (if not all) Linux distributions, have numerous advantages over traditional partitioning management. Perhaps the most distinguishing feature of LVM is that it allows logical divisions to be resized (reduced or increased) at will without much hassle.
The structure of the LVM consists of:
- One or more entire hard disks or partitions are configured as physical volumes (PVs).
- A volume group (VG) is created using one or more physical volumes. You can think of a volume group as a single storage unit.
- Multiple logical volumes can then be created in a volume group. Each logical volume is somewhat equivalent to a traditional partition &ndash with the advantage that it can be resized at will as we mentioned earlier.
- One of the most useful and helpful technology to linux system administrator is Linux Logical Volume Manager(LVM), version 2 (or LVM 2).
- LVM is a widely-used technique and extremely flexible disk management scheme for deploying logical rather than physical storage. With LVM, system administrator can easily resize and extend the logical drive when it is required.
Creating LVM
First, you need to check current Disk status and for that, you need to run the following command.
[root@linuxhelp11 ~]# lsblk
NAME   MAJ:MIN RM  SIZE RO TYPE MOUNTPOINT
sda      8:0    0   35G  0 disk
├─sda1   8:1    0  500M  0 part /boot
├─sda2   8:2    0    2G  0 part [SWAP]
└─sda3   8:3    0   25G  0 part /
sdb      8:16   0   20G  0 disk
Once it is done, you need to create new Partition by making use of the following command.
Here n is given to denote the creation of new partition.
l => will display all types of partitioning
[root@linuxhelp11 ~]# fdisk /dev/sdb
Welcome to fdisk (util-linux 2.23.2).
.
.
Command (m for help): n
Partition type:
   p   primary (0 primary, 0 extended, 4 free)
   e   extended
Select (default p):
Using default response p
Partition number (1-4, default 1):
First sector (2048-41943039, default 2048):
Using default value 2048
Last sector, +sectors or +size{K,M,G} (2048-41943039, default 41943039): +10G
Partition 1 of type Linux and of size 10 GiB is set
Command (m for help): t
Selected partition 1
Hex code (type L to list all codes): l

 0  Empty           24  NEC DOS         81  Minix / old Lin bf  Solaris
 1  FAT12           27  Hidden NTFS Win 82  Linux swap / So c1  DRDOS/sec (FAT-
 2  XENIX root      39  Plan 9          83  Linux           c4  DRDOS/sec (FAT-
 3  XENIX usr       3c  PartitionMagic  84  OS/2 hidden C:  c6  DRDOS/sec (FAT-
 4  FAT16 < 32M      40  Venix 80286     85  Linux extended  c7  Syrinx
 5  Extended        41  PPC PReP Boot   86  NTFS volume set da  Non-FS data
 6  FAT16           42  SFS             87  NTFS volume set db  CP/M / CTOS / .
 7  HPFS/NTFS/exFAT 4d  QNX4.x          88  Linux plaintext de  Dell Utility
 8  AIX             4e  QNX4.x 2nd part 8e  Linux LVM       df  BootIt
 9  AIX bootable    4f  QNX4.x 3rd part 93  Amoeba          e1  DOS access
 a  OS/2 Boot Manag 50  OnTrack DM      94  Amoeba BBT      e3  DOS R/O
 b  W95 FAT32       51  OnTrack DM6 Aux 9f  BSD/OS          e4  SpeedStor
 c  W95 FAT32 (LBA) 52  CP/M            a0  IBM Thinkpad hi eb  BeOS fs
 e  W95 FAT16 (LBA) 53  OnTrack DM6 Aux a5  FreeBSD         ee  GPT
 f  W95 Ext' d (LBA) 54  OnTrackDM6      a6  OpenBSD         ef  EFI (FAT-12/16/
10  OPUS            55  EZ-Drive        a7  NeXTSTEP        f0  Linux/PA-RISC b
11  Hidden FAT12    56  Golden Bow      a8  Darwin UFS      f1  SpeedStor
12  Compaq diagnost 5c  Priam Edisk     a9  NetBSD          f4  SpeedStor
14  Hidden FAT16 < 3 61  SpeedStor       ab  Darwin boot     f2  DOS secondary
16  Hidden FAT16    63  GNU HURD or Sys af  HFS / HFS+      fb  VMware VMFS
17  Hidden HPFS/NTF 64  Novell Netware  b7  BSDI fs         fc  VMware VMKCORE
18  AST SmartSleep  65  Novell Netware  b8  BSDI swap       fd  Linux raid auto
1b  Hidden W95 FAT3 70  DiskSecure Mult bb  Boot Wizard hid fe  LANstep
1c  Hidden W95 FAT3 75  PC/IX           be  Solaris boot    ff  BBT
1e  Hidden W95 FAT1 80  Old Minix
Here select type for LVM
Hex code (type L to list all codes): 8e
Changed type of partition ' Linux'  to ' Linux LVM'
Don’ t forget to save the changes by making use of the w option.
Command (m for help): w
The partition table has been altered!
Calling ioctl() to re-read partition table.
Syncing disks.
Once all the modification is done in the partition, you can restart it by making use of the following command.
[root@linuxhelp11 ~]# partprobe
Warning: Unable to open /dev/sr0 read-write (Read-only file system).  /dev/sr0 has been opened read-only.
You can now create the display created partition by making use of the following command.
[root@linuxhelp11 ~]# lsblk
NAME   MAJ:MIN RM  SIZE RO TYPE MOUNTPOINT
sda      8:0    0   35G  0 disk
.
.
sdb      8:16   0   20G  0 disk
" └─sdb1   8:17   0   10G  0 part "
You should then create Physical volume.
[root@linuxhelp11 ~]# pvcreate /dev/sdb1
Physical volume " /dev/sdb1"  successfully created.
And then create Volume group.
[root@linuxhelp11 ~]# vgcreate test /dev/sdb1
Volume group " test"  successfully created
After which you need to create a Logical volume as well.
[root@linuxhelp11 ~]# lvcreate -n check -L 8G test
Logical volume " check"  created.
You can have the information displayed after creating LVM.
[root@linuxhelp11 ~]# lsblk
NAME           MAJ:MIN RM  SIZE RO TYPE MOUNTPOINT
sda              8:0    0   35G  0 disk
.
.
sdb              8:16   0   20G  0 disk
└─sdb1           8:17   0   10G  0 part
  └─test-check 253:0    0    8G  0 lvm
And then make directory for mounting.
[root@linuxhelp11 /]# mkdir /test
Also, set format of partition.
[root@linuxhelp11 /]# mkfs.xfs /dev/test/check
You should now check the BlockID
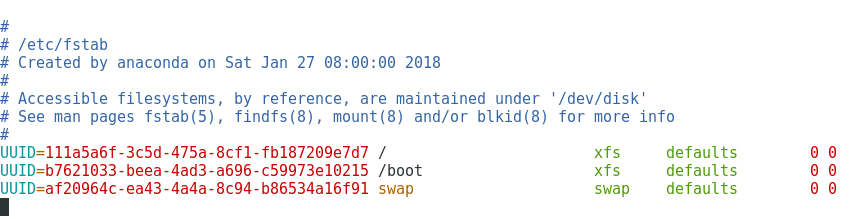
[root@linuxhelp11 /]# blkid
/dev/sda1: UUID=" b7621033-beea-4ad3-a696-c59973e10215"  TYPE=" xfs"
.
.
" dev/mapper/test-check: UUID=" 9da1920c-978d-4c1e-bc3b-1307789e07fc"  TYPE=" xfs"  "

[root@linuxhelp11 /]# vim /etc/fstab
And then update mounting.
[root@linuxhelp11 /]# mount -a
And then, display after mounting Partitioning by making use of the following command.
[root@linuxhelp11 /]# lsblk
NAME           MAJ:MIN RM  SIZE RO TYPE MOUNTPOINT
sda              8:0    0   35G  0 disk
.
.
sdb              8:16   0   20G  0 disk
└─sdb1           8:17   0   10G  0 part
  └─test-check 253:0    0    8G  0 lvm  /test
Managing and removing LVM
LVM has been created, now we shall manage it. Let’ s un-mount a partition by making use of the following command.
root@linuxhelp11 /]# umount /dev/test/check
And to clear entry of fstab you should run the following command.
[root@linuxhelp11 /]# vim /etc/fstab
You can display information after unmount partition.
[root@linuxhelp11 /]# lsblk
NAME           MAJ:MIN RM  SIZE RO TYPE MOUNTPOINT
sda              8:0    0   35G  0 disk
.
.
sdb              8:16   0   20G  0 disk
└─sdb1           8:17   0   10G  0 part
  └─test-check 253:0    0    8G  0 lvm
If you want to remove Logical volume, run the following command.
[root@linuxhelp11 /]# lvremove  /dev/test/check
Do you really want to remove active logical volume test/check? [y/n]: y
  Logical volume " check"  successfully removed
You can remove volume group by making use of the following command.
[root@linuxhelp11 /]# vgremove /dev/test
Volume group " test"  successfully removed
And then, remove Physical volume by making use of the following command.
[root@linuxhelp11 /]# pvremove /dev/sdb1
Labels on physical volume " /dev/sdb1"  successfully wiped.
You can display information after removing LVM by making use of the following command.
[root@linuxhelp11 /]# lsblk
NAME   MAJ:MIN RM  SIZE RO TYPE MOUNTPOINT
sda      8:0    0   35G  0 disk
.
.
sdb      8:16   0   20G  0 disk
└─sdb1   8:17   0   10G  0 part
If you want to delete a partition, make use of the following command.
[root@linuxhelp11 /]# fdisk /dev/sdb
Welcome to fdisk (util-linux 2.23.2).
.
.
Command (m for help): d
Selected partition 1
Partition 1 is deleted
Make sure you save changes for partitioning by using the following option.
Command (m for help): w
The partition table has been altered!
.
.
Syncing disks.
You shall restart the Disk partition
[root@linuxhelp11 /]# partprobe
Warning: Unable to open /dev/sr0 read-write (Read-only file system).  /dev/sr0 has been opened read-only.
And then, you shall display information after remove partitioning.
[root@linuxhelp11 /]# lsblk
NAME   MAJ:MIN RM  SIZE RO TYPE MOUNTPOINT
sda      8:0    0   35G  0 disk
.
.
sdb      8:16   0   20G  0 disk
With this, the tutorial on creating, managing and removing LVM on CentOS 7 comes to an end.
Comments ( 0 )
No comments available