How to Install Fedora 22 Server
To Install Fedora 22 Server
The step by step procedure to install Fedora 22 Server with snapshots and the basic requirements are discussed in this article.
Requirements
Download Fedora 22 Server Live Image
Download Fedora 22 Server Net install Image for smaller ISO
To Install of Fedora 22 Server
To check the integrity of ISO image
After downloading the ISO image, check the integrity of ISO image using following command.
[user1@linuxhelp Desktop]$ sha256sum Fedora-Server-DVD-x86_64-22.iso
b2acfa7c7c6b5d2f51d3337600c2e52eeaa1a1084991181c28ca30343e52e0df  Fedora-Server-DVD-x86_64-22.iso
The integrity of Downloaded ISO is verified, you may proceed to burn it to a DVD Disk or Make a USB flash Drive boot-able and boot it.
To burn it to a DVD Disk
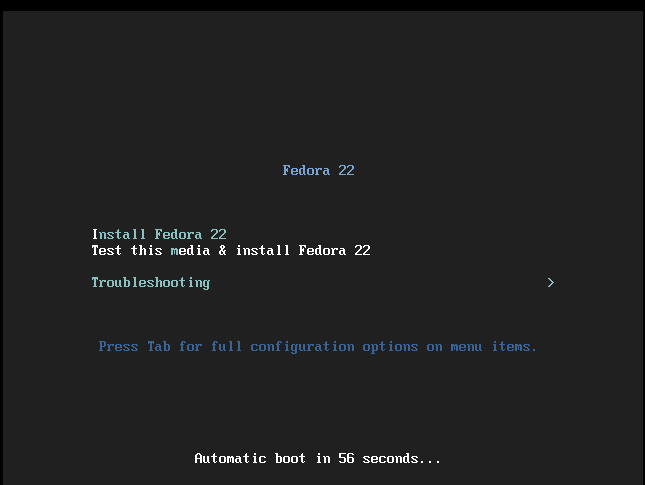
After writing it to USB Flash Drive or to a DVD ROM, put the media in and boot from the respective media, by prioritizing it from BIOS. You will get boot Menu, once the Fedora 22 Server Boots from the Disk/Drive.
The default boot option is “ Test this media & Install Fedora 22” and you can by pass it by using your UP Navigation Key and then choose to boot into “ Install Fedora 22” .
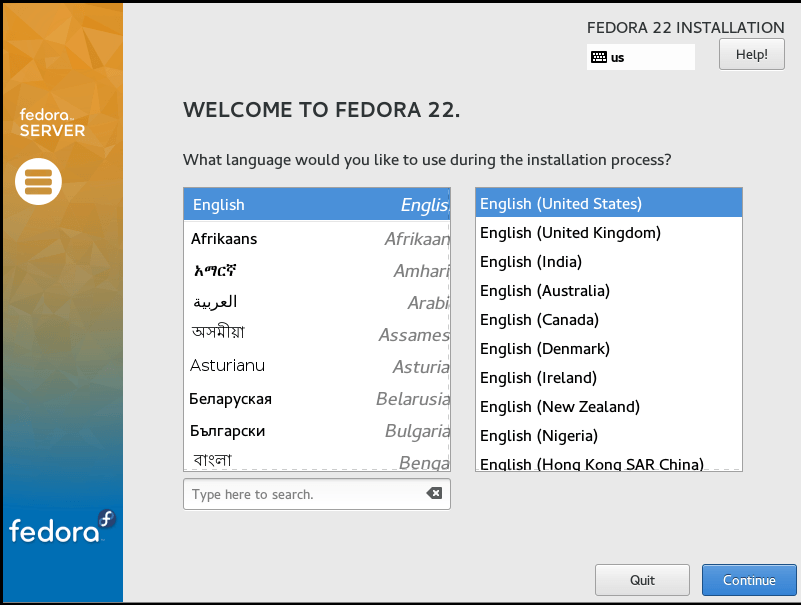
To select language
Now select the Language, which suits you and click Continue.
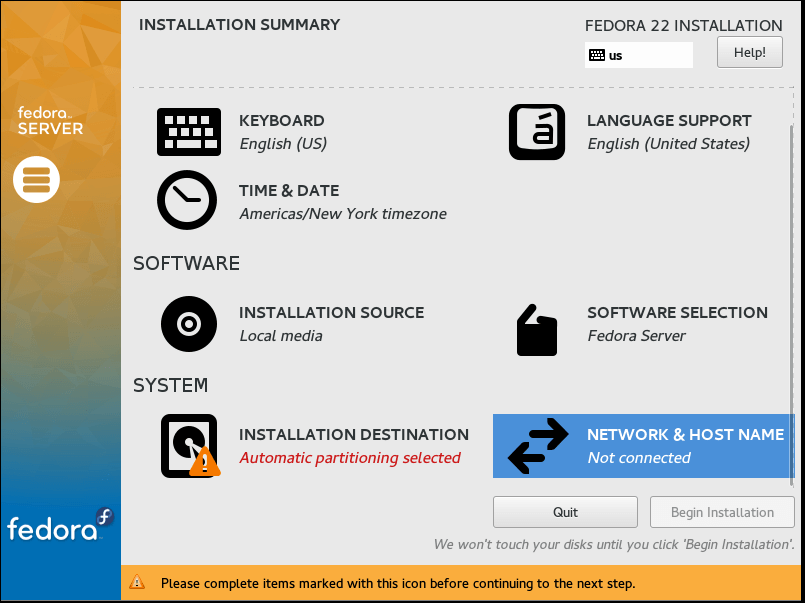
Installation summary
The next screen “ Installation Summary” lets you configure a lots of option.
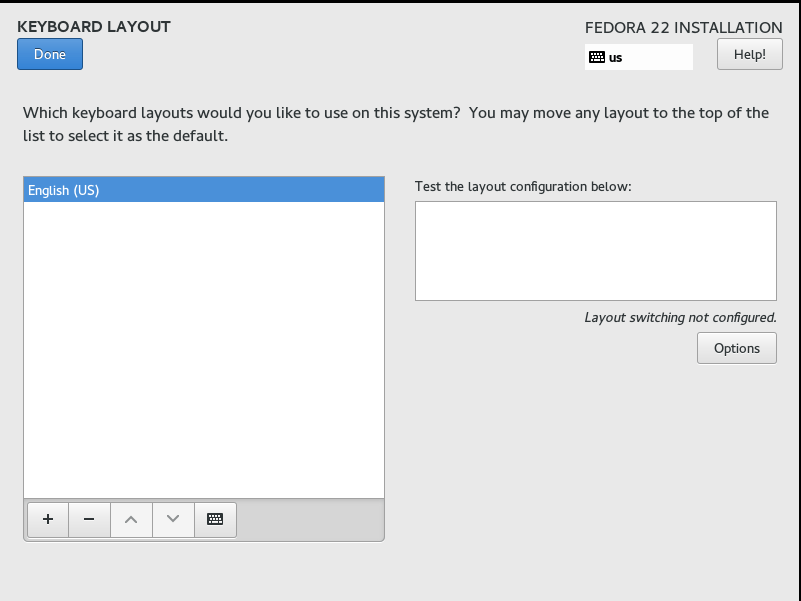
Select Keyboard
First Select ‘ Keyboard‘ . click on ‘ +‘ every-time you want to add a new Layout followed by clicking on ‘ Add‘ and you can add as many layout you want to add. When all the required Keyboard Layouts are Added, Click Done on the Top Left Corner of the Screen.
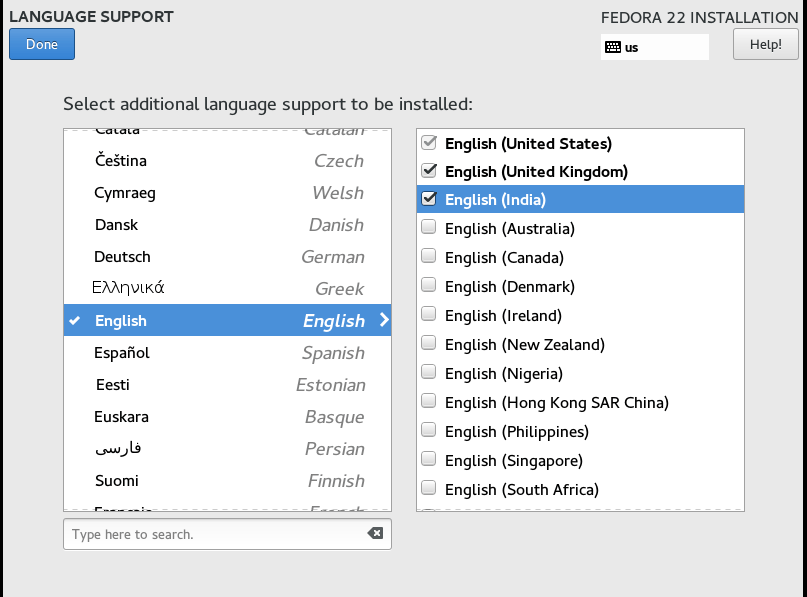
Language support
Next click ‘ Language Support‘ . Select all the Language Support you want by putting a check mark on the required boxes and click done.
Time and date
Click on ‘ Time & Date‘ . Set time, Date and Geographical Location by clicking on the world map and click Done.

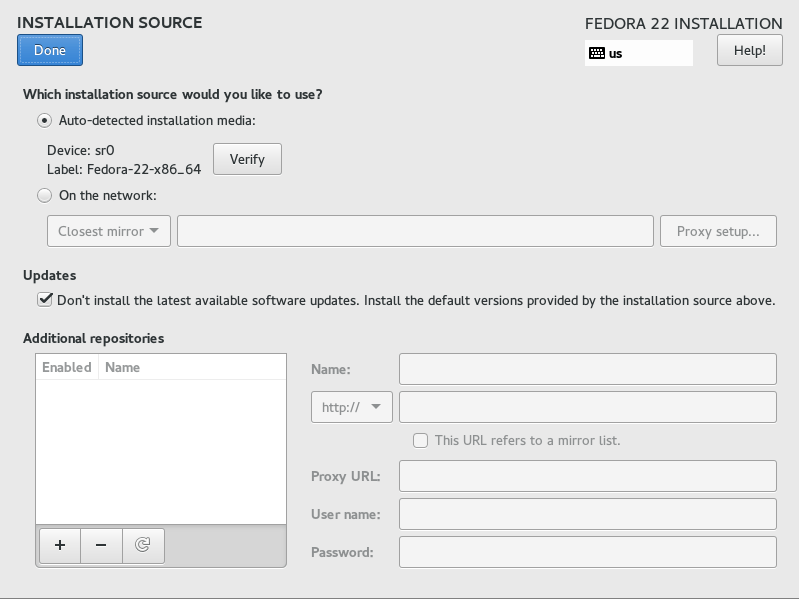
Installation Source
Click on ‘ Installation Source‘ . Here you can add network mirrors and additional repository.
The ‘ Auto-detected installation media‘ is enough to install Minimal Fedora Server. Click Done.
Software Selection
Click “ Software Selection” and there are 4 different option there &ndash ‘ Minimal Install‘ , ‘ Fedora Server‘ , ‘ Web Server‘ and ‘ Infrastructure Server‘ . It is always recommended to install Minimal Server so that unwanted packages are not installed.
Minimal Install
Click ‘ Minimal Install‘ and click Done.

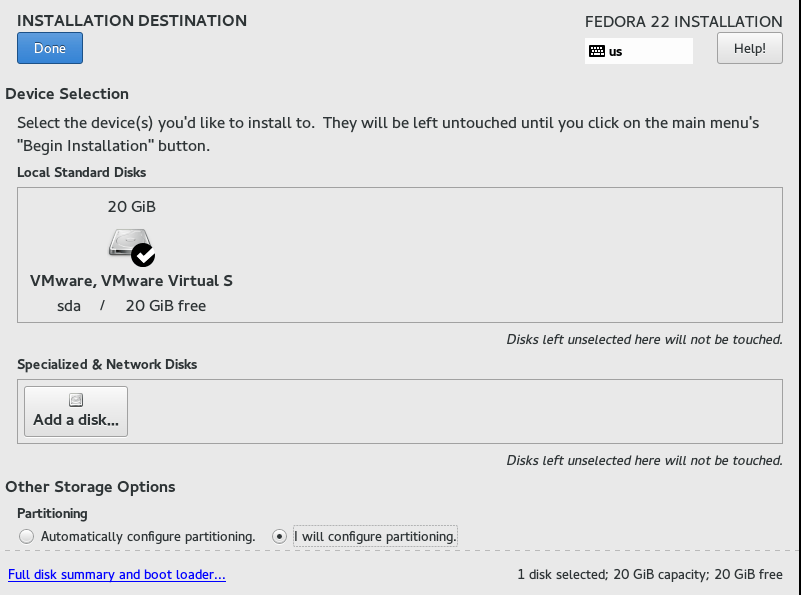
Installation Destination
Next click ‘ Installation Destination‘ and the default option is ‘ Automatically Configure Partitioning‘ .
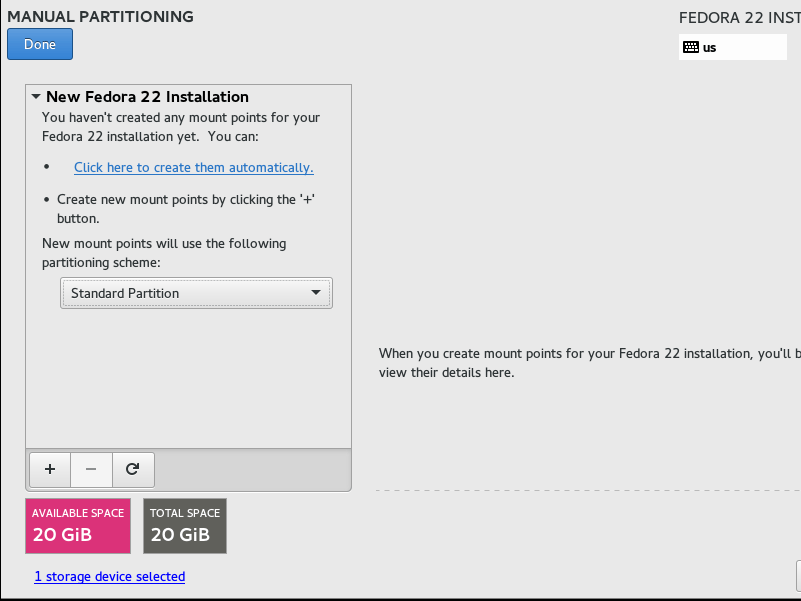
Configure Partitioning
Click ‘ I will Configure Partitioning‘ , to partition manually in the ‘ Installation Destination‘ window. By Selecting Manual Partitioning, you can make most out of your Space and also you may select to ‘ Encrypt‘ your data from this window. Finally click done.
LVM partitioning Scheme
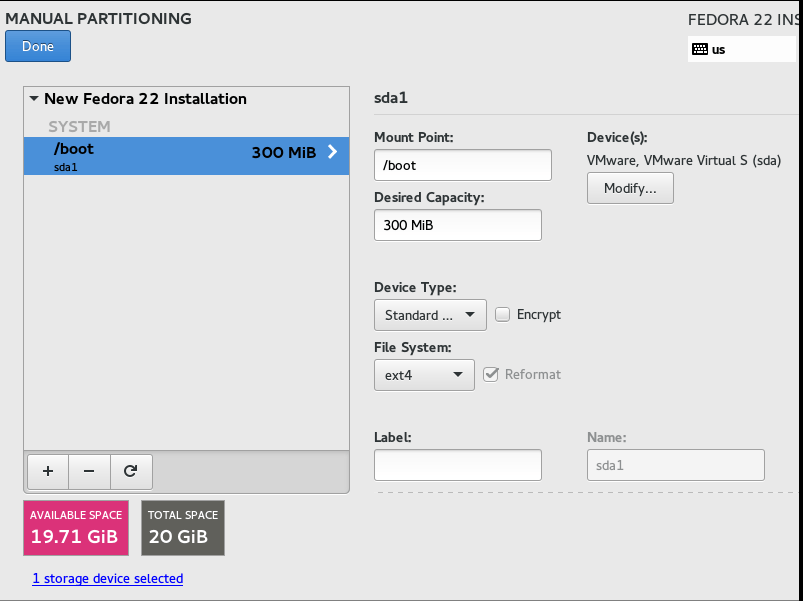
Use LVM partitioning Scheme, if you want to install and extend it to LVM. On most of the server, LVM is almost there. Click on + on the bottom left and create /boot partitioning. Enter Desired Capacity and Click ‘ Add mount Point‘ .
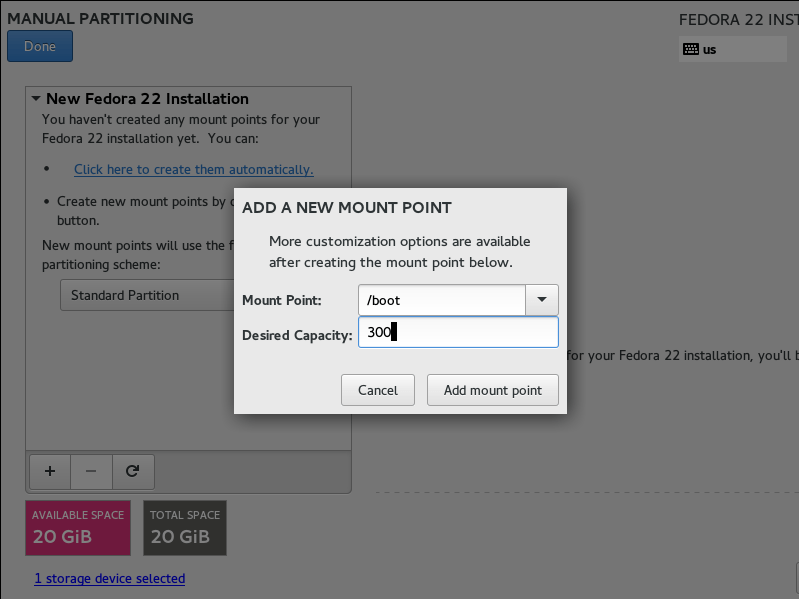
The File System type for /boot must be ‘ ext4‘ and device type is ‘ Standard Partition‘ .
Create SWAP space
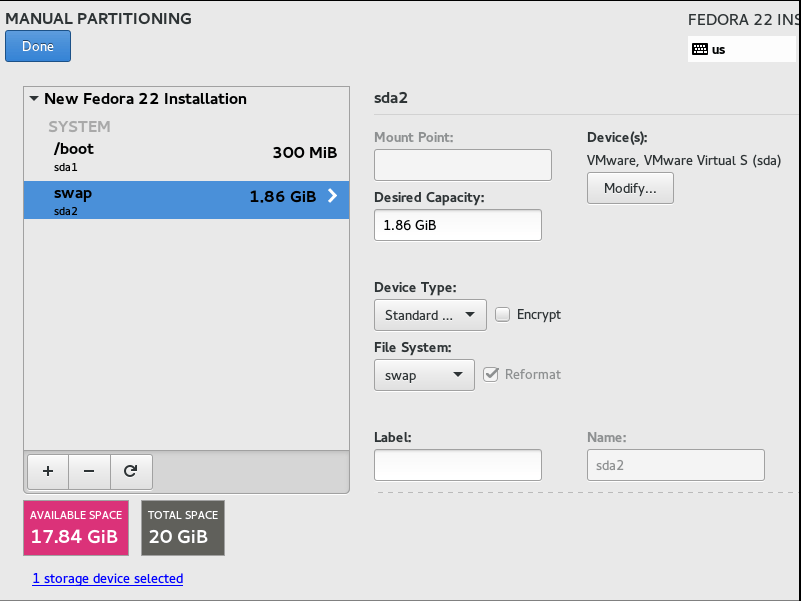
Click on + and Create SWAP space. Add Desired Capacity and click “ Add mount Point” .
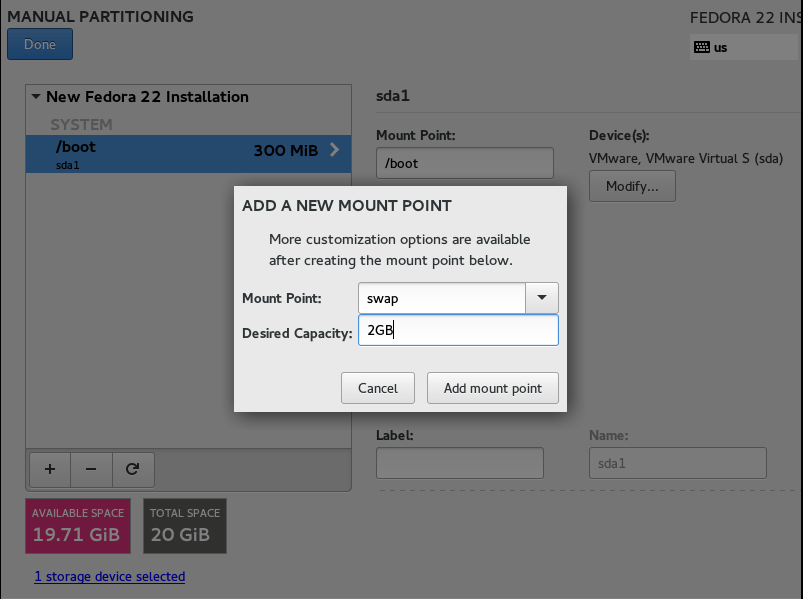
The File System type is ‘ SWAP‘ and Device Type is ‘ LVM‘ .
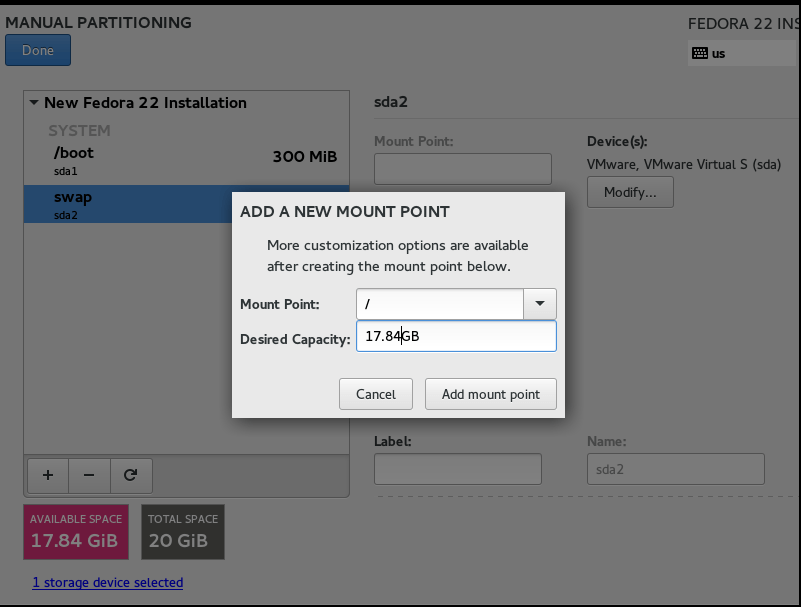
Create root partition
Finally we will be creating root partition (/), add all the Remaining Disk Space and Click ‘ Add mount Point‘ .
Click Accept Changes
Click on Network and Host Name on the “ Installation Summary” window. You got an interface to modify your IP, DNS, Route, Subnet Mask and Host Name.
You will notice you got a dynamic IP and in most general it is suggested to have a static IP. Click on Configure and change the method from ‘ Automatic‘ to ‘ Manual‘ under Hood. ‘ IPv4 Settings‘ and Click ‘ save‘ .
Network and Host Name
Again you will be back to ‘ Network & Host Name‘ Interface. Here you may set Host Name and for the changes to be taken into effect immediately, switch off and again on Ethernet, from this interface and click Done.
Once you will find yourself back to ‘ Installation Summary‘ Interface. Now Click Begin Installation.
Install packages
The system will install necessary packages, basic configuration and Boot Loaders. You have to set ‘ Root password‘ and ‘ Create User‘ .
Root Password
To create password click on ‘ Root Password‘ . Enter same password twice.
User Creation
Next click on ‘ User Creation‘ from the configuration Interface and fill up necessary information like full name, user name and password and Click Done.
Once the installation and configuration is over, you will notice a message at the right bottom of the screen “ Fedora is now Successfully Installed, reboot the machine to finish installation.
Reboot
The system will reboot.
Login interface
The login interface will be available in no time, enter username and password of new user account you created.
To check the version
Once logged-in, check the version of Fedora 22 using following command.
[root @linuxhelp ~]#cat /etc/fedora-release


Comments ( 0 )
No comments available