How to install TigerVNC Server to Access Remote Desktops
Installation of TigerVNC Server to Access Remote Desktops in Fedora and CentOS/RHEL
Virtual Networking Computing (VNC) is an independent open source application is compatible with Windows and also Unix/Linux. It is a remote sharing system, which helps in taking control of any other computer connected to internet. It efficiently helps the system administrators to manage their servers and also desktops without belonging to the same location.
This article illustrates the installation of VNC Server using TigerVNC, with GNOME Desktop remote access on CentOS, Fedora and RHEL systems.
Step 1:
Installation of GNOME Desktop
You need to install a GUI with GNOME Desktop, if you have installed a minimal version of Operating System. The GNOME desktop gives a lightweight desktop environment, which works efficiently on remote VNC desktops.
[root@linuxhelp ~]# yum groupinstall " X Window System" " Desktop"
Step 2:
Installation of TigerVNC Server
TigerVNC is a remote desktop control software, which enables you to efficiently connect to remote desktops, to install this, use the following command.
[root@linuxhelp ~]# yum install tigervnc-server -y
Loaded plugins: aliases, changelog, fastestmirror, kabi, presto, refresh-packagekit,
              : security, tmprepo, verify, versionlock
Loading support for CentOS kernel ABI
Setting up Install Process
Loading mirror speeds from cached hostfile
 * base: centos.webwerks.com
 * extras: centos.webwerks.com
 * updates: mirrors.viethosting.vn
---> Package tigervnc-server-1.1.0-16.el6.centos.x86_64 will be installed
.
.
.
Installed:
Tigervnc-server-1.1.0-16.el6.centos.x86_64 installed
Complete!
Step 3:
Creating a Normal VNC User
Now we will be creating a normal user, which will be used to connect to remote desktop.
[root@linuxhelp ~]# useradd linuxhelp
[root@linuxhelp ~]# passwd linuxhelp
Changing password for user linuxhelp
New password:
Retype new password:
passwd: all authentication tokens updated successfully.
Step 4:
Setting a VNC Password for User
Now we will be creating a new password for newly created user. For this you have to login to the user and run “ vncpasswd” in order to set the VNC password for the user.
The new password can be used for accessing VNC remote desktop and the password, which we created in step 3 is used for accessing SSH.
[root@linuxhelp ~]# su - linuxhelp
[linuxhelp@linuxhelp ~]$ vncpasswd
Password:
Verify:
The above command will prompt you to provide password twice and also creates .vnc directory under user’ s home directory with passwd file within it. You can also check the password file created using following command.
[linuxhelp@linuxhelp ~]$ ls -l /home/linuxhelp/.vnc
-rw-------. 1 linuxhelp linuxhelp     8 Apr 16 17:39 passwd
Now you need to exit from user login and then return to root user login.
[linuxhelp@linuxhelp ~]$ exit
exit
Step 5:
Creating VNC Xstartup Script
You have to create the xstartup script as root user, by starting the VNC server.
[root@linuxhelp ~]# /etc/init.d/vncserver start
Starting VNC server: 1:linuxhelp
New ' linuxhelp.com:1 (linuxhelp)'  desktop is linuxhelp.com:1

Starting applications specified in /home/linuxhelp/.vnc/xstartup
Log file is /home/linuxhelp/.vnc/linuxhelp.com:1.log
[ OK ]
Next, you have to verify that xstartup script is created under user’ s home directory using ‘ ls -l’ command.
[root@linuxhelp ~]# ls -l /home/linuxhelp/.vnc
-rw-------. 1 linuxhelp linuxhelp     8 Apr 16 17:39 passwd
-rwxr-xr-x. 1 linuxhelp linuxhelp   654 Apr 16 18:23 xstartup
After it is created, you can set a desktop resolution in xstartup file. To do this, it is essential to stop running the VNC service.
[root@linuxhelp ~]# /etc/init.d/vncserver stop
Shutting down VNC server: 1:linuxhelp              [  OK  ]
Step 6:
Set up Xstarup Resolution
First open file /etc/sysconfig/vncservers file in your editor. Now let us create a new VNC Session for linuxhelp with following command where ‘ -geometry‘ is used to define the desktop resolution.
[root@linuxhelp ~]# vim /etc/sysconfig/vncservers
And append the below lines to it at the bottom of the file and then save and close it.
VNCSERVERS=” 1:linuxhelp”
VNCSERVERARGS[1]=” -geometry 1280× 1024&Prime
When you deal with multiple users, create a vncpasswd for all the user’ s, add the user’ s to the VNCSERVERS line and append a VNCSERVERARGS[x] entry, where ‘ x‘ is the ID number.
Step 7:
Beginning with TigerVNC Server
[root@linuxhelp ~]# /etc/init.d/vncserver start
Starting VNC server: 1:linuxhelp
New ' linuxhelp.com:1 (linuxhelp)'  desktop is linuxhelp.com:1

Starting applications specified in /home/linuxhelp/.vnc/xstartup
Log file is /home/linuxhelp/.vnc/linuxhelp.com:1.log

  [  OK  ]
Step 8:
To allow VNC Ports on Firewall
By using the iptables command we can allow the port on Firewall.
[root@linuxhelp ~]# iptables -A INPUT -m state --state NEW -m tcp -p tcp --dport 5901 -j ACCEPT
Now save and restart the iptables services.
[root@linuxhelp ~]# service iptables save
iptables: Saving firewall rules to /etc/sysconfig/iptables:[  OK  ]
[root@linuxhelp ~]# service iptables restart
iptables: Setting chains to policy ACCEPT: filter mangle na[  OK  ]
iptables: Flushing firewall rules:                         [  OK  ]
iptables: Unloading modules:                               [  OK  ]
iptables: Applying firewall rules:                         [  OK  ]
Step 9:
To Download VNC client
Download and install VNC Viewer client.
http://www.realvnc.com/download/viewer/
Step 10:
To Connect to Remote Desktop Using Client
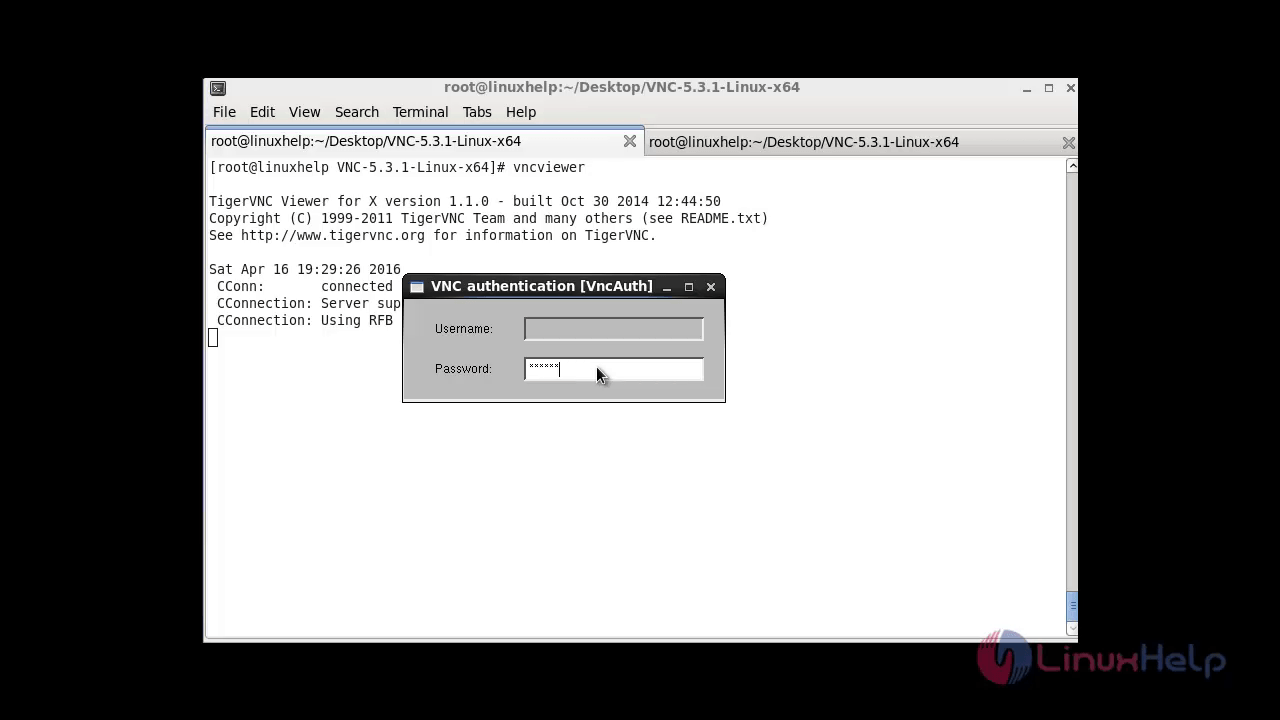
Run the vncviewer command in server and in that pop-up window type the VNC client IP address along with VNC ID to start using the VNC Viewer client.

While typing the ip address next to it give “ : “ symbol and add the port number for the particular user to whom you want to connect :1 is refers to :5901 port
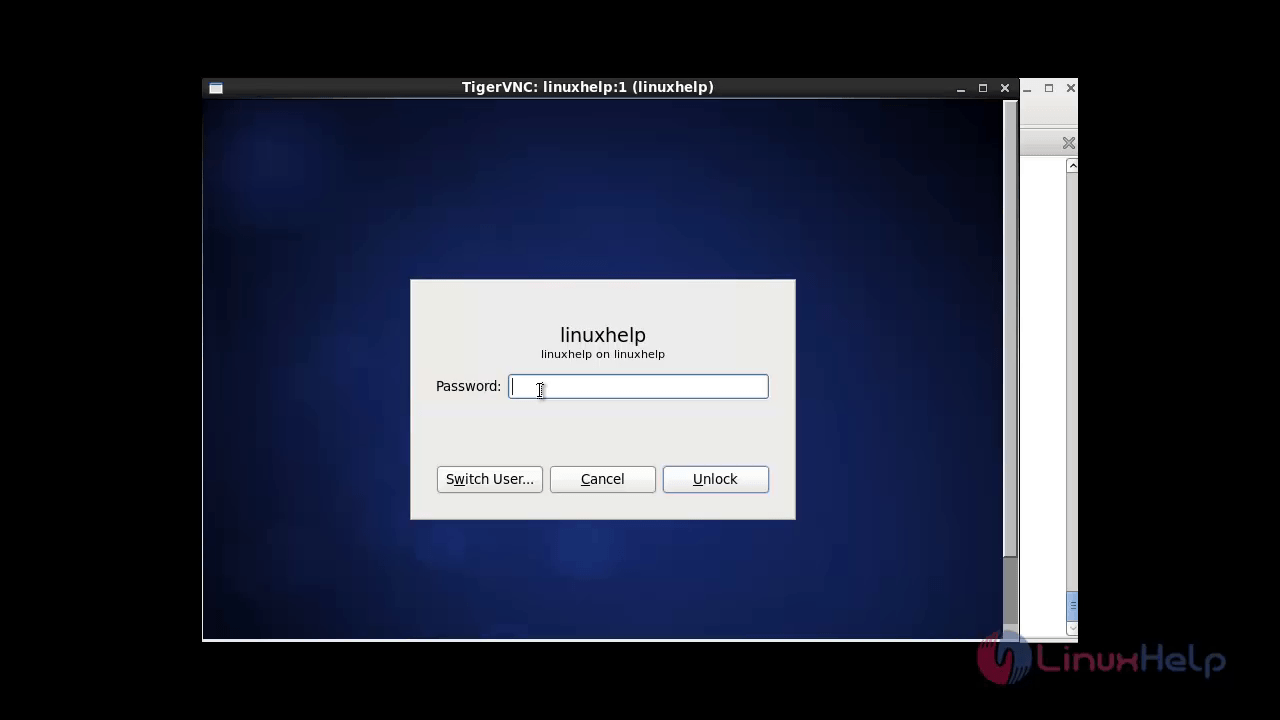
Type the password, which was generated using vncpasswd command.
Now its connected to the Remote desktop.
Save
Comments ( 0 )
No comments available