How to create your own social media site - Boonex Dolphin
Boonex Dolphin is a free platform to develop your own Social Media Websites like Facebook, Twitter etc.,. This is an user friendly tool to create and customise social sites. It is available in Trial and Paid Versions. Installation of Boonex Dolphin is explained in this article.
To install Boonex Dolphin
Utilise the following command to download the Boonex Dolphin.
root@linuxhelp:~# wget http://get.boonex.com/Dolphin-v.7.1 -O dolphin-v.7.1.6.zip
--2016-07-26 10:00:44-- http://get.boonex.com/Dolphin-v.7.1
Resolving get.boonex.com (get.boonex.com)... 67.228.245.248
Connecting to get.boonex.com (get.boonex.com)|67.228.245.248|:80... connected.
HTTP request sent, awaiting response... 301 Moved Permanently
Location: https://get.boonex.com/Dolphin-v.7.1 [following]
--2016-07-26 10:00:44-- https://get.boonex.com/Dolphin-v.7.1
Connecting to get.boonex.com (get.boonex.com)|67.228.245.248|:443... connected.
HTTP request sent, awaiting response... 200 OK
Length: 17590630 (17M) [application/zip]
Saving to: ‘ dolphin-v.7.1.6.zip’

dolphin-v.7.1.6.zip 100%[==========================================================================================> ] 16.78M 519KB/s in 38s

2016-07-26 10:01:24 (455 KB/s) - ‘ dolphin-v.7.1.6.zip’  saved [17590630/17590630]
root@linuxhelp:~# ls
Desktop Documents dolphin-v.7.1.6.zip Downloads examples.desktop Music Pictures Public Templates Videos
Extract the downloaded package by using the following command.
root@linuxhelp:~# unzip dolphin-v.7.1.6.zip
Archive: dolphin-v.7.1.6.zip
creating: Dolphin-v.7.1.6/
inflating: Dolphin-v.7.1.6/.htaccess
inflating: Dolphin-v.7.1.6/about_us.php
inflating: Dolphin-v.7.1.6/activation_email.php
creating: Dolphin-v.7.1.6/administration/
inflating: Dolphin-v.7.1.6/administration/.htaccess
inflating: Dolphin-v.7.1.6/administration/admin_tools.php
.
.
.
inflating: Dolphin-v.7.1.6/xmlrpc/lib/compat/array_key_exists.php
inflating: Dolphin-v.7.1.6/xmlrpc/lib/compat/is_a.php
inflating: Dolphin-v.7.1.6/xmlrpc/lib/compat/is_callable.php
inflating: Dolphin-v.7.1.6/xmlrpc/lib/compat/is_scalar.php
inflating: Dolphin-v.7.1.6/xmlrpc/lib/compat/var_export.php
inflating: Dolphin-v.7.1.6/xmlrpc/lib/compat/version_compare.php
inflating: Dolphin-v.7.1.6/xmlrpc/lib/xmlrpc.inc
inflating: Dolphin-v.7.1.6/xmlrpc/lib/xmlrpc_wrappers.inc
inflating: Dolphin-v.7.1.6/xmlrpc/lib/xmlrpcs.inc
inflating: Dolphin-v.7.1.6/xmlrpc/r.php
Rename the extracted directory by running the following command
root@linuxhelp:~# mv Dolphin-v.7.1.6/ Dolphin
root@linuxhelp:~# ls
Desktop Documents Dolphin dolphin-v.7.1.6.zip Downloads examples.desktop Music Pictures Public Templates Videos
Move the extracted directory to your web-server' s default root directory.
root@linuxhelp:~# mv Dolphin /var/www/html
Alter the ownership for the dolphin directory located in /var/www/html/
root@linuxhelp:~# chown www-data:www-data -R /var/www/html/Dolphin
Set the permission for the file as follows.
root@linuxhelp:~# chmod 755 /var/www/html/Dolphin/flash/modules/global/app/ffmpeg.exe
Install the Java and ImageMagick package by running the following command.
root@linuxhelp:~# apt-get install openjdk-7-jdk ImageMagick -y
Reading package lists... Done
Building dependency tree
Reading state information... Done
The following extra packages will be installed:
ca-certificates-java fonts-dejavu-extra imagemagick-6.q16 imagemagick-common java-common libatk-wrapper-java libatk-wrapper-java-jni libfftw3-double3 libgif4
libgnomevfs2-0 libgnomevfs2-common libice-dev libilmbase12 liblqr-1-0 libmagickcore-6.q16-2 libmagickcore-6.q16-2-extra libmagickwand-6.q16-2 libnetpbm10 libopenexr22
libpthread-stubs0-dev libsctp1 libsm-dev libx11-dev libx11-doc libxau-dev libxcb1-dev libxdmcp-dev libxt-dev lksctp-tools netpbm openjdk-7-jre openjdk-7-jre-headless
tzdata tzdata-java x11proto-core-dev x11proto-input-dev x11proto-kb-dev xorg-sgml-doctools xtrans-dev
.
.
.
Adding debian:IdenTrust_Commercial_Root_CA_1.pem
Adding debian:Verisign_Class_4_Public_Primary_Certification_Authority_-_G3.pem
Adding debian:Trustis_FPS_Root_CA.pem
Adding debian:QuoVadis_Root_CA_2.pem
done.
Processing triggers for libc-bin (2.21-0ubuntu4) ...
Processing triggers for ca-certificates (20150426ubuntu1) ...
Updating certificates in /etc/ssl/certs...
0 added, 0 removed  done.
Running hooks in /etc/ca-certificates/update.d...
done.
done.
Create a Database and Database User for Dolphin by utilising the following command.
root@linuxhelp:~# mysql -u root -p
Enter password:
Welcome to the MySQL monitor. Commands end with   or g.
Your MySQL connection id is 2
Server version: 5.6.31-0ubuntu0.15.10.1 (Ubuntu)

Copyright (c) 2000, 2016, Oracle and/or its affiliates. All rights reserved.

Oracle is a registered trademark of Oracle Corporation and/or its
affiliates. Other names may be trademarks of their respective
owners.

Type ' help '  or ' h'  for help. Type ' c'  to clear the current input statement.

mysql>  CREATE DATABASE DolphinDB
Query OK, 1 row affected (0.05 sec)

mysql>  GRANT ALL PRIVILEGES ON DolphinDB.* TO ' Dolphin' @' localhost'  IDENTIFIED BY ' ubuntu'
Query OK, 0 rows affected (0.04 sec)

mysql>  FLUSH PRIVILEGES
Query OK, 0 rows affected (0.02 sec)

mysql>  exit
Bye
Open the php.ini configuration file.
root@linuxhelp:~# vim /etc/php5/apache2/php.ini
And edit as follows.
memory_limit = 128M
file_uploads = On
allow_url_fopen = On
allow_url_include = Off
register_globals = Off
safe_mode = Off
short_open_tag = On
magic_quotes_gpc = Off
default_charset = " UTF-8"
Create new Apache virtual host for Boonex Dolphin by using the following command.
root@linuxhelp:~# vim /etc/apache2/sites-available/dolphin.conf
Add the following entry to the virtual host configuration file.
ServerAdmin admin@linuxhelp.com
DocumentRoot /var/www/html/Dolphin/
ServerName linuxhelp.com
ServerAlias www.linuxhelp.com

Options FollowSymLinks
AllowOverride All

ErrorLog /var/log/apache2/linuxhelp.com-error_log
CustomLog /var/log/apache2/linuxhelp.com-access_log common
Run the following command to create a soft link.
root@linuxhelp:~# ln -s /etc/apache2/sites-available/dolphin.conf /etc/apache2/sites-enabled/dolphin.conf
Restart the apache services.
root@linuxhelp:~# systemctl restart apache2
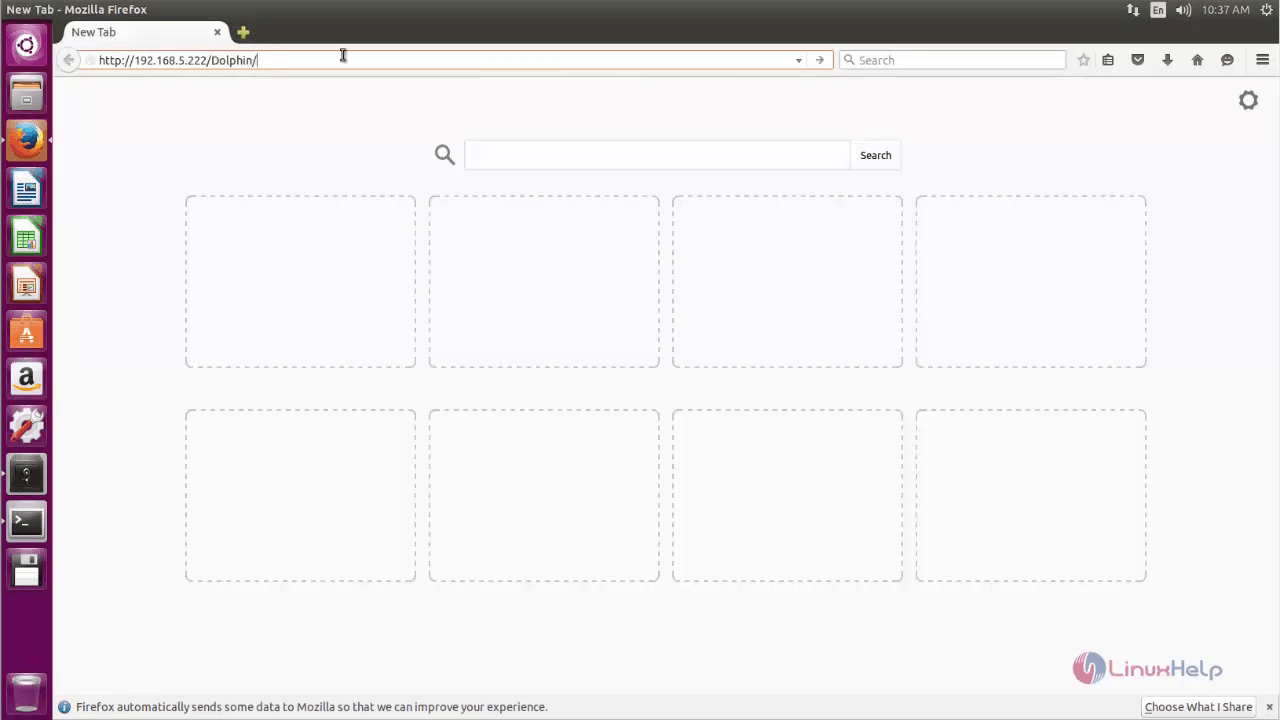
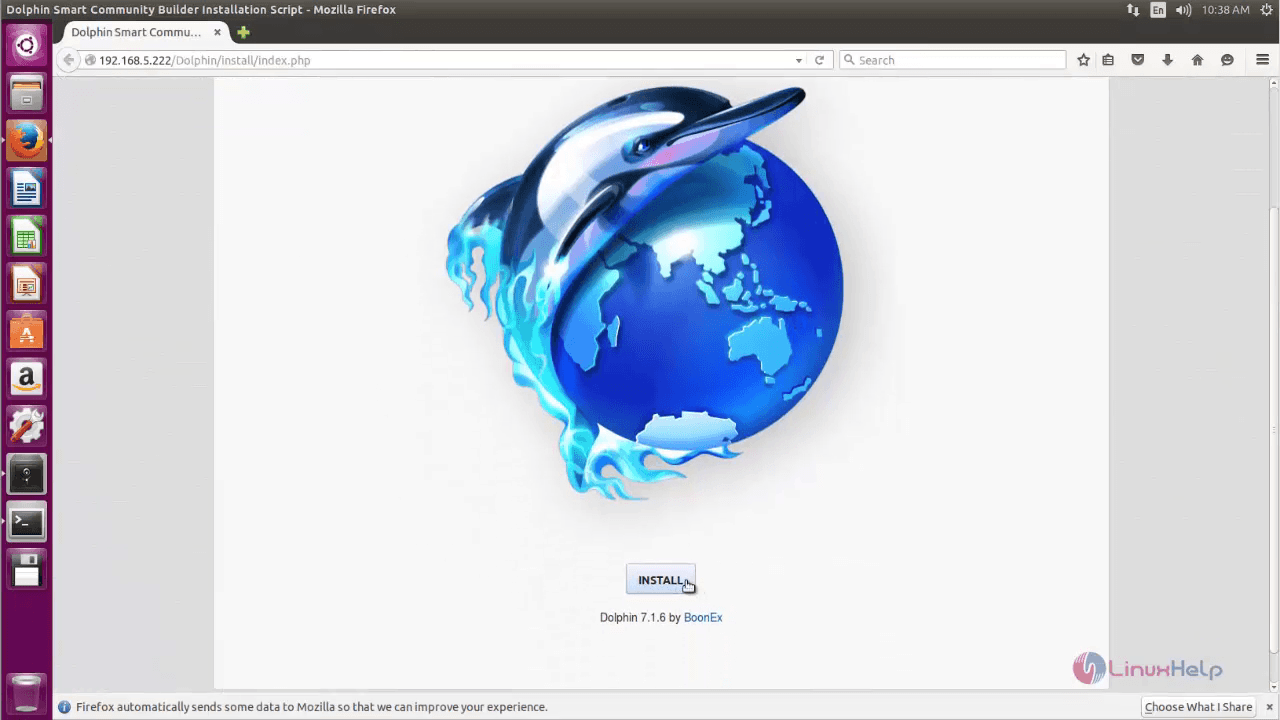
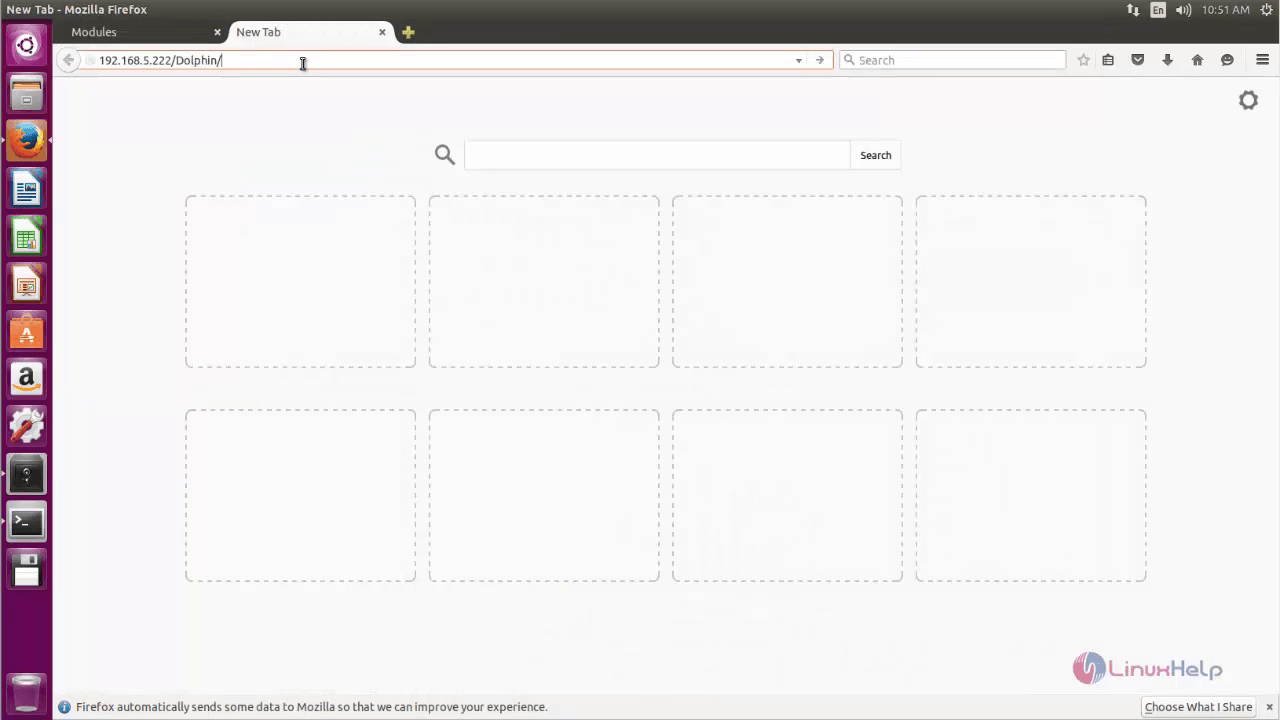
Open the browser and navigate to http://< IP_address> /Dolphin
Click “ Install” to start dolphin installation.
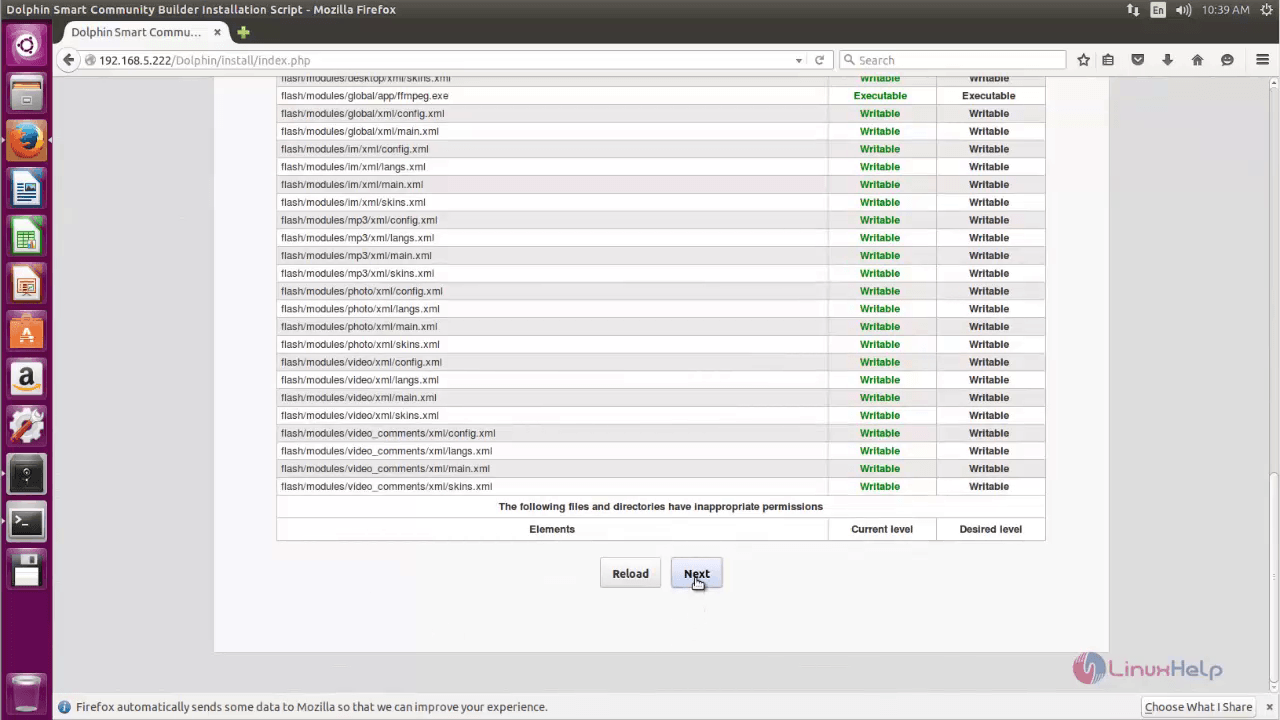
Verify the directories inside the dolphin and then click “ Next”
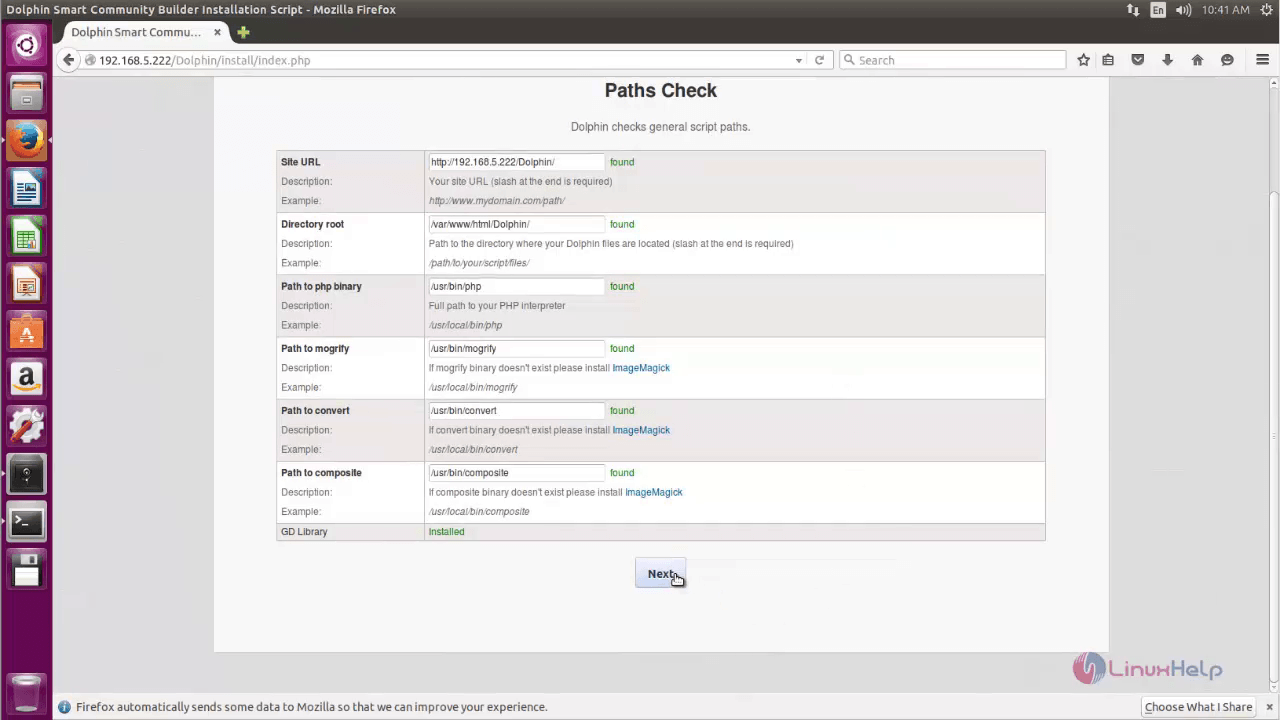
Check the paths and click “ Next”
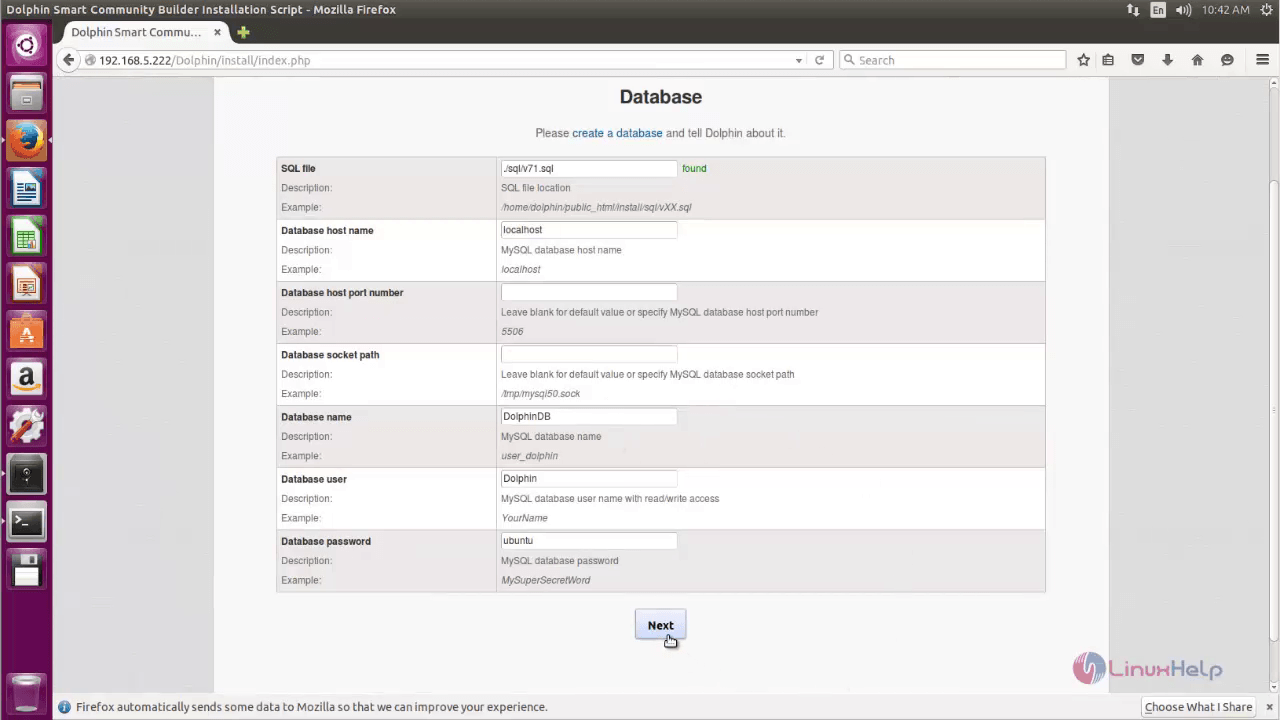
Enter the database information and click “ Next”
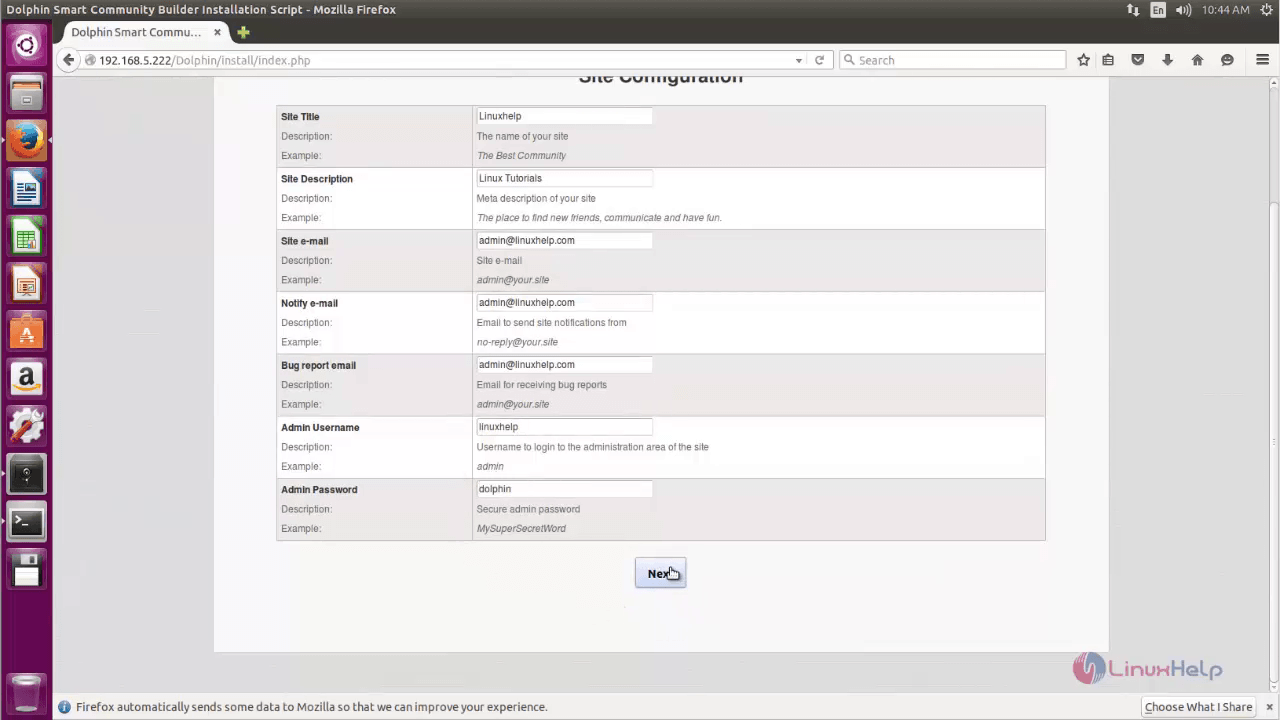
Configure the site and add the admin username and password. Then click “ Next” .
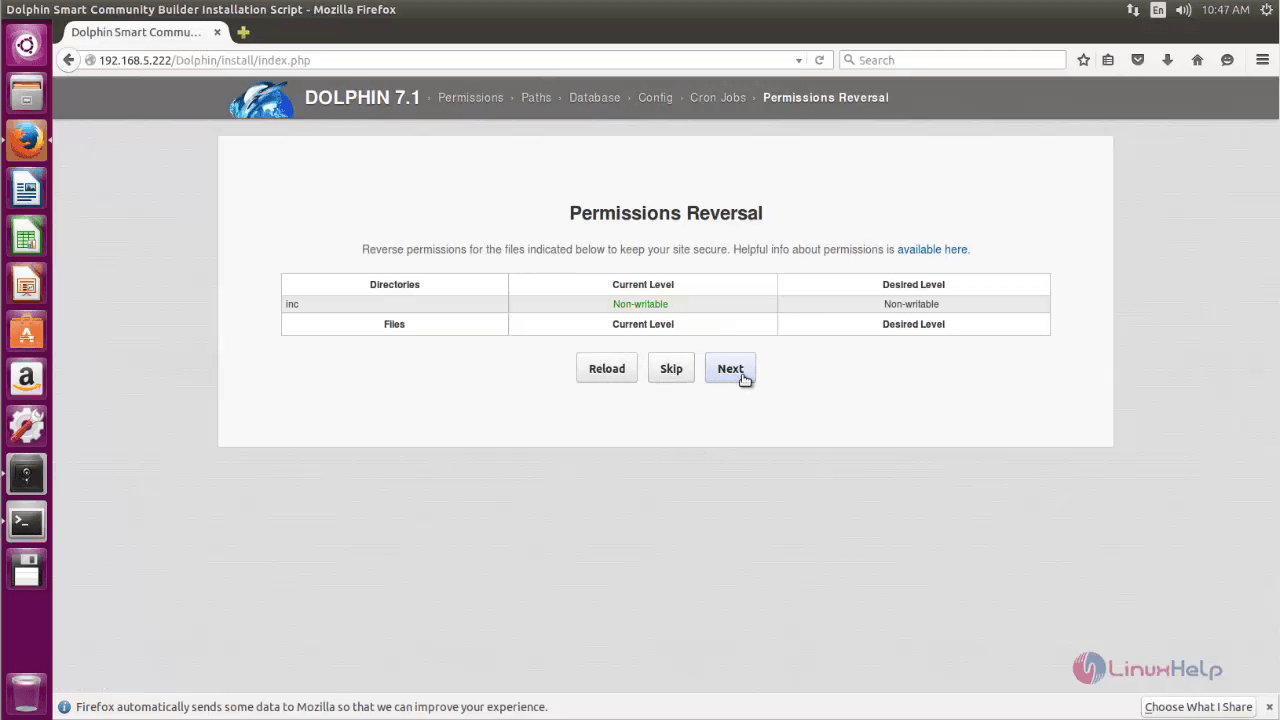
To keep the site secured, change the permission for the files displayed.
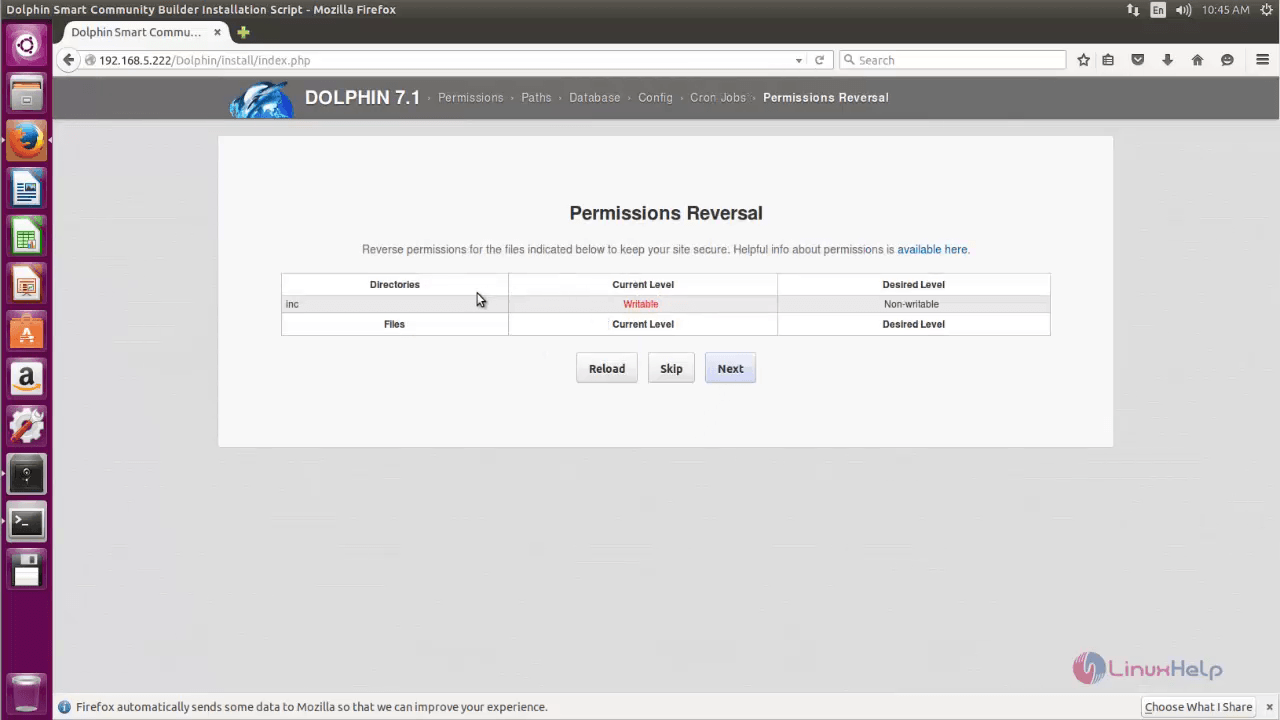
Run the following command, to change the permissions.
root@linuxhelp:~# chmod a-w /var/www/html/Dolphin/inc
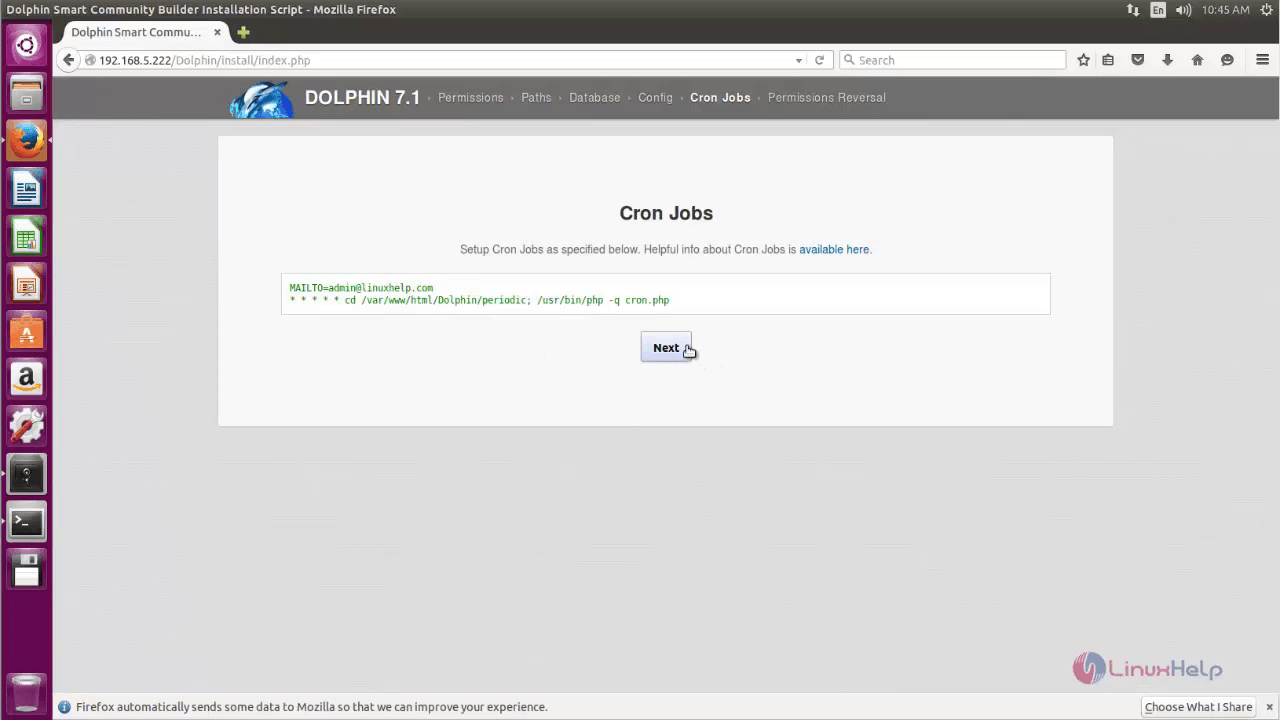
Open your browser and reload it. Then click “ Next”
Now the installation of dolphin is successfully completed. Click Proceed to Admin Panel to install modules.
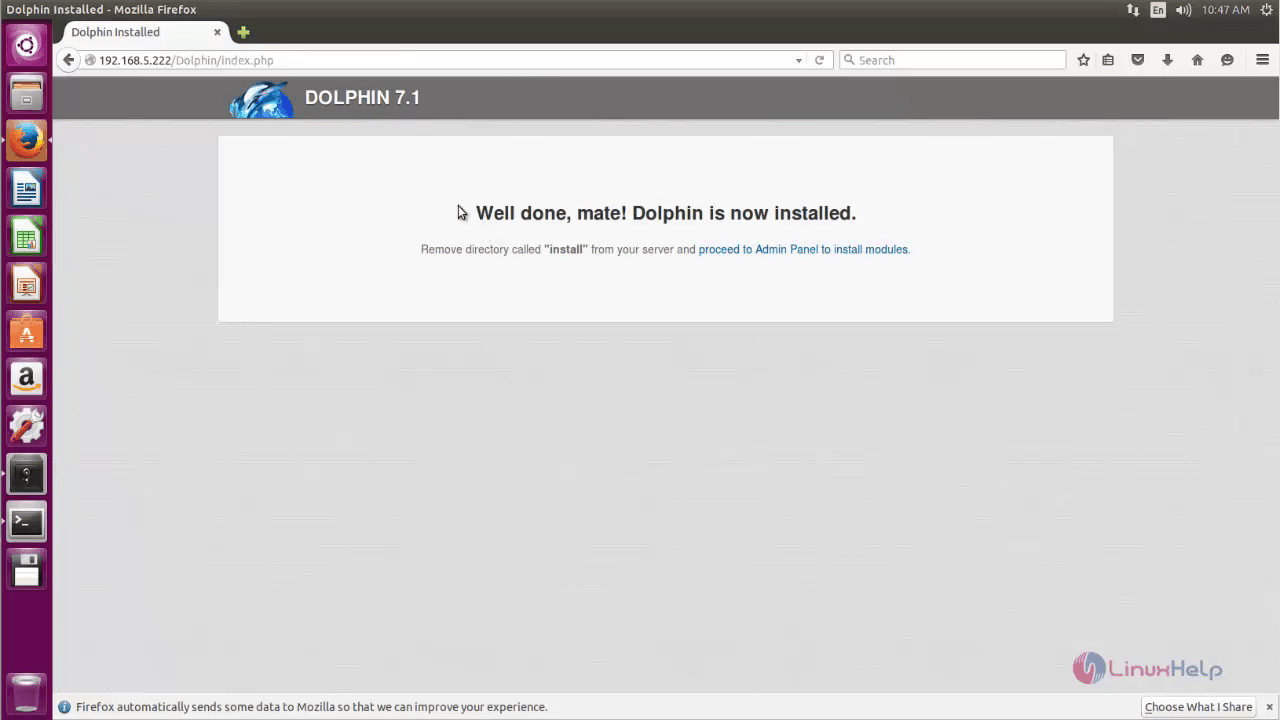
Remove the dolphin folder after the installation completes.
root@linuxhelp:~# cd /var/www/html/Dolphin/ root@linuxhelp:/var/www/html/Dolphin# rm -rf install
Now open the browser and click proceed to Admin panel to install modules.
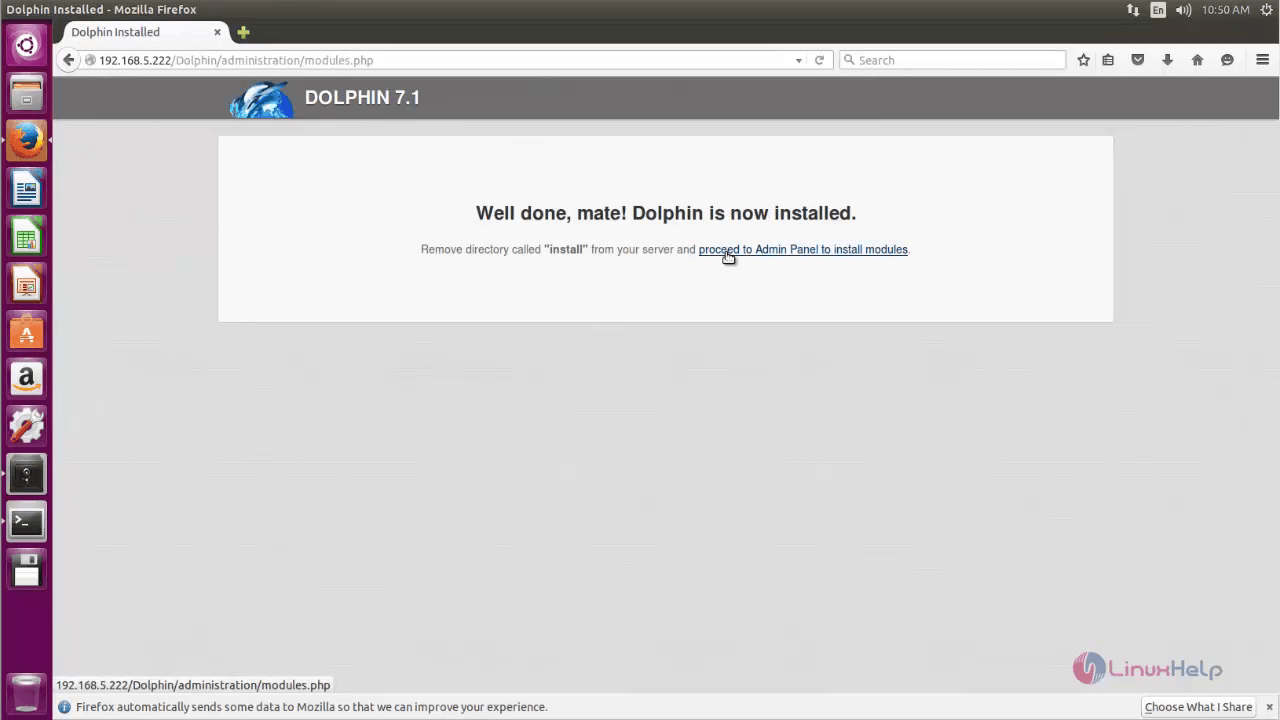
Open another tab and point to http://< IP_address> /Dolphin

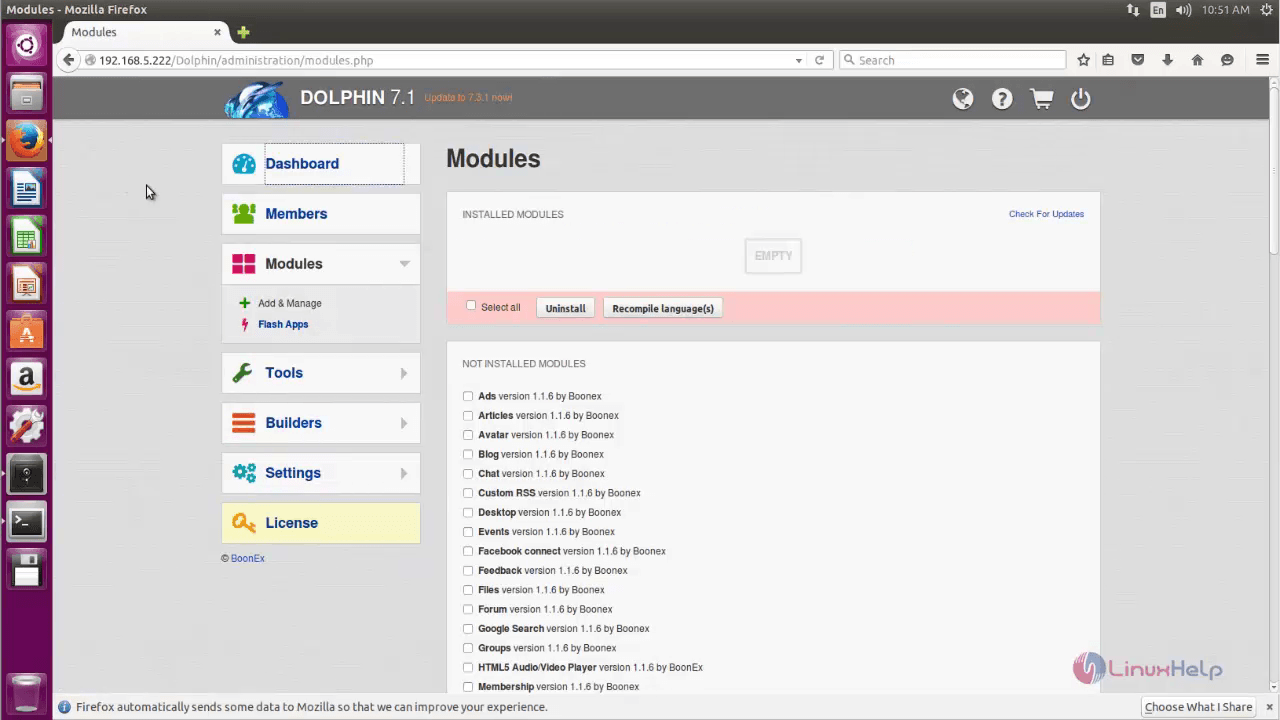
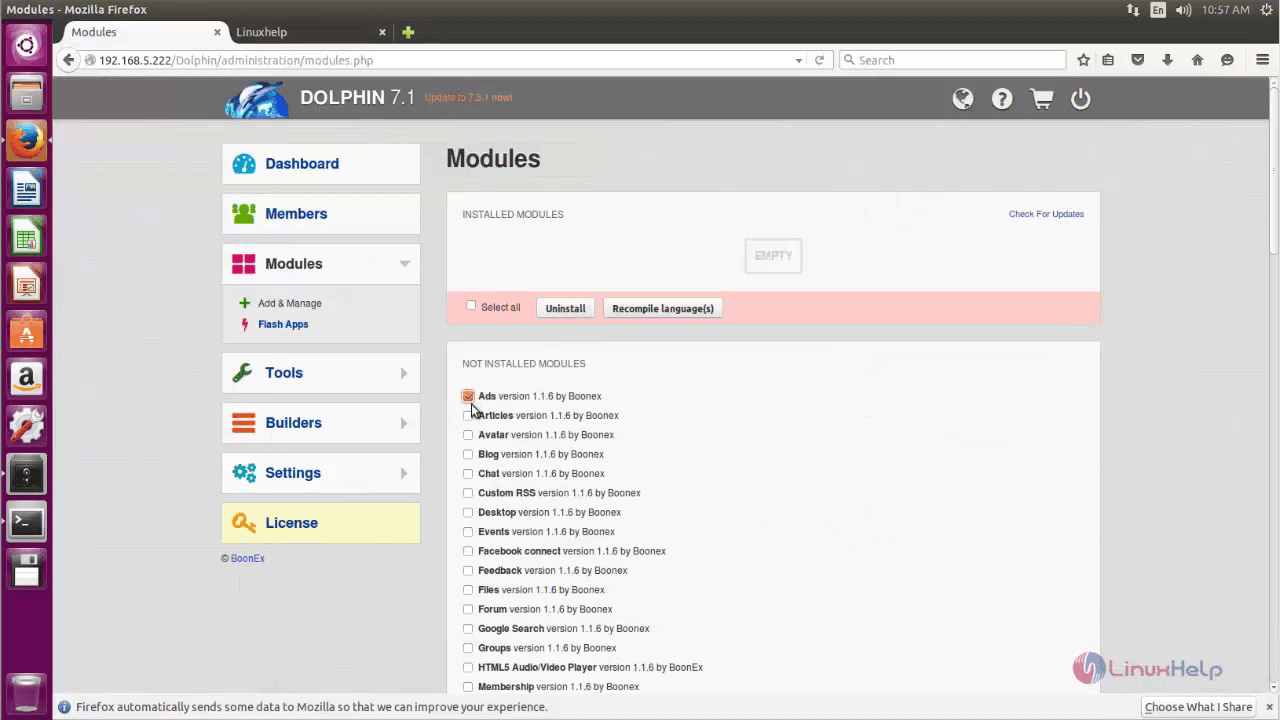
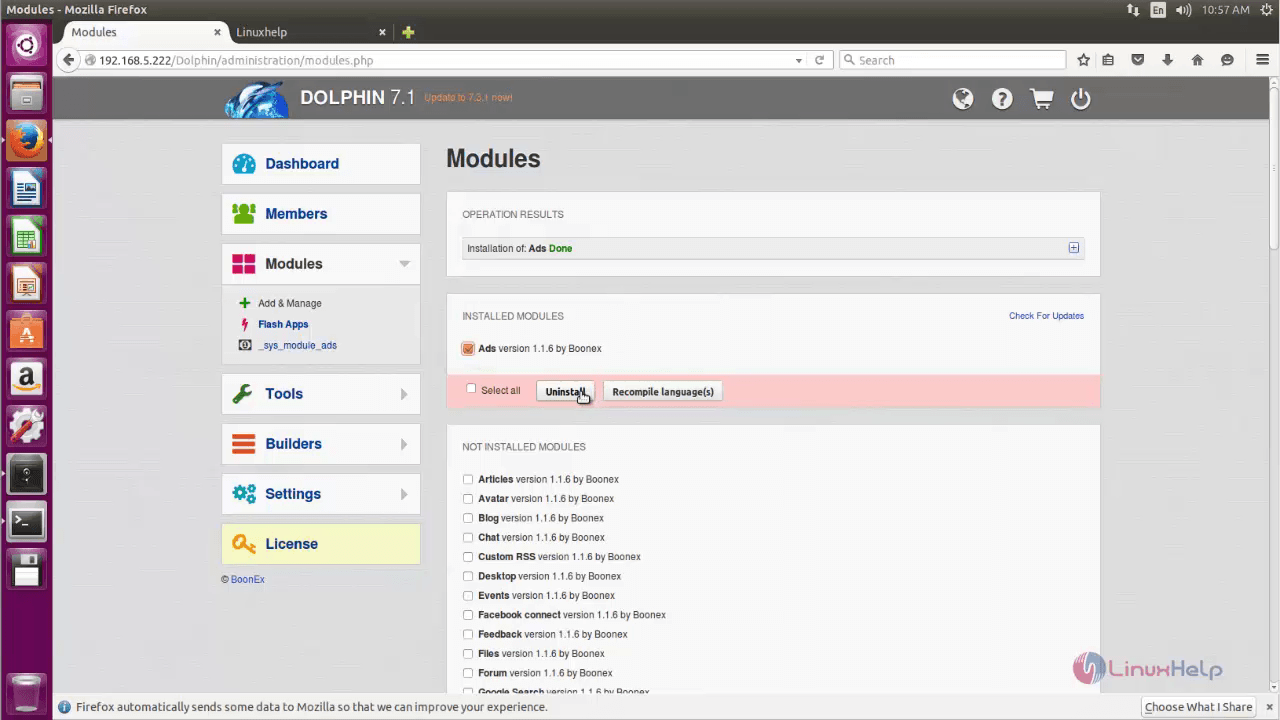
Select the module to be installed and then click “ Install” .

To Uninstall the Module, select the module to be deleted and click Uninstall.
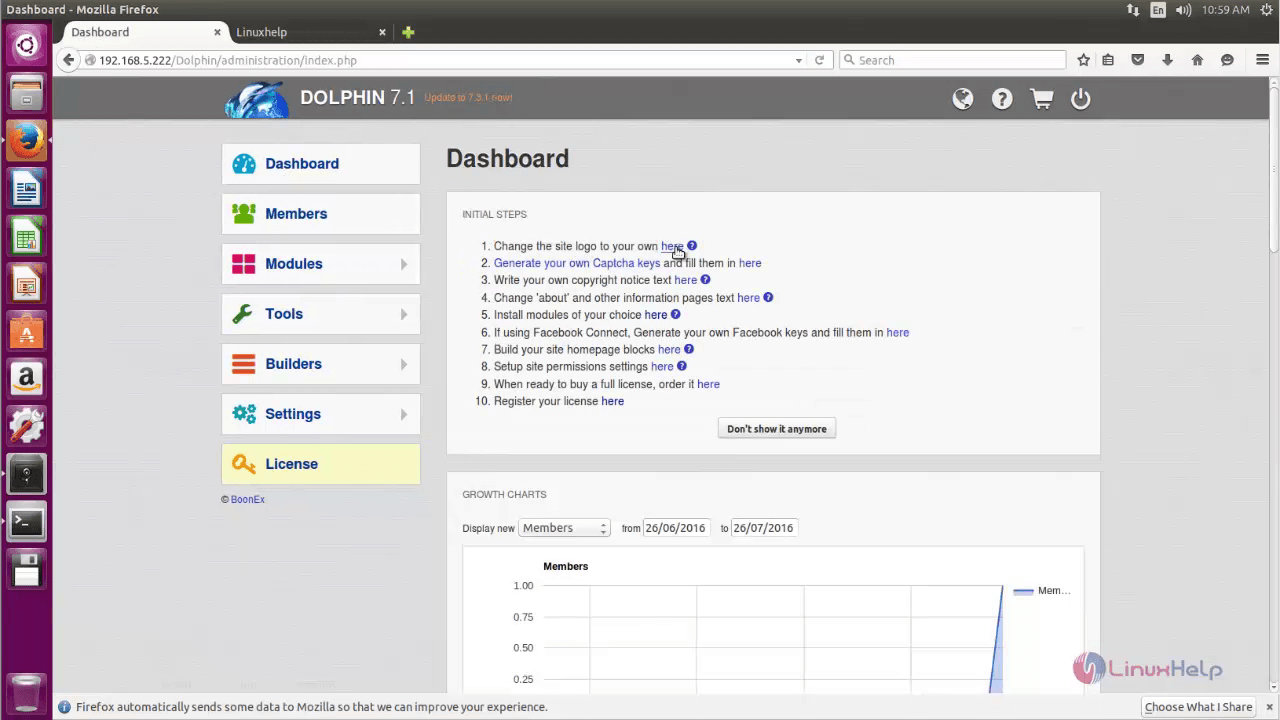
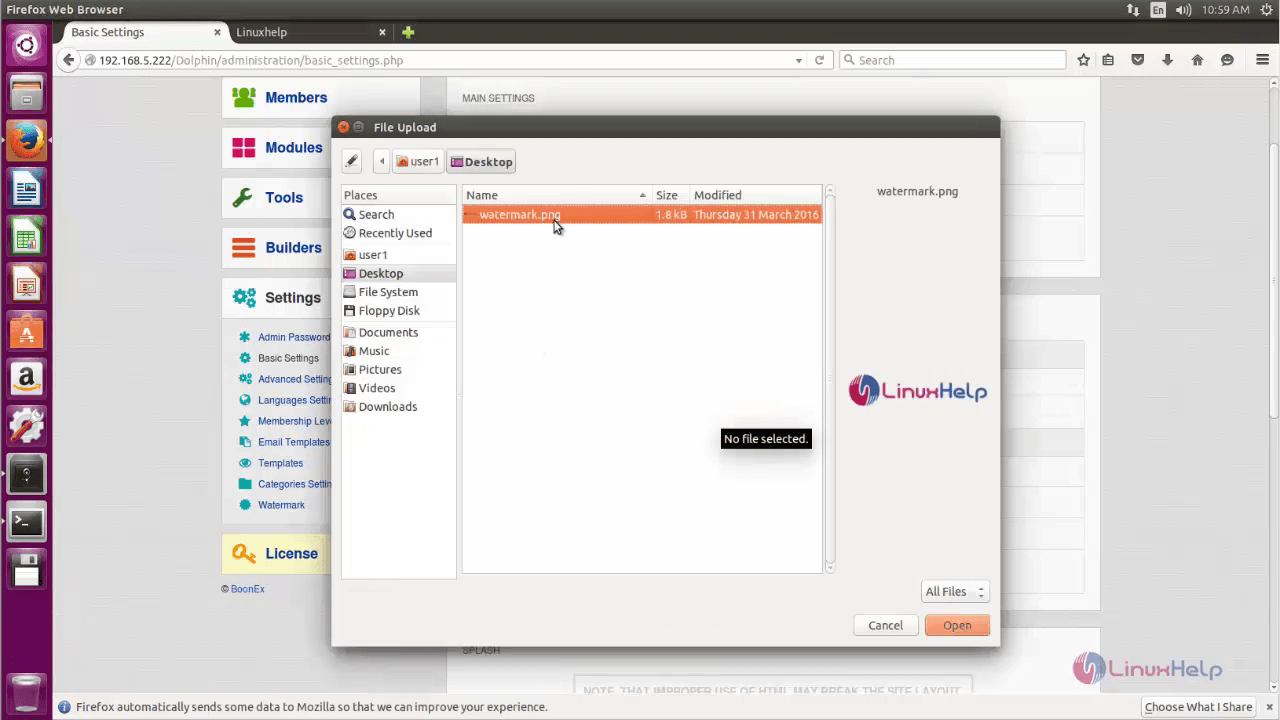
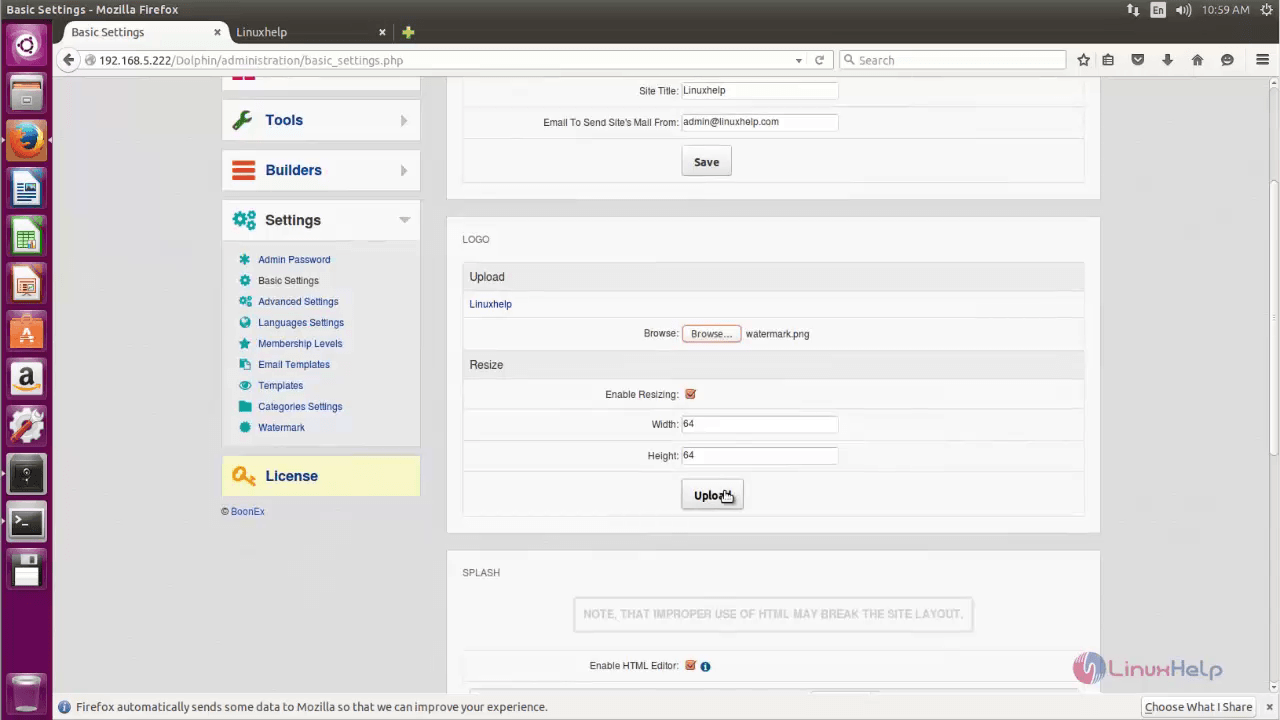
To change logo , click the link in the initial steps.

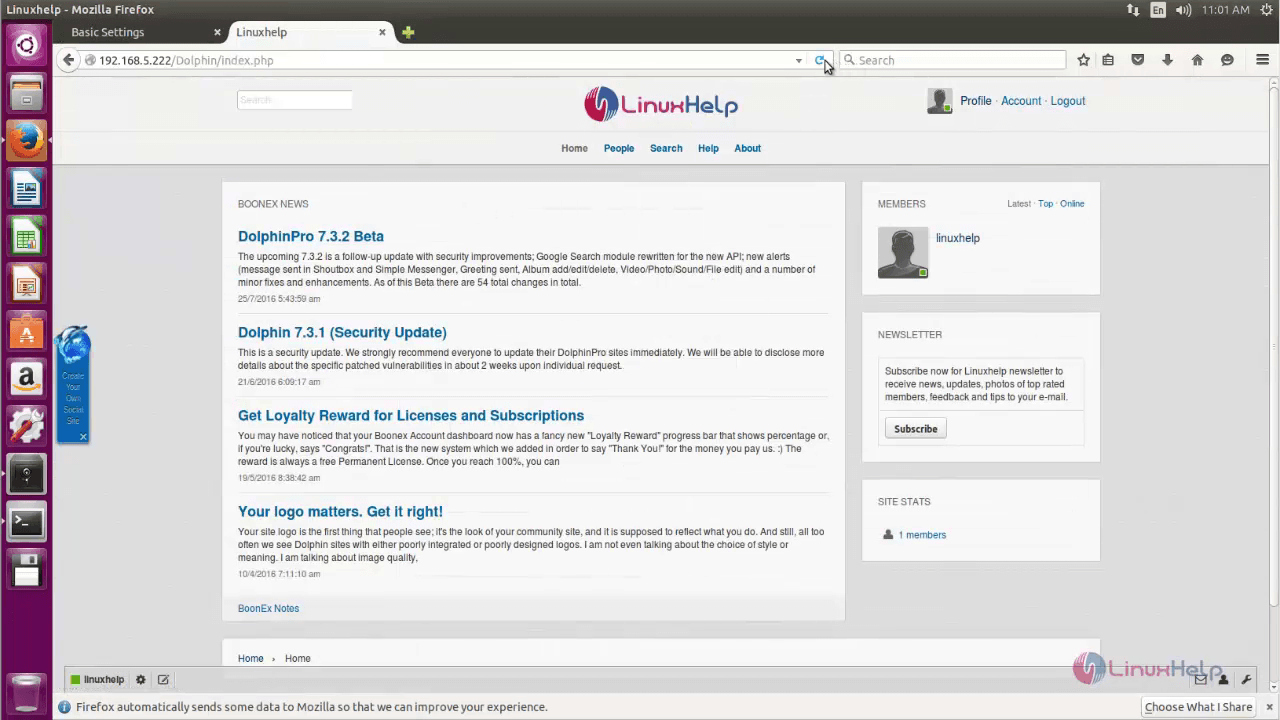
Go to the main page and click reload to view your logo.


Comments ( 0 )
No comments available