How to install Nagios on Ubuntu 22.04
To Install Nagios on Ubuntu 22.04
Introduction
Nagios is a powerful and versatile open-source monitoring tool that allows you to keep a vigilant eye on your infrastructure. In this article, we will delve into the intricacies of installing Nagios on Ubuntu 22.04, exploring various methods and providing step-by-step guidance to ensure your monitoring setup is smooth and efficient.
Procedure
Step – 1 : At First, Check the OS version
root@linuxhelp:~# lsb_release -a
No LSB modules are available.
Distributor ID:	Ubuntu
Description:	Ubuntu 22.04.3 LTS
Release:	22.04
Codename:	jammy
Step – 2 : Install apache web server by using the following command
root@linuxhelp:~# apt install apache2 -y
Reading package lists... Done
Building dependency tree... Done
Reading state information... Done
The following packages were automatically installed and are no longer required:
  libflashrom1 libftdi1-2 libllvm13
Use 'apt autoremove' to remove them.
The following additional packages will be installed:
  apache2-bin apache2-data apache2-utils libapr1 libaprutil1 libaprutil1-dbd-sqlite3 libaprutil1-ldap
Suggested packages:
  apache2-doc apache2-suexec-pristine | apache2-suexec-custom
The following NEW packages will be installed:
  apache2 apache2-bin apache2-data apache2-utils libapr1 libaprutil1 libaprutil1-dbd-sqlite3 libaprutil1-ldap
0 upgraded, 8 newly installed, 0 to remove and 105 not upgraded.
Need to get 1,918 kB of archives.
After this operation, 7,706 kB of additional disk space will be used.
Get:1 http://in.archive.ubuntu.com/ubuntu jammy-updates/main amd64 libapr1 amd64 1.7.0-8ubuntu0.22.04.1 [108 kB]
Get:2 http://in.archive.ubuntu.com/ubuntu jammy-updates/main amd64 libaprutil1 amd64 1.6.1-5ubuntu4.22.04.2 [92.8 kB]
Get:3 http://in.archive.ubuntu.com/ubuntu jammy-updates/main amd64 libaprutil1-dbd-sqlite3 amd64 1.6.1-5ubuntu4.22.04.2 [11.3 kB]
Get:4 http://in.archive.ubuntu.com/ubuntu jammy-updates/main amd64 libaprutil1-ldap amd64 1.6.1-5ubuntu4.22.04.2 [9,170 B]
Get:5 http://in.archive.ubuntu.com/ubuntu jammy-updates/main amd64 apache2-bin amd64 2.4.52-1ubuntu4.6 [1,345 kB]
Processing triggers for ufw (0.36.1-4ubuntu0.1) ...
Processing triggers for man-db (2.10.2-1) ...
Processing triggers for libc-bin (2.35-0ubuntu3.1) ...
Step – 3 : Now start and enable apache service
root@linuxhelp:~# systemctl start apache2 && systemctl enable apache2
Synchronizing state of apache2.service with SysV service script with /lib/systemd/systemd-sysv-install.
Executing: /lib/systemd/systemd-sysv-install enable apache2
Step – 4 : Install Nagios by using the apt command
root@linuxhelp:~# apt install nagios4 nagios-plugins
Reading package lists... Done
Building dependency tree... Done
Reading state information... Done
Note, selecting 'monitoring-plugins' instead of 'nagios-plugins'
The following packages were automatically installed and are no longer required:
  libflashrom1 libftdi1-2 libllvm13
Use 'apt autoremove' to remove them.
The following additional packages will be installed:
  bsd-mailx javascript-common libapache2-mod-php libapache2-mod-php8.1 libdbi1 libjs-jquery liblockfile-bin liblockfile1
  libmysqlclient21 libnet-snmp-perl libpq5 libradcli4 libsmbclient liburiparser1 libwbclient0 monitoring-plugins-basic
  monitoring-plugins-common monitoring-plugins-standard mysql-common nagios-images nagios4-cgi nagios4-common nagios4-core
  php-common php8.1-cli php8.1-common php8.1-opcache php8.1-readline postfix python3-gpg python3-samba python3-tdb rpcbind
  samba-common samba-common-bin samba-dsdb-modules samba-libs smbclient snmp
Suggested packages:
  php-pear libcrypt-des-perl libdigest-hmac-perl libio-socket-inet6-perl icinga2 nagios-
Processing triggers for libc-bin (2.35-0ubuntu3.1) ...
Processing triggers for php8.1-cli (8.1.2-1ubuntu2.14) ...
Processing triggers for libapache2-mod-php8.1 (8.1.2-1ubuntu2.14) ...
Step – 5 : Nagios uses Apache as its web server. So need to enable Apache modules
root@linuxhelp:~# a2enmod rewrite cgi
Enabling module rewrite.
Enabling module cgi.
To activate the new configuration, you need to run:
  systemctl restart apache2
Step – 6 : Restart apache by using the following command
root@linuxhelp:~# systemctl restart apache2
Step – 7 : Now start and enable Nagios service by using the following command
root@linuxhelp:~# systemctl start nagios4
root@linuxhelp:~# systemctl enable nagios4
Synchronizing state of nagios4.service with SysV service script with /lib/systemd/systemd-sysv-install.
Executing: /lib/systemd/systemd-sysv-install enable nagios4
Created symlink /etc/systemd/system/multi-user.target.wants/nagios4.service → /lib/systemd/system/nagios4.service.
Now go to the browser and search with your ip or domain name along with the /nagios4. Example : http://192.168.6.113/nagios4 or https://example.com/nagios4
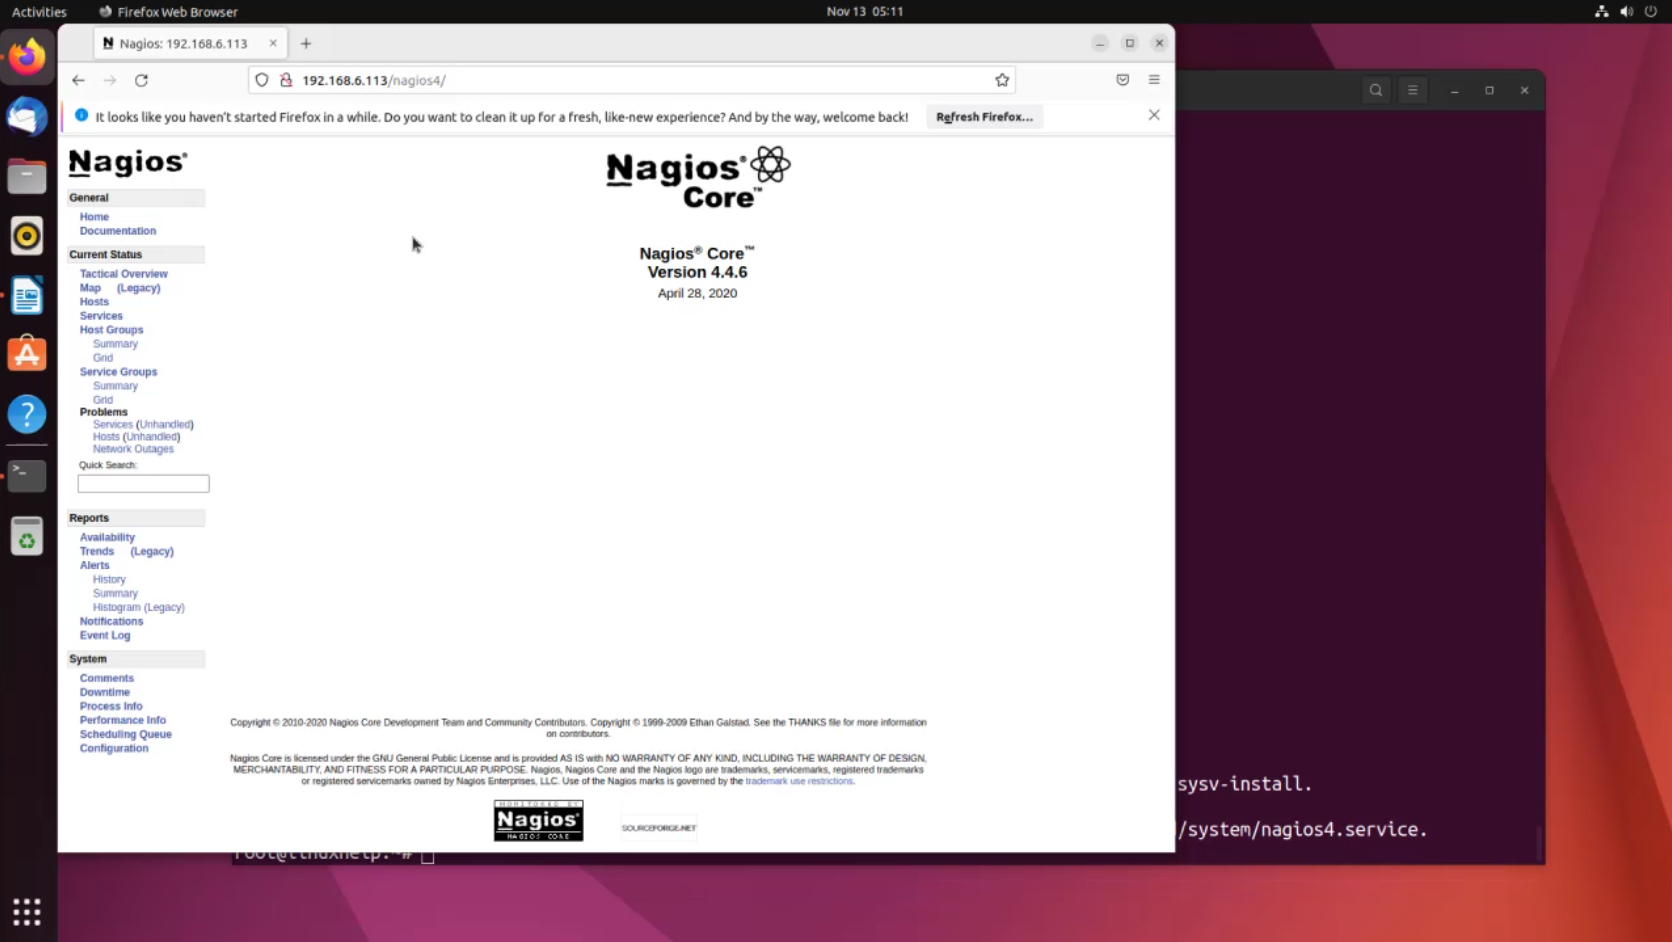
Conclusion
We have reached the end of this article. In this guide, we have walked you through the steps required to Installation of Nagios on Ubuntu 22.04. Your feedback is much welcome.


Comments ( 0 )
No comments available