How to install GLPI Asset management on CentOS 7
To install GLPI Asset management on CentOS 7
GLPI is an open-source asset IT resource manager with an additional Administration Interface. It is used to build up a database with an inventory devices such as computer, software, and printers, etc. It has enhanced functions like a job-tracking-system with mail-notification and methods to build a database with basic information about your network-topology. This tutorial covers the installation procedure of GLPI asset management on CentOS 7.
Pre-Requisite
LAMP Setup
-Apache
-MariaDB
-PHP
Installation procedure
To start with the installation procedure, go to its official website and copy the link for downloading GLPI package by running the wget command.
[root@linuxhelp ~]# wget https://github.com/glpi-project/glpi/releases/download/9.1.3/glpi-9.1.3.tgz
--2017-08-24 14:39:26--  https://github.com/glpi-project/glpi/releases/download/9.1.3/glpi-9.1.3.tgz
Resolving github.com (github.com)... 192.30.255.113, 192.30.255.112
Connecting to github.com (github.com)|192.30.255.113|:443... connected.
HTTP request sent, awaiting response... 302 Found
Location: https://github-production-release-asset-2e65be.s3.amazonaws.com/39182755/c5562782-2c07-11e7-9a66-6e723bb737e6?X-Amz-Algorithm=AWS4-HMAC-SHA256& X-Amz-Credential=AKIAIWNJYAX4CSVEH53A%2F20170824%2Fus-east-1%2Fs3%2Faws4_request& X-Amz-Date=20170824T090951Z& X-Amz-Expires=300& X-Amz-Signature=747865a3c4c130620e55a9abacbc17741e4bf136aee5942ca41bcd93c0685a56& X-Amz-SignedHeaders=host& actor_id=0& response-content-disposition=attachment%3B%20filename%3Dglpi-9.1.3.tgz& response-content-type=application%2Foctet-stream [following]
--2017-08-24 14:39:27--  https://github-production-release-asset-2e65be.s3.amazonaws.com/39182755/c5562782-2c07-11e7-9a66-6e723bb737e6?X-Amz-Algorithm=AWS4-HMAC-SHA256& X-Amz-Credential=AKIAIWNJYAX4CSVEH53A%2F20170824%2Fus-east-1%2Fs3%2Faws4_request& X-Amz-Date=20170824T090951Z& X-Amz-Expires=300& X-Amz-Signature=747865a3c4c130620e55a9abacbc17741e4bf136aee5942ca41bcd93c0685a56& X-Amz-SignedHeaders=host& actor_id=0& response-content-disposition=attachment%3B%20filename%3Dglpi-9.1.3.tgz& response-content-type=application%2Foctet-stream
Resolving github-production-release-asset-2e65be.s3.amazonaws.com (github-production-release-asset-2e65be.s3.amazonaws.com)... 52.216.225.96
Connecting to github-production-release-asset-2e65be.s3.amazonaws.com (github-production-release-asset-2e65be.s3.amazonaws.com)|52.216.225.96|:443... connected.
HTTP request sent, awaiting response... 200 OK
Length: 29325987 (28M) [application/octet-stream]
Saving to: ‘ glpi-9.1.3.tgz’
100%[======================================> ] 29,325,987   676KB/s   in 56s
2017-08-24 14:40:25 (508 KB/s) - ‘ glpi-9.1.3.tgz’  saved [29325987/29325987]
Now extract the downloaded package by executing the tar command.
[root@linuxhelp ~]# tar -xvf glpi-9.1.3.tgz
glpi/
glpi/vendor/
glpi/vendor/autoload.php
glpi/vendor/zetacomponents/
glpi/vendor/zetacomponents/graph/
glpi/vendor/zetacomponents/graph/.gitmodules
glpi/vendor/zetacomponents/graph/.travis.yml
.
.
.
.
glpi/ajax/autocompletion.php
glpi/README.md
glpi/LISEZMOI.txt
glpi/COPYING.txt
glpi/CHANGELOG.txt
glpi/AUTHORS.txt
glpi/.htaccess
After extracting the package, move the GLPI package to apache root directory (i.e) /var/www/html/ location.
[root@linuxhelp ~]# mv glpi /var/www/html/
[root@linuxhelp ~]# cd /var/www/html/
[root@linuxhelp html]# ls -l
total 15288
drwxrwxr-x 15 1002 1002     4096 Apr 28 15:12 glpi
Provide the owner permission and read write execution permission to the Apache root directory.
[root@linuxhelp html]# chown -R apache:apache /var/www/html/glpi/
[root@linuxhelp html]# chmod 775 /var/www/html/glpi/
Create a configuration file named glpi.conf and enter the following contents in the file. Save and exit the file.
[root@linuxhelp html]# vim /etc/httpd/conf.d/glpi.conf
< VirtualHost *:80>
        ServerName 192.168.7.165
        DocumentRoot /var/www/html/glpi
        < Directory>  /var/www/html/glpi/config>
                AllowOverride None
                Require all denied
        < /Directory>
        < Directory>  /var/www/html/glpi/files>
                AllowOverride None
                Require all denied
        < /Directory>
< /VirtualHost>
Restart your apache service by running the following command.
[root@linuxhelp html]# systemctl restart httpd
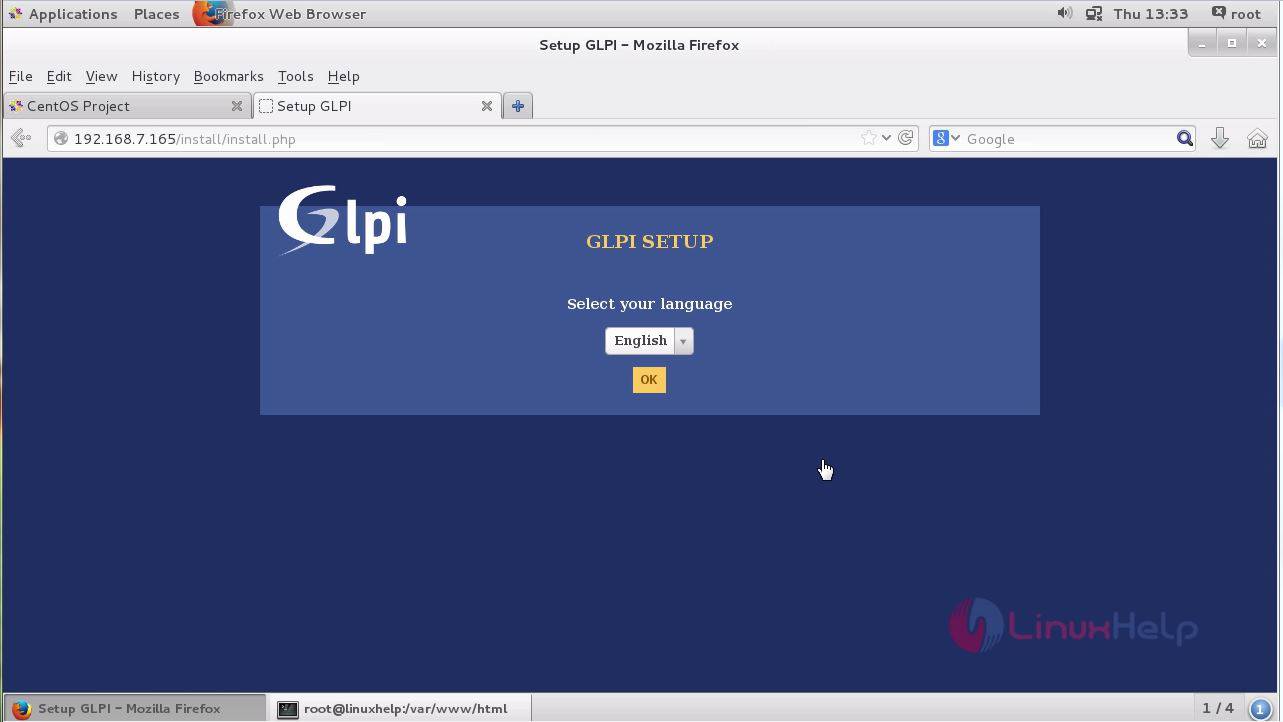
Switch to your browser and enter your machine‘ s IP address. The GLPI setup screen will appear. Select the required language.
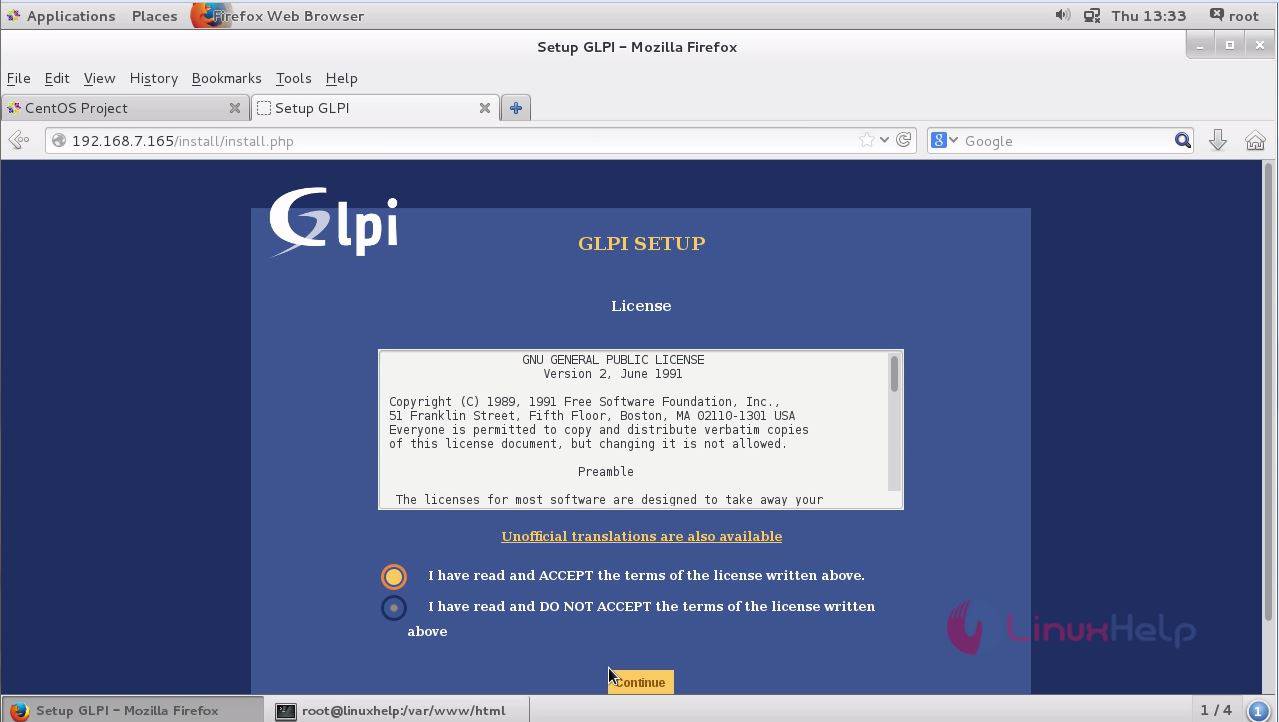
Accept the license agreement and select the acceptance option and click continue.
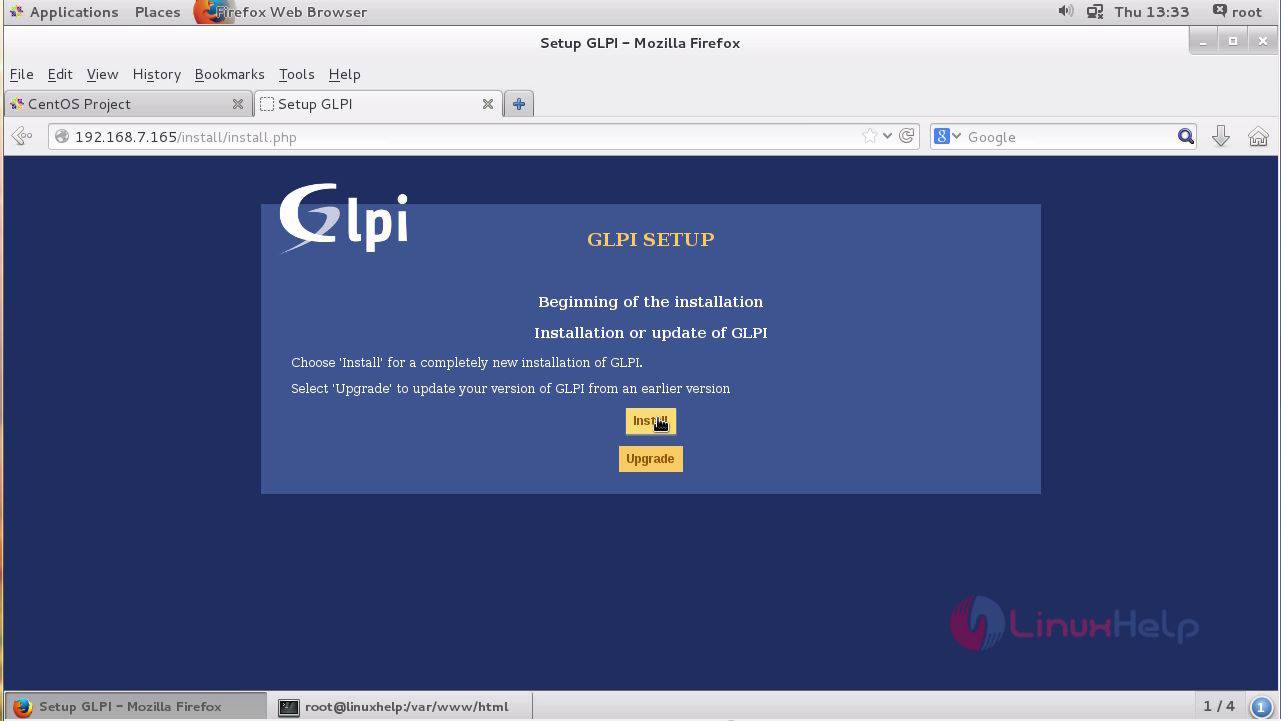
To begin your installation Click “ install” option.
This screen contains the list of Compatibility checks, if everything goes fine click “ continue” .

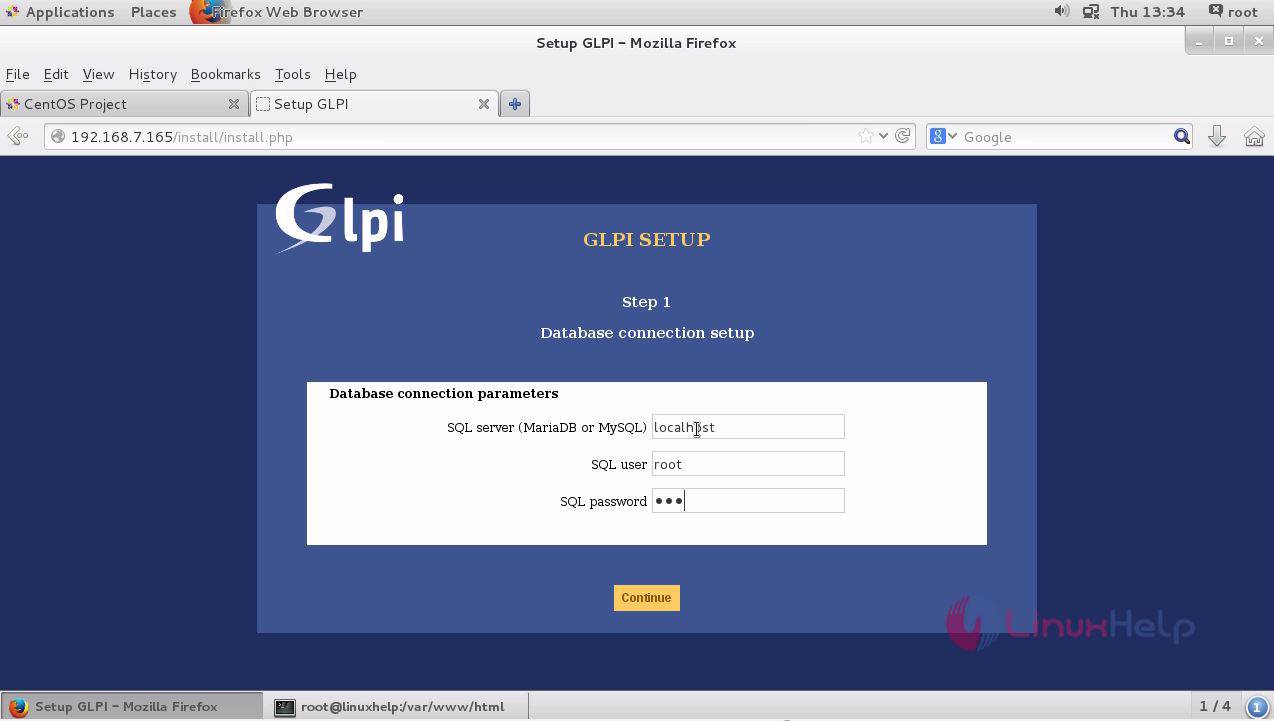
Provide your database credentials (sql server, user and password) and click continue.
Select your already created database or else create new database.
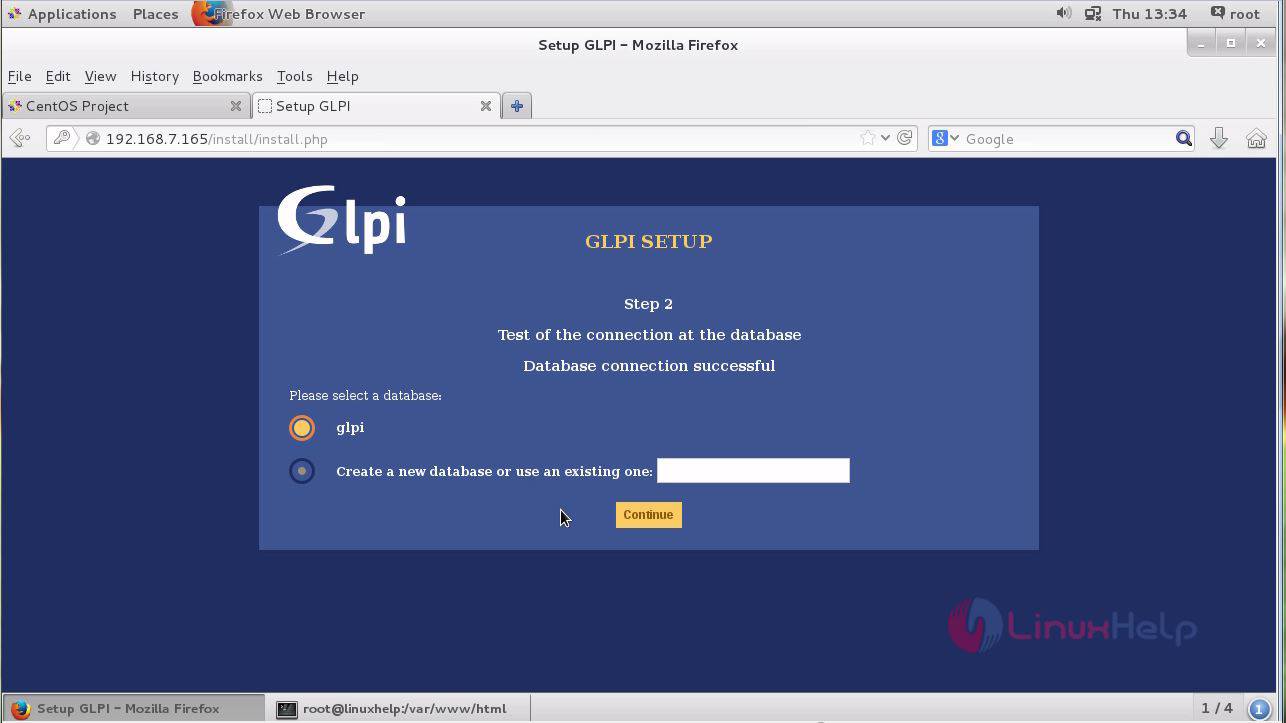
The initialization of database is established successfully.

The installation is completed and now select Use GLPI option.
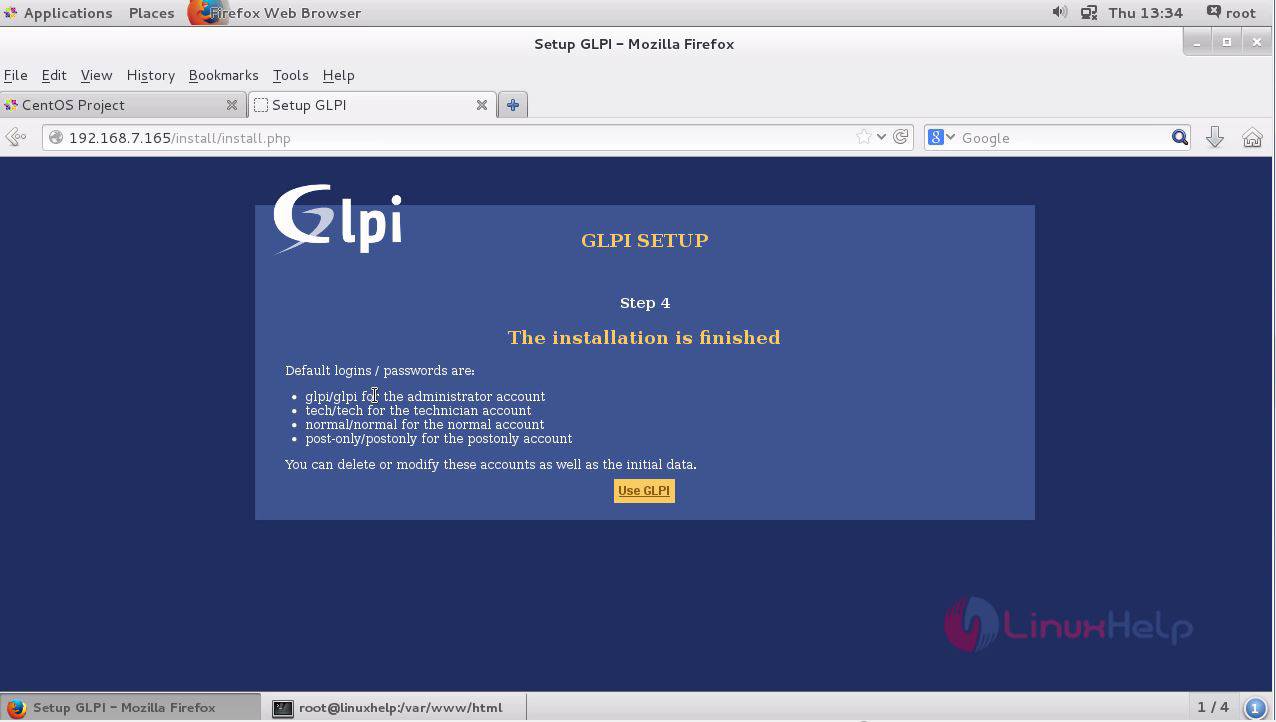
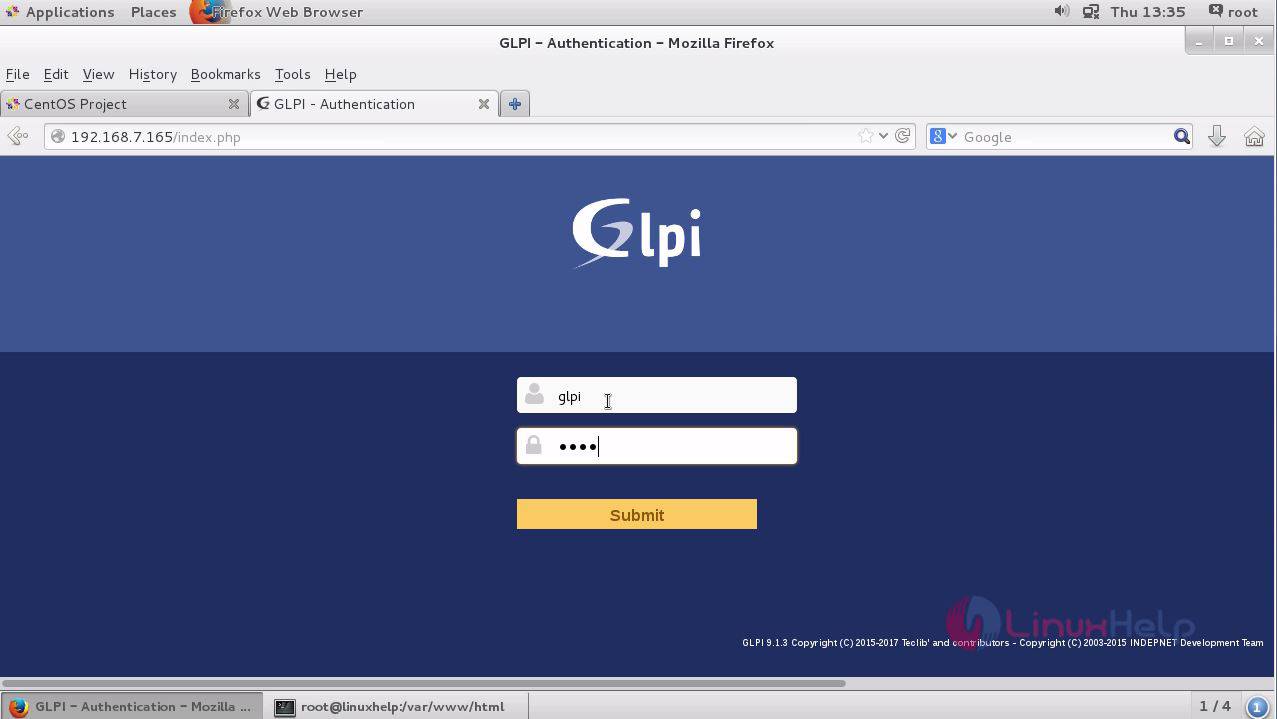
Enter the admin credentials and submit the details.
Remove the installation folder from the terminal and execute the following command.
[root@linuxhelp ~]# rm -rf /var/www/html/glpi/install/install.php
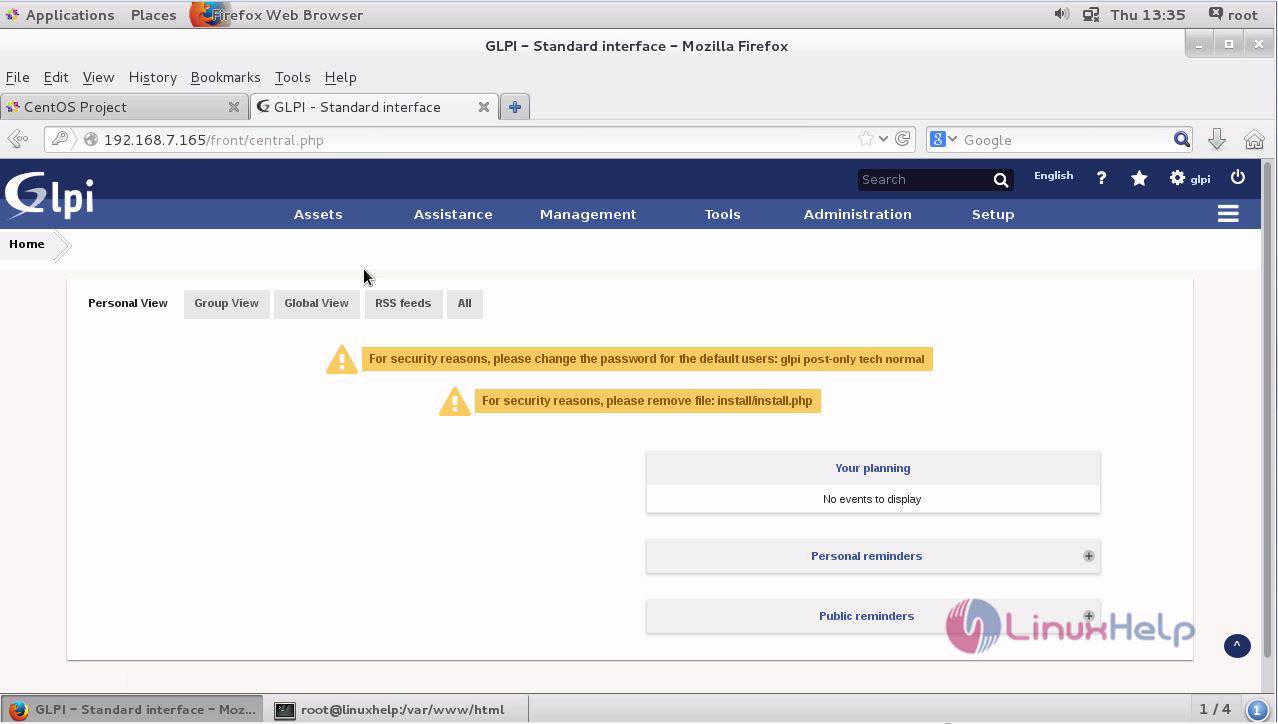
The GLPI asset manager is now ready to use.
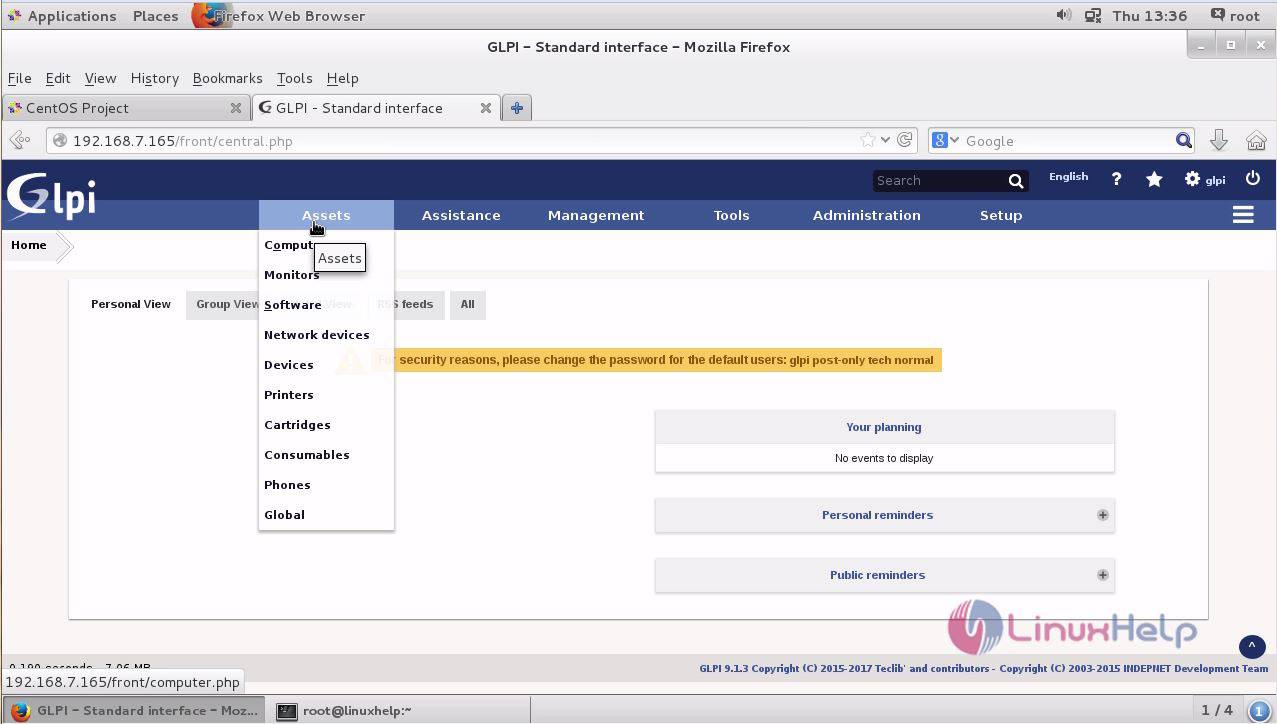
The installation of GLPI asset manager is done successfully.
Comments ( 0 )
No comments available