How to Install Bugzilla in CentOS
How to Install Bugzilla 4.4 in CentOS
Bugzilla is a web based bug tracker tool that is used to log and track fault in databases. It is used mainly in chip design, Systems Administration deployment management and development problem tracking (both pre-and-post fabrication), software and hardware bug tracking for many famous systems like Redhat, NASA, Linux-Mandrake etc.
To install Bugzilla
Install some packages, before installing Bugzilla.
[root@linuxhelp bugzilla]# yum install httpd mod_ssl mysql-server mysql php-mysql gcc perl* mod_perl-devel
Loaded plugins: fastestmirror, refresh-packagekit, security
Setting up Install Process
Loading mirror speeds from cached hostfile
 * base: centos.mirror.net.in
 * extras: mirror.fibergrid.in
 * updates: mirror.fibergrid.in
Resolving Dependencies
-->  Running transaction check
--->  Package gcc.x86_64 0:4.4.7-17.el6 will be installed
--->  Package httpd.x86_64 0:2.2.15-54.el6.centos will be installed
--->  Package mod_perl-devel.x86_64 0:2.0.4-11.el6_5 will be installed
-->  Processing Dependency: mod_perl = 2.0.4-11.el6_5 for package: mod_perl-devel-2.0.4-11.el6_5.x86_64
-->  Processing Dependency: perl(mod_perl2) for package: mod_perl-devel-2.0.4-11.el6_5.x86_64
.
.
.

  qemu-kvm.x86_64 2:0.12.1.2-2.491.el6_8.1            scrub.x86_64 0:2.2-2.el6                           seabios.x86_64 0:0.6.1.2-30.el6
  sgabios-bin.noarch 0:0-0.3.20110621svn.el6          spice-server.x86_64 0:0.12.4-13.el6.1              usbredir.x86_64 0:0.5.1-3.el6
  vgabios.noarch 0:0.6b-3.7.el6                       yajl.x86_64 0:1.0.7-3.el6

Complete!
open the port 80 in the firewall and save changes by running the following command.
[root@linuxhelp1 ~]# iptables -I INPUT -p tcp --dport 80 -j ACCEPT
[root@linuxhelp1 ~]# service iptables save
iptables: Saving firewall rules to /etc/sysconfig/iptables:[  OK  ]
To start the service while booting.
[root@linuxhelp1 ~]# /sbin/chkconfig httpd on
To configure MySQL Server
[root@linuxhelp1 ~]# chkconfig mysqld on
Run the following command to start the mysqld services.
[root@linuxhelp1 ~]# service mysqld start
Initializing MySQL database:  Installing MySQL system tables...
OK
Filling help tables...
OK

To start mysqld at boot time you have to copy
support-files/mysql.server to the right place for your system

PLEASE REMEMBER TO SET A PASSWORD FOR THE MySQL root USER !
To do so, start the server, then issue the following commands:

/usr/bin/mysqladmin -u root password ' new-password'
/usr/bin/mysqladmin -u root -h linuxhelp1 password ' new-password'

Alternatively you can run:
/usr/bin/mysql_secure_installation

which will also give you the option of removing the test
databases and anonymous user created by default.  This is
strongly recommended for production servers.

See the manual for more instructions.

You can start the MySQL daemon with:
cd /usr   /usr/bin/mysqld_safe &

You can test the MySQL daemon with mysql-test-run.pl
cd /usr/mysql-test   perl mysql-test-run.pl

Please report any problems with the /usr/bin/mysqlbug script!

                                                           [  OK  ]
Starting mysqld:                                           [  OK  ]
Utilise the following command to install Mysql secure for root.
[root@linuxhelp1 ~]# mysql_secure_installation
NOTE: RUNNING ALL PARTS OF THIS SCRIPT IS RECOMMENDED FOR ALL MySQL
      SERVERS IN PRODUCTION USE!  PLEASE READ EACH STEP CAREFULLY!

In order to log into MySQL to secure it, we' ll need the current
password for the root user.  If you' ve just installed MySQL, and
you haven' t set the root password yet, the password will be blank,
so you should just press enter here.

Enter current password for root (enter for none):
OK, successfully used password, moving on...

Setting the root password ensures that nobody can log into the MySQL
root user without the proper authorisation.

Set root password? [Y/n]
New password:
Re-enter new password:
Password updated successfully!
Reloading privilege tables..
 ... Success!

By default, a MySQL installation has an anonymous user, allowing anyone
to log into MySQL without having to have a user account created for
them.  This is intended only for testing, and to make the installation
go a bit smoother.  You should remove them before moving into a
production environment.

Remove anonymous users? [Y/n]
 ... Success!

Normally, root should only be allowed to connect from ' localhost' .  This
ensures that someone cannot guess at the root password from the network.

Disallow root login remotely? [Y/n]
 ... Success!

By default, MySQL comes with a database named ' test'  that anyone can
access.  This is also intended only for testing, and should be removed
before moving into a production environment.

Remove test database and access to it? [Y/n]
 - Dropping test database...
 ... Success!
 - Removing privileges on test database...
 ... Success!

Reloading the privilege tables will ensure that all changes made so far
will take effect immediately.

Reload privilege tables now? [Y/n]
 ... Success!

Cleaning up...


All done!  If you' ve completed all of the above steps, your MySQL
installation should now be secure.

Thanks for using MySQL!
Create a database and user for bugzilla
[root@linuxhelp1 ~]# mysql -u root -p
Enter password:
Welcome to the MySQL monitor.  Commands end with   or g.
Your MySQL connection id is 10
Server version: 5.1.73 Source distribution

Copyright (c) 2000, 2013, Oracle and/or its affiliates. All rights reserved.

Oracle is a registered trademark of Oracle Corporation and/or its
affiliates. Other names may be trademarks of their respective
owners.

Type ' help '  or ' h'  for help. Type ' c'  to clear the current input statement.

mysql>  create database bugzilladb
Query OK, 1 row affected (0.00 sec)

mysql>  grant all on bugzilladb.* to user1@localhost identified by ' linuxc'
Query OK, 0 rows affected (0.00 sec)

mysql>  exit
Bye
Download the bugzilla by running the following command
[root@linuxhelp1 ~]# wget https://ftp.mozilla.org/pub/mozilla.org/webtools/bugzilla-5.0.3.tar.gz
--2016-07-21 17:13:11--  https://ftp.mozilla.org/pub/mozilla.org/webtools/bugzilla-5.0.3.tar.gz
Resolving ftp.mozilla.org... 54.230.173.16
Connecting to ftp.mozilla.org|54.230.173.16|:443... connected.
HTTP request sent, awaiting response... 200 OK
Length: 4069689 (3.9M) [application/x-tar]
Saving to: “ bugzilla-5.0.3.tar.gz”

100%[===============================================================================================================> ] 4,069,689    705K/s   in 5.7s

2016-07-21 17:13:17 (697 KB/s) - “ bugzilla-5.0.3.tar.gz”  saved [4069689/4069689]
Extract the downloaded bugzilla package by using the following command.
[root@linuxhelp1 ~]# tar zxvf bugzilla-5.0.3.tar.gz
bugzilla-5.0.3/
bugzilla-5.0.3/search_plugin.cgi
bugzilla-5.0.3/admin.cgi
bugzilla-5.0.3/editkeywords.cgi
bugzilla-5.0.3/request.cgi
bugzilla-5.0.3/showdependencygraph.cgi
bugzilla-5.0.3/attachment.cgi
bugzilla-5.0.3/.htaccess
.
.
.
bugzilla-5.0.3/mod_perl.pl
bugzilla-5.0.3/checksetup.pl
bugzilla-5.0.3/sanitycheck.pl
bugzilla-5.0.3/sanitycheck.cgi
bugzilla-5.0.3/whine.pl
Now move the extracted bugzilla directory into the apache' s default root directory.
[root@linuxhelp1 ~]# mv bugzilla-5.0.3 /var/www/html/
[root@linuxhelp1 ~]# cd /var/www/html/
[root@linuxhelp1 html]# ls
bugzilla-5.0.3
[root@linuxhelp1 html]# mv bugzilla-5.0.3/ bugzilla
To execute the checksetup.pl script to install bugzilla.
[root@linuxhelp1 html]# cd bugzilla/
[root@linuxhelp1 bugzilla]# ./checksetup.pl --check-modules
* This is Bugzilla 5.0.3 on perl 5.10.1
* Running on Linux 2.6.32-642.3.1.el6.x86_64 #1 SMP Tue Jul 12 18:30:56 UTC 2016

Checking perl modules...
Checking for               CGI.pm (v3.51)     ok: found v3.51
Checking for           Digest-SHA (any)       ok: found v5.47
Checking for             TimeDate (v2.23)     found v2.22
Checking for             DateTime (v0.75)     found v0.53
.
.
.
To attempt an automatic install of every required and optional module
with one command, do:

  /usr/bin/perl install-module.pl --all

*** Installation aborted. Read the messages above. ***
Install the perl modules by using the following command.
[root@linuxhelp1 bugzilla]# perl install-module.pl --all
Checking for                 CPAN (v1.81)     ok: found v1.9402
Checking for                 YAML (any)       ok: found v0.70
Checking for   ExtUtils-MakeMaker (v6.31)     ok: found v6.55_02
Fetching with LWP:
  http://www.cpan.org/authors/01mailrc.txt.gz
Going to read ' /root/.cpan/source/authors/01mailrc.txt.gz'
............................................................................DONE
Fetching with LWP:
  http://www.cpan.org/modules/02packages.details.txt.gz
Going to read ' /root/.cpan/source/modules/02packages.details.txt.gz'
  Database was generated on Thu, 21 Jul 2016 11:41:02 GMT
.
.
.
Installing /var/www/html/bugzilla/lib/man/man3/DBD::SQLite::Cookbook.3pm
Installing /var/www/html/bugzilla/lib/man/man3/DBD::SQLite.3pm
Appending installation info to /var/www/html/bugzilla/lib/x86_64-linux-thread-multi/perllocal.pod
  ISHIGAKI/DBD-SQLite-1.50.tar.gz
  /usr/bin/make install  -- OK
You have mail in /var/spool/mail/root
Then Execute the checksetup.pl script again
[root@linuxhelp1 bugzilla]# ./checksetup.pl
* This is Bugzilla 5.0.3 on perl 5.10.1
* Running on Linux 2.6.32-642.3.1.el6.x86_64 #1 SMP Tue Jul 12 18:30:56 UTC 2016

Checking perl modules...
Checking for               CGI.pm (v3.51)     ok: found v3.51
Checking for           Digest-SHA (any)       ok: found v5.47
Checking for             TimeDate (v2.23)     ok: found v2.24
Checking for             DateTime (v0.75)     ok: found v1.34
Checking for    DateTime-TimeZone (v1.64)     ok: found v2.01
.
.
.
This version of Bugzilla contains some variables that you may want to
change and adapt to your local settings. The following variables are
new to ./localconfig since you last ran checksetup.pl:

create_htaccess, webservergroup, use_suexec, db_driver, db_host,
db_name, db_user, db_pass, db_port, db_sock, db_check,
db_mysql_ssl_ca_file, db_mysql_ssl_ca_path, db_mysql_ssl_client_cert,
db_mysql_ssl_client_key, index_html, interdiffbin, diffpath,
site_wide_secret

Please edit the file ./localconfig and then re-run checksetup.pl
to complete your installation.
Now you have to open the localconfig file and edit the database-name, database-username and database password.
$db_name = ' bugzilladb'
$db_user = ' user1'
$db_pass = ' linuxc'
Save and close the file
Execute the checksetup.
[root@linuxhelp1 bugzilla]# ./checksetup.pl
* This is Bugzilla 5.0.3 on perl 5.10.1
* Running on Linux 2.6.32-642.3.1.el6.x86_64 #1 SMP Tue Jul 12 18:30:56 UTC 2016
Checking perl modules...
Checking for CGI.pm (v3.51) ok: found v3.51
Checking for Digest-SHA (any) ok: found v5.47
Checking for TimeDate (v2.23) ok: found v2.24
Checking for DateTime (v0.75) ok: found v1.34
Checking for DateTime-TimeZone (v1.64) ok: found v2.01
Checking for DBI (v1.54) ok: found v1.609
Checking for Template-Toolkit (v2.24) ok: found v2.26
.
.
.
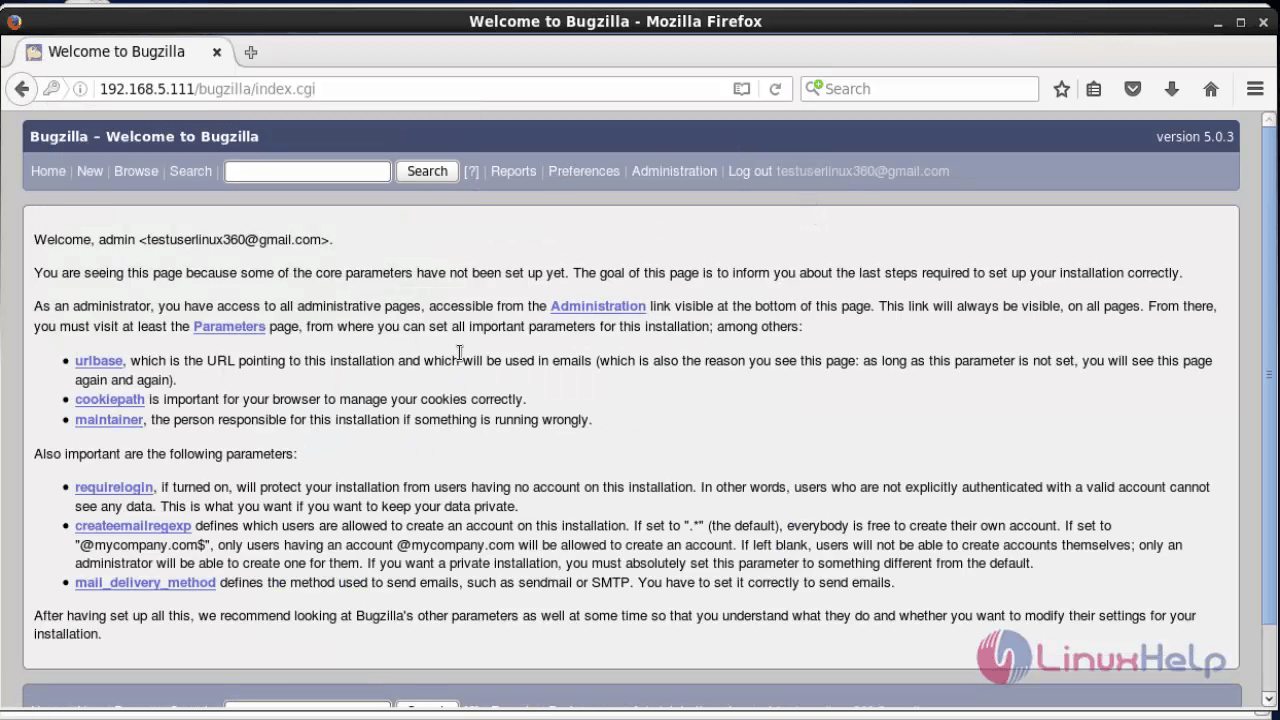
Now that you have installed Bugzilla, you should visit the ' Parameters'
page (linked in the footer of the Administrator account) to ensure it
is set up as you wish - this includes setting the ' urlbase' option to
the correct URL.
checksetup.pl complete.
Open the apache configure file.
[root@linuxhelp1 bugzilla]# nano /etc/httpd/conf/httpd.conf
Add Bugzilla to our Apache configure file.
< Directory /var/www/html/bugzilla>
AddHandler cgi-script .cgi
Options +ExecCGI +FollowSymLinks
DirectoryIndex index.cgi index.html
AllowOverride Limit FileInfo Indexes Options
< /Directory>
Restart the apache service
[root@linuxhelp1 bugzilla]# service httpd restart
Stopping httpd: [ OK ]
Starting httpd: [ OK ]
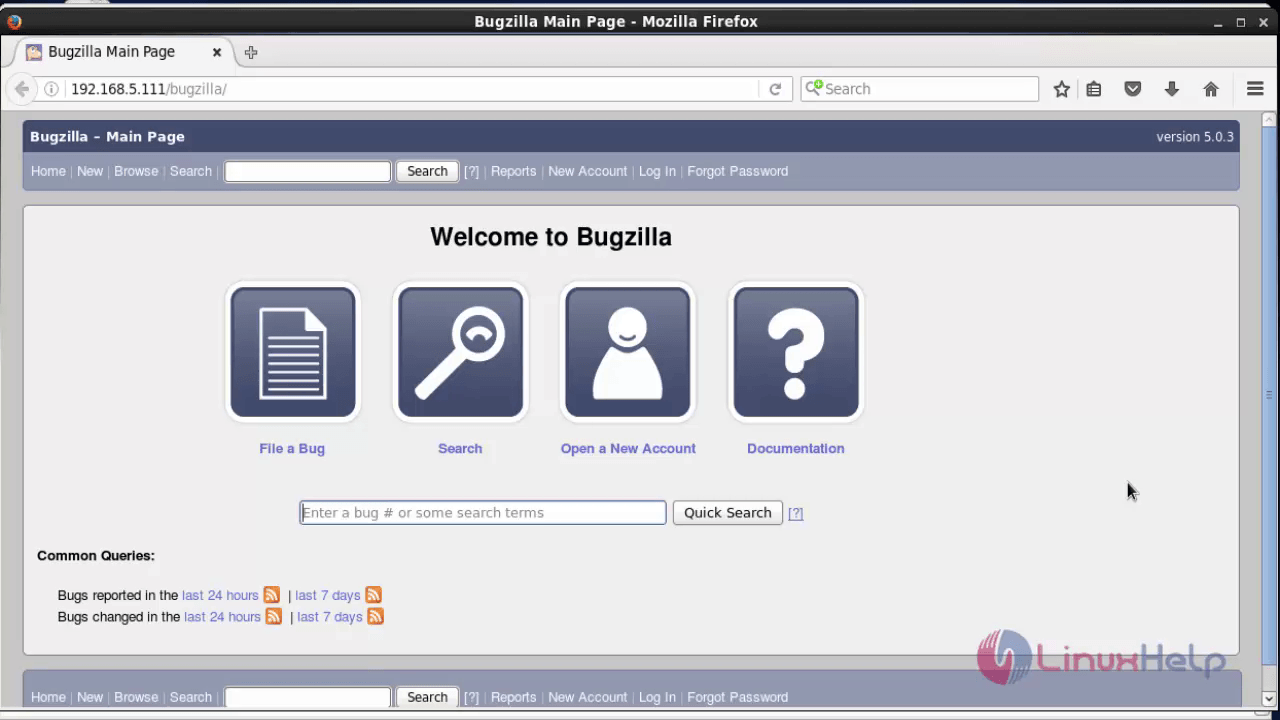
Now open the web browser and type http://< IP_address> /bugzilla
Click Login
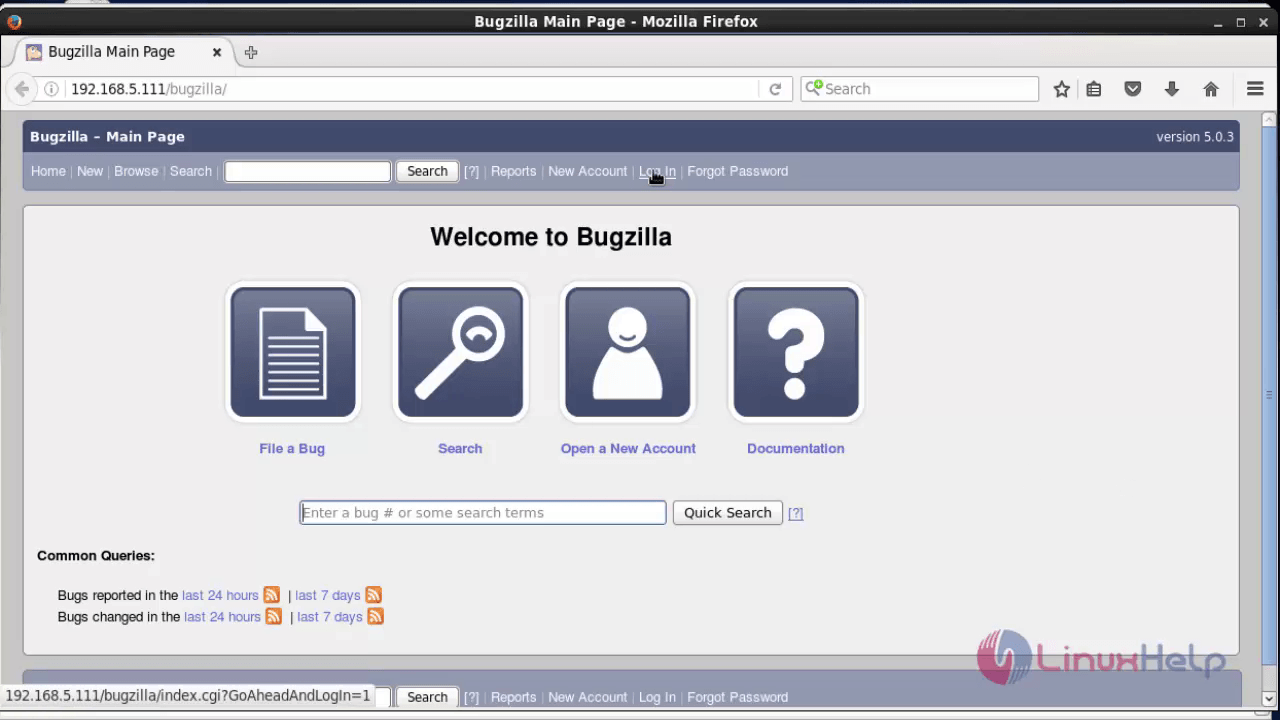
And enter the user credentials.

Comments ( 4 )
Kindly check the permission and Ownership of your bugzilla File
#chown -R apache.apache bugzilla
#chmod -R 775 bugzilla
Forbidden
You don't have permission to access /bugzilla on this server.
Apache/2.2.15 (CentOS) Server at 10.0.0.125 Port 80