How to Install and Configure Privoxy Server On CentOS 8.1
To Install and Configure Privoxy On CentOS 8.1
Introduction:
Privoxy is a freeware and easy to install on CentOS that is a non-caching web proxy server that allows high-level features like ad blocking, web content filtering, modifying web page data and HTTP access, controlling access, and blocking unwanted sites. This tutorial covers the ground on the same process. To Install and Configure Privoxy First, Install epel repository by using the following command.
[root@proxy ~]# yum install epel-release -y
Loaded plugins: fastestmirror, refresh-packagekit, security
Setting up Install Process
Determining fastest mirrors
 * base: mirror.vbctv.in
 * extras: mirror.vbctv.in
 * updates: mirror.vbctv.in
base                                                                                                                    | 3.7 kB     00:00
extras                                                                                                                 | 3.4 kB     00:00
updates                                                                                                              | 3.4 kB     00:00
updates/primary_db                                                                                         | 6.4 MB     00:00
1/1
Installed:
epel-release.noarch 0:6-8
Complete!
Now install privoxy using the following command.
[root@linuxhelp ~]# yum install privoxy -y
CentOS Linux 8 - AppStream                                       390 kB/s | 6.2 MB     00:16
CentOS Linux 8 - BaseOS                                          161 kB/s | 2.3 MB     00:14
CentOS Linux 8 - Extras                                          719  B/s | 1.5 kB     00:02
Extra Packages for Enterprise Linux Modular 8 - x86_64           7.0 kB/s | 8.8 kB     00:01
Extra Packages for Enterprise Linux 8 - x86_64                    19 kB/s | 4.2 kB     00:00
Extra Packages for Enterprise Linux 8 - x86_64                   343 kB/s | 8.6 MB     00:25
Remi's Modular repository for Enterprise Linux 8 - x86_64        2.5 kB/s | 3.5 kB     00:01
Remi's Modular repository for Enterprise Linux 8 - x86_64        107 kB/s | 707 kB     00:06
Safe Remi's RPM repository for Enterprise Linux 8 - x86_64       3.6 kB/s | 3.0 kB     00:00
Safe Remi's RPM repository for Enterprise Linux 8 - x86_64       133 kB/s | 1.6 MB     00:12
Dependencies resolved.
Installed size: 3.1 M
Downloading Packages:
privoxy-3.0.28-2.el8.x86_64.rpm                                  242 kB/s | 943 kB     00:03
-------------------------------------------------------------------------------------------------
Total                                                            190 kB/s | 943 kB     00:04
Running transaction check
Transaction check succeeded.
Running transaction test
Transaction test succeeded.
Running transaction
  Preparing        :                                                                         1/1
  Running scriptlet: privoxy-3.0.28-2.el8.x86_64                                             1/1
  Installing       : privoxy-3.0.28-2.el8.x86_64                                             1/1
  Running scriptlet: privoxy-3.0.28-2.el8.x86_64                                             1/1
  Verifying        : privoxy-3.0.28-2.el8.x86_64                                             1/1
Installed products updated.

Installed:
  privoxy-3.0.28-2.el8.x86_64
Complete!
Now move to the file location..
[root@linuxhelp ~]# cd /etc/privoxy/
List all the files
[root@linuxhelp privoxy]# ll
total 272
-rw-r--r--. 1 root root 74096 Dec  8  2019 config
-rw-r--r--. 1 root root 92713 Dec  8  2019 default.action
-rw-r--r--. 1 root root 40806 Dec 31  2018 default.filter
-rw-r--r--. 1 root root   600 Dec 31  2018 match-all.action
-rw-r--r--. 1 root root 39234 Dec 31  2018 regression-tests.action
drwxr-xr-x. 2 root root  4096 Dec 14 16:58 templates
-rw-r--r--. 1 root root  3665 Dec 31  2018 trust
-rw-r--r--. 1 root root  8692 Dec 31  2018 user.action
-rw-r--r--. 1 root root     0 Dec  8  2019 user.filter
Here the main configuration file is config, and it has 2 categories of configurations like action files and filter files. Action files have match-all.action, default.action & user.action and then filter files has default.filter & user.filter.So we need to use the above configurations in-order to configure your own proxy setup. Now let’ s configure the basic proxy setup, now open your main configuration file and do the steps as shown below.
[root@linuxhelp privoxy]# vim config
Change the value as mentioned below with your IP address of the proxy server. listen-address 192.168.7.224:8118 (Line No: 783) Next, you need to configure the log file path, the default path is /var/log/privoxy, it will be mentioned in your config file as shown below.
logdir /var/log/privoxy
You can modify the above-mentioned line if you want, and below the line, you can change the log file name in your configuration file also.
logfile logfile
Now look for debug levels and there you can find the below levels for debugging. We need to enable this option for logging
debug     1 # Log the destination for each request Privoxy let through.                   (line no: 571)
debug     2 # show each connection status
debug     4 # show I/O status
debug     8 # show header parsing
debug    16 # log all data written to the network
debug    32 # debug force feature
debug    64 # debug regular expression filters
debug   128 # debug redirects
debug   256 # debug GIF de-animation
debug   512 # Common Log Format
debug  1024 # Log the destination for requests Privoxy didn' t let through, and the reason why.
debug  2048 # CGI user interface
debug  4096 # Startup banner and warnings.
debug  8192 # Non-fatal errors
debug 32768 # log all data read from the network
debug 65536 # Log the applying actions
Now restart the privoxy service
[root@linuxhelp privoxy]# service privoxy restart
Redirecting to /bin/systemctl start privoxy.service
Job for privoxy.service failed because the control process exited with error code.
See "systemctl status privoxy.service" and "journalctl -xe" for details.
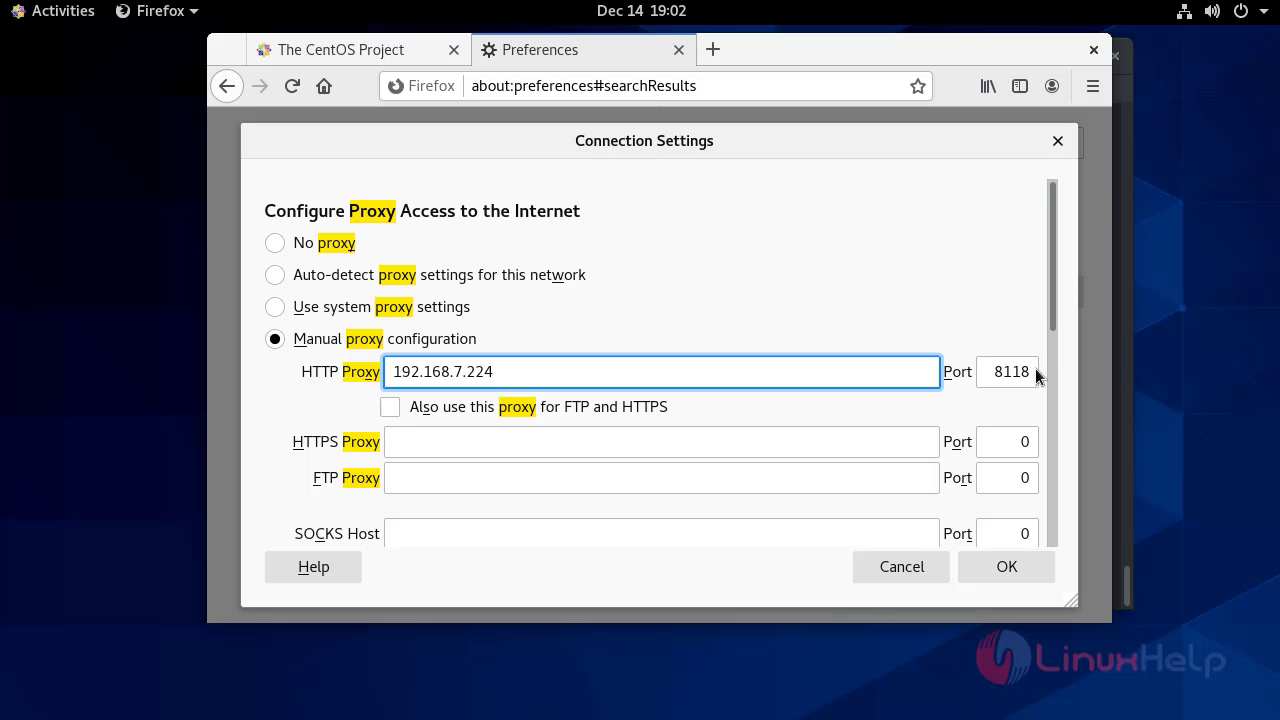
Now goto the browser and enter your ip and port https:// ip address:8118 in proxy setup configuration page.
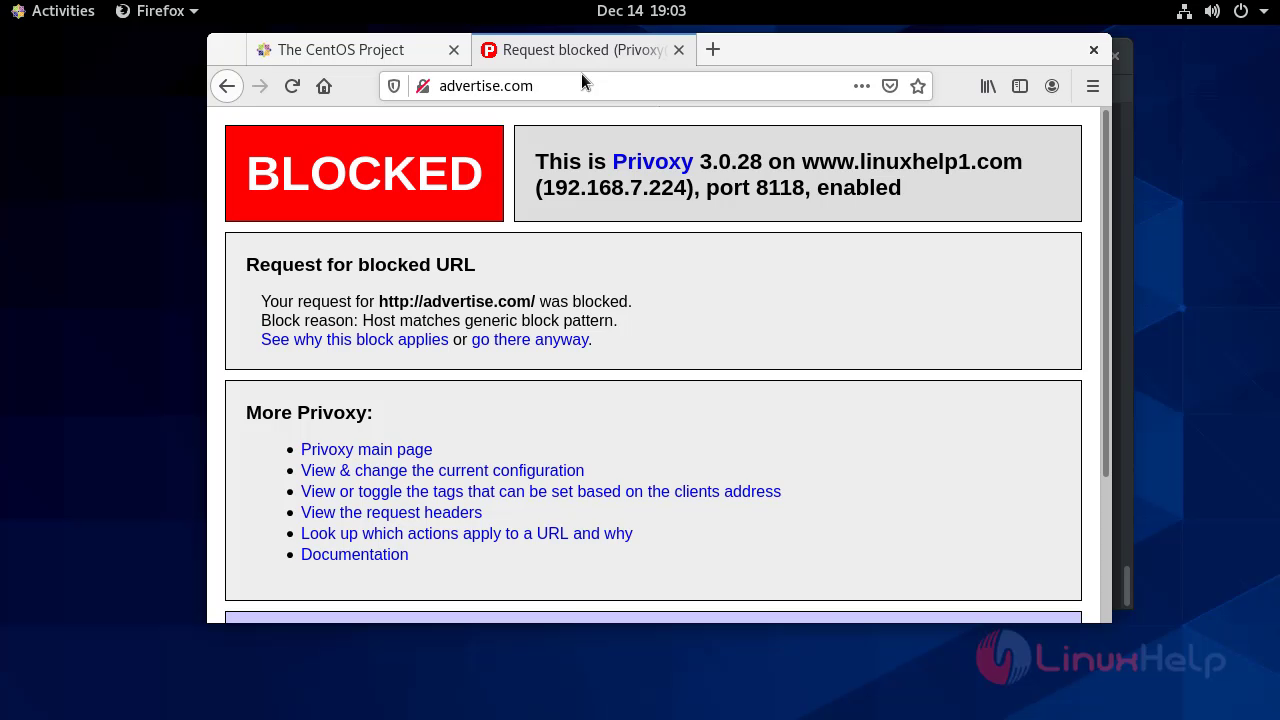
 Now check the given advertiing domain name on browser
 With this method, the installation and configuration on CentOS 8.1 comes to an end.
Comments ( 0 )
No comments available