How to install and configuration Vesta Control Panel on CentOS 7 server
To install and configuration Vesta Control Panel on CentOS 7 server
VestaCP is an open source hosting control panel currently supports both RHEL flavoured Linux releases (Red Hat, CentOS) and Ubuntu. It packs a bunch of features by default to allow you to host and manage your websites with ease on your Virtual Private Server. It is really so simple to install and configure Vesta Control Panel on CentOS 7 and this tutorial covers the ground on the same process.
Installing Vesta Control Panel
First let’ s start the process by ensuring your system is up-to-date and for that, you need to run the following command.
[root@linuxhelp ~]# yum -y update
Loaded plugins: fastestmirror, langpacks
Loading mirror speeds from cached hostfile
 * base: mirror.dhakacom.com
 * extras: mirror.dhakacom.com
 * updates: mirrors.123host.vn
No packages marked for update
And then, you need to download the Vesta Control panel install script with the following command.
[root@linuxhelp ~]# curl -O http://vestacp.com/pub/vst-install.sh
  % Total    % Received % Xferd  Average Speed   Time    Time     Time  Current
                                 Dload  Upload   Total   Spent    Left  Speed
100  1721  100  1721    0     0   2392      0 --:--:-- --:--:-- --:--:--  2396
After the download is completed, make the script execute and execute it
[root@linuxhelp ~]# chmod +x vst-install.sh
[root@linuxhelp ~]# bash vst-install.sh
--2018-02-23 19:08:55--  http://vestacp.com/pub/vst-install-rhel.sh
Resolving vestacp.com (vestacp.com)... 104.236.66.100
Connecting to vestacp.com (vestacp.com)|104.236.66.100|:80... connected.
HTTP request sent, awaiting response... 200 OK
Length: 48116 (47K) [text/plain]
Saving to: ‘ vst-install-rhel.sh’
100%[==================================================================================================> ] 48,116      --.-K/s   in 0.003s
2018-02-23 19:08:56 (16.9 MB/s) - ‘ vst-install-rhel.sh’  saved [48116/48116]
Type “ y” where it ask if you want to proceed. The system will ask you for an email address, it’ s ok to provide a real one, when it’ s complete and will issue your login credentials to that address.
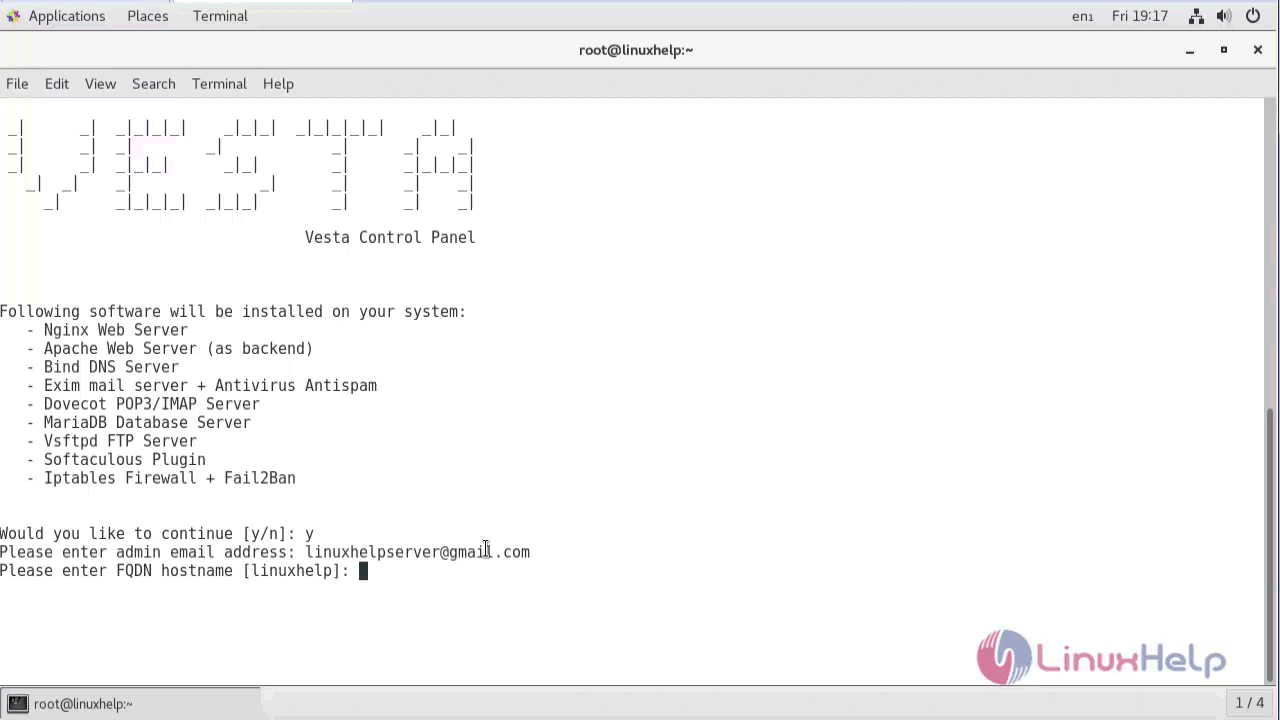
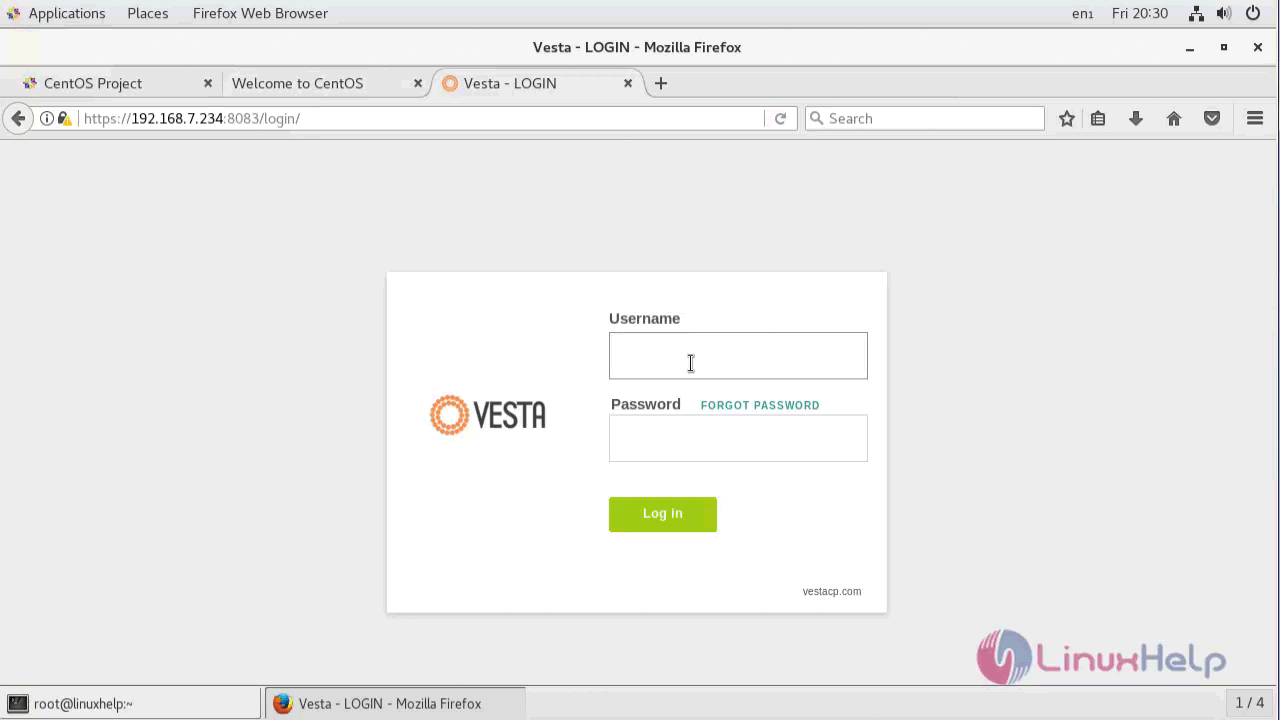
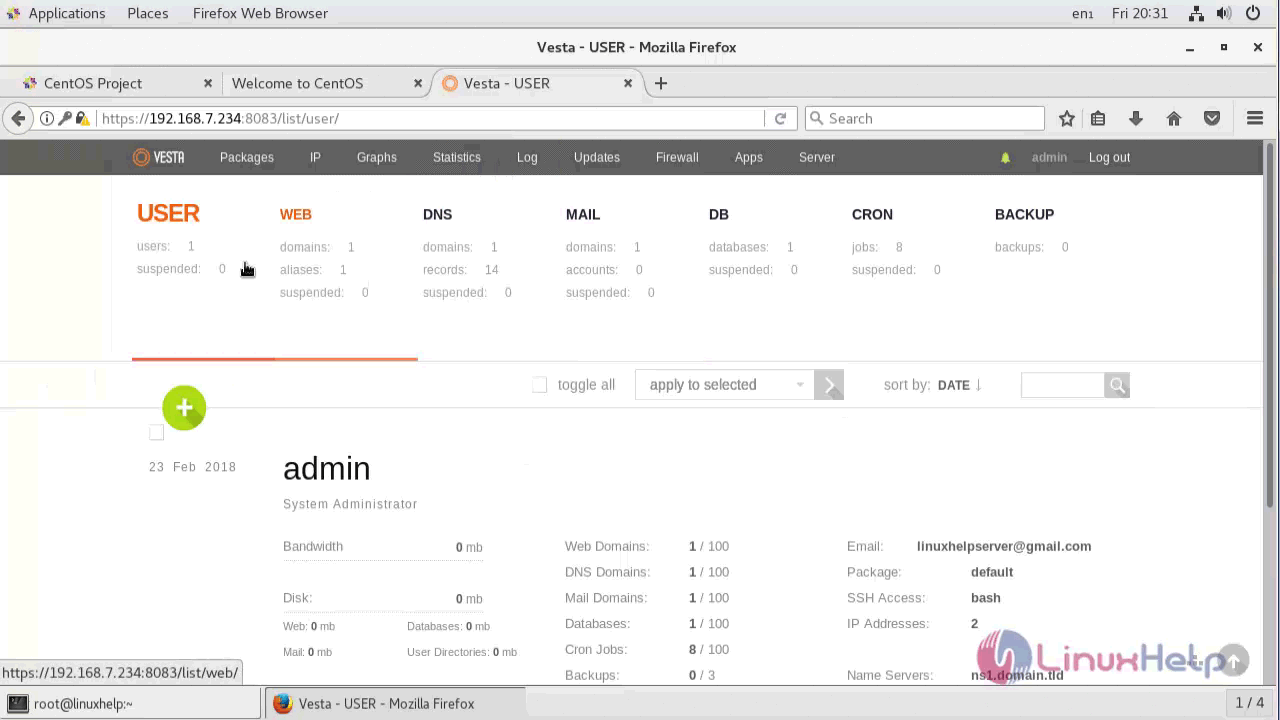
Once the installer finishes installing, it will show you the url, Username and Password. Just open that url in web browser and login using the username and password.
With this, the tutorial comes to an end.


Comments ( 0 )
No comments available